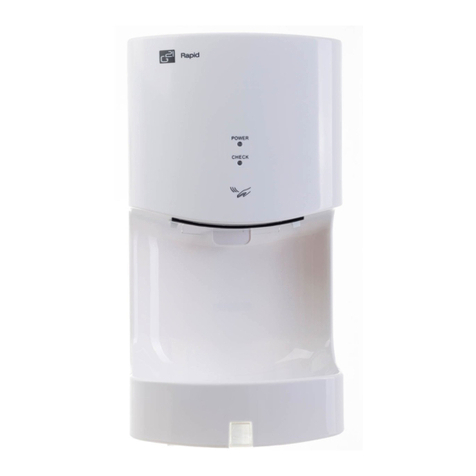
G21 Razor User manual

HU PL
SK
DE
EN
CZ
RAZOR
HAND
DRYER


EN
Do not attempt to install the unit yourself unless you are a trained service technician. Otherwise,
this may affect the safety and proper functioning of the unit.
Read this manual thoroughly and carefully before beginning to use the unit, ensuring safety and
proper function. Please keep it well for later reference.
Features
Drying hands without contact is hygienic.
Electricity cost saving because of drying hands at high speed.
Do not use towels and tissues, no dispose of waste.
Anti-bacteria and environmental materials, no pollution.
Thanks to heater switch is possible to set the cool or warm drying temperature:
• Heating switch to 1 (on), means the heating is always on, ambient temperature can not effect
the heating.
• Heating switch to 0 (on), means the heating is automatic working, this means:
»When the ambient temperature is below 20°C, the heating is on working, the hand dryer can
bring the warm air to the user.
»When the ambient temperature is over 20°C, the heating is not working, the hand dryer only
bring the cool wind.
Anti-damage timer
Installed anti-damaged timer, this machine will stop work after working 25 seconds. Draw out your
hands and put again your hands into the dryer to continue use.
No need windpipe.
Separate air supply, quite
hygienic.
No drip comes into the unit.
Upper and lower air
nozzles.
Prevent water drops form
splattering on the unit body.
Ergonomic shapes, for
comfortable use.
Ease of use.
A
CB
A. Airflow
B. Drain tank
C. Air inlet
Thank you for purchasing our product.
Before using this unit, please read this manual in order to avoid improper handling and use
ofthedevice.

Warning
Personal injury accidents will happen if use improperly.
• Do not open the front panel, otherwise, this may get an electric shock.
• Children forbidden hanging on the machine, there is risk of falling.
• Do not use in a wet environment, for example, near the bathroom where it may get the direct
water and places where the condensation may form, otherwise, this may cause electric shock and
unit malfunction.
• Do not allow the unit get wet, otherwise it will cause electric shock.
• Do not modify and disassemble the unit unnecessarily. Otherwise, this may cause a fire, electric
shock, or personal injury.
• If power tolerance is over +/-10%, there will be breakdown. If using incorrect power supply, fire,
electric shock and machine malfunction will happen.
• Please use dedicated socket. If using together with other appliances, the socket may cause
abnormal heat leading to fire.
• Power must be cut off when maintenance to prevent the risk of electric shock.
• Drain tank and air filter must be installed. Do not switch on after power connected for 10 seconds.
• If the machine doesn’t work or have abnormal conditions, please cut off power to prevent
accidents and close leakage circuit breaker and ask supplier to check and repair, or it may lead to
fire because of electricity leakage and short circuit.
• It must have the reliable grounding wire otherwise it may cause electric shock when the unit
failure or leakage.
• Attention when installation: do not install when the machine are power connected.
• It must be operated by the professional construction person, who was trained examined the
knowledge requirements of the standards relating to electrical equipment (paragraph 50) when
install the unit. If the construction is incorrect, it may cause electric shock and fire accident.
• This appliance is not intended for use by persons (including children) with reduced physical,
sensory or mental capabilities, or lack of experience and knowledge, unless they have been given
supervision or instruction concerning use of the appliance by a person responsible for their safety.
• If the cord is damaged, it must be replaced by the manufacturer, its service agent or similarly
qualified persons in order to avoid a hazard.
Packing list
Unit 1 pc
Mounting plate 1 pc
5 mm expansion pipe 6 pcs
5x30 mm self-tapping screw 6 pcs
User manual 1 pc

1
2
3
4
5
6
7
5
6
10
9
7
8
Part names and dimensions
1. Heat switch
2. Speed governor
3. Power switch
4. Dreainage line
5. Water tank
6. Filter
7. Terminal box location
8. Installation panel
9. Power cord hose (rear)
10.Installation base

Using the unit
Stretch out both hands
and insert them all the way
in. The unit starts to run
automatically.
Pull them out slowly, letting
the air blow the water off.
Pull them out completely.
Self-check indicator
When a malfunction or error occurs, the self-check indicator on the right side will either light up
or flash.
Turn off the power switch, wait about 40 seconds until all the indicators go off, then turn on the
power switch.
If the indicator still lights up or flashes, turn of the power, disconnect the unit from the socket, and
contact your dealer immediately.
When using the unit
Turn on the power switch.
The power indicator lights up.
The lamp lights up.
The cover of power supply is closed.
Cleaning the unit body
Clean the unit with a soft cloth. If the unit gets very dirty, clean with a soft cloth dampened with
neutral agent, then clean with a dry soft cloth.
Remove the dirt from the sensor (to prevent malfunction).
Note
Only use the neutral cleaning agents.
Do not use thinner, accidic or alkaline toilet cleaners, or nylon brush. (Otherwise, they may damage
the smoothness of surface).
Only use alcohol to clean the hans drying area. (Do not use alcohol anywhere else).
If the chemical cloths used, please read their instructions first.
Disinfecting agents will damage your unit.
Warning
Before you clean the unit, turn off the power switch.
Do not splatter water on the unit.
Caution
Wear gloves when cleaning.
The antibacterial coating becomes not effective when the surfaces get very dirty.

A B
C
A
Draining and cleaning the drain tank
Before it fills up (at least once a week).
• The water blown off the hands is called ‘’drain water’’.
• Empty the drain water at any moment, in order to prevent accumulated water from exceeding the full level.
• It will start smelling if the accumulated water remains in the tank for too long time.
Pull the drain tank out in the horizontal direction.
This ensures the drain water does not splatter out.
Open the cover and empty the water.
Pull the cover up with your fin-
gers in the direction of the arrow
on top of the cover and then re-
move the cover completely.
Wash out the interior of the
drain tank.
C
A
A. Full level
B. Drain tank
C. Cover
Close the water tank cover
and re-attach it to the unit as
original.
Open the side panel, wipe with a cloth.
Regular cleaning drainage routes, can effectively inhibit bacteria.
Cleaning the air filter
Around once a week.
Remove the air filter. Cleaning the air filter.
If it is very dirty, wash it off with cold or warm water.
Re-attach to the unit.
Insert it all the way in, until it stops. If it is not in place, the dirt or dust will enter to the unit and
shorten its service life.
Note:
If you wash the air filter with water, dry it as much as possible. Do not expose to the fire.
Beat it lightly by hand or use a
vacuum cleaner.
Pull the air filter out.

Trouble shooting
If you discover the following circumstances, please inspection and handling as following:
Problem Check Action
No air blows
when hands are
inserted.
Do the display indicators lights up?
Is the power switch on?
Are you putting your hands all the
way in?
Check the ground-fault circuit
breaker.
Turn the power switch on.
Reput hands all the way in.
Machine works
long time after
hands drawn
out, finally stop.
Any dirt or foreign body on sensor? Switch off the power button and
then remove dirt or foreign body on
sensor after the power light off, when
finished, switch on power button.
No hot wind. There is a built-in heater in the unit.
Any dirt on heating sensor?
Fuse inside terminal box blown?
Is the ambient temperature higher
than 20°C?
Switch off power, remove front cover.
There is a terminal box inside. Take
down the cover of terminal box.
Check the fuse inside box which is
blown or not.
Airflow is too
low.
Is the speed button on low level? Put speed button on high level.
If the above actions do not work, turn off the power and the ground-fault circuit breaker and
call your dealer to inspect and repair it if necessary.

Electrical circuit chematic
21
7
9
910
8
11
12
13
14 15
16
17
3 4 5 6
1. Power
2. Power switch
3. Heat switch
4. Fuse protector
5. Thermal fuse
6. PTC Electric heater thermostat
7. Hand dryer control circuit
8. Fuse protector
9. Capacitor
Status Status Solution
Power
indicator
light
Light
Power
input
normally
Extinguish
Power not supply.
Check the external
power source, close the
power switch.
Master board fuse
blew out.
State
indicator
light
Extinguish Don’t
work Flashing
light
Motor fault,
it can’t start
normally.
Check motor connecting
wires and the rotor
foreign material.
Always
light Working
Trick or working
time longer than
25s.
Clear work space foreign
material, restart to work.
10.Transformer
11.Sensorless BLDC motor
12.Sensorless brushless DC motor
13.Infrared receiver control circuit
14.Speed potentiometer
15.Infrared emission
16.Operating instuctions
17.Power indicator

1
2
3
4
Precautions before installing
Do not install in the following types of location, otherwise this may cause malfunction:
• Locations where the temperature can exceed -10 C or 40 C.
• Locations where the unit may come into direct contact with water.
• Locations where the unit is under direct or strong sunlight.
• Locations where there is a lot of condensation.
• Locations where corrosive, neutral, or reductive gases are present.
• Places lower than -20m or hig her than 2000m above sea level.
Installation location:
• Install the unit somewhere, where it will be easy to use, as shown in the figure. If the unit is in-
stalled too low, water may get on it when the floor is being cleaned. (The bottom of the unit must
be at least 150 mm higher than the floor or any objects under it.)
• The left side of the unit must be at least 150 mm away from any walls, because the power switch
is located on the left.
• Ensure there are no mirrors or walls near the right side, as drops of water may splatter to the
right when drying hands. (Recommended distance is at least 100 mm.)
• Avoid locations where people or doors might bump into the unit.
• Choose a completely flat surface on the wall to install the unit.
Installation base:
• If your space is limited and the condition of wall is unsatisfactory, you can purchase an installa-
tion base to install the unit.
1. Fixing screw
2. The mounting screw holes
3. Machine hanging hole
4. Wall screw into position

Wire the unit.
Embed the switchbox in the installation location
and wire the power cord (with the green and yellow
combined is ground line).
• If no switchbox is used, the power cord will
be pushed out, and prevent the unit from being
installed firmly against the wall.
Attach the installation panel to the wall using the
6 installation screws.
If the wall is concrete, use commercially available
metal screw plugs.
If the wall is not concrete, reinforce it before
installation.
Remove the drain tank.
Remove the front panel. Remove the terminal box
cover.
Pull the separate line power cord into the unit
and secure inside.
Pull the power cord through the power cord hole on
the rear of the unit, attach the rear side to the 3 hooks
on the installation panel and secure with the installation
screws while pushing the unit against the wall lightly.
The installation screws for the unit will not tighten
completely if the hooks at the bottom of the installa-
tion panel are not in place. Ensure the lower hooks
are completely hooked onto the rear of the unit.
Installation procedures
Connecting the appliance can either install it to the terminal, or by using the power cable.
Use a multiplied wire power cord which is 1.5mm2 - 2.0 mm2multiplied wire (cords other than
1.5mm2 - 2.0 mm2single-core cords cannot be used.)
(A drop in voltage is possible if the power cord exceeds 11 m in length.)
Before installation the product please remove the test line (cable with plug).
1
2
3
4
Note:
Ensure the unit is hooked on the installation panel, tightened the fixed screws, otherwise, this
may cause the unit to drop and be in the danger of theft.
• Remove the two screws.
• Remove all the front
panel chuckholes.
• Remove the terminal
box cover screw and pull
the cover out towards you.

5
6
7
Wire the terminal box (there is no polarity).
Strip the wire sheath as shown in the figure at right.
Loosen the screws on the terminal box and
connect the power cord to the terminal box.
Remove the protective seal attached to the
terminal box before connecting the ground wire.
Tighten the screws on the terminal box and pull the
power cord to make sure it is secured firmly.
Bind the power cord using the clip to the right of
the terminal box and fix it to its original location.
Attach the terminal box cover.
Place the terminal box tabs into the holes and
return the cover to its original position, securing it
with the screw.
Make sure the power cord and other wires are not
pinched.
The front panel can not be attached if there are any
wires in front of the terminal box cover. Move the
wires to the right of the terminal box cover.
Attach the front panel.
Insert the 3 front panel chuckholes into the unit.
Replace the 2 screws that were removed.
Attach the drain tank.
Make sure the air filter is all the way in.
1. Front panel
2. Unit
3. Installation screw
4. Drain tank
5. Air filter
1
35
4
2

Test run
Step Check
1Check the voltage of power supply Is single-phase alternating current 220-240 V 50/60
Hz used?
2Turn the ground-fault circuit
breaker on
3 Turn the power switch on Does the power indicator light up?
4 Dry hands Is the air blowing?
5Check the unit Is the unit installed firmly? Any vibration or strange
noise?
Do not turn the unit power switch on with your hands inside.
If the self-check indicator in the display lights or is flashiong, turn off the power switch off and turn
the power back on when all the indicators go off (after 40 seconds).
Technical specifications:
Rated voltage AC 220-240 V
Rated frequency 50/60 Hz
Input power 1000 – 1300 W
Wind velocity 95 – 100 m/s
Heating power 550 W
Motor Brushless DC motor
Dimension 300x219x670 mm
Net weight 9,5 kgs
The English version of the manual is an exact translation of the original manufacturer‘s instructions.
Images used in this manual are for illustrational purposes only and may differ from the actual product.

Wenn Sie kein erfahrener Servicetechniker sind, empfehlen wir Ihnen, dieses Gerät nicht allein zu
installieren, sonst kann die Sicherheit negativ beeinflusst sein, ferner kann es zu einem unrichtigen
Funktionieren des Geräts kommen.
Bitte, bewahren Sie diese Anleitung für den nächsten Gebrauch auf.
Vorteile
Das Händetrocknen ist hygienisch, weil Sie das Gerät nicht berühren müssen.
Weil das Händetrocknen sehr schnell ist, sind auch die Energiekosten kleiner.
Es entstehen auch keine Abfälle, weil weder Hand- noch Papierhandtücher benutzt werden müssen.
Es kommt auch zu keiner Verunreinigung, weil antibakterielle und ökologische Materialien benutzt werden.
Dank dem Wärmeschalter kann die Temperatur des Trocknens nach Ihrer Wahl eingestellt werden,
ob Hände mit der Warm- oder Kaltluft abgetrocknet werden.
• Wenn die Heizung auf die 1. Stufe eingeschaltet ist, heißt es, dass die Luft warm bläst, die
Umwelttemperatur beeinflusst die Temperatur des Heizens nicht.
• Wenn die Heizung auf die 0. Stufe eingeschaltet ist, arbeitet die Heizung automatisch:
»Wenn die Umwelttemperatur unter 20 °C sinkt, ist die Heizung eingeschaltet und die Luft
bläst warm.
»Wenn die Temperatur höher als 20°C ist, ist die Heizung nicht eingeschaltet und die Hände
sind mit kalter Luft abgetrocknet.
Timmer gegen die Beschädigung
Der installierte Timmer sichert, dass das Gerät jedes Mal ausschaltet, wenn es 25 Sekunden
arbeitet. Ziehen Sie Hände aus dem Gerät und legen Sie diese wieder hinein und das Gerät fängt
an, wieder zu arbeiten.
Es ist kein Schlauch für die
Wasserzufuhr nötig.
Getrennter Luftzufuhr
In den Gerätekörper fließt
kein Wasser hinein.
Obere und untere Luftdü-
sen.
Diese verhindern das Spri-
tzen aus dem Gerätekörper
hinaus.
Ergonomische Formen für
die gemütliche Benutzung.
Einfache Benutzung.
A
CB
A. Luftstrom
B. Auslassbehälter
C. Luftzufuhr
DE
Vielen Dank, dass Sie sich für unser Produkt entschieden haben.
Bevor Sie das Gerät benutzen, lesen Sie bitte die Bedienungsanleitung sorgfältig durch, um sich
mit allen Sicherheitshinweisen vertraut zu machen.

Warnung
Wenn das Gerät nicht richtig benutzt wird, kann es eine Verletzung verursachen.
• Öffnen Sie die vordere Wandplatte nicht, sonst kann ein Stromschlag zugeführt werden.
• Kinder dürfen sich am Gerät nicht einhängen, sonnt stürzt das Gerät ab.
• Das Gerät darf nicht in nasser Umwelt benutzt werden, z.B. in der Nähe des Bades, wo das
Gerät in einen direktem Kontakt mit Wasser kommen kann, ferner an Stellen, wo sich der Dampf
bildet, sonst kann es zu einem Stromschlag oder zu einem Kurzschluss kommen.
• Verhindern Sie, dass das Gerät zu nass ist, sonst kann zu einem Schlag elektrischen Stroms
kommen.
• Passen Sie das Gerät nicht an und zerlegen Sie dieses nicht, wenn es nicht nötig ist, sonst kann
es zu einem Brand, Stromschlag oder einem Unfall kommen.
• Wenn die Spannungstoleranz um +/-10% abweicht, kann zu einer Störung des Geräts kommen.
Wenn eine falsche Spannung benutzt wurde, kann zum Brand, Stromschlag oder Gerätestörung
kommen.
• Bitte benutzen Sie eine getrennte Steckdose. Wenn das Gerät mit anderen Anlagen benutzt
wird, kann zur Überhitzung der Steckdose kommen, wodurch ein Brand entstehen kann.
• Um den Stromschlag bei der Gerätewartung zu verhindern, muss die Stromversorgung
ausgeschaltet sein und der Behälter für den Luftfilter installiert werden. Bei dem Anschluss ist das
Gerät erst nach 10 Sekunden einzuschalten.
• Wenn das Gerät nicht arbeitet, trennen Sie das Gerät vom Strom und schalten sie den
Sicherungsschalter, damit Sie einen Unfall verhindern. Sichern Sie die Kontrolle oder Reparatur
des Geräts, sonst kann es zu einem Brand kommen, der durch einen Kurzschluss verursacht wird.
• Das Gerät muss zuverlässig geerdet werden, sonst kann zu einem Schlag elektrischen Stroms
kommen.
• Hinweis bei der Installation: das Gerät darf nicht indem Fall installiert werden, wenn dieses nicht
vom Strom getrennt wird.
• Die Installation muss von einer speziell geschulten Person durchgeführt werden oder von einem
Mitarbeiter, der in die Kenntnisse von Vorschriften und Normen eingeschult und geprüft wurde,
welche elektrische Anlagen betreffen (Paragraf 50). Wenn die Montage des Produkts nicht richtig
durchgeführt wird, kann zu einem Stromschlag und Brand kommen.
• Um Unfälle zu verhindern, darf diese Anlage nicht von Personen (inkl. Kindern) mit beschränkter
psychischen Störung, Sinnes- oder Mentalstörung, mit mangelnden Erfahrungen und Kenntnissen
benutzt werden, wenn sie sich nicht unter einer sicheren Aufsicht befinden, oder wenn diesen
keine Instruktionen erteilt wurden, wie das Gerät sicher benutzt werden soll, damit es zu keinem
Unfall kommt.
• Wenn das Kabel des Geräts beschädigt wurde, muss dieses durch den Hersteller, Servicedienst
oder eine andere ähnliche qualifizierte Person ersetzt werden.
Inhalt der Verpackung
Gerät 1 St.
Montageplatte 1 St.
5 mm Dübel 6 St.
5x30 mm Schneidschrauben 6 St.
Gebrauchsanweisung 1 St.

1
2
3
4
5
6
7
5
6
10
9
7
8
Abmessungen und Teilebezeichnungen
1. Einschaltung der Heizung
2. Geschwindigkeit der Umdrehungen
3. Ausschaltung
4. Abflussstrecke
5. Wasserbehälter
6. Filter
7. Platzierung der Terminalbox
8. Installationsplatte
9. Versorgungskabel (hinteres)
10.Installationsbasis

Benutzung des Geräts
Strecken Sie beide Hände
und legen Sie diese hinein in
das Gerät. Das Gerät startet
automatisch.
Ziehen Sie langsam Ihre
Hände heraus und lassen
Sie den Händetrockner Ihre
Hände abzutrocknen.
Ziehen Sie Ihre Hände ganz
heraus.
Kontrollindikator
Wenn ein Fehler oder eine Störung erscheint, leuchtet der Kontrollindikator auf rechter Seite auf
oder dieser fängt an zu blinken.
Schalten Sie den Hauptschalter aus, warten Sie etwa 40 Sekunden, bis der Indikator ausschaltet,
dann schalten den Hauptschalter ein.
Leuchtet oder blinkt der Indikator immer noch, trennen Sie das Gerät vom Strom und nehmen Sie
umgehend mit einem Reparaturarbeiter oder einen Servicedienst Kontakt auf.
Beim Gebrauch des Geräts
Schalten Sie den Hauptschalter ein.
Der Leistungsindikator leuchtet.
UV-Licht leuchtet.
Der Deckel ist zugeschlossen.
Reinigung des Gerätekörpers
Waschen Sie das Gerät mit einem weichen Lappen. Ist das Gerät sehr schmutzig, waschen Sie
dieses mit einem weichen Lappen, der in einem neutralen Waschmittel eingetunkt wurde, danach
waschen Sie es mit einem weichen sauberen Lappen.
Entfernen Sie den Schmutz vom Sensor (um die Störung vorzubeugen)
Bemerkung
Benutzen Sie keinen Verdünner, saure oder alkalische Toiletten-Reinigungsmittel oder
Nylonbürsten. (Sonst kann es zur Beschädigung der glatten Oberschicht des Gerätes kommen).
Den Alkohol darf nur an den Stellen benutzt werden, wo Hände abgetrocknet werden. (Alkohol darf
an keiner anderen Stelle benutzt werden).
Wenn Sie chemische Webware benutzen, lesen Sie zuerst Instruktionen des Herstellers.
Das Desinfektionsmittel kann das Gerät vernichten.
Warnung
Vor der Reinigung des Gerätes ist der Hauptschalter auszuschalten.
Kein Wasser auf das Gerät spritzen.
Hinweis
Tragen Sie bei der Reinigung Handschuhe.
Antibakterieller Schutz ist nicht effektiv, wenn Kunststoffe schmutzig sind.

A B
C
A
Trocknen und die Reinigung des Wasserbehälters
bevor dieser voll ist (mindestens einmal wöchentlich).
• Das Wasser, welches von Ihren Händen weggeblasen ist, heißt „abtropfendes Wasser“.
• Lassen Sie das Wasser nicht im Behälter, damit sich dieses nicht auf das volle Niveau nachfüllt.
• Wenn das nachgefüllte Wasser im Behälter zu lange bleibt, fängt es an übel zu riechen.
Ziehen Sie den Behälter in horizontaler Richtung heraus
Damit wird gesichert, dass das abtropfende Wasser nicht hinaus spritzt.
Öffnen Sie den Deckel und machen Sie den Behälter leer.
Ziehen Sie den Deckel in der
Richtung des Pfeils, der auf
der Oberfläche des Deckels
markiert ist und entnehmen
Sie danach den Deckel ganz.
Waschen Sie den Innenteil des
Wasserbehälters.
C
A
A. Unterer Teil des Behälters
B. Behälter
C. Deckel
Schließen Sie den Deckel des
Wasserbehälters zu und bau-
en Sie diesen fest im Gerät ein.
Öffnen Sie die Seitenplatte und reinigen Sie diese mit einem Lappen.
Die regelmäßige Reinigung von Abzugskanälen kann die Bakterienbildung effektiv begrenzen.
Reinigung des Luftfilters
ca. 1x wöchentlich
Nehmen Sie den Luftfilter heraus. Reinigen Sie den Luftfilter.
Ist der Filter schmutzig, reinigen Sie diesen mit kaltem oder warmem Wasser.
Befestigen Sie den Filter zurück in das Gerät.
Legen Sie diesen ganz hinein, bis dieser einrastet. Wurde der Filter nicht richtig auf seien Stelle
eingelegt, kann in das Gerät Schmutz und Staub gelangen, was die Lebensdauer des Gerätes
verkürzt.
Reinigen Sie den Filter mit Händen oder
benutzen Sie den Staubsauger.
Nehmen Sie den Luftfilter heraus.

Lösung von Problemen
Wenn Sie nachfolgende Probleme finden, richten Sie sich mit nachfolgenden Instruktionen:
Problem Kontrolle Aktionen
Bei dem
Einlegen von
Händen bläst
keine Luft.
Werden am Display Anzeigen
angezeigt?
Ist der Hauptschalter eingeschaltet?
Werden Ihre Hände ganz in das
Gerät eingelegt?
Kontrollieren Sie den
Sicherungsschalter.
Schalten Sie den Hauptschalter ein.
Legen Sie Ihre Hände wieder in das
Gerät hinein.
Das Gerät
arbeitet nach
lange nach dem
Herausziehen
von Händen aus
dem Gerät.
Befindet sich auf dem Sensor ein
fremder Gegenstand oder Schmutz?
Schalten Sie den Hauptschalter und
entfernen den Schmutz oder den
fremden Gegenstand vom Sensor,
dann schalten sie den Hauptschalter
wieder ein.
Es bläst warme
Luft.
Im Gerät ist Heizkörper eingebaut.
Befindet sich am Heizkörper ein
Schmutz?
Funktioniert die Sicherung im
Klemmblock?
Ist die Umwelttemperatur höher als
20°C?
Trennen Sie das Gerät vom Strom
und entnehmen Sie den vorderen
Deckel. Im Innenteil befindet sich
der Klemmblock. Entnehmen Sie
den Deckel vom Klemmblock.
Überprüfen Sie, ob die Sicherung im
Klemmblock funktioniert.
Die Luft bläst
wenig.
Befindet sich der
Geschwindigkeitsknopf auf der
niedrigsten Stufe?
Erhöhen Sie die Stufe der
Geschwindigkeit des Blasens auf
dem Geschwindigkeitsknopf.
Wenn bei diesem Problem die erwähnten Reparaturen nicht funktionieren, trennen sie das
Gerät und die Erdungsleitung vom Strom und rufen Sie einen Servicetechniker herbei, um das
Gerät zu kontrollieren oder zu reparieren, wenn es nötig ist.
Bemerkung:
Wenn sie den Filter mit dem Wasser reinigen, trocknen Sie diesen möglichst gut. Der Filter darf nicht
dem Feuer ausgestellt werden.

Elektrisches Schema
21
7
9
910
8
11
12
13
14 15
16
17
3 4 5 6
1. Spannung
2. Hauptschalter
3. Ausschaltung der Wärme
4. Sicherung
5. Wärmesicherung
6. Elektrischer Thermostat
7. Steuerkreis des Händetrockners
8. Schutz der Sicherung
9. Kondensator
Status Status Lösung
Kontrollle-
uchte der
Versorgung
Leuchtet
Normaler
Leistu-
ngsbedarf
Leuchtet
nicht
Ohne Spannung Kontrollieren Sie die
Versorgungsquelle,
schalten Sie den
Hauptschalter aus.
Beschädigte
Sicherung
Stand der
Kontrollle-
uchte
Leuchtet
nicht
Arbeitet
nicht
Blinkt
Motorfehler
Kontrollieren Sie den
Motorstand, ob im Motor
fremde Gegenstände
nicht befindliche sind.
Leuchtet
immer Arbeitet
Ist die
Betriebszeit nicht
länger als 25 s?
Reinigen Sie den
Arbeitsplatz und starten
Sie das Gerät neu.
10.Transformator
11.Sensorloser BLDC-Motor
12.Bürstenloser, sensorloser DC-Motor
13.Infraroter Empfänger des Steuermotors
14.Potentiometer der Geschwindigkeit
15.Infrarote Emission
16.Betriebsinstruktionen
17.Indikator der Versorgung
Table of contents
Languages:
Other G21 Dryer manuals