manuals.online logo
Brands
  1. Home
  2. •
  3. Brands
  4. •
  5. Gaggenau
  6. •
  7. Cooktop
  8. •
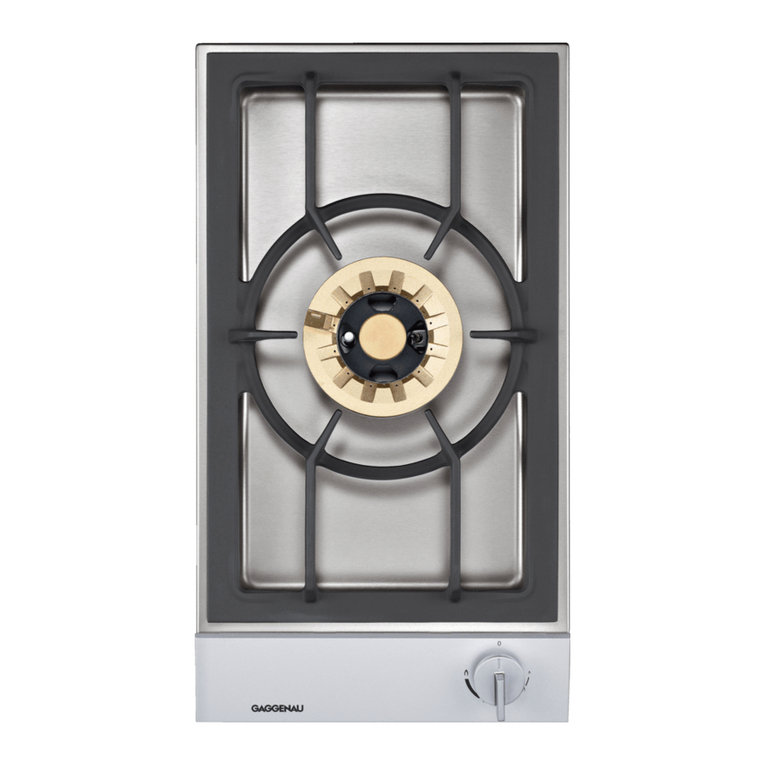
  9. Gaggenau VG 231 AU User manual

Gaggenau VG 231 AU User manual

9000576976 950910
VG 231 AU ÚInstallation instructions

PLQ

PLQ


[ 

¡
¡
PLQ
PLQ
PLQ


PLQ


PLQ

 
)ORRU
PD[
PP

PP

PP
*DVFRQQHFWLRQ





PD[

$%
&
'

en
ÚInstallation instructions
Important notes
Read these instructions carefully and keep them in a safe place.
Safety during use can only be ensured if the appliance is fitted
correctly according to these installation instructions. The
installer is responsible for ensuring that the appliance operates
perfectly at the point of installation.
The appliance must be connected to the mains only by an
authorised person.
Before carrying out any type of work, turn off the electricity and
gas supply.
Statutory regulations
This appliance shall be installed in accordance with the
manufacturer’s installation instructions, local gas fitting
regulations, municipal building codes, electrical wiring
regulations and AS/NZS 5601.1 the Australian Standard for gas
installations. Refer also to AS/NZS 5601.1 for pipe sizing tables.
Before connecting the appliance, please check whether the
local connection conditions such as the gas type, gas pressure
and mains voltage and the appliance settings are correct. Refer
to the data plate located on the hob base for the necessary
information.
If the data plate does not agree with the appliance settings refer
to SampfordIXL contact details.
For conversion to another type of gas, please call the after-sales
service.
m Risk of gas escape!
After connecting the appliance to the gas supply, always check
the connection for leak tightness. The manufacturer accepts no
responsibility for the escape of gas from a gas connection
which has been previously tampered with.
Ensure sufficient air exchange in the room where the
appliance is installed. Up to 11 kW total output:
■Minimum volume of the room where appliance is installed:
20 m³
■A door leading to the open air or a window which can be
opened.
Up to 18 kW total output:
■Minimum volume of the room where appliance is installed:
2 m³ per kW total output.
■A door leading to the open air or a window which can be
opened.
■An extraction hood into the open air. Minimum displacement
volume of extraction hood: 15 m³/h per kW total output.
The plug must remain accessible after installation is complete.
Do not kink or trap the mains connection cable.
The appliance must be fitted according to the installation
drawing.
A minimum clearance of 260 mm from the periphery of the
burner to a rear or side horizontal combustible surface must be
maintained. If clearance is less than 260 mm then that surface
must be non-combustible or be protected in accordance with
AS/NZS 5601.1 clause 6.10.1.2
Overhead clearances
Rangehoods and exhaust fans shall be installed in accordance
with the manufacturers instructions. However, in no case shall
the clearance between the highest part of the burner and the
underside of the rangehood be less than 650 mm or for a
overhead exhaust fan, 750 mm.
This appliance is not intended for operation with an external
timer or an external remote control.
Do not install this appliance on boats or in vehicles.
Preparing the furniture
The surrounding kitchen unit must be heat-resistant to at least
90 °C. The stability of the unit must be maintained after
producing the cut-out.
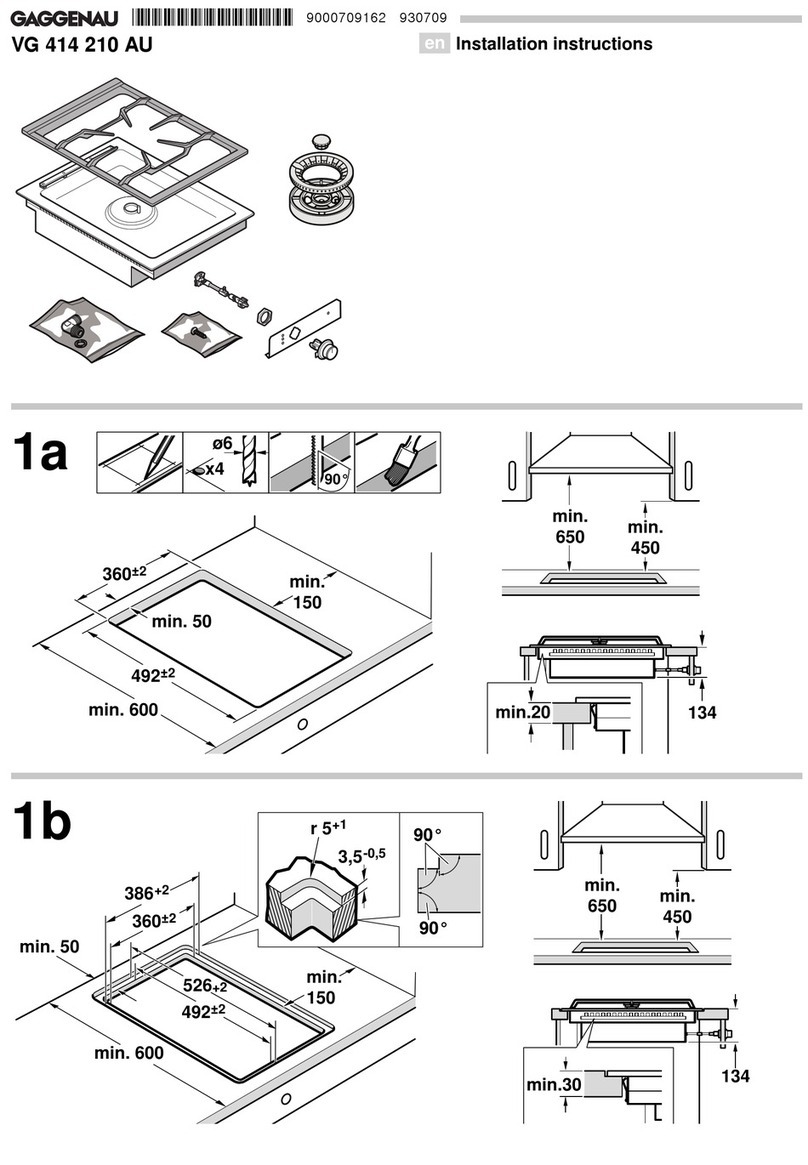
Produce the cut-out for one or several Vario appliances.
Proceed as shown in the installation sketch. The angle between
the cut surface and the worktop must be 90°.
After producing the cut-out, remove the shavings. Seal the cut
surfaces to make them heat-resistant.
Observe a minimum clearance between the appliance housing
and parts of the unit of 10 mm.
When fitting several Vario appliances: allow for the additional
space required for the connecting strip VV 200. Appliances can
also be fitted in individual recesses, if a minimum clearance of
40 mm between the appliances is observed.
Fitting the appliance
1. Mark the centre of the recess exactly. Fit the mounting rails to
the front and rear of the recess. Make sure the lugs of the
mounting rails lie on the worktop. The centre marking on the
mounting rails must be precisely flush with the centre marking
of the recess.
Note. when fitting the appliance in a stone worktop glue on the
mounting rails with a temperature-resistant two-component
adhesive (metal on stone).
2. For combination with the appliance cover VD 201: secure the
appliance cover on the appliance before installation (refer to
the installation manual of VD 201).
3. Lower the appliance into the cut-out. The snap-in pins on the
appliance must lie exactly on the catch springs. Firmly press
the appliance into the cut-out. The pins on the appliance must
snap into the catch springs.
Removing the appliance
Disconnect the appliance from the power and the gas supply.
Push out the appliance from below.
Caution!
Risk of damage! Do not lever out the appliance from above.
Gas connection
The supply connection point shall be accessible with the
appliance installed.
Using the R½'' (for appliance side) connection elbow provided,
connect the appliance with the associated gasket to a fixed
connection pipe. For natural gas the regulator must be
connected.
If using a flexible connection
This appliance is approved for connection by a CLASS B hose.
Connection is in compliance with AS/NZS 5601.1
There are two ways to carry out the connection to the main gas
line:
■A: The hotplate can be connected with rigid pipe.
■B: Flexible Hose: If installing with a hose assembly, install with
a hose assembly that complies with AS/NZS 1869 (AGA
Approved), 10 mm ID, class Bor D, no more than 1.2 m long
and in accordance with AS/NZS 5601.1. Ensure that the hose
does not contact the hot surfaces of the hotplate, oven,
dishwasher or any other appliance that may be installed
underneath or next to the hotplate. The hose should not be
subjected to abrasion, kinking or permanent deformation and
should be inspected along its entire length with the cooktop in
the installed position. Unions compatible with the hose fittings
must be used and all connections tested for gas leaks.
Before leaving - check all connections for gas leaks with soap
and water. DO NOT use a naked flame for detecting leaks.
Ignite all burners both individually and concurrently to ensure
correct operation of gas valves, burners and ignition. Turn gas
taps to low position and observe stability of the flame for each
burner individually and all together.
Adhere the duplicate data plate to an accessible location near
to the cook top. When satisfied with the cook top, please
instruct the user on the correct method of operation. In case the
appliance fails to operate correctly after all checks have been
carried out, refer to the authorised service provider in your area.
Electrical connection
Check that the appliance has the same voltage and frequency
as the electrical installation system.
The hob is delivered with a mains cable and 3 pin moulded
plug.
Only connect the appliance to sockets which have been fitted
and earthed according to regulations.
The appliance corresponds to type Y: the mains connection
cable must only be replaced by the after-sales service. Check
the cable type and minimum cross section.
Technical data / nozzle table
Total connected load electric 0.8 VA
Nozzle table
Conversion to another type of gas
This gas hob corresponds to the categories specified on the
rating plate. It is possible to convert the appliance to any of the
gases listed on the plate by changing the nozzles. The
modification kit can be ordered via our after-sales service.
Depending on the model the parts required may beincluded in
the scope of delivery.
The conversion must be carried out by an authorised person.
Before carrying out the conversion, turn off the electricity and
gas supply.
Changing the low burn nozzle:
1. Remove pan support and all burner parts.
2. Unscrew two fastening screws (Torx T20) and remove
stovetop.
3. Remove control knob. Remove control panel: Unscrew the two
upper, lateral fastening screws (Torx T20). Raise control panel
in the rear and push it forward. Remove switch cover.
4. The low burn nozzle is located in the gas valve and is screwed
in from above. For easier accessibility, turn switch or remove
securing ring and remove switch. Unscrew the nozzle and
insert the new nozzle as specified in the low-setting nozzle
table. The nozzle must be screwed in fully.
5. Put switch, securing ring, switch cover and control panel back
in place and screw them tight. Put on control knob
Changing the full burn nozzle:
1. Remove securing clips on the burner pipes. Remove burner
pipes. Loosen screw on air-regulating tube. Remove nozzle
fitting
2. Remove nozzle and O-ring for inner circular burner by hand.
Unscrew nozzle for outer circular burner (SW10).
3. Check that O-ring is correctly positioned in new full-burn nozzle
for inner circular burner. Push nozzle onto burner pipe. Screw
new main nozzle for outer circular burner all the way into nozzle
fitting.
4. Put on nozzle fitting and burner pipes. Put on securing clips.
5. Set air-regulating tube to correct dimension after loosening the
screw (see nozzle table). Tighten screw again.
6. Put stovetop in place and screw it tight. Put burner parts and
pan support in place, positioning them correctly.
If it should be necessary to correct the low-setting nozzle as the
result of deviating gas types and pressure, the flow rate can be
increased by turning to the left.
These burners do not require the primary air to be adjusted.
Checking functions after the conversion:
The flames are adjusted correctly if no yellow tips are visible
and if they do not go out when switching over swiftly from the
high to the low setting.
Note. stick the adhesive label included with the nozzle set over
the rating plate of the appliance to document the changeover to
a different gas type.
Gas Natural Gas Propane Gas
Pressure 1.0 kPa 2.75 kPa
CNozzle, full burn, outer 195 110
ANozzle, low burn, outer 88 57
DNozzle, full burn, inner 67 42
BNozzle, low burn, inner 51 31
Air gap adjustment, outer 0 mm 0 mm
Total connected load 18.0 MJ (5 kW) 18.0 MJ (5 kW)
Total consumption 0.47 m³/h 376 g/h
Other manuals for VG 231 AU

3

Other Gaggenau Cooktop manuals

Gaggenau VI 230 620 User manual

Gaggenau

Gaggenau VI 230 620 User manual

Gaggenau VI 230 620 User manual

Gaggenau

Gaggenau VI 230 620 User manual

Gaggenau CE 491 User manual

Gaggenau

Gaggenau CE 491 User manual

Gaggenau CG 492 User manual

Gaggenau

Gaggenau CG 492 User manual

Gaggenau KG 260 AU User manual

Gaggenau

Gaggenau KG 260 AU User manual

Gaggenau VP 230 620 User manual

Gaggenau

Gaggenau VP 230 620 User manual

Gaggenau CV 282 User manual

Gaggenau

Gaggenau CV 282 User manual

Gaggenau KG 291 CA User manual

Gaggenau

Gaggenau KG 291 CA User manual

Gaggenau CV282110 User manual

Gaggenau

Gaggenau CV282110 User manual

Gaggenau CI 49X User manual

Gaggenau

Gaggenau CI 49X User manual

Gaggenau CE 490 User manual

Gaggenau

Gaggenau CE 490 User manual

Gaggenau VE 230 614 User manual

Gaggenau

Gaggenau VE 230 614 User manual

Gaggenau VE 260 614 User manual

Gaggenau

Gaggenau VE 260 614 User manual

Gaggenau VG 295 AU User manual

Gaggenau

Gaggenau VG 295 AU User manual

Gaggenau CI 491 User manual

Gaggenau

Gaggenau CI 491 User manual

Gaggenau VE 230 614 User manual

Gaggenau

Gaggenau VE 230 614 User manual

Gaggenau VG 425 211 CA User manual

Gaggenau

Gaggenau VG 425 211 CA User manual

Gaggenau VG 264 CA User manual

Gaggenau

Gaggenau VG 264 CA User manual

Gaggenau CX482610 User manual

Gaggenau

Gaggenau CX482610 User manual

Gaggenau VG 231 HK User manual

Gaggenau

Gaggenau VG 231 HK User manual

Gaggenau VI 424 610 User manual

Gaggenau

Gaggenau VI 424 610 User manual

Gaggenau CI 292 602 User manual

Gaggenau

Gaggenau CI 292 602 User manual

Gaggenau VG 233 234 CN User manual

Gaggenau

Gaggenau VG 233 234 CN User manual

Gaggenau VG 295 User manual

Gaggenau

Gaggenau VG 295 User manual

Popular Cooktop manuals by other brands

Bompani BO374AA/E User instructions

Bompani

Bompani BO374AA/E User instructions

Jenn-Air JIC4724HB installation instructions

Jenn-Air

Jenn-Air JIC4724HB installation instructions

Hyundai EP 110 W instruction manual

Hyundai

Hyundai EP 110 W instruction manual

Thermador Traditional GGN30 Care and use manual

Thermador

Thermador Traditional GGN30 Care and use manual

Smeg ET52250EC installation instructions

Smeg

Smeg ET52250EC installation instructions

Euromaid G7FS1 user manual

Euromaid

Euromaid G7FS1 user manual

Eico 70 IQWP User instructions

Eico

Eico 70 IQWP User instructions

Frigidaire FEC36C2ASA owner's guide

Frigidaire

Frigidaire FEC36C2ASA owner's guide

KitchenAid KECC056, KECC506, KECC507, KECC508, KECC556, KECC567,... user manual

KitchenAid

KitchenAid KECC056, KECC506, KECC507, KECC508, KECC556, KECC567,... user manual

Frigidaire FEF376ASH Wiring diagram

Frigidaire

Frigidaire FEF376ASH Wiring diagram

Seiki SC-600AUECT instruction manual

Seiki

Seiki SC-600AUECT instruction manual

Teka IZ 8320 HS Installation instructions and recommendations for using and maintaining

Teka

Teka IZ 8320 HS Installation instructions and recommendations for using and maintaining

Frigidaire FEC26C2AS - 26" - Coil Electric Cooktop Specifications

Frigidaire

Frigidaire FEC26C2AS - 26" - Coil Electric Cooktop Specifications

KitchenAid KGCP487JSS08 parts list

KitchenAid

KitchenAid KGCP487JSS08 parts list

Westinghouse WHEHP01K instruction manual

Westinghouse

Westinghouse WHEHP01K instruction manual

Bosch PIU8 K17E Series instruction manual

Bosch

Bosch PIU8 K17E Series instruction manual

Miele KM 6350 Operating and installation instructions

Miele

Miele KM 6350 Operating and installation instructions

Frigidaire FGC3X4XA Factory parts catalog

Frigidaire

Frigidaire FGC3X4XA Factory parts catalog

manuals.online logo
manuals.online logoBrands
  • About & Mission
  • Contact us
  • Privacy Policy
  • Terms and Conditions

Copyright 2025 Manuals.Online. All Rights Reserved.