NOTE:
1.
2. Backlight:
If the Low battery indicator symbol is displayed on the sensor or main unit,
please replace new batteries for them.
a.
b.
c.
When you use the battery as power supply, press the “SNZ/LIGHT” button
to light up the display for approximately 10 seconds. (In battery mode the
display brightness regulation is disabled.)
When you use the USB line as power supply, the backlight will light up all
the time.
We recommend best using the original USB line for the main power
supply and the battery for the backup power supply.
Press and hold “Set” button for about 3 seconds to enter the time setting
mode.
Press “Up” or “Down” button to adjust the time.
Press “Set” again to confirm the setting and go on for the next setting.
Setting order is hour → minute → year → month → day → 12/24HR → exit.
Press “SET” to confirm the setting and go on for next setting.
Setting will be auto-saved once without any operation for 20 seconds.
a.
b.
c.
d.
e.
f.
Press “SET” button once to switch to alarm time display (AL).
Under alarm time display (AL) mode, press and hold “SET” button for about
3 seconds to enter the alarm setting mode.
Press “Up” and “Down” button to adjust the time.
Press “SET” button again to confirm the setting and go on to the next
setting
Setting order is hour → minute → exit.
Setting will be auto-saved once without any operation for 20 seconds.
TIME SETTING
a.
b.
c.
d.
e.
f.
ALARM SETTING
• Alarm time setting
It is suggested to set all the 3 sensors and channels before turning on the
main unit.
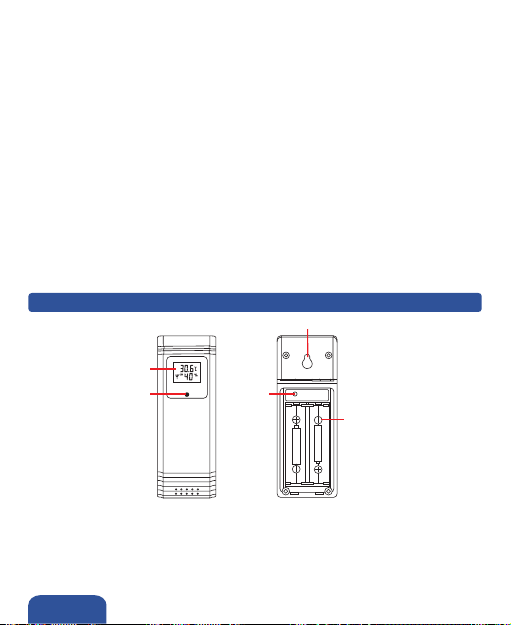
Insert the batteries with the correct polarity into the battery compartment and
press “CH” button at the back of the sensors to set the channel 1, 2 and 3
accordingly.
The channel number should appear at the left-hand-side of the humidity to
indicate which channel is it using.
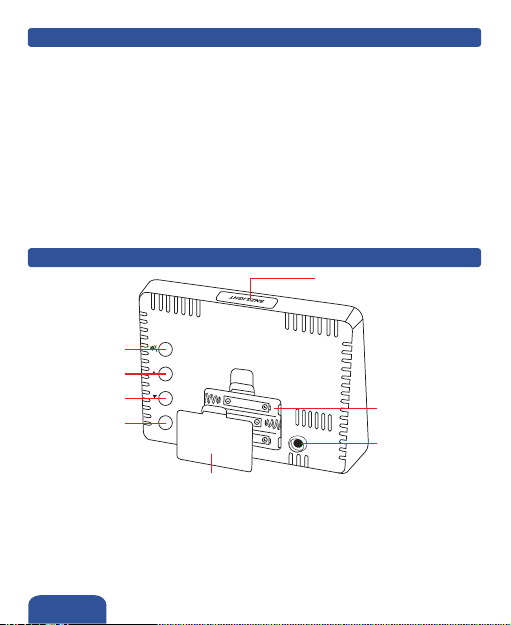
Insert the USB line connector into the connection socket of the main unit or
insert the batteries with the correct polarity into the battery compartment of
main unit to turn it on.
After turning on the main unit, it will automatically receive the signals from the
sensors.
It may take three minutes to warm up, all the data in the first three minutes
may not be accurate.
SETTING UP THE MAIN UNIT
If the main unit cannot receive the signal after three minutes, you can hold
and press “CH” button at the back of main unit to re-register or take out the
batteries and repeat the previous steps from a ~ e.
The sensors will be reset after changing new batteries. Please be reminded
to go through the previous steps to set up the weather station again after
changing the new batteries.
g.
h.
- 5 -