Galactron MK 2245 User manual

1
Owner’s Manual
MK 2245

2
Thank you and congratulation.
By choosing GALACTRON you have not only purchased a
sophisticated and refined piece of hi-fi sound reproduction
equipment but have also acquired 40 years of experience,
research and interrupted love for music.
The most important content of your new GALACTRON is not its
built-in technology but rather the tradition of excellence, appeal
and style associated with our name, earned in over the span of our
history, a name is now almost a legend.
We have worked hard to perfect this technology and bring it to
market at an acceptable price, driven by our passion for music and
humbly convinced to provide a small contribution to the man’s
peace of mind by creating instruments with which to enjoy music.
The best reward of our enterprise is your satisfaction and the
serene hours you will spend listening to your GALACTRON.

3
BEFORE STARTING
Your GALACTRON amplifier is ready out of the box to be plugged into the household wall outlet and to
other components of your hi-fi system without the need for internal setting.
DO NOT OPEN THE AMPLIFIER CASE FOR ANY REASON: ANY REPAIRS OR ADJUSTMENT TO
BE MADE INSIDE THE UNIT MUST BE PERFORMED BY A GALACTRON DEALER OR CERTIFIED
SERVICE CENTER.
To meet the acting regulations and ensure your safety, always disconnect the power cord from the main
power line before working on this equipment.
PLEASE READ THIS MANUAL CAREFULLY: GALACTRON AMPLIFIER DIFFER GREATLY
FROM ALL OTHER AMPLIFIER, AND THEIR CORRECT USE REQUIRES AN AT LEAST
CURSORY LEVEL OF INSTRUCTION.
PARTS LIST
In addition to this manual, the packing should include the following material:
MK 2245 integrated amplifier
power cord, meeting IEC specs
infrared remote control
guarantee card
POWER LINE REQUIREMENTS
The amplifier includes a separate power cord, which has an IEC norm socket on one end and a 10 A plug on
the other.
Before inserting the IEC socket into the recessed plug located on the rear panel of the amplifier (see the
Chapter on “Connections and Checks”), make sure the main power switch is in the OFF position.
top
down
switch in the ON position switch in the OFF position
The amplifier is factory wired for a nominal line voltage of 230+5% V:TO USE A DIFFERENT VOLTAGE,
CONTACT A GALACTRON SERVICE CENTER. The 230 V line voltage is the new European standard.
CONNECTING COMPONENTS
Connection with other pieces of audio equipment does not have special limitations. Be sure to use suitable
cables and connectors, so as not to degrade the exceptionally high performance of these amplifiers.
The various connection possible and the electrical specifications of the input and output are reported in detail
in the following chapters.
WARNING: CONNECTING THE SPEAKER OUTPUT TO THE LINE VOLTAGE OR ANY FORM OF
CURRENT GENERATOR WILL DESTROY THE FINAL POWER STAGE.
COMMANDS AND CONTROLS
GALACTRON integrated amplifiers do not have front panel commands, and their function are selected and
adjusted with the enclosed remote control.
The remote control is also normally used to turn the amplifier ON and OFF. If you plan not to use the
amplifier for an extended period of time, you can completely shut down the unit by setting the main power
switch to the OFF position.

4
PLACEMENT
The dissipation of the heat produced by the power MOSFET is a slot way, placed above.
The particular configuration as it takes advantage of the upward convection of hot air, drawing it down over
the device and funnelling it to the upper slots. With this solution it is not necessary to provide a large space
side and rear, but it is good that the amplifier remains above a certain free space to allow the air vent slits.
In order to receive commands, in addition, the infrared receiver must not be covered by anything and the
front panel of the amplifier must be well in sight to the remote.
CONNECTION AND CHECKS
REAL PANEL
The rear panel of the amplifier is divided in two by the heat sink: the left side houses the signal connections
and the right side the power connections.
1. POWER SOCKET
This is a standard IEC recessed plug. Any power cord meeting this standard can be use. If the power cord
supplied with your unit does not fit into your wall outlet, replace it with one that is rated at least 10 A.
2. MAIN POWER SWITCH
This serves to power up and completely shut down the unit. Under normal operating conditions, it should
be left in the ON position, thus supplying power to the control microprocessor.
3. MICROPROCESSOR LINE FUSE (0.5 A)
This fuse protects the power supply of the circuits that control the amplifier’s remote control.
4. MAIN LINE FUSE (3.5 A)(7 A for 110 V or 100 V, main line voltage)
This fuse protects the power supply of the audio circuits of the amplifier.
5. AUX 2 INPUT
Unbalanced line input, selected by pressing the AUX 2 button on the remote control. Accepts any source
that has a nominal output level ranging from 400 mV to 6 V.
6. AUX 1 INPUT
Unbalanced line input, selected by pressing the AUX 1 button on the remote control. Accepts any source
that has a nominal output level ranging from 400 mV to 6 V.
7. TUNER INPUT
Unbalanced line input, selected by pressing the TUNER button on the remote control. Accepts any source
that has a nominal output level ranging from 400 mV to 6 V.
8. CD INPUT
Unbalanced line input, selected by pressing the CD button on the remote control. Accepts any source that
has a nominal level ranging from 400 mV to 6 V.
9. TAPE IN INPUT
Unbalanced line input, selected by pressing the TAPE MONITOR button on the remote control. Accepts
the monitor output of any recording system.
10.TAPE OUT OUTPUT
Unbalanced line output. This output is connected to the program source selected by remote control, at the
same signal level.
11. BI-AMP OUTPUT
Unbalanced line output, with nominal levels of 2 Volt RMS, under the control of volume setting. This
output is not active unless the BM 2001 card is installed, the Bi-Amp output provides a low pass filtered
signal. For further details on bi-amplification, refer to the chapter “Semi-passive
bi- amplification”, later in this manual.
12. RIGHT SPEAKER OUTPUT
Power output, with gold plated terminal. These terminals accept stripped wire up to 6 mm2or a standard 4
mm banana jack. Connect the “+” terminal to the positive binding post of the right speaker and the “-“
terminal to the negative binding post of the right speaker.
13. LEFT SPEAKER OUTPUT
Power output, with gold plated terminal. These terminal accept stripped wire up to 6 mm2or a standard 4
mm banana jack. Connect the “+” terminal to the positive binding post of the left speaker and the “-“
terminal to the negative binding post of the left speaker.
14.REMOTE CONTROL
Digital output, to be used only to control an additional add-on GALACTRON. When this output is not
in use, the plug inserted at the factory must be left in place; this plug should only be removed to
connect the control cable to a GALACTRON power amplifier.

5
FRONT PANEL
The front panel does not have any controls, but only illuminated messages indicating the operation of the
amplifier.
The FRONT PANEL provides the following messages:
POWER
Three coloured (red, green, yellow) Led.
The red illumination goes ON when the main power switch is in the ON position. This indicates that the
amplifier is connected to the line supply but is in stand-by.
The green illumination goes ON when the amplifier is active by the remote control and is operating
normally. The yellow illumination goes ON when the amplifier has entered the protected state.
This implies that a fuse has blown.
WARM-UP
This led flashes while the amplifier is warming-up; during this period the operating temperature and
currents are reaching steady state conditions. When warming-up, the amplifier is not able to express
its full sound reproduction qualities, and some background noise is normal. The Led will be
illuminated continuously when stable operating conditions have been reached.
CD
Indicates that the CD program source has been selected.
TUNER
Indicates that the TUNER program source has been selected.
AUX 1
Indicates that the AUX 1 program source has been selected.
AUX 2
Indicates that the AUX 2 program source has been selected.
T.MON
Indicates that the signal from the tape deck has been selected.
VOLUME
The indicator goes On when a change in volume is requested with the remote control, for as long as the
volume button is pressed. When the volume is increasing the up arrow will light, and when the volume is
decreasing the down arrow will light. When the volume has reached the minimum settings, the associated
arrow will go Off, even is the remote control button is pressed.
BALANCE
The indicator goes On when a change in speaker balance is requested from the remote control. The right
arrow will go On when the left channel is attenuated, and the left arrow will go On when the right channel
is attenuated.
MUTING
The indicator goes On when the muting function is pressed on the remote control.
PROGRAM
The indicator goes On when the control microprocessor is placed in “program” mode, and can thus be
programmed from the remote control.
INFRA RED DETECTOR
All commands to the amplifier are communicated via this sensor. The infra red detector should be kept
free of obstruction, and the front of the amplifier should face towards the listening area.
REMOTE CONTROL
The remote control has the following button:
1. CD
Press this Key to activate the amplifier and select the CD input.
2. TUNER
Press this Key to activate the amplifier and select the TUNER input.
3. AUX 1
Press this button to activate the amplifier and select the AUX 1 input.
4. AUX 2
Press this Key to activate the amplifier and select the AUX 2 input.
5. TAPE MONITOR
Press this Key to select the TAPE IN input. The signal selected with keys 1, 2, 3, or 4 above will be sent
to the tape deck input.
6. VOLUME
Press this Key to increase or decrease the volume of the amplifier.

6
7. BALANCE
Press this Key to attenuate the level of the right of the right or left channel by one step, shifting the
balance of the amplifier. To attenuate by another step, release the key and press again.
10. MUTE
Press this Key to lower the volume by 20 dB.
To restore the volume to its initial level, press the key again.
11. HEADPHONES
This function is not implemented in the MK 2240 and MK 2245 amplifier; pressing this Key will not
have any effects.
12. PROG.
Press this Key to initiate the microprocessor programming sequence.
To restore the microprocessor to normal operating mode, press the key again.
13. VOL.PR.1
Press this Key to automatically adjust the volume to the first preset value. The Key is also used in
programming mode to memorise the desired volume level.
14. VOL.PR.2
Press this Key to automatically adjust the volume to the second preset value. The Key is also used in
programming mode to memorise the desired volume level.
15. VOL.PR.3
Press this Key to automatically adjust the volume to the third preset value. The Key is also used in
programming mode to memorise the desired volume level.
16. HEAD PR.
This function is not implemented on the MK 2240 and MK 2245 amplifiers.
17. STAN-BY
Press this Key to deactivate the amplifier, placing it in STAND-BY mode. In this condition, the control
microprocessor is active whereas the amplifier itself is inactive. To activate the amplifier, press any of the
input selection buttons 1 to 4.
18. DIMMER
Press this Key to enable an external dimmer, used to vary the light level in the room.
(OPTIONAL DM 2004).
19. BATTERY HOLDER
The remote control requires four AAA batteries. When the batteries are low, the remote control will not
function.
HOW TO OPERATE THE AMPLIFIER
CONNECTING THE PROGRAM SOURCES
All inputs have a nominal sensitivity of 400 mV, allowing to connect any audio source without risking
saturation or excessive noise. The sufficiently high input impedance protects the output stages of the audio
sources from overload. Moreover, the presence of an isolator stage on the tape output guarantees that the load
seen by the sources is not influenced by the presence or absence of the recorder, and at the same time,
provides a sufficiently low impedance at the output so as not be affected by the characteristics of the records
interface.
Check that the audio source and amplifier are correctly matched, right channel with right channel and left
channel with left channel. Without here delving into the audio characteristics of the interconnects, always use
cables with gold or rhodium plated terminals to minimise the formation of surface oxidation, which greatly
degrades the system sound quality.
Similarly, before making the connection, carefully remove all traces of grease and oxidation from the
amplifier terminals and cable end-connectors using alcohol or other suitable cleaning fluid. Remember that
merely touching the connectors with your fingers will deposit an isolating film of oil.
CONNECTING THE “REMOTE CONTROL” OUTPUT
This output must be used only when the amplifier is operated together with a GALACTRON power
amplifiers in bi-amp configuration. The “remote control” output comes factory equipped with a plastic plug,
this plug must remain in place unless the outlet is connected to the same name input in the rear panel of a
GALACTRON power amplifier. Before to physically connect together the units with a standard RCA
shielded cable, please check that both the power switches are in the Off position. Turning on the units to the
“Stand-By” mode for the first time, it is mandatory to operate first the power switch of the integrated
amplifier (master) and later on the power amplifier’s switch (slave). Now being in the stand-by mode, a
turning-on command from the master integrated amplifier remote control will light up also the slave power
amplifier. This routine must be repeated when one or both the units have been turned off by the power switch
or disconnected from the AC main supply.

7
CONNECTING THE SPEAKERS
The power output stage is accessed via gold-plated screw block terminals, which can accept a stripped wire
up to 6 mm2, with either a spade mount or standard 4 mm banana plug. The use of a simple stripped wire is
not recommended due to the heavy surface oxidation to which copper wire, either nude, tinned or silver
plated, is susceptible. The output stage of GALACTRON amplifiers do not have either voltage or current
protection. For this reason, their design parameters have been greatly oversized (the heat dissipation capacity
of the final stage MOSFETs is equal to eight times the nominal value at 8 Ohms), in order to be able to
handle even a short circuit of the output terminals in the presence of a high input signal. This, however, does
not mean that shorting the output will not have any consequence. The four fuses in the power amplifier PC
board should prevent an excessive power drain by the final stages: if these fuses blow the power to the final
amplifier stage will be
cut-off and the amplifier will not function; these fuses must be replaced by a GALACTRON SERVICE
CENTER. The lack of protection and the mighty power supply allows GALACTRON amplifiers to drive any
speaker system, if the input impedance seen by the amplifier is very low (less than 2 Ohm) and the volume is
kept very high for long periods of time, the current delivered to the final amplifier stages can lead to
remarkable temperature increase.
POWER UP
GALACTRON AMPLIFIER are controlled by a microprocessor that oversees all function without, however,
in any way interfering with the audio signal. For this reason, the power up procedure differs from that of
ordinary amplifiers. When the main power switch turned to the On position, the amplifier enters Stand-By
mode. Basically, the control circuits are powered but the primary winding of the main power transformer is
not connected to the main power supply. Under these conditions, the power led will be illuminated red. To
activate the amplifier, press one of the four audio input keys on the remote control. At this point the
microprocessor will start the specific power up sequence. First, the relay that supplies the voltage to the main
power supply will be activated, and the power led turns green. After about four seconds, the output of the
preamplifier stage, which is grounded in STAND-BY mode, is enabled, and the microprocessor starts the
warm-up sequence; the warm-up led begins flashing.
WARM-UP
At this point the amplifier is ready for operation. However, due to the special “ZERO FEEDBACK” circuit
design, the amplifier is not able to express its full performance until a steady state thermal equilibrium has
been reached. Accordingly, the warm-up period, indicated by a flashing led, was adopted to identify the
period during which the amplifier should not be used if you demand the purest sound reproduction. DURING
THE WARM-UP PERIOD, IT IS NORMAL TO HEAR AN INCREASE, EVEN APPRECIABLE, OF
BECKGROUND NOISE.
Once the warm-up period has terminated, the led will be illuminated continuously. The duration of the warm-
up period is not constant. It depends on how long the unit has remained ON before being turned OFF; indeed,
the microprocessor takes into account the effective initial temperature of the heat sink.
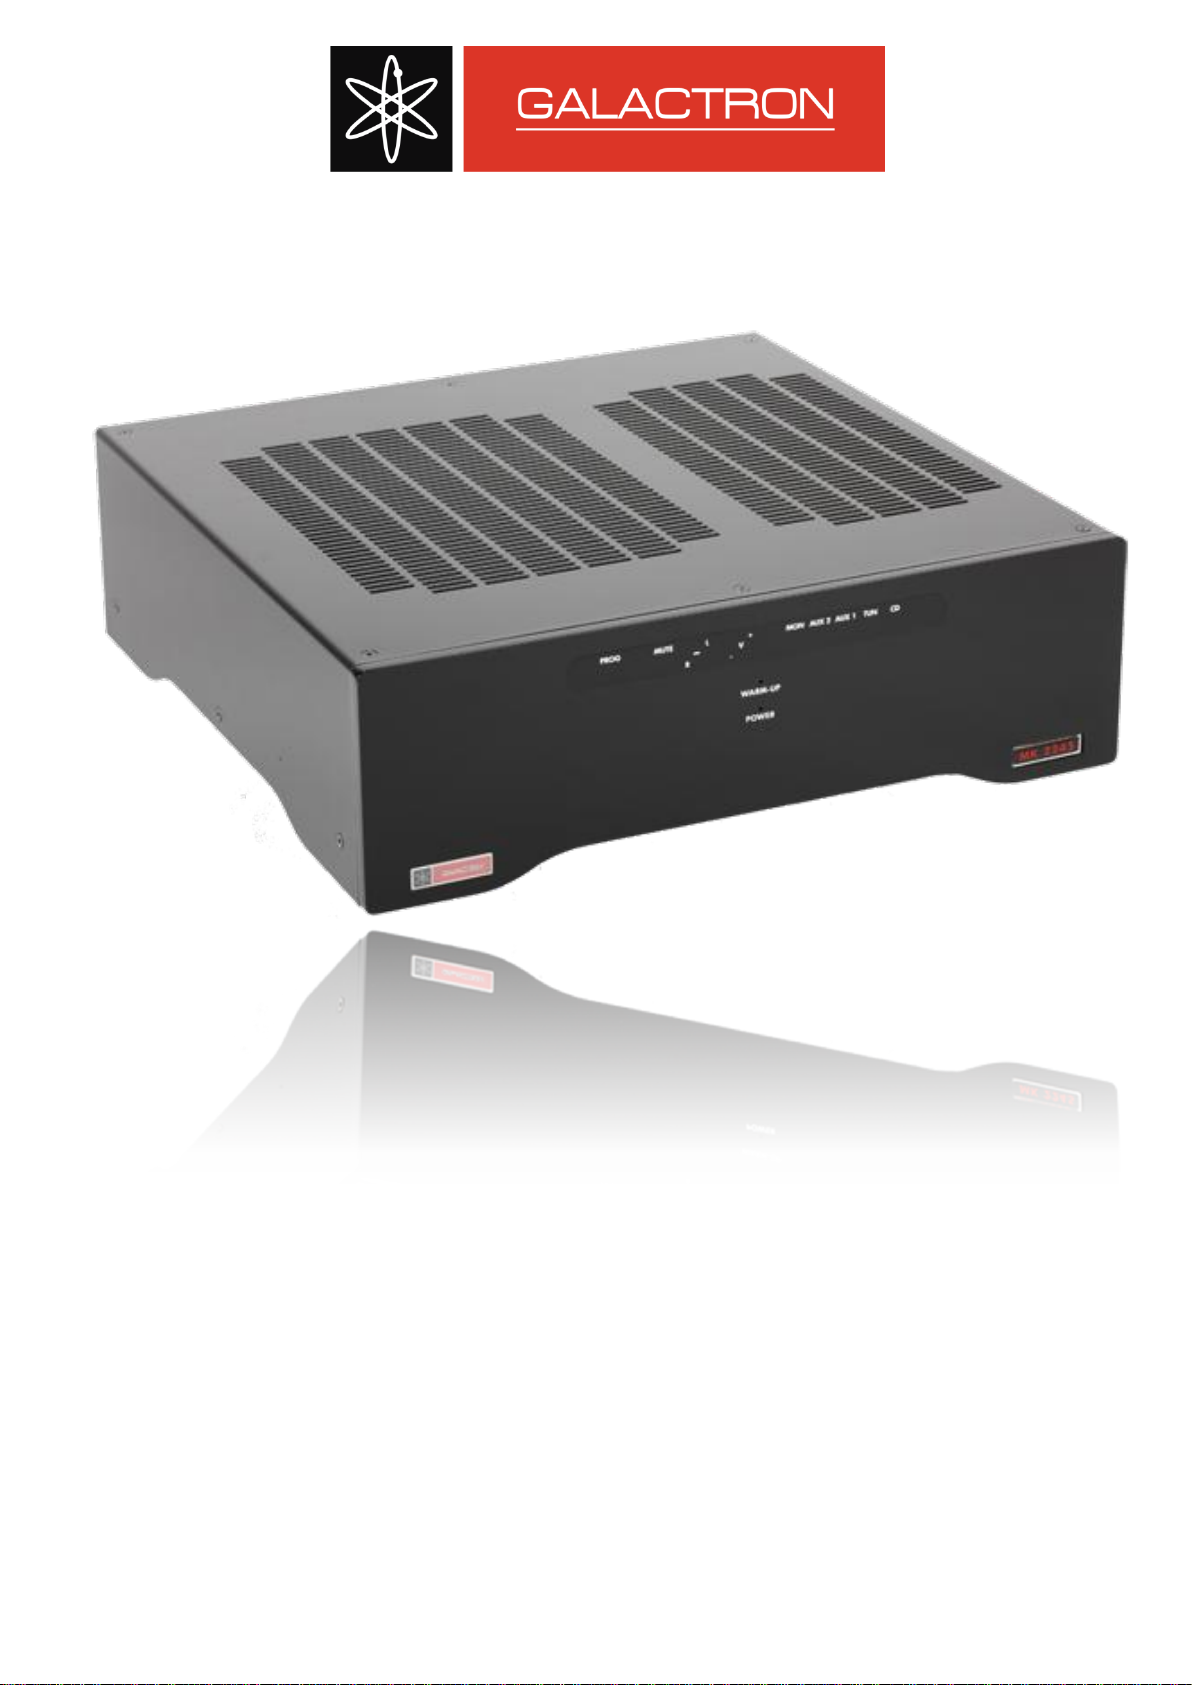
SOURCE SELECTION
The program source is selected by pressing one of the associated keys on the remote control. With each
selection, the new source is selected in place of the previous choice. The program source selected is
visualised by an illuminated message on the front panel.
When the TAPE MONITOR key is pressed, the signal returning from the tape deck is sent to the speakers the
main source is not deselected, and its is signal continues to be sent to the tape deck. Activation of the monitor
is displayed by the associated wording on the front panel.
To de-select listening to the signal returning from the tape recorder and return to the selected source, simply
press the tape monitor key again. The wording on the front panel will disappear. If a source selection key is
pressed when the tape monitor is active, the amplifier will continue to be connected to the tape deck, but the
signal sent to the record will depend on the key pressed.
VOLUME
The volume is adjusted by using the two keys on the remote control. The volume adjustment has been
divided into steps.
The maximum attenuation before the last step is -48 dB; the last step silences the volume.
When one of the volume control keys is pressed on the remote control, a massage and an arrow appears on
the front panel, indicating if the level is increasing or decreasing. Once maximum attenuation or gain is
reached, the massage and the arrow will no longer be illuminated, indicating the limit has been reached.
Pressing MUTE key will lower the output signal by 20 dB. Activation of the mute function is indicated by a
massage on the front panel. To return to the previous volume, press the key again.

8
BALANCE
Speaker balance is adjusted by differently than in most other amplifier. When the balance is adjusted, one
channel remains unchanged whereas the other is attenuate and excluded at the limit condition. When one of
the balance keys is pressed, the associated channel is attenuated by 1 dB step and a massage and arrow
appears on the front panel indicating the direction the balance is changing. For example, if the right balance
key is pressed, an arrow pointing leftward appears on the right of the warding, and the right channel remain
unbalanced.
Unlike the volume control which is continues, the balance must be changed in steps by releasing the balance
keyed pressing it again. The massage and arrow on the front panel will go OFF momentarily to indicate that
the command had been executed.
Since the balance control must be vary bland, only four attenuation steps are available, the last of which
silences the channel. This function can be useful when setting up the stereo system.
To return to the central balanced position, press the opposite key as many times as the number of steps
previously executed. When the speaker are again balanced, the massage and the arrow will go OFF.
PROGRAM
Some states of the microprocessor can be programmed using the remote control: specifically, you can define
three preset listening levels. The amplifier will automatically adjust the volume to these levels when the VOL
PR.1, VOL PR.2 and VOL PR.3 keys are pressed.
To enter program mode, follow these sequence of commands:
press the PROG key, activation of program mode is indicated by the “program” message on the front
panel.
adjust the volume to the desired level.
press the VOL PR1. Key. The “program” message will flash twice
press the PROG key again. The massage on the front panel will disappear.
This action will program the key VOL PR1 to a given volume. Repeat the same sequence using VOL PR 2
and VOL PR3 for the other two volume settings.
TURNING OFF THE AMPLIFIER
To deactivate the amplifier, press the stand-by key on the remote control. The control microprocessor will
execute the shut-down sequence, grounding the output of the preamplifier to avoid impulse noise, and then
deactivating the relay that supplies voltage to the main power supply: at this point all front panel light will go
OFF, except the POWER LED, that changes colour from green to red.
The amplifier normally should be turned-off from the remote control, leaving the main power switch in the
On position. If the unit will not be used for an extended period of time, we recommended that you also turn
off the main power switch.
WARNING: NEVER TURN OFF THE AMPLIFIER WITH THE MAIN LINE SUPPLY POWER
SWITCH BEFORE HAVING PLACED THE UNIT IN STAND-BY. THIS ERRONEUS
PROCEDURE WILL CAUSE VIOLENT TRANSIENT AT THE AMPLIFIER OUTPUT, WITH
POTENTIALLY DANGEROUS EFFECTS ON THE SPEAKERS.
TROUBLESHOOTING
The main power switch is turned on, but the POWER LED is not illuminated.
The wall outlet is not powered.
Check that the correct voltage is presents at the end of the power cord. If
the mains supply voltage is supplied to the machine
The fuse to the microprocessor has blown*.
Turn off the amplifier, disconnect the cord from the wall socket,
remove the fuse from its holder and check for continuity.
If the fuse is in good condition,
The POWER LED is burned out
Try to activate the amplifier using the remote control. If there is not
action,
The microprocessor has failed.
The POWER LED is illuminated but the amplifier does not respond to the remote control.
The infrared detector on the amplifier is obstructed, or it is placed at an
angle greater than 30° with respect to the remote control.
Check that the amplifier is in correct position.
If the amplifier is in the correct position,
The batteries in the remote control unit are dead.
Check the battery charge level, and replace as required.

9
If the battery are charged,
The remote control unit has malfunctioned.
Try setting the amplifier with another remote control of the same
type.
If the unit still does not work properly,
the infrared detector has failed.
The amplifier goes ON normally, but no sound is produced by the speakers.
The program source is not connected correctly.
Check that the input selected is correctly connected to the audio
source.
If the connections are correct,
The source is not functioning properly,
Check that a correct signal is output by the source.
If the output signal is correct,
The cable are bad.
Check the electrical continuity of the cables and jacks.
If they are not interrupted,
The speakers are hooked-up incorrectly.
Check that the speakers are correctly connected to the output terminals.
If the connection are correct,
The power cable are interrupted.
Check the continuity of the cables.
If they are not interrupted,
A fuse might as blown into the amplifier’s PC board.
Have the amplifier checked from a suitable Service Station.
The amplifier goes into PROTECTION mode, (power led orange)
One external or internal fuse might has blown.
Check the external or internal fuse might has blown.
Check the external 3.5 A (or 7 A) main fuse.
Have the internal fuses checked by a suitable Service Station.
After being turned on with the power switch, the amplifier goes in stand-by and then goes On
automatically, regarding less the commands sent with the remote control. Symmetrically, once turned
off with the remote control, the amplifier goes in stand-by for four seconds and then goes On again.
The factory installed plastic plug has been removed.
Plug-in again the plastic lug or a simple RCA pin jack NOT short
circuited.

10
TECHNICAL SPECIFICATION
MK 2245
Continues Power
2x 60 W/8 Ohm
2x 10⁸ W/4 Ohm
2x 172 W/2 Ohm
Inputs
4 RCA
Unbalanced
Input Impedance
20 KOhm
Input sensitivity
400 mV
THD (at rated power)
< 1%
Remote control
infrared
Weight
15 kg

11
Instructions for Recycling
The symbol on the side, shown on the packing of the product means
that the product, if it is no longer used, cannot be treated as unsorted
municipal waste, but must be returned to a collection point for the
recycling of electrical and electronic equipment, in accordance with the
regulations (WEEE Recycling of Electrical and Electronic equipment).
Ensuring this product is disposed of correctly, you will help prevent
potential negative consequences to the environment and human health,
which could otherwise be caused by inappropriate handling of this
product as unsorted municipal waste. The recycling of materials will
help to conserve natural resources.
Caution !
Changes or modifications not approved by the manufacturer could void the
compliance to laws and make the device unsuitable for use by the user.
The manufacturer declines all responsibility for damage or injury caused by
the use of a device subject to unauthorized modifications or improper
operation or system failures subject to unauthorized changes.

12
Conventions and
Meaning of the Symbols
This document contains instructions on generic
safety, installation and use for Filter Power
MK-600. It 'important that you read this
document before groped to use this amplifier.
Pay particular attention to the safety
instructions.
Appears on the unit to indicate the
presence of dangerous
voltage not isolated inside the
unit. Voltages sufficient to constitute a
risk of electric shock.
Appears on the unit to indicate important
instructions for use or maintenance
instructions
in the accompanying literature.
Appears on the unit to indicate
compliance with the directives on
electromagnetic compatibility
(EMC) and safety (LVD) issued by the
European Union.
It calls attention to an operating
procedure, practice, or similar use which,
if not correctly performed or adhered to,
could result in
personal injury, death or damage to the
machine or other objects.
Draws attention to information that is
considered essential to highlight.
Table of contents
Other Galactron Amplifier manuals
Popular Amplifier manuals by other brands

Phase Technologies
Phase Technologies P-200 user guide

Taramp's
Taramp's DS800X2 instruction manual

Phase Technologies
Phase Technologies A-BUS ABR-40 installation instructions

Triton Audio
Triton Audio Fethead Germanium user guide

HH Scott
HH Scott 222D Service bulletin

Waudio
Waudio AMP50 - XTR 1000 user manual

Audio Control
Audio Control ARCHITECT MODEL 2660 installation manual

Elmo
Elmo SAXophone installation guide

HobbyPCB
HobbyPCB HARDROCK-50 operating instructions

piezosystemjena
piezosystemjena NV40/1CLE instruction manual

Fire-Eye
Fire-Eye RED-EYE INSTRUMENT PREAMPLIFIER manual

Storm Audio
Storm Audio ISP Elite MK3 quick start guide