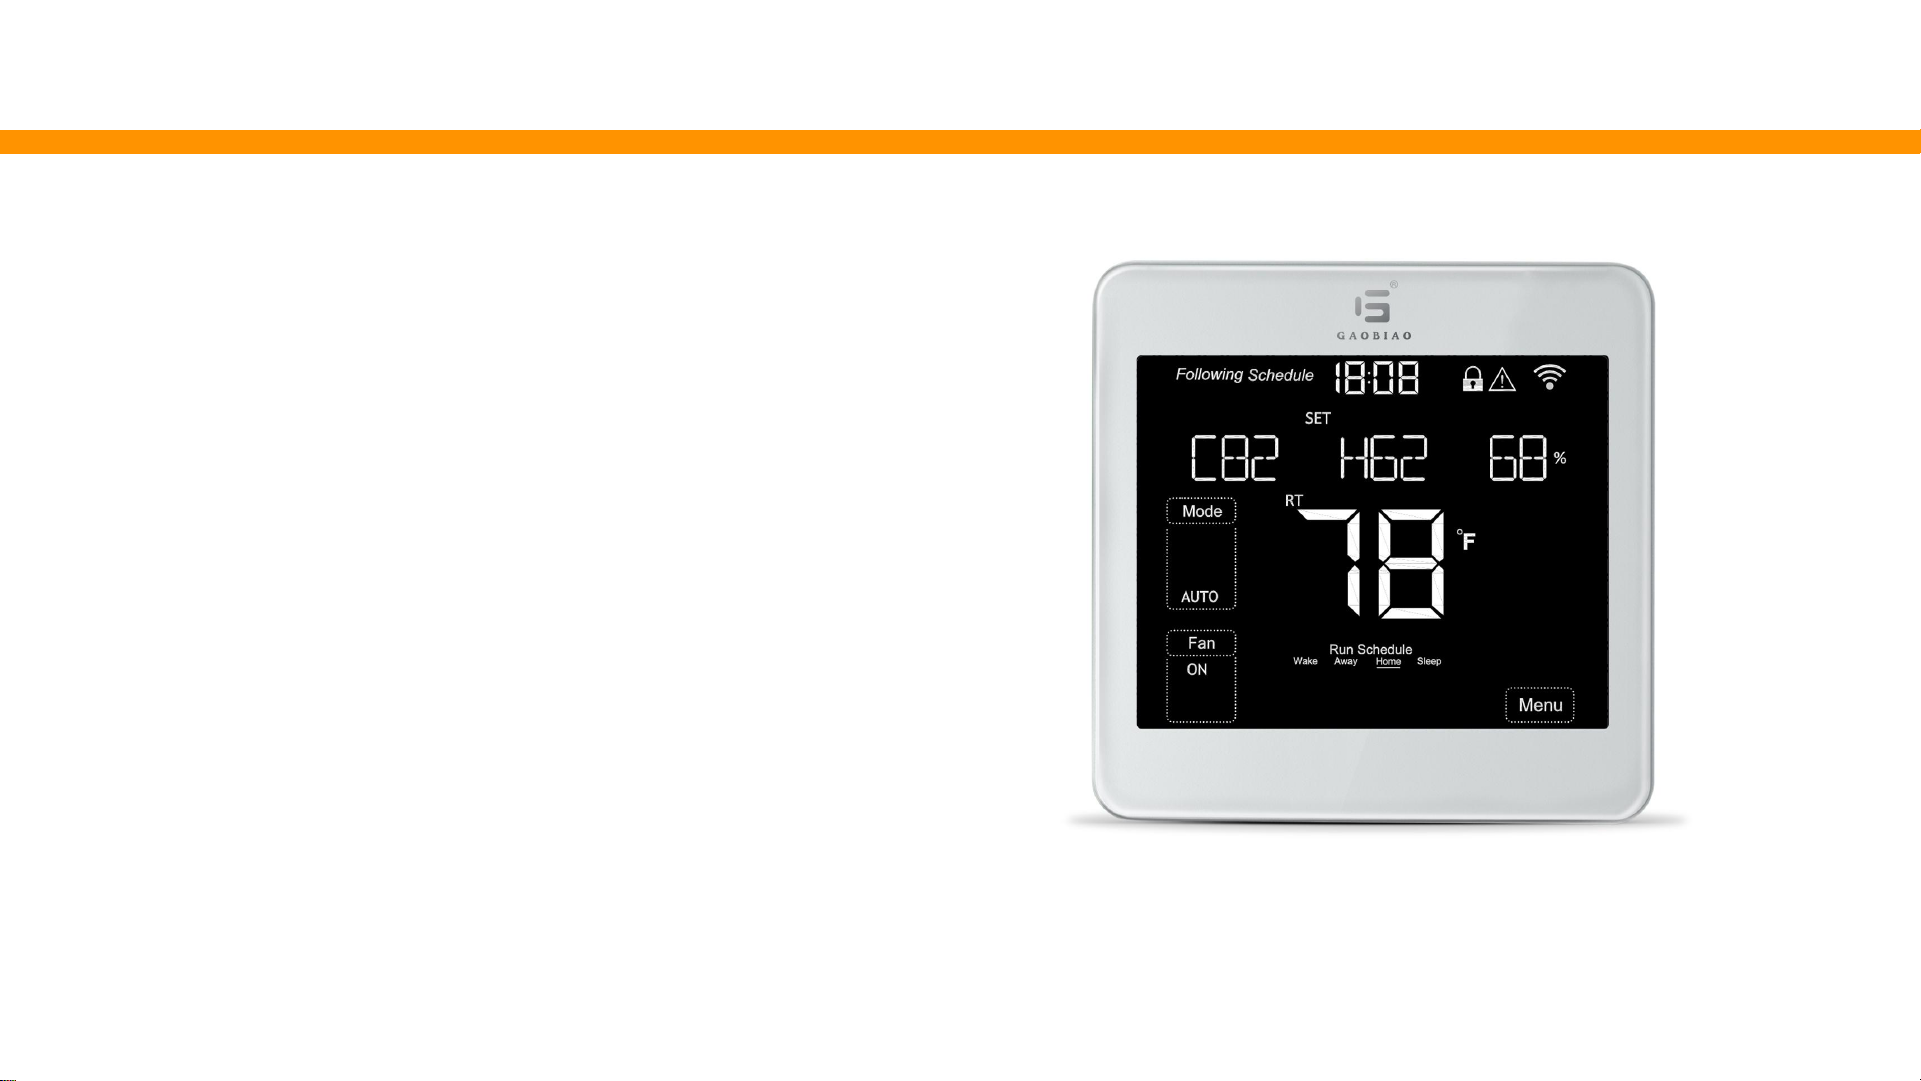
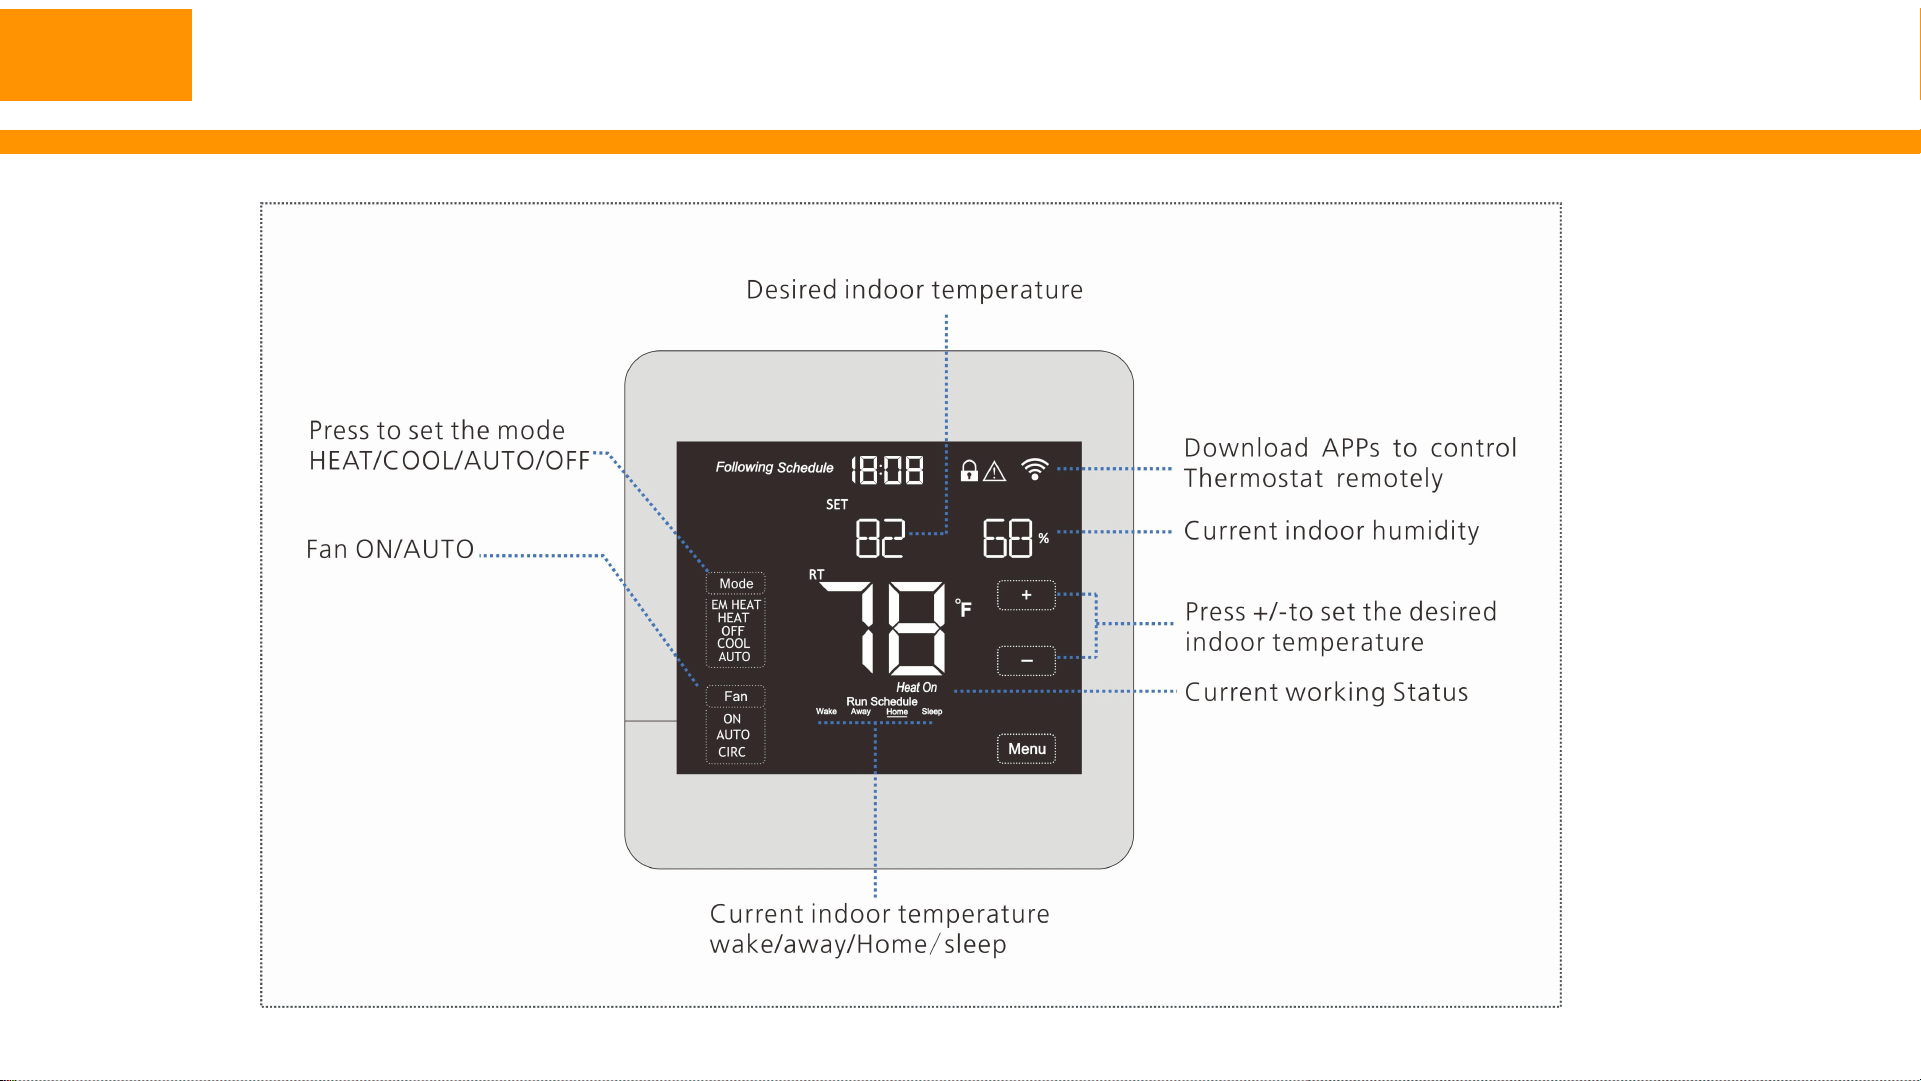
NO.5 Functions & Settings
Set WIFI
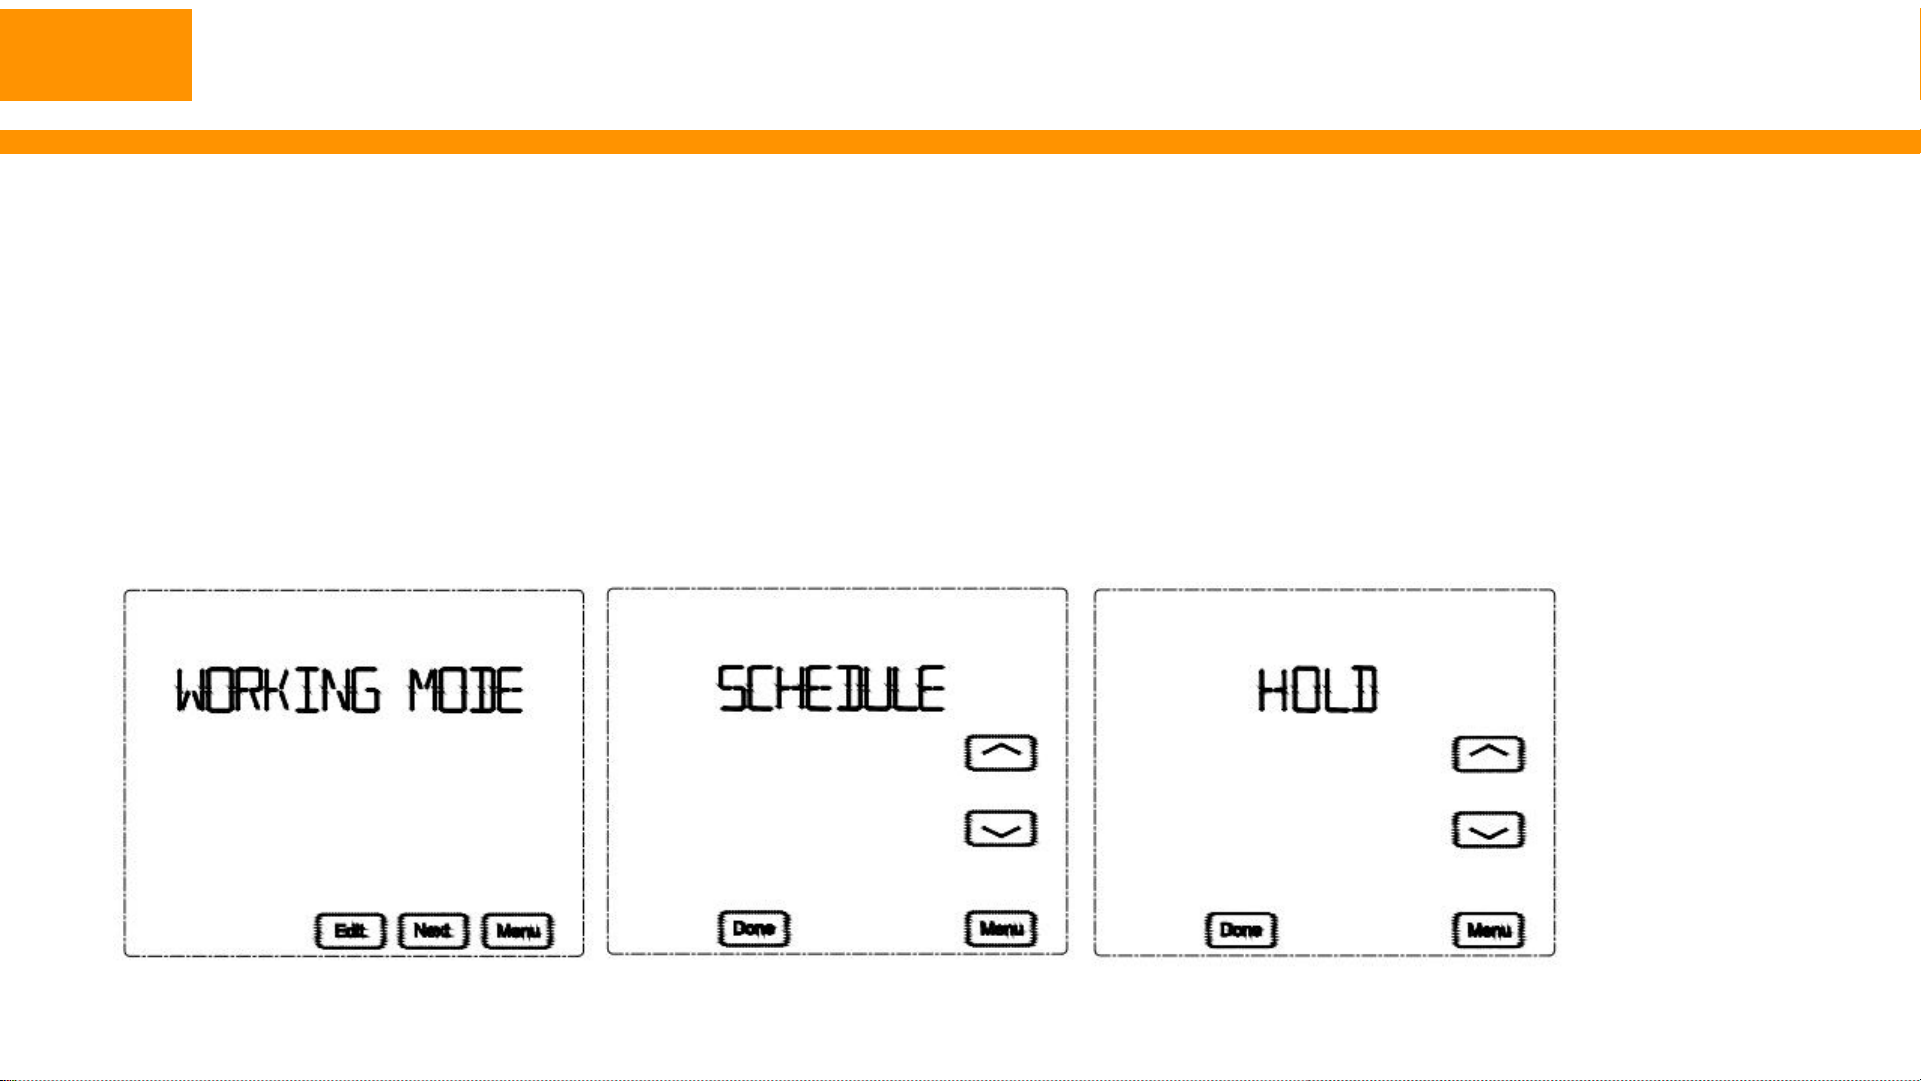
Press Menu, then the screen displays DATE TIME, then press Next twice, then the screen displays SETUP
WIFI, then press Edit, the screen displays SMART MODE, press UP or DOWN arrow to switch between
SMART MODE and AP MODE. After setting, press Done to exit. Then the WIFI icon on the screen will be
blinking.
Note: For SMART MODE, the user will only need to input the WIFI password.
For AP MODE, the user will need to select the WIFI network first and then input password.
When the WIFI icon on the thermostat is blinking, open the APP-Plus Thermostat (Search 'PLUS
THERMOSTAT' in Google Play or APP Store to download the APP, get registered with phone number or
e-mail and log in) on the user's phone.
lPress + on the right upper corner of the APP to bind a thermostat to the APP.
lThen confirm the WIFI icon on the thermostat is blinking (Fig.1)
lInput the WIFI network password to configure WIFI signal for the thermostat. (Fig.2) The connection will
need about 30seconds (Fig. 3), if failed to connect, please try again. If failure more than 3 times, please
check if the WIFI network is good. After connected successfully, the APP will show the main interface. (Fig. 4)