GAUI 500X User manual
GAUI
Max FlyingWeight :
2200g
Weight : 670g
(without battery).
10 inch prop.
Battery : 2S~4S LiPo
4~5CH radio control system
Item No.222001
Item No.222002
Item No.222003
GAUI
GAUI TAI SHIH HOBBY CORPORATION
P1~11
P12
P13
P14~16
P16
P17
P18
P19
P20
P20
P21
P22
P23~24
P21
索引
機身製作
收納
防護框
攝影機組
FPV酬載板
燈具
系統設定
電子變速器設定說明
試飛
變更機頭方向(GU-344)
效率與時間計算
酬載架
零件表
電子變速器校正
取得最新的手冊:我們非常建議您取得最新版本的手冊。請到泰世網站下載最新的手冊,並且取代目前
的手冊。
Get the latest manual: We highly recommend getting the latest version of the manual.
Please visit GAUI website to download a copy.
http://www.gaui.com.tw
Main Frame Assembly
Storage
Protection Frame
FPV platform
System Setting
ESC Setting
Check Before First Flight
Nose Direction Setting
Power Efficiency and Flying Time
Parts List
Payload Mount Set
Index
ESC Tuning
Camera Mount Set
LED Lights

GAUI
GAUI TAI SHIH HOBBY CORPORATION
x 4
x 4
M2x3.2 x 4
M2x5 x 16
M3x4 x 16
O3x8 x 24
O3x12 x 12
PM2x3.5x22 x 6
VCP Cap x 4
M2 Nut x 4
Damper x 4
Post x 4
Washer x 4
A
10A Prop. x 2
10B Prop. x 2
Adaptor and Spinner set x 4
2212 Motor (STD) x 4
18A ESC x 4
Connector (R) Connector (B)
B
A=Item#222001
A+B=Item#222002
A+B+GU-344=Item#222003
內容物
魔術氈
說明書
動力艙
艙罩
軸管
上底板 平台下底板
機身
貼紙
背袋
防護框
Touch Fastener Tape
Content
Motor Mounts Canopy
Boom
Top Frame system platformBottom Frame
Main Frame
Assembly Instruction
Decal
Storage bag
Protection Frame

GAUI
GAUI TAI SHIH HOBBY CORPORATION
GAUI TAI SHIH HOBBY CORPORATION
P.1
O3 x 8
M2 x 5
PM2 x 3.5 x 22
O3 x 8
將內部套環凸點鑲入孔內並鎖緊。(注意:定位點在下方)
上方也同樣鎖緊,並將六支鋁柱固定至機身。
機身製作
定位點
機身製作
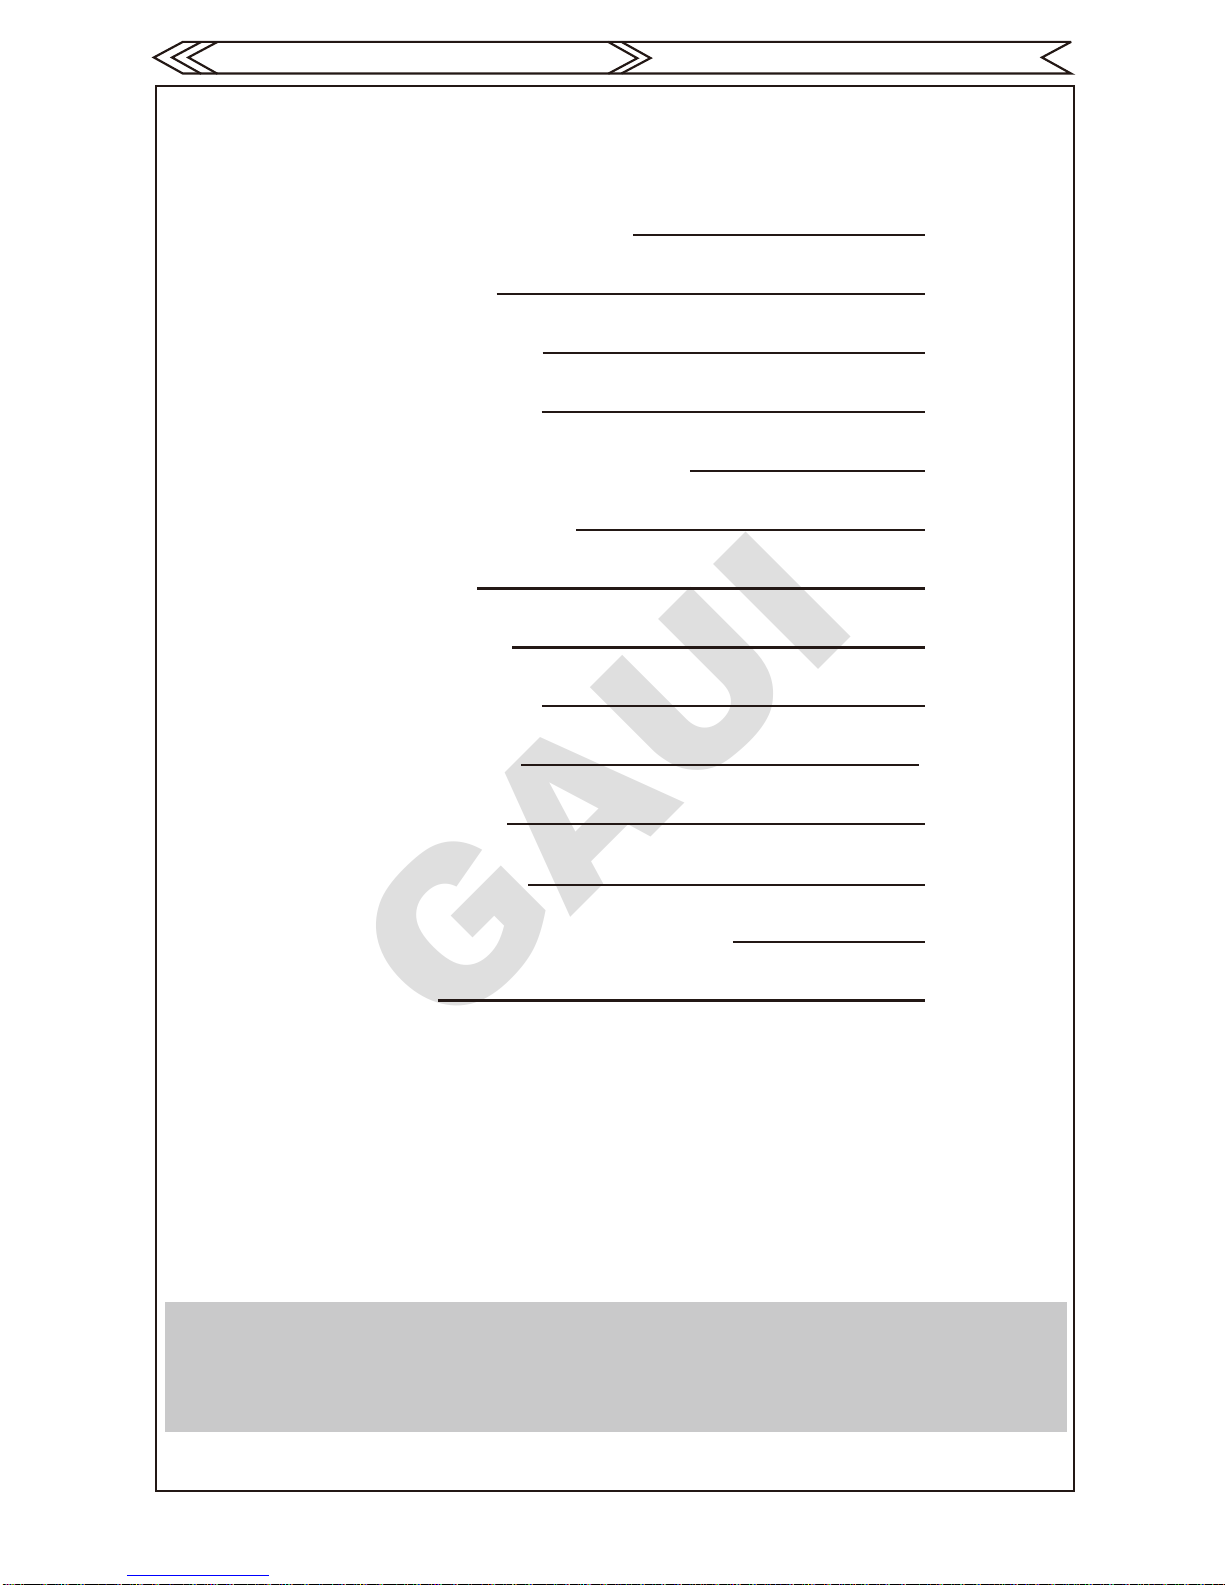
Main Frame Assembly
Start with Bottom side of Main Frame. Insert pivot point of Inside Boom Holder into pivot hole
and lock in place with screw (O3 x 8). (Attention: Position Indicator is on bottom).
Put on Top of Main Frame. Insert the 4 pivot points into the 4 pivot hole on Top Main Frame
and lock in place with screws (O3 x 8 ). Insert the 6 aluminum posts (PM2 x 3.5 x 22) and
lock in place with screws (M2 x 5).
Main Frame Assembly
Position Indicator
GAUI
GAUI TAI SHIH HOBBY CORPORATION
GAUI TAI SHIH HOBBY CORPORATION
P.2
O3 x 8
W3 x 4 x 1
O3 x 8
將外部套環如圖的位置鎖上螺絲。(注意:外部套環的螺絲孔在上方)
將螺絲套入華司小心鎖入機身下方的定位點,最後將套環套入上方的四個孔內。
機身製作
機身製作
螺絲孔
套環
Main Frame Assembly
Lock in place the four Outside Boom Holder with (O3 x 8) screws (Attention: Outside boom
holder screw hole is on top side Frame)
Lock the screws (with washer) in the positions shown in drawing (bottom frame).
Main Frame Assembly
Damper
Threaded hole

GAUI
GAUI TAI SHIH HOBBY CORPORATION
GAUI TAI SHIH HOBBY CORPORATION
P.3
O3 x 12
M2 x 5
M2 Nut
M3 x 4
將腳架置入馬達艙內並鎖上螺絲。
將馬達套入馬達艙內並鎖上螺絲。
機身製作
機身製作
腳架
Main Frame Assembly
Insert the spring type landing gear into motor base, tighten with screws as drawing indicates.
Insert the motor into the motor base and tighten with screws (M3 x 4) as drawing indicates.
Main Frame Assembly
Spring type landing gear.
GAUI
GAUI TAI SHIH HOBBY CORPORATION
GAUI TAI SHIH HOBBY CORPORATION
P.4
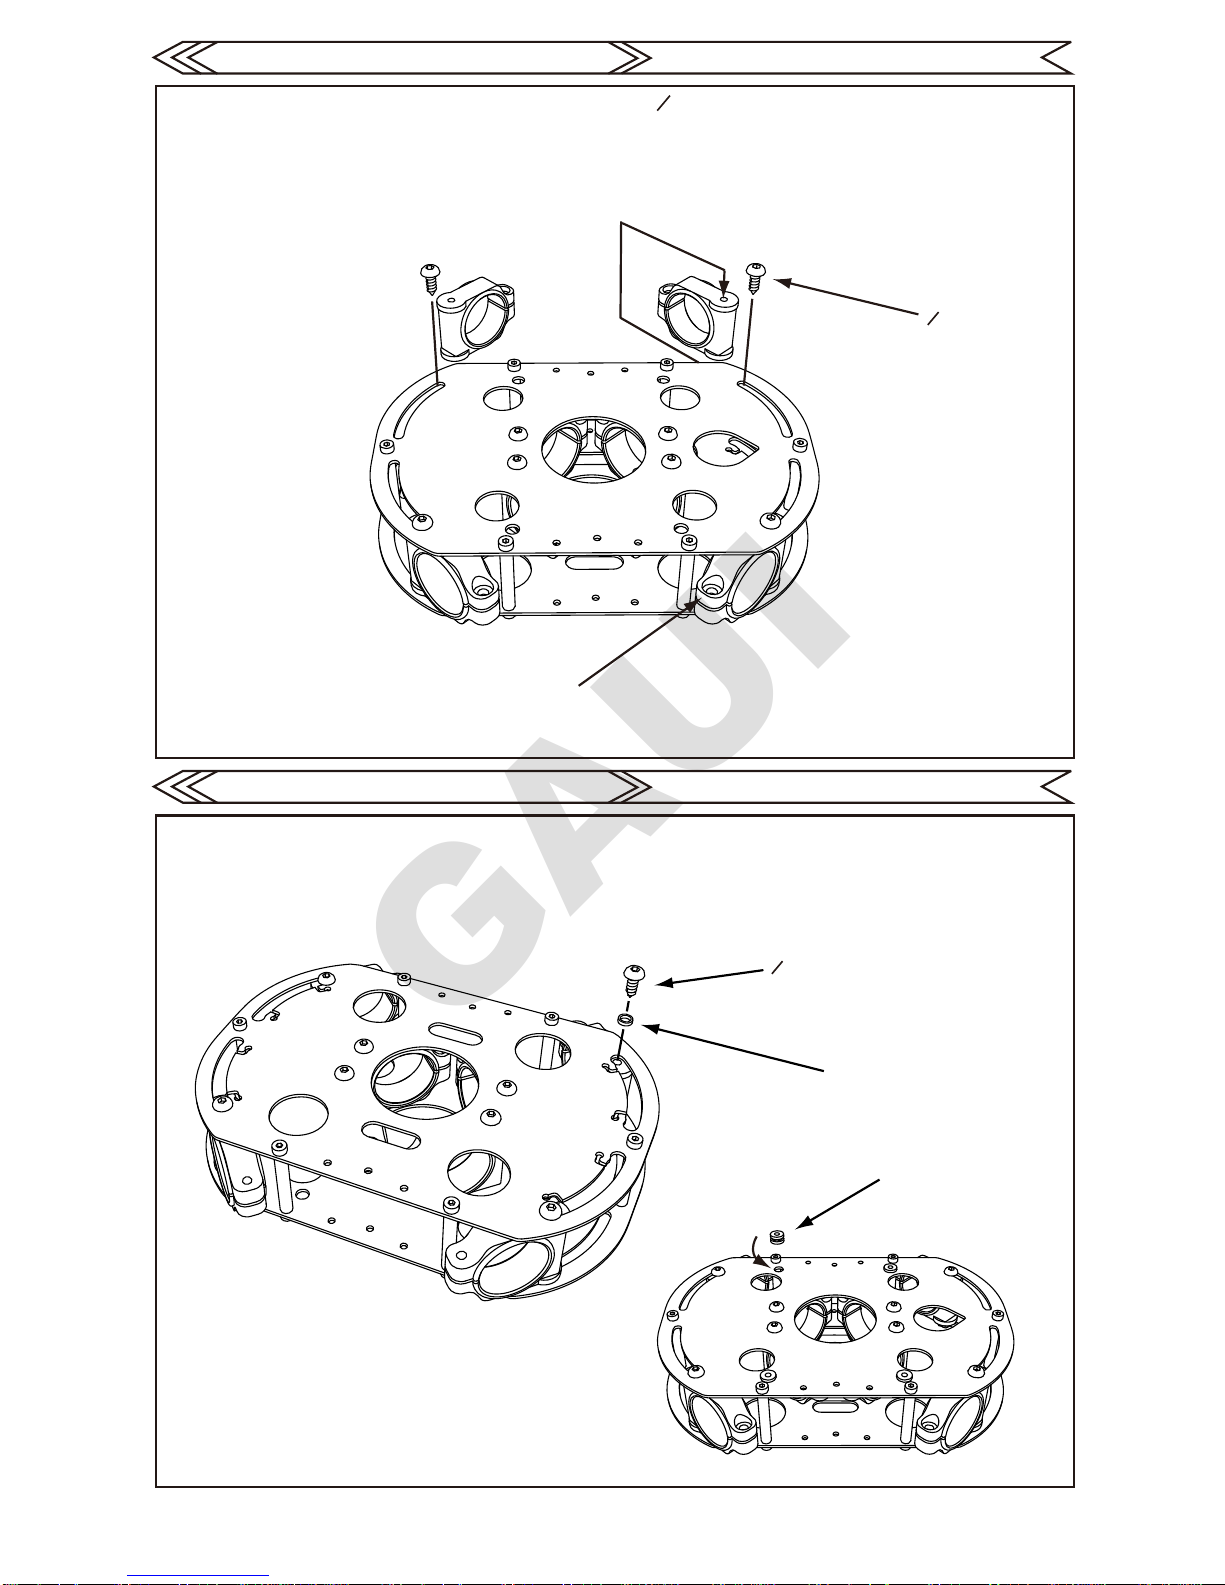
ESC Motor No1,3
No2,4
Oil
將電子變速器接至馬達。(注意四組馬達接頭的顏色區別:1、3為順向,2、4為反向)
將電子變速器外膜上一點油酯並套入軸管內。(注意軸管缺口位置)
機身製作
機身製作
缺口
Main Frame Assembly
Connect ESC to Motors (Attention on cable connections: Motor + ESC (1&3) connect the
same color cables together; Motor + ESC (2&4) red connects to black, black connects to
red & the other cable should connect same color cable.
Put a small amount of lubricant oil over the ESC cover and insert into the boom arm
(attention on the Position Indicator Gap).
Main Frame Assembly
Position Indicator Gap
GAUI
GAUI TAI SHIH HOBBY CORPORATION
GAUI TAI SHIH HOBBY CORPORATION
P.5
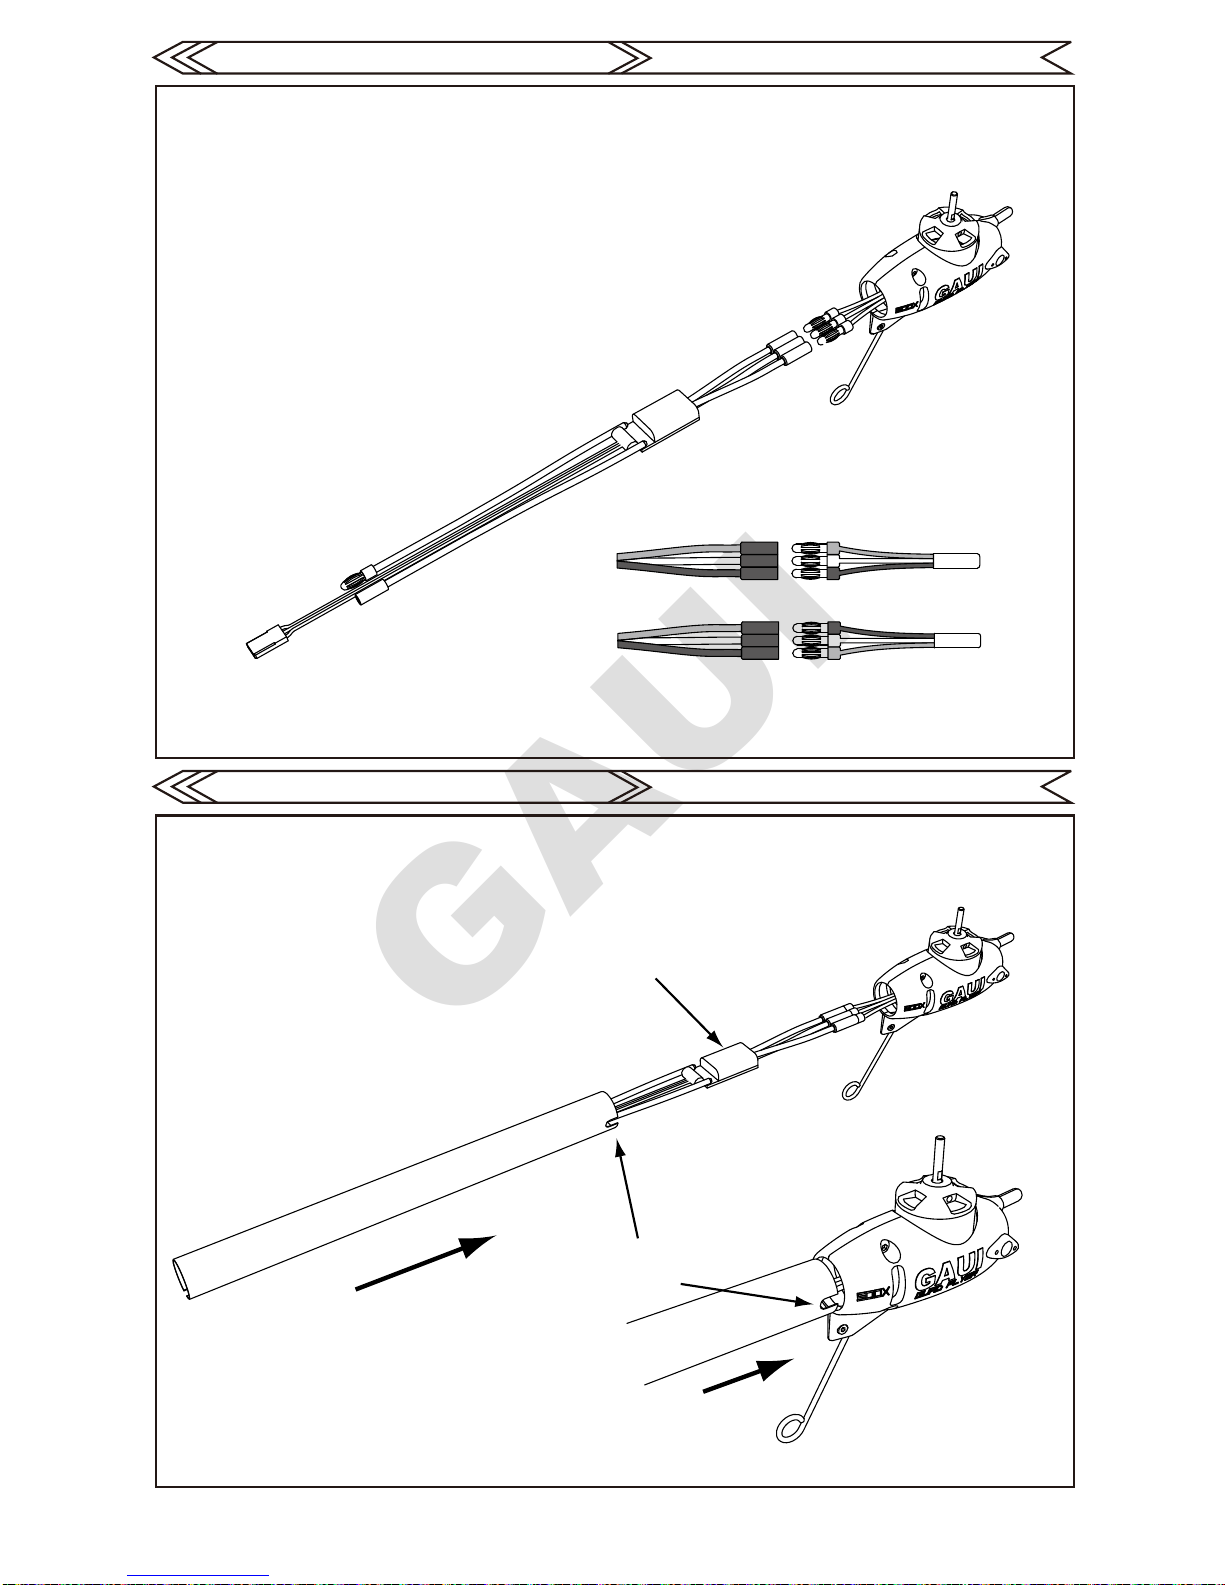
ESC Motor
No1,3
No2,4
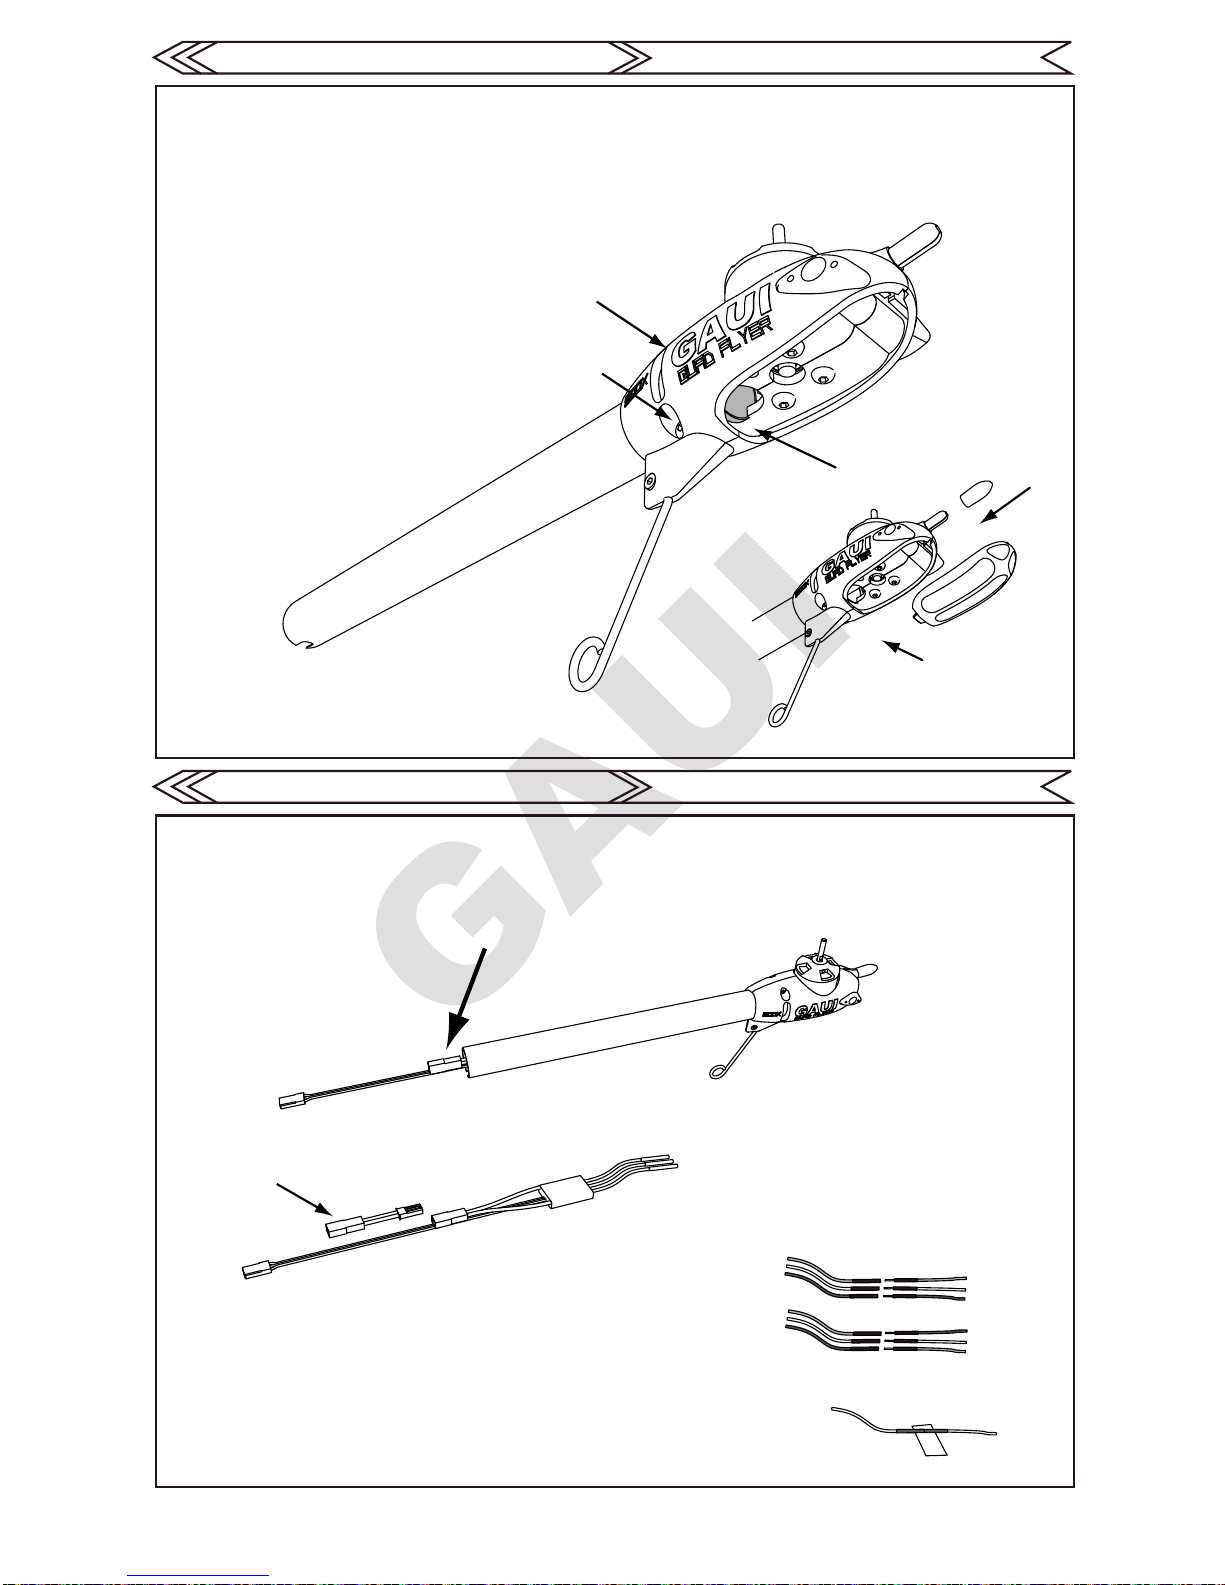
將軸管確實插入馬達艙定位點(軸管必須突出塑膠),然後鎖緊螺絲並蓋上蓋子及套子。
若採用330X動力系統(10A ESC),請注意電源線必須伸出管外,若長度不夠可自行延長或另購電源延長
線。
機身製作
機身製作
電源延長線
馬達線與ESC接法皆相同,接好後必須以膠帶固定。
Main Frame Assembly
Insert boom into Motor base, attention on Position Indicator Gap, tighten screws and insert
VCP Cap & plastic lid cover.
If your are using 330X power system (10A ESC & motor from 330X), note the power cable
must extend itself outside of boom arm. If length is not enough you need to add a power
extension cable.
Main Frame Assembly
Power extension cable (Item#222170)
Motor 1&3: Connect RED to RED, YELLOW to YELLOW, BLACK to BLACK.
Motor 2&4: Connect RED to BLACK, YELLOW to YELLOW, BLACK to RED.
After connecting Motor/ESC power/signal cables.
Secure cable connections with tapes.

GAUI
GAUI TAI SHIH HOBBY CORPORATION
GAUI TAI SHIH HOBBY CORPORATION
P.6
No.1
No.2
No.3
No.4
No.1
Mark
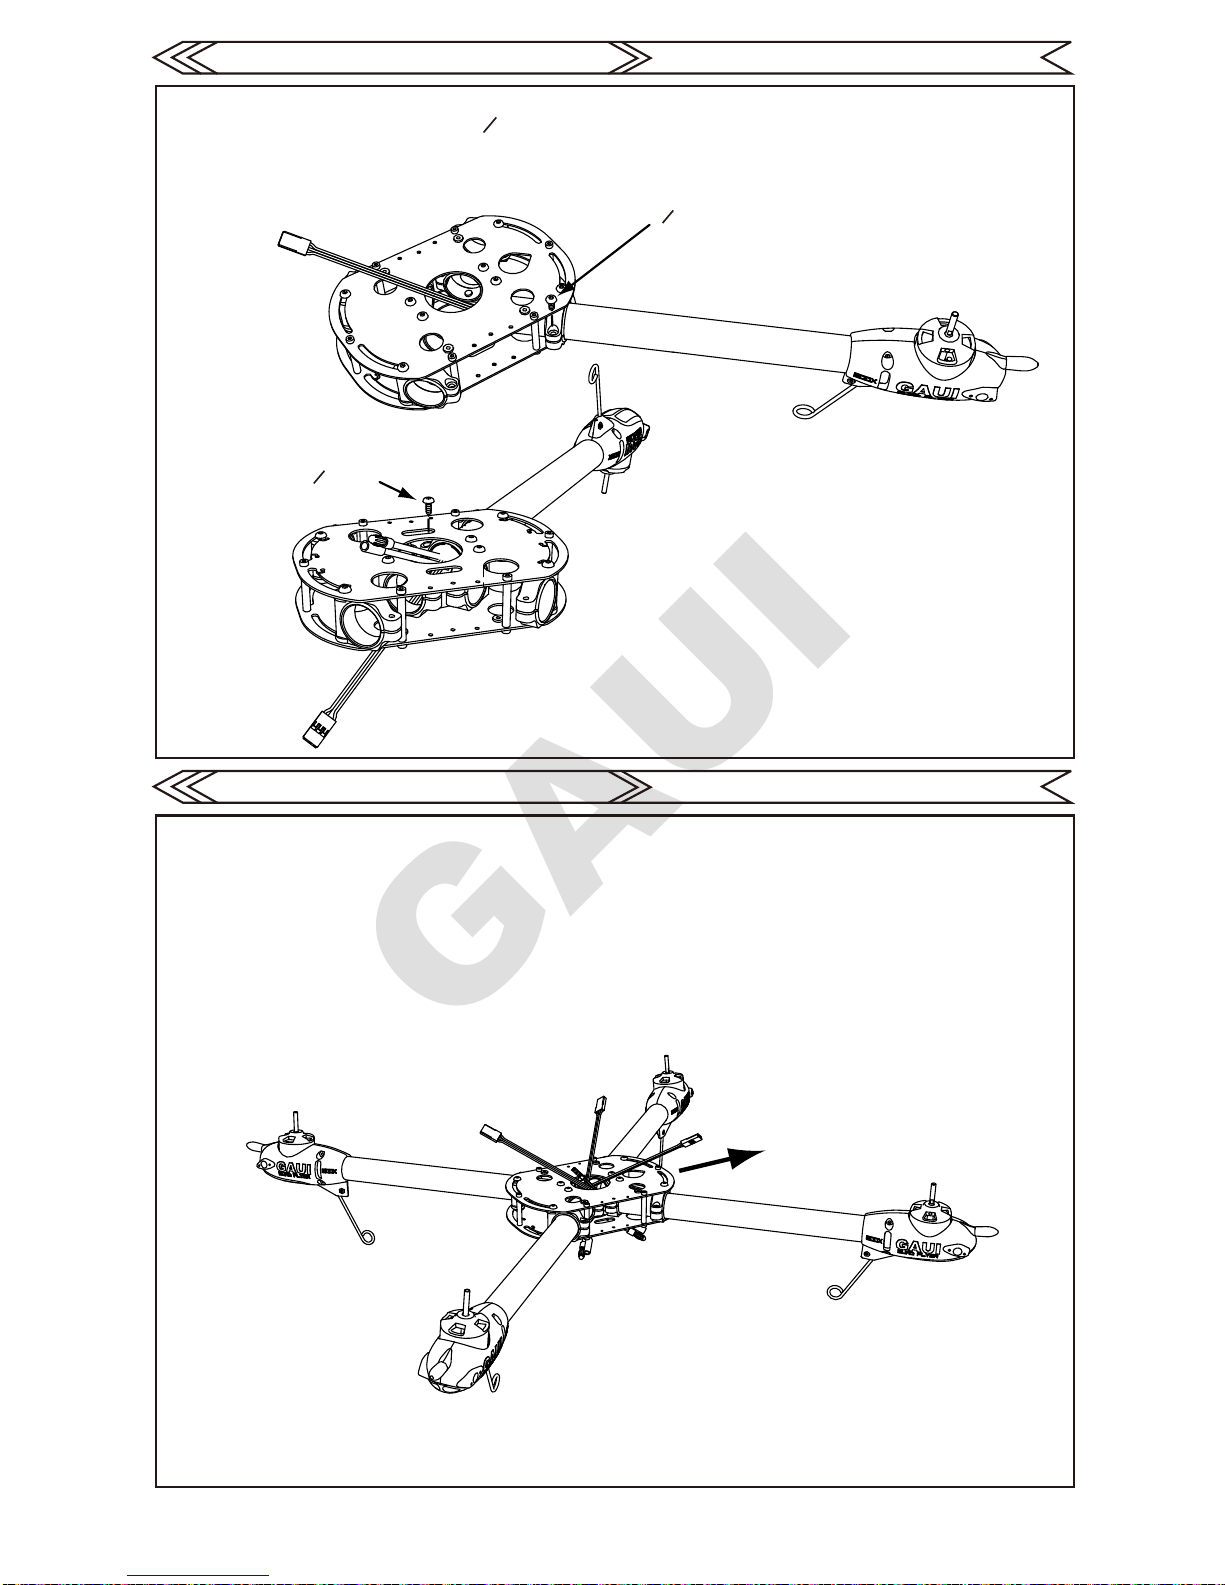
完成四組動力艙後便可逐一組合。
插至內套環時需注意軸管缺口需在定位點上(如下圖)。
機身製作
機身製作
首先將一號動力艙由機身外套環插至內套環(注意機身前方位置)。
機頭方向
Main Frame Assembly
When completing the 4 flight arms (labeling each arm & cables with numbers 1~4 is highly
recommanded).
Starts from arm#1, insert into the two lined up rings (attention on Nose direction, front).
Main Frame Assembly
Nose Direction (front)
When inserting each arm into the inner ring please pay attention
on the Position Indicator Gap (as indicated in drawing).
GAUI
GAUI TAI SHIH HOBBY CORPORATION
GAUI TAI SHIH HOBBY CORPORATION
P.7
No.1
No.2
No.3
No.4
O3 x 8
O3 x 8
將訊號線由上方穿出,電源線由下方穿出,並將內外套管鎖上螺絲固定。
機身製作
機身製作
相同方法逐一將四個動力艙組合。
機頭方向
Main Frame Assembly
Signal cable should come out from top frame, power cable should come out from bottom
frame. Tighten flight arms with O3 x 8 screws.
Use same method and complete the other three flight arms.
Main Frame Assembly
Nose Direction
This manual suits for next models
3
Other GAUI Quadcopter manuals


