GBD DCD300 User manual

DCD300
DCD300 Waterproof multifunction
keypad
with double relay for
stand-alone access control
USER MANUAL
UK

DCD300
Installation
Material
Programming
Power supply
Absorption at rest
Form of identification
Keypad
PIN lenght
RFID reader
Users number
Alarm output
Wiring connections
Status and programming
LED
Status and programming
acoustic signal
Operating
temperature / RH
Cable lenght
Waterproof rating
Dimensions (l x h x w)
Gross weight
Wall mounting
Metal alloy
By keypad
12/24V ac/dc
< 50mA
Code / Tag RFID or both
12 backlit metallic buttons
1-8 digits
(up to 100.000.000 combinations)
125Khz up to 6cm
1 - 999
Output 0V
Door open too long / Door
forced / Max. no. wrong attempts /
Anti-tampering
Relay output, Exit button,
Alarm, Door Contact,
Doorbell
Green, red, blue, yellow
Buzzer/Beep sound
2 m
IP 66
from -30°C to +60°C / 98% RH
55 x 135 x 24 mm
0,54 Kg
1 - TECHNICAL SPECIFICATIONS
2 - FORM OF IDENTIFICATION
Card/Tag
PIN code
Card/Tag
+ PIN code
Button
Entry of a code (from 1 to 8 digits except
0 and 00000000), then #
Reading of a Card/Tag
Reading of a Card/Tag and entry
of a PIN code associated, then #
Pressure on the keypad button

3 - INSTALLATION
1
2
Install the fixing support
on a
perfectly flat surface
Fix the device on the
fixing support from above,
then pull down
Tighten the device on the fixing
support with the locking screw
DescriptionWires Name
Red
Black
Blue
Blue/Black
Green
Green/Black
White
White/Black
Grey
Yellow
Orange
Brown
Purple (*)
(*) usable only in DC
NO 1
NO 2
NC 1
NC 2
COM 1
COM 2
GND
OPEN 1
OPEN 2
D_IN
Alarm
Power supply 12-24V ac/dc
Power supply 12-24V ac/dc
Normally open Relay 1
Normally open Relay 2
Normally close Relay 1
Normally close Relay 2
Common Relay 1
Common Relay 2
GND
Push button Relay 1 (PTE)
Push button Relay 2 (PTE)
Location contact of the door
Output alarm 0V if on alert
4 - WIRING DESCRIPTION

Grey
Yellow
White
Green
Red
Black
Power supply
12-24 V DC
Diode
1N4004
provided
(**)
Electrical
lock device -
de-energised
to release
+
Clock (*)
Push Button
(PTE) (*)
+
5 - CONNECTION DIAGRAM
5.1 - Electric lock device - de-energised to release
(*) Clock/Push Button (PTE):
Enable relay for "timed relay" (see
chap. 10) or as long as the contact
is closed.
The Push button input does not work
in bistable mode
(**) Diode 1N4004:
To be used only with power supply
in DC

5 - CONNECTION DIAGRAM
5.2 - Electric lock - energised to release
Grey
Yellow
White
Blue
Red
Black
+
+
Power supply
12-24 V DC
Diode
1N4004
supplied
(**)
Electric lock -
energised
to release
Push
Button
(PTE) (*)
(*) Push Button (PTE):
Enable relay for "timed relay" (see
chap. 10) or as long as the contact
is closed.
The Push button input does not work
in bistable mode
(**) Diode 1N4004:
To be used only with power supply
in DC

5 - CONNECTION DIAGRAM
5.3 - Device controlled by a dry contact NO
(*) Push Button (PTE):
Enable relay for "timed relay" (see
chap. 10) or as long as the contact
is closed.
The Push button input does not work
in bistable mode.
Control from dry contact NO
Grey
Yellow
White
Blue
Red
Black
+
Transformer
12-24 V AC/DC
Push Button
(PTE) (*)

5.4 - Connection of a door switch to manage
the alarm if door open too long
and/or door forced (see chap. 10)
5 - CONNECTION DIAGRAM
Brown
Purple
Black
Red
Grey
Power supply
12-24 V DC
+
Buzzer, siren,
flash, relay,...
This output
uses only DC
current
Position
contact
of the door
(closes the contact
when the door
is closed)

6 - FIRST POWER UP
7 - ENTRY IN PROGRAMMING MODE
• At first power up, the blue LED and the Buzzer works for 3s, then
the device switches into “Stand-by” with flashing blue LED.
• The entry of the default PIN 8 8 8 8 8 8 ,then #
enables the relay 1 for 5s (green LED fixed).
WARNING: from the registration of the first user, the default
PIN will no longer be active.
Chap.
Chap.
Chap.
Chap.
1
2
3
yellow LED
yellow LED
*(you have 20s to type enter
the Master code)
Type the Master code
8 8 8 8 8 8 then #
The device is in programming mode, proceed with the
required function:
Users Programming and Cancellation:
• Programming of a PIN code
or a Card/Tag
• Programming of Card/Tag
in succession
• Programming of Card/Tag + PIN
• User/s Cancellation
Advanced functions:
• Relay 1 configuration
• Relay 2 configuration
• Doorbell button configuration
• Keypad backlight
• Buzzer sound volume
• “Door open too long” alarm
• “Door forced” alarm
• Max. no. of wrong attempts alarm
• Anti-tampering alarm
• Back to factory parameters
Chap.
Chap.
Chap.
Chap.
Chap.
Chap.
Chap.
Chap.
Chap.
Chap.
10.1
10.2
10.3
10.4
10.5
11.1
11.2
11.3
11.4
12
.................................
.................................
.....................
........................................
.................................
.........................
.....................................
..............
.................................
........................
LED / Audible beep
Buttons
9.1
9.2
9.3
9.4
.............................................
.............................................
................
....................................
4Blue LED
*to exit from Programming
mode
(a)
(a) Without any action, the device automatically exits from Programming
mode after 60 sec.

Addition of a
Read the Card/Tag or enter
the number of the Card/Tag,
then press #
Card/Tag
(b)
Default Master code = 8 8 8 8 8 8
New Master code = ................................
8 - CHANGE OF DEFAULT MASTER CODE
9 - USERS ADDITION AND CANCELLATION
WARNING: Change the default Master Code at
your first installation.
The device must be in Programming mode, see Chap. 7
The device must be in Programming mode, see Chap. 7
1
2
3
2
Yellow LED
Yellow LED
OK = Green LED
+ 2 Beeps
Error = Red LED
+ 5 Beeps
0 (enables the function)
LED / Audible beep
Buttons
Enter the new Master Code (from 4
to 8 digits, except 0 and 00000000)
then press #
Enter the new Master Code again,
then press #
Enter a User ID from 1 to 999,
then press #
4Yellow LED
OR
Blue LED
Enter another function or press
to exit from Programming mode
1Yellow LED
Yellow LED
LED / Audible beep
Buttons
3Yellow LED
9.1 - ADDITION OF A PIN OR A CARD/TAG
Choose the relay associated to
the User ID chosen: = relay 1,
(a)
or 2 = relay 2 , or
(a)
1 2 = relay 1 and 2 , simulta-
neously, then press #
1
1 1 (enables the function)
4B
OK =
+ 1 Beep
Error = Red LED
+ 5 Beeps
Green LED
4A
OK = Green LED
+ 1 Beep
Error = Red LED
+ 5 Beeps
Addition of a PIN
Enter a PIN (from 1 to 8 digits,
except 0 and 00000000), then
press #
OR

Resume from point 1 to add another user
5
5
Yellow LED
OR
Blue LED
Yellow LED
OR
Blue LED
Enter another function or press
to exit from Programming mode
Enter another function or press
to exit from Programming mode
The device must be in Programming mode, see Chap. 7
The device must be in Programming mode, see Chap. 7
LED / Audible beep
LED / Audible beep
Buttons
Buttons
9.2 - ADDITION OF CARD/TAG IN SUCCESSION
9.3 - ADDITION OF A CARD/TAG + PIN
1
1
Yellow LED
Yellow LED
1 2 (enables the function)
1 5 (enables the function)
2Enter User ID of the 1st user
between 1 and 999, then press #
Yellow LED
3Yellow LED
Choose the relay you must
associate to User ID: 1 = relay 1,
(a)
or 2 = relay 2 , or
(a)
1 2 = relay 1 and 2 , simulta-
neously, then press #
4
OK = Green LED
+ 1 Beep
Error = Red LED
+ 5 Beeps
Read the Card/Tag in succession,
then press #
2Enter a User ID from 1 to 999,
then press #
Yellow LED
3Yellow LED
Choose the relay associated to the
User ID chosen: 1 = relay 1,
or 2 = relay 2 , or
(a)
1 2 = relay 1 and 2 , simulta-
neously, then press #
(a)
4
Press a PIN (from 1 to 8 digits,
except 0 and 00000000), then
press #
Yellow LED
Error = Red LED
+ 5 Beeps

0 00 0 0 0 0 0
5
2A
2B Enter
then press #
Cancellation of all the users
or
Cancellation of a user
Enter the User ID from 1 to 999, or
read the corresponding Card/Tag
or enter the number
of the Card/Tag, then press #
(b)
Read the Card/Tag or enter
the number of the Card/Tag,
then press #
(b)
OK = Green LED
+ 1 Beep
Error = Red LED
+ 5 Beeps
OK = Green LED
+ 1 Beep
Error = 3 Beeps
OK =
+ 1 Beep
Error = 3 Beeps
Green LED
Resume from point 1 to add other user
6Yellow LED
OR
Blue LED
Enter another function or press
to exit from Programming mode
The device must be in Programming mode, see Chap. 7
LED / Audible beep
Buttons
9.4 - USER /S CANCELLATION
1Yellow LED 2 (enables the function)
3Yellow LED
OR
Blue LED
Enter another function or press
to exit from Programming mode
It is impossible to program the same user on more
positions
It is impossible to replace a user without having cancelled
it previously.
(a) It is impossible to assign the Relay 2 to a user if it is
programmed as “Doorbell button”.
(b) The Card/Tag Number must be composed by 10 digits:
XXXXXXXXXX YYY,YYYYYYY
Card Number
Tag Number
XXXXXXXXXX

10 - ADVANCED FUNCTIONS
The device must be in Configuration mode, see Chap. 7
2A
2A
2B
2B
Timed relay (default adjustment
at 5 sec.). Enter the duration from
1 to 300 sec., then press #
Timed relay (default adjustment
at 5 sec.). Enter the duration from
1 to 300 sec., then press #
Bistable relay (ON/OFF).
Press 0 ,then # . (In this mode,
OPEN 1 input cannot be used)
1
1
Yellow LED
Yellow LED
LED / Audible beep
Buttons
10.1 - RELAY 1 CONFIGURATION
3 1 (enables the function)
3 2 (enables the function)
OK = Green LED
+ 2 Beeps
Error = Red LED
+ 5 Beeps
OK = Green LED
+ 2 Beeps
Error = Red LED
+ 5 Beeps
OK =
+ 2 Beeps
Error = Red LED
+ 5 Beeps
Green LED
OK =
+ 2 Beeps
Error = Red LED
+ 5 Beeps
Green LED
OR
OR
3
3
Yellow LED
OR
Blue LED
Yellow LED
OR
Blue LED
Enter other function
or press to get out from
Programming mode
Enter another function or press
to exit from Programming mode
*
The device must be in Configuration mode, see Chap. 7
LED / Audible beep
Buttons
10.2 - RELAY 2 CONFIGURATION
10.3 - DOORBELL BUTTON CONFIGURATION
If configured to do so (see below), by pressing buttons 0 then # ,
Relay 2 will act as a door bell output for a duration programmable
between 1 and 300 s. If Relay 2 is assigned to a User ID, it is not
possible to enable the Doorbell button mode.
Bistable relay (ON/OFF).
Press 0 ,then # . (In this mode,
OPEN 2 input cannot be used)

The device must be in ProgramminG mode, see Chap. 7
1Yellow LED4 (enables the function)
LED / Audible beep
Buttons
2A1
2A2
2A
2B
2B
2C
Enter the duration from 1 to 300 s,
then press #
Disabling Doorbell button
mode (default adjustment).
Press 2 then #
Backlight always on
(default adjustment).
Press 1 then #
Backlight always off
Press 2 then #
Backlight automatically
(a)
off after 60 sec.
Press 3 then #
Enabling of Doorbell button
mode. Press 1 ,then #
OK = Green LED
+ 2 Beeps
Error = 3 Beeps
OK = Green LED
+ 2 Beeps
Error = 3 Beeps
OK = Green LED
+ 1 Beep
OR
OR
OR
3Yellow LED
OR
Blue LED
Enter another function or press
to exit from Programming mode
The device must be in Programming mode, see Chap. 7
1Yellow LED5 1 (enables the function)
OK =
+ 2 Beeps
Error = Red LED
+ 5 Beeps
Green LED
OK =
+ 2 Beeps
Error = Red LED
+ 5 Beeps
Green LED
OK =
+ 2 Beeps
Error = Red LED
+ 5 Beeps
Green LED
(a) In automatic mode, after 60 s. the keypad turns on again when
you push a button, that is not considered part of a code
3Yellow LED
OR
Blue LED
Enter another function or press
to exit from Programming mode
LED / Audible beep
Buttons
10.4 - KEYPAD BACKLIGHT

Buzzer:
1 = Enabled / 2 = Disabled
10.5 - BUZZER SOUND VOLUME
Buzzer volume when you enter a code or read a Card/Tag.
2
Adjust the volume from 0 to 5
(0 = Off / 5 = Max), then press # .
Default adjustment = volume at 3.
The device must be in Programming mode, see Chap. 7
1Yellow LED 6 1 (enables the function)
OK = Green LED
+ 2 Beeps
Error = Red LED
+ 5 Beeps
LED / Audible beep
Buttons
3Yellow LED
OR
Blue LED
Enter another function or press
to exit from Programming mode
The sound level of Programming mode and alarm is not
adjustable
11 - ALARMS CONFIGURATION
The alarm for door open too long and door forced
needs the connection of a door switch (for ex.
magnetic contact) between the brown wire (D_IN)
and the grey wire (GND). This contact must be
closed when the door is closed.
Interruption of the alarm by simply closing the door, a Card/Tag
reading or the entering of a valid PIN code.
2A1
2A2
2A3
Enables the open door detection.
Press 1 then #
Enter the opening duration before
the alarm from 1 to 300 sec., then
press #
(during the alarm) then press #
The device must be in Programming mode, see Chap. 7
1Yellow LED7 1 (enables the function)
OK = Green LED
+ 1 Beep
LED / Audible beep
Buttons
11.1 - “DOOR OPEN TOO LONG” ALARM
OK =
+ 1 Beep
Error = 3 Beeps
Green LED
OK = Green LED
+ 1 Beep
Error = 3 Beeps

OR
OR
2A4
2A4
2B
2B
(a)
Alarm output : 1 = Enabled /
2 = Disabled (during the alarm)
then press #
Disables open door detection
(default adjustment)
Press 2 then #
Disables open door forced
detection (default adjustment)
Press 2 then #
OK = Green LED
+ 2 Beepd
Error = 3 Beeps
OK =
+ 2 Beeps
Error = 3 Beeps
Green LED
OK =
+ 2 Beeps
Error = 3 Beeps
Green LED
OK =
+ 2 Beeps
Error = 3 Beeps
Green LED
3
3
Yellow LED
OR
Blue LED
Yellow LED
OR
Blue LED
Enter another function or press
to exit from Programming mode
11.2 - “DOOR FORCED” ALARM
Interruption of the alarm by simply closing the door and waiting
for the end of alarm duration, or by a Card/Tag reading or the
entering of a valid PIN code.
2A1
2A2
2A3
Enables open door forced
detection. Press 1 then #
Enter the alarm duration from 1
to 300 sec., then press #
The device must be in Programming mode, see Chap. 7
1Yellow LED 7 2 (enables the function)
OK = Green LED
+ 1 Beep
LED / Audible beep
Buttons
OK =
+ 1 Beep
Error = 3 Beeps
Green LED
OK = Green LED
+ 1 Beep
Error = 3 Beeps
(a) The alarm output works only when the device is powered in DC
(a) The alarm output works only when the device is powered
in DC
Buzzer:
1 = Enabled / 2 = Disabled
(during the alarm) then press #
(a)
Alarm output : 1 = Enabled /
2 = Disabled (during the alarm)
then press #
Enter another function or press
to exit from Programming mode

OR
2A4
2B Alarm disabled (default adjustment)
Press 2 then #
OK =
+ 2 Beeps
Error = 3 Beeps
Green LED
OK =
+ 2 Beeps
Error = 3 Beeps
Green LED
3Yellow LED
OR
Blue LED
11.3 - MAX.NUMBER OF WRONG ATTEMPTS ALARM
11.4 - ANTI-TAMPERING ALARM
After 10 wrong attempts of Card/Tag reading or wrong entering
of PIN code, the keypad will block and any attempt will not be
possible for 10 minutes. The Doorbell button mode will be enabled
even if the alarm is working.
Interruption of the alarm when you close again the reader-keypad
and by the reading of a Card/Tag or a valide PIN code.
2A1
2A1
2A2
2A2
2A3
Alarm enabled.
Press 1 then #
Anti-tampering alarm enabled
Press 1 then #
Enter the alarm duration from
1 to 300 sec., then press #
Enter the duration of the alarm
from 1 to 300 sec, then press #
The device must be in Programming mode, see Chap. 7
The device must be in Programming mode, see Chap. 7
1
1
Yellow LED
Yellow LED
7 3 (enables the function)
7 4 (enables the function)
OK = Green LED
+ 1 Beep
OK = Green LED
+ 1 Beep
LED / Audible beep
LED / Audible Beep
Buttons
Buttons
OK =
+ 1 Beep
Error = 3 Beeps
Green LED
OK =
+ 1 Beep
Error = 3 Beeps
Green LED
OK =
+ 1 Beep
Error = 3 Beeps
Green LED
(a) The alarm output works only when the device is powered
in DC
Buzzer:
1 = Enabled / 2 = Disabled
(during the alarm) then press #
(a)
Alarm output : 1 = Enabled /
2 = Disabled (during the alarm)
then press #
Enter another function or press
to exit from Programming mode

OK =
+ 1 Beep
Error = 3 Beeps
Green LED
or
2A4
2B
OK =
+ 2 Beeps
Error = 3 Beeps
Green LED
OK =
+ 2 Beeps
Error = 3 Beeps
Green LED
3Yellow LED
OR
Blue LED
2A3
(a) The alarm output works only when the device is powered in DC
12 - BACK TO FACTORY PARAMETERS
This procedure allows to reset the default factory
parameters. It does not cancel the users program-
med (for User/s Cancellation, see Chap. 9.4).
Turn off the power from the device.
Push the button and hold it down.
Supply power to the device.
At the end of 4 beeps, release button
13 - DIMENSIONS
55
24
135
14 - STATUS OUTPUTS
Relay 1 and/or Relay 2 enabled
Blue LED
Red LED + 5 Beeps
Red LED + Beep for the
duration of the alarm
LED / Audible beep
Status
Stand-by
(in normal operation / on standby)
Wrong PIN code or Card/Tag
In alarm
Green LED
AND / OR
Blue LED + 1 Beep
Buzzer:
1 = Enabled / 2 = Disabled
(during the alarm) then press #
(a)
Alarm output : 1 = Enabled /
2 = Disabled (during the alarm)
then press #
Alarm disabled (default adjustment)
Press 2 then #
Enter another function or press
to exit from Programming mode

GI.BI.DI. S.r.l. - Via Abetone Brennero, 177/B
46025 Poggio Rusco (MN) - ITALY
Tel. +39.0386.52.20.11 - Fax +39.0386.52.20.31
www.gibidi.com - E-mail: [email protected]
Cod. AIC6571 - 10/2021 - Rev. 02
The assembly, connections and startup of this
product must be necessarily made by personnel
qualified in electrical installations.
In case of doubt about the activation or operation
of this product, please call your dealer.
DECLARATION OF CONFORMITY CE
The manufacturer:
GI.BI.DI. S.r.l.
Via Abetone Brennero, 177/B,
46025 Poggio Rusco (MN) - ITALY
declares that the product:
MULTIFUNCTION KEYPAD DCD300
Code: AU02201
is in conformity with the following Directives:
• 2014/53/UE
• 2011/65/UE
and that the following harmonised Standards have been applied:
• EN 62368-1: 2014+A11: 2017
• EN 62311: 2008
• ETSI EN 301 489-1 V2.2.3 (2019-11)
• ETSI EN 301 489-3 V2.1.1 (2019-03)
• EN 55032: 2015 • EN 55035; 2017
• ETSI EN 300 330 V2.1.1 (2017-02)
This declaration of conformity is issued under the exclusive
responsibility of the manufacturer.
Date 28/09/2021
The legal representative
Michele Prandi
UKCA DECLARATION BY THE MANUFACTURER: The UKCA
declaration of conformity is available at: http://conformity.gibidi.com
Table of contents
Popular Keypad manuals by other brands
DSC
DSC PowerSeries RFK55 433 Series installation instructions

Richmond
Richmond GTR120 Programming and Operating Instruction Manual
Digital Monitoring Products
Digital Monitoring Products 691 Installation and programming guide
PRASTEL
PRASTEL EASYBKA manual
Sercomm
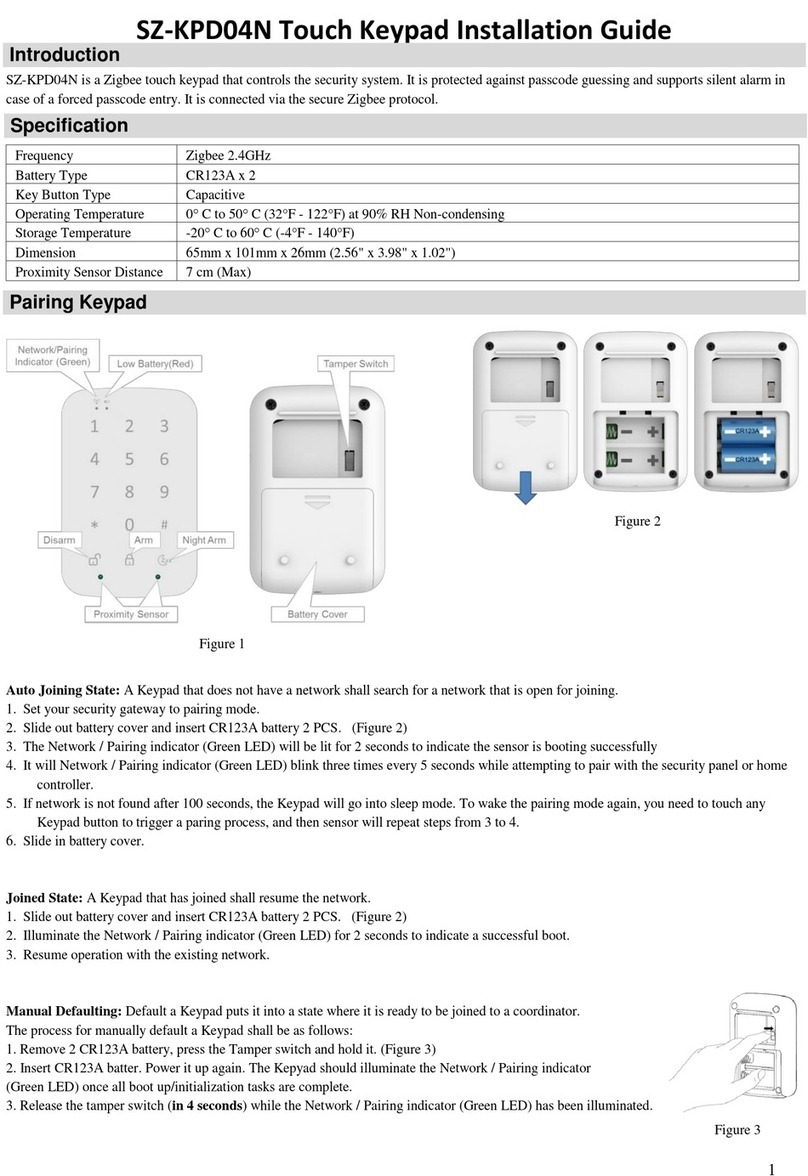
Sercomm SZ-KPD04N installation guide
Pyronix
Pyronix EURO mini user manual
