•Do not play your headset at a high volume.
Hearing experts advise against continuous extended
play.
• If you experience a ringing in your ears, reduce volume
or discontinue use.
• Do not use while operating a motorized vehicle or
bicycle, it may create a traffic hazard and is illegal in
many areas.
• You should use extreme caution or temporarily
discontinue use in potentially hazardous situations.
• Even if your headset is an open-air type designed to let
you hear outside sounds, don't turn up the volume so
high that you can't hear what's around you.
Headset Safety
• Alkaline batteries are recommended for longer play.
Carbon-zinc or nickel cadmium rechargeable batteries
can substantially reduce play time.
• If you’re not going to use your player for a month or
more, be sure to remove batteries because they can
leak and damage the unit.
• Dispose of batteries in the proper manner, according
to federal, state, and local regulations.
• Any battery may leak electrolyte if mixed with a
different battery type, if inserted incorrectly, if all
batteries are not replaced at the same time, if
disposed of in fire, or if an attempt is made to charge
a battery not intended to be recharged.
• Discard leaky batteries immediately. Leaking batteries
can cause skin burns or other personal injury.
Important Battery Information
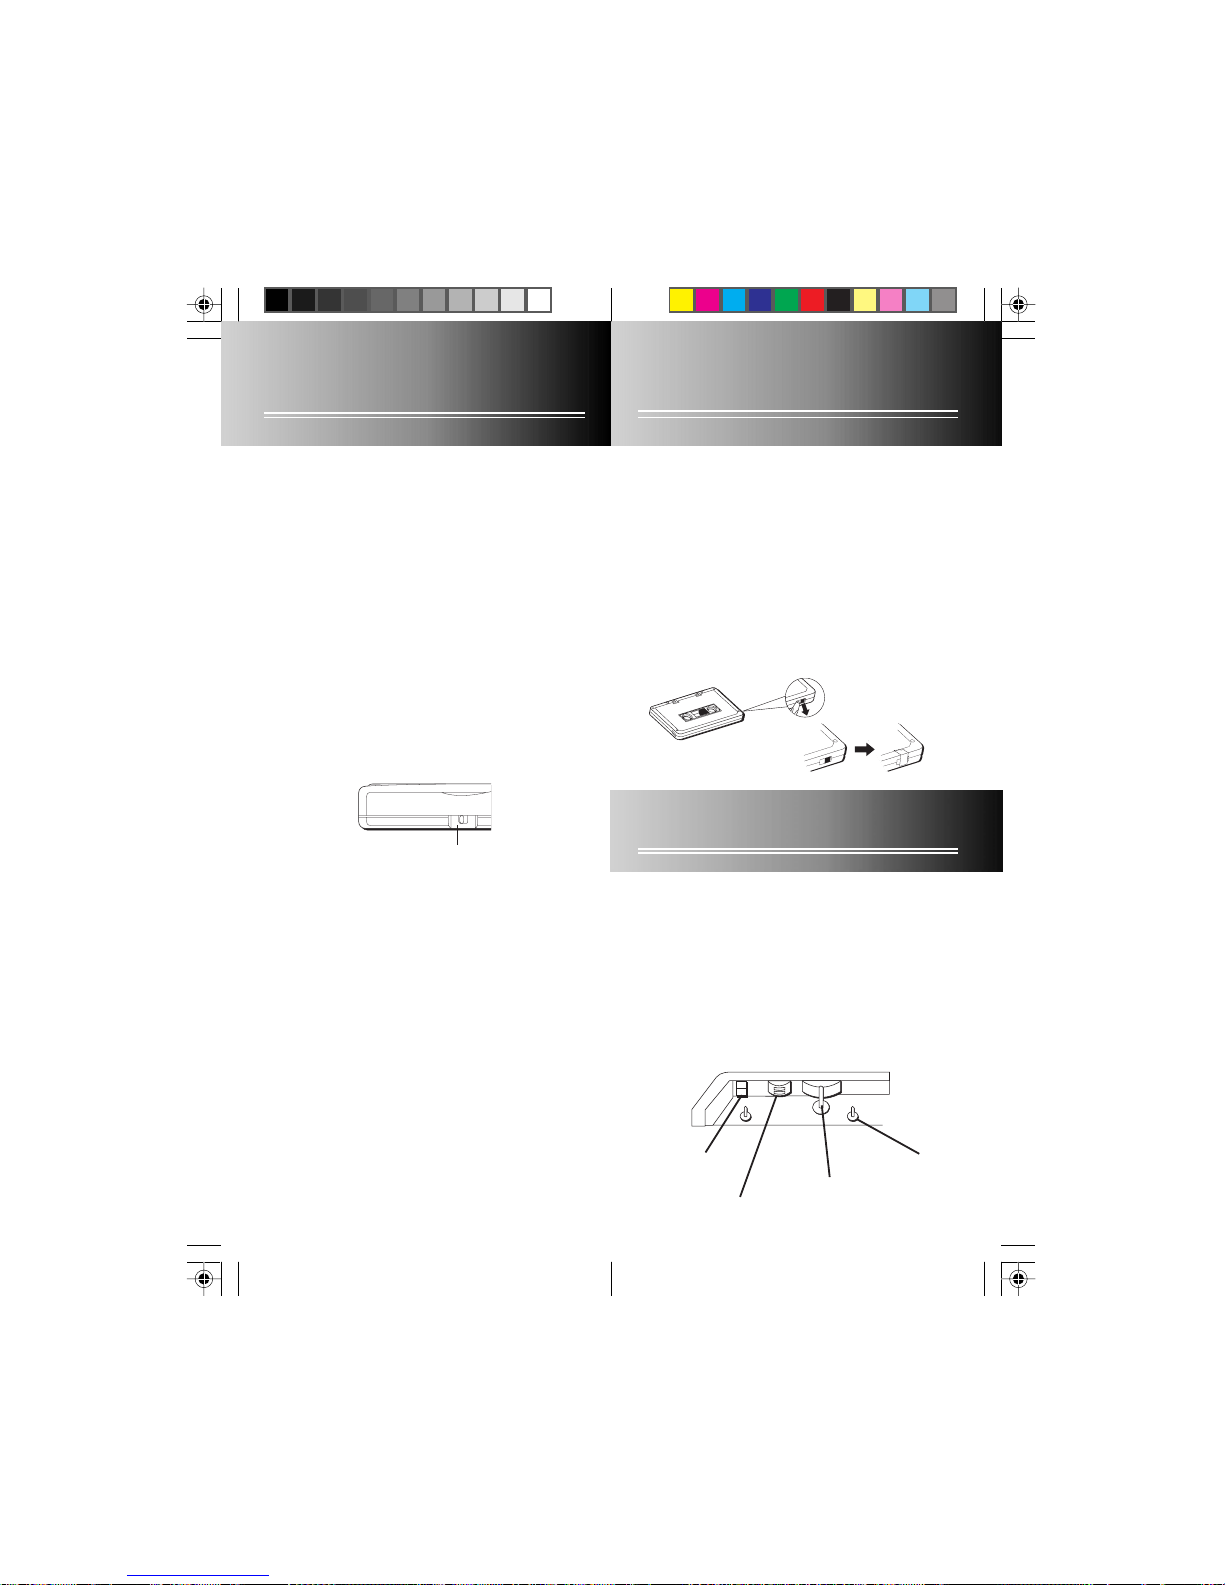
Battery Installation
1. Open hinged battery door by pressing down just
above the arrow, sliding it as indicated and lifting up.
Note that to avoid damage to the battery door, do not
attempt to force door beyond its normal stopping
point.
Powering the Recorder
2. Insert 2 “AA” alkaline batteries (not included) into the
battery compartment. Be sure each battery is installed
as shown on the battery diagram in the battery
compartment.
3. Close the battery door by lowering and sliding door
into the closed position.
NOTE: If the recording sounds distorted, or if the tape
moves very slowly or not at all, check the batteries, try AC
power or a fresh set of batteries before seeking service
(See Record/Battery Indicator).
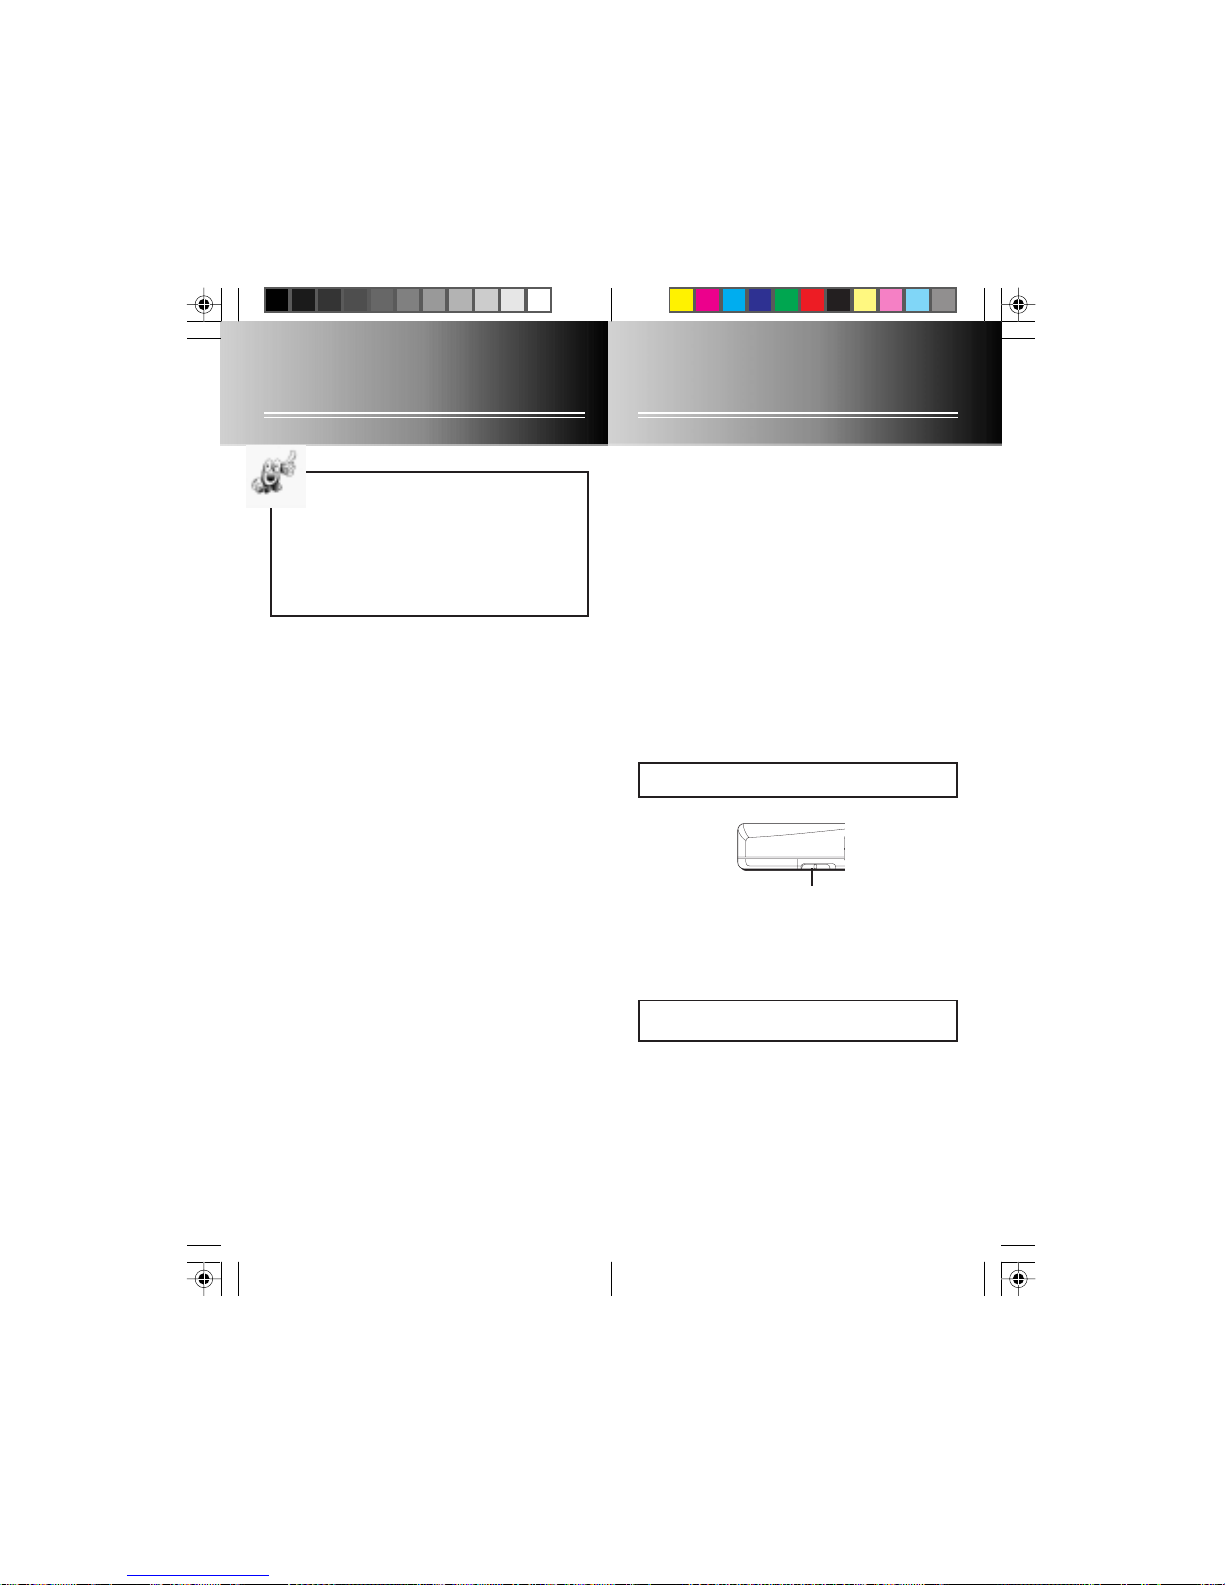
AC/DC Converter (not included)
To save batteries you can use the AC Converter to
operate your recorder. The cord plugs into the DC 3V jack
on the recorder and the AC end plugs into a household
outlet. When the AC/DC Converter is used, batteries are
automatcially disconnected.
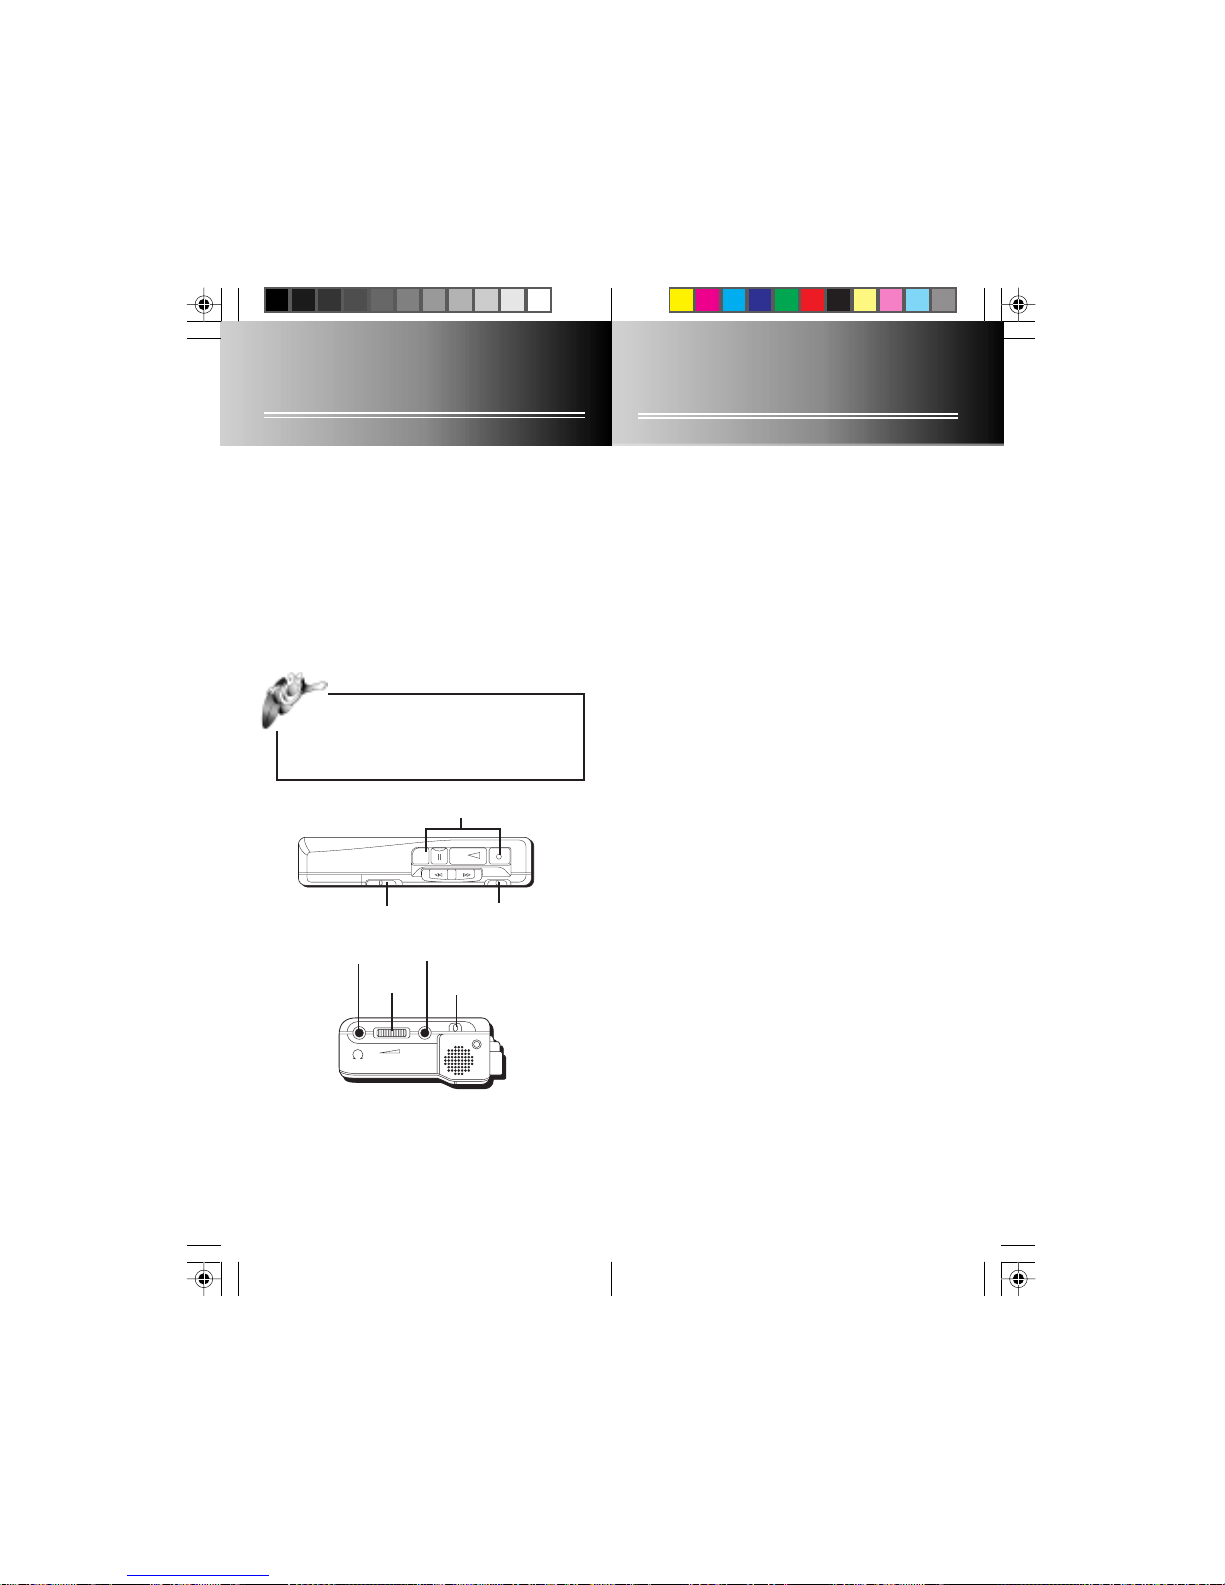
Record/ Battery Indicator
• Recording Indicator—Light will remain on when in
continuous record mode.
• Battery Condition Indicator—When in the record
mode, the brightness level of the light indicates
battery condition. When the indicator is dim or does
not light, batteries are weak and need replacing. Note
that the optional AC/DC Converter (not included) must
be disconnected from DC 3V jack to check batteries.
1 2
3-5383 US Eng 11/26/99, 5:24 PM2-3