GE JE3A Use and care manual

‘Use arid
”Care
Cooking
Gtiide
‘
Mini-Compact
Microwave
Oven
Contents
Adapter Plugs 23 Grounding Instructions 23
Aluminum Foil 4
Heating or Reheating Guide 11, 12
Appliance Registration
Micromve
Cookwme
Guide 10
Care and Cleaning
2:
Microwaving Tips
3
Consumer Services 27 Model and Serial Numbers
2
Control Panel
6
Precautions
2-5
Cooking
7
Problem Solver 24
Cooking Guide
15-21
Safety Instructions
2-5
Defrosting
8
Timer
6-8
Defrosting Guide
13,14
Warranty Back Cover
Extension Cords
23
Features 6
Glass Cooking
Tmy
6,22
GE Answer
Center@
Glossary of Microwve Terms 9 800.626.2000
ModelJE3A
GE Appliances
Microwave power output
of this oven is 525 watb.

Help us help you...
Before using your oven,
read this book carefully.
It
is
intended to help you operate
and maintain your
new microwave
oven properly.
Keep it handy
for
answers to your
questions.
If you don’t understand something
or
need
more help, write (include
your phone number):
Consumer Affairs
GE Appliances
Appliance Park
Louisville, KY 40225
Write down the model and
serial
numbers.
You’ll find them on a label inside
the oven.
These numbers are also on the
Consumer Product Ownership
Registration Card that came with
your microwave oven. Before
sending in this card, please write
these numbers here:
Model Number
Serial
Number
Use these numbers in any
correspondence or service calls
concerning your microwave oven.
Be sure your microwave
oven is registered.
It is important that we know the
location of your microwave oven
should a need occur for
adjustments.
Your supplier is responsible for
registering you as the owner.
Please check with your supplier to
be sure he has done so; also send
in your Consumer Product
Ownershi p Registratio n Card. If
you move, or if you are not the
original purchaser, please write to
us, stating model and serial
numbers.
2
This appliance must be registered.
Please
be certain that it is.
Write to:
GE Appliances
Range Product Service
Appliance Park
Louisville, KY 40225
If you received a
damaged oven...
Immediately
contact the dealer (or
builder) that sold you the oven.
Save time and money.
Before you request service...
Check the Problem Solver in the
back of this book. It lists causes of
minor operating problems that you
can correct yourself.
All these things are
normal
with your microwave oven.
c
Steam or
vapor escaping from
around
the door.
c
Light reflection around door or
outer case.
●
~imming
oven
light
and
change
in
blower
sound
may
occur
while
operating at power
JeveIs
other
than high.
“
Dull
thumping sound
while
oven
is
Operating.
● Some TV-Radio interference
might be noticed
while
using your
microwave oven. It’s similar to the
interference caused by other small
appliances and does not indicate a
problem with your oven.
If you need service...
To obtain service, see the
Consumer Services page in the
back of this book.
We’re proud of our service and
want you to be pleased. If for some
reason you are not happy with the
service you receive, here
are
three
steps to follow for further help.
FIRST, contact the people who
serviced your appliance. Explain
why you are not pleased. In most
cases, this will solve the problem.
NEXT, if you are still not pleased,
write all the details—including
your phone number—to:
Manager, Consumer Relations
GE Appliances
Appliance Park
Louisville,
KY 40225
FINALLY, if your problem is still
not
resolved, write:
Major Appliance Consumer
Action
Pane]
20 North
Wacker
Drive
Chicago, IL
6~606
PRECAUTIONS
TO AVOID
POSSIBLE
EXPOSU~
TO
EXCESSIVE
MICROWAVE
ENERGY
(a)
DoNotAttenpttoo@fa(e
fhis
oven with
the
door
open since
open-door operation can result
in
harmful
exposure to microwav
e
energy. It is important not
to defeat
or tamper with the safety
interlocks.
(b) Do Not Place any object
between
the
oven front face and
the door or allow soil or cleaner
residue to accumulate on sealing
surfaces.
(c) Do Not Operate the oven if it
is damaged. It is particularly
important that the oven door close
properly and that there is no
damage to the:
(1)
door
(bent)
(2) hinges and latches (broken or
loosened)
(3) door seals and sealing surfaces.
(d) The Oven Should Not be
adjusted or repaired by anyone
except properly qualified service
personnel.

Microwaving Tips
● Make sure all cookware used in
your microwave oven is suitable
for microwaving. Most glass
casseroles, cooking dishes,
measuring cups, custard cups,
pottery or china dinnerware which
does not have metallic trim or
glaze with a metallic sheen can be
used. Some cookware is labeled
“suitable for microwaving.”
If you are not sure if a dish is
microwave-safe, use this test:
Place in the oven both the dish you
are testing and a glass measuring
cup filled with
one cup water—set
the measuring cup either in or next
to the dish. Microwave
1
minute at
high. If the dish heats, it should not
be used for microwaving. If the
dish remains cool and only the
water in the cup heats, then the
dish is microwave-safe.
● Paper towels, waxed paper and
plastic wrap can be used to cover
dishes in order to retain moisture
and prevent spattering. Be sure to
vent plastic wrap so steam can
escape.
● Some microwaved foods require
stirring, rotating or rearranging.
Check the cooking guide.
● Steam builds up pressure in
foods which are tightly covered
by a skin or membrane. Pierce
potatoes, egg yolks and chicken
livers to prevent bursting.
E
safe for use in microwave ovens.
~PORTANT
SAFETY
INSTRUCTIONS
Read all instructions before using
ttis
appliance.
When using electrical
appliances, basic safety
precautions should be followed,
including the following:
WARNING–To reduce
the risk of burns, electric
shock, fire,
i~ury
to persons
or exposure to excessive
microwave energy:
_
Use this appliance only for
its intended use as described
in this manual. Do not use
corrosive chemicals or vapors
in this appliance. This
microwave oven is specifically
designed to heat or cook food,
and is not intended for laboratory
or industrial use.
● Read and follow the specific
“PRECAUTIONS TO AVOID
POSSIBLE EXPOSURE TO
EXCESSIVE MICROWAVE
ENERGY” in this book.
● This appliance must be
grounded. Connect only to
properly grounded outlet.
See “GROUNDING
INSTRUCTIONS.”
● For best operation, plug
this appliance into its own
electrical outlet, to prevent
flickering of lights, blowing of
fuse or tripping of circuit breaker.
● Do not mount this appliance
over a sink. Install or locate
this appliance only in
accordance with the provided
Installation Instructions.
● Do not cover or block any
openings on the appliance.
● Do not store this appliance
outdoors. Do not use this
product near water—for
example, in a wet basement,
or near a swimming pool.
● Do not immerse power cord
or plug in water.
● Keep power cord away from
heated surfaces.
c
Do not let power cord hang
over edge of table or counter.
● Do not operate this
appliance if it has a damaged
power cord or plug, if it is not
working properly, or if it has
been damaged or dropped.
● See door surface cleaning
instructions in the Care and
Cleaning section(s) of this
book.
● This appliance should be
serviced
ody
by qualified
service personnel. Contact
nearest authorized service
facility for examination, repair
or adjustment.
c
As with any appliance, close
supervision is necessary when
used by children.
● To reduce the risk of
fire
in
the oven cavity:
—Remove wire twist-ties from
paper or plastic bags before
placing bags in oven.
—Do not overeook food.
Carefully attend appliance
if paper, plastic or other
combustible materials are
placed inside the oven to
facilitate cooking.
—Do not use recycled paper
produc~. Recycled paper
towels, napkins and waxed
paper may cause arcing or
ignite. Paper products
containing nylon or nylon
filaments should be avoided,
as they may
dso
ignite.
(continued next page)
b
m
0

IMPORTANT SAFETY
INSTRUCTIONS
(continued)
—Do not use your microwave
oven to dry newspapers.
—Do not pop popcorn in your
microwave oven unless in a
special microwave popcorn
accessory or unless you use
popcorn labeled for use in
microwave ovens.
—Do not operate the oven
while empty to avoid damage
to the oven and the danger of
fire. If by accident the oven
should run empty a minute or
two, no harm is done. However,
try to avoid operating the oven
empty at all times—it saves
energy and prolongs the life of
the oven.
—Do not overcook potatoes.
They could dehydrate and catch
fire, causing damage to your
oven.
●
Do
not use the oven for storage
purposes. Do not leave paper
products, cooking utensils or
food in the oven when not in use.
● If materials inside oven
should ignite, keep oven door
closed, turn oven off, and
disconnect power cord, or shut
off power at the fuse or circuit
breaker panel.
● Some products such as whole
eggs and sealed containers—
for example, closed jars-will
explode and should not be
heated in this microwave oven.
Such use of the microwave oven
could result in injury.
● Avoid heating baby food in
glass jars, even without their
lids; especially meat and egg
mixtures.
● Don’t defrost frozen
beverages in narrow necked
bottles (especially carbonated
beverages). Even if the
container is opened, pressure
can build up. This can cause the
container to burst, possibly
resulting in injury.
● Use metal only as directed in
this book. TV dinners maybe
microwaved in foil trays less
than 3/4” high; remove top foil
cover and return tray to box.
When using metal in the
microwave oven, keep metal
at least 1 inch away from sides
of oven.
● Cookware may become hot
because of heat
transfemed
from
the heated food. Pot holders
may be needed to handle the
cookware.
● Sometimes, the oven floor
can become too hot to touch.
Be careful touching the floor
during and after cooking.
c
Foods cooked in liquids
(such as pasta) may tend to boil
over more rapidly than foods
containing less moisture.
Should this occur, refer to the
Care and Cleaning section(s) for
instructions on how to clean the
inside of the oven.
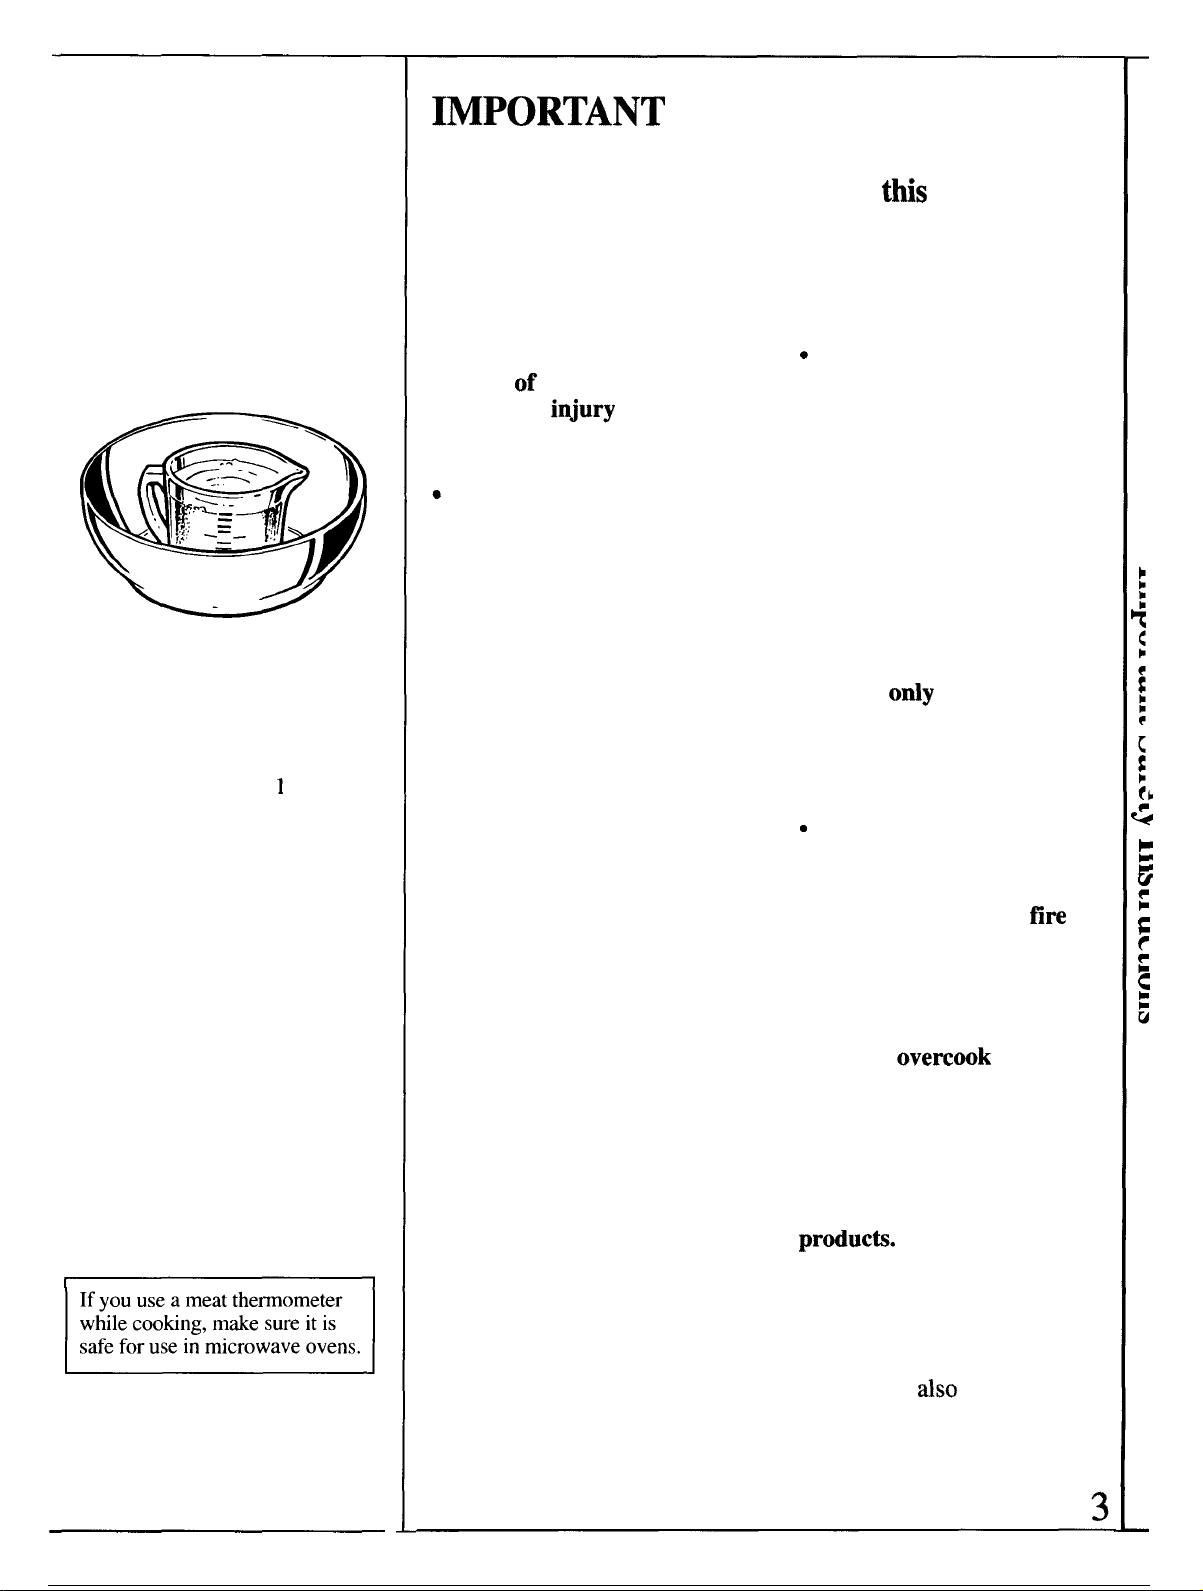
● Thermometer—Do not use a
thermometer in food you are
microwaving unless the
thermometer is designed or
recommended for use in the
microwave oven.
● Plastic cookware—Plastic
cookware designed for
microwave cooking is very
useful, but should be used
carefully.
Even microwave-safe
plastic may not be as tolerant of
overcooking conditions as are
glass or ceramic materials and
may soften or char if subjected to
short periods of overcooking. In
longer exposures to overcooking,
the food and cookware could
ignite. For these reasons: 1) Use
microwave-safe plastics only and
use them in strict compliance
with the cookware manufacturer’s
recommendations. 2) Do not
subject empty cookware to
microwaving. 3) Do not permit
children to use plastic cookware
without complete supervision.
● When cooking pork, follow
the directions exactly and
always cook the meat to an
internal temperature of at least
170°F.
This assures that, in the
remote possibility that trichina
may be present in the meat, it
will be killed and the meat will
be safe to eat.
● Do not boil eggs in a
microwave oven. Pressure will
build
up inside egg yolk and
will cause it to burst, possibly
resulting in injury.
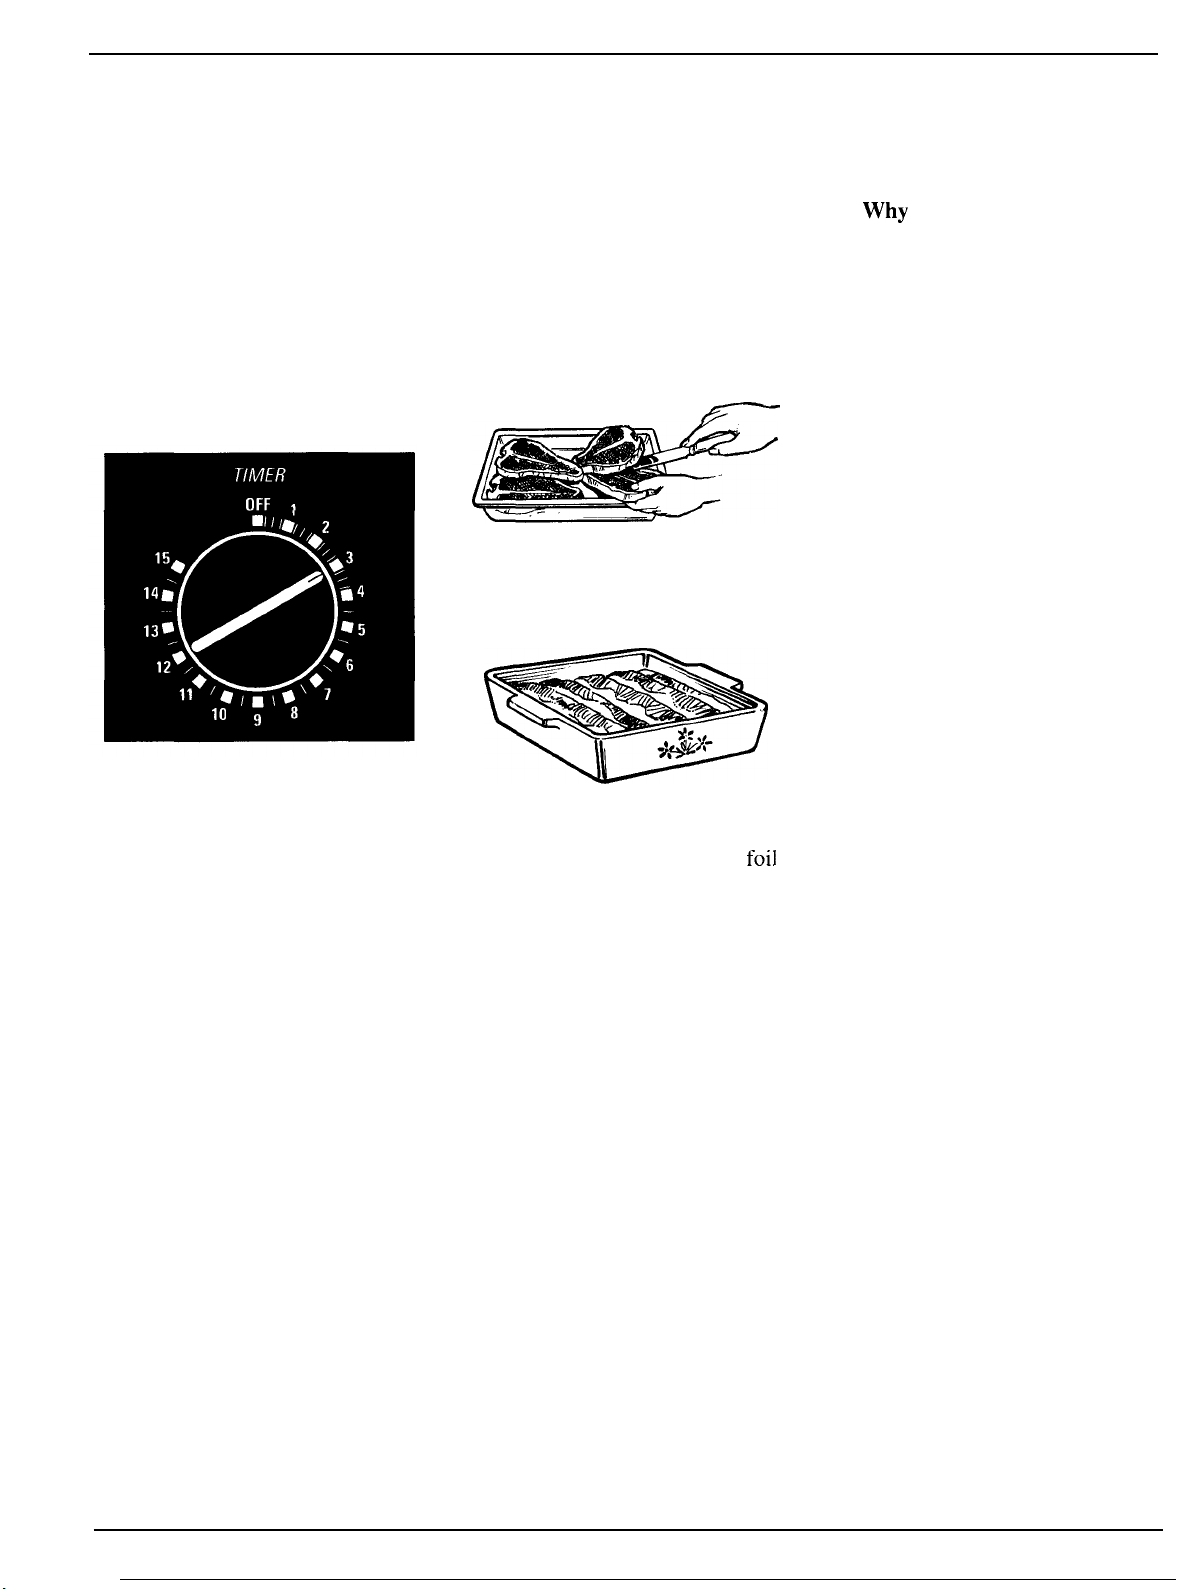
● Foods with unbroken outer
“skin” such as potatoes,
sausages, tomatoes, apples,
chicken livers and other giblets,
and egg yolks (see previous
caution) should be pierced to
allow steam to escape during
cooking.
● Not all plastic wrap is
suitable for use in microwave
ovens. Check the package for
proper use.
c
Spontaneous boiling—Under
certain special circumstances,
liquids may start to boil during
or shortly after removal from
the microwave oven. To prevent
burns from splashing liquid,
stir the liquid briefly before
removing the container from
the microwave oven.

●
~~Boilable”
cooking pouches
and tightly closed plastic bags
should be slit, pierced or vented
as directed by package. If they
are not, plastic could burst
during or immediately after
cooking, possibly resulting in
injury. Also, plastic storage
containers should be at least
partially uncovered because
they form a tight seal. When
cooking with containers tightly
covered with plastic wrap,
remove covering carefully and
direct steam away from hands
and face.
c
Hot foods and steam can
cause burns. Be careful when
opening any containers of hot
food, including popcorn bags,
cooking pouches and boxes.
To
prevent possible injury, direct
steam away from hands and face.
SAVE THESE
INSTRUCTIONS
5
.

Features of Your Microwave Oven
0’”
—
!...:;
. .
.
:.;:.:,
,:,:1
i
!,.;::::::.;
[:::”i
~j:j;
L
..,.:,.,,.,)
.,,.
. .
.
:..:.:..;.:,
.....
.
,[
07’
“
1. Door Handle.
Pull to open door.
5. Model and Serial Numbers. 8.
Glass
Cooking Tray. Tray must
Door must be securely lat;hed for
oven to operate.
2. Door Latch System.
3. Door Screen. Metal screen
permits viewing of foods and keeps
microwaves confined inside oven.
4. Oven Vent.
6. Mode Cover. Protects the
microwave energy distributing
system. Do not remove the cover.
You will damage the oven.
7. 15-Minute Timer. Set timer to
desired cooking time. Setting the
timer starts the oven (when the
door is closed).
be in place when-using the oven.
Cooking performance
will
be
unsatisfactory without the tray in
place. The tray may be removed
for cleaning.
6

CooMng
The timer allows you to set the
cooking time.
The oven shuts off automatically.
To become better acquainted with
time cooking, make a cup of coffee
by following the steps below.
Step 1: Fill a cup 2/3 full of water
and add 1 teaspoon of instant
coffee and stir to dissolve. Use a
cup that has no metal decoration
and is microwave safe (refer to
Microwaving Tips in the Safety
Instructions section). Place cup in
oven and close door.
Step 2: Set Timer Control. For
coffee, set at
17Z
minutes. Timer
may be reset during cooking if
needed,
Note: To set timer less than 2
minutes, turn the Timer Control
past 2 and then back to the
desired time.
Step 3: Open the door when time
is up.
Questions and Answers
Q. I set my oven for the time
called for in the recipe, but at the
end of the time allowed, my food
wasn’t done. What happened?
A. Since house power varies due to
time or location, most recipes give
you a time range to prevent
overcooking. Set the oven for
minimum time, test the food for
doneness, and cook your food a
little longer, if necessary.
Q. What happens if I
accidentally operate the
microwave oven without food
in it?
A. Accidental use for short periods
of time does not damage the
magnetron but it is not
recommended.
Q. Can I interrupt the cooking
function to check the food?
A. Yes.
To resume cooking, simply
close
the door. The timer must be
reset for cooking to resume unless
time is remaining on timer.
7

Defrosting
The speedy thawing of frozen
food is one of the great advantages
of a microwave oven.
● See your Defrosting Guide for
defrosting help.
To become better acquainted with
the defrost function, defrost frozen
pork chops by following the steps
below.
Step 1: Place package of frozen
chops in the oven and close door.
Step
2: Turn Timer Control to one
half of the total defrosting time
recommended in the Defrosting
Guide.
Step 3: When oven turns off, turn
package over, close door, and set
timer for remaining defrosting
time. Chops may need to be
separated.
Defrosting Tips
● Foods frozen in paper or plastic
can be defrosted in the package.
● For even defrosting, many foods
need to be broken up or separated
part of the way through the
defrosting time.
● Family size, prepackaged frozen
dinners can be defrosted and
microwaved. If the food is in a
foil
container, transfer it to a
microwave-safe dish.
Questions and Answers
Q.
Why
don’t the defrosting
times in the Defrosting Guide
seem right for my food?
A. These times are averages.
Defrosting time can vary according
to the temperature in your freezer.
Set your oven for the time
indicated in your Defrosting
Guide. If your food is still not
completely thawed at the end of
that time, reset your oven and
adjust the time accordingly.
Q. Should all foods be
completely thawed before
cooking?
A. Some foods should not be
completely thawed before cooking.
For example, fish cooks so quickly
it is better to begin cooking while
it is still slightly frozen.
Q.
Can I
open the door during
defrosting to check on the
progress of my food?
A. Yes.
You may open the door at
any time during microwaving. To
resume defrosting, close the door.
The oven begins operating if time
is left on timer. If not, reset timer.
● Check the Defrosting Guide for
other defrosting tips.
8

Glossary of Microwave Terms
When adapting recipes for the microwave, it is best
to start with a familiar recipe. Knowing how the
food should look and taste will help when adapting
recipes for microwaving. Foods that require
browning or crisp, dry surfaces
will
cook better
conventionally.
● Moist
foods,
such
as
vegetables, fruits, poultry and
seafood, microwave well.
● Rich foods, such as bar cookies, moist cakes and
candies, are suitable for microwaving because of their
high fat and sugar content.
“
Reduce conventional cooking time by one-half to
one-
third. Check food after minimum time to avoid
overcooking.
● Small amounts of butter or
oil
can be used for
flavoring, but are not needed to prevent sticking.
● Seasonings may need to be reduced. Salt meats and
vegetables after cooking.
Covering. In both conventional and microwave
cooking, covers hold in moisture, allow for more even
heating and reduce cooking time. Conventionally,
partial covering allows excess steam to escape. Venting
plastic wrap or covering with wax paper serves the
same purpose when microwaving.
Venting. After covering a dish with plastic wrap, you
vent the plastic wrap by turning back one corner so
excess steam can escape.
Arranging Food in Oven. In conventional baking, you
position foods, such as cake layers or potatoes, so hot
air can flow around them. When microwaving, you
arrange foods in a ring, so that all sides are exposed to
microwave energy.
Stirring. In range-top cooking, you stir foods up from
the bottom to heat them evenly. When microwaving,
you stir cooked portions from the outside to the center.
Foods that require constant stirring conventionally will
need only occasional stirring when microwaving.
Turning Over.
In range-top cooking, you turn over
foods, such as hamburgers, so both sides can directly
contact the hot pan. When microwaving, turning is
often needed during defrosting or when cooking certain
foods, such as frozen hamburgers.
Standing Time. In conventional cooking, foods such as
roasts or cakes are allowed to stand to finish cooking or
to set. Standing time is especially important in
microwave cooking. Note that a microwaved cake is
not placed on a cooling rack.
Shielding. In a conventional oven, you shield chicken
breasts or baked foods to prevent over-browning. When
microwaving, you use small strips of
foil
to shield thin
parts, such as the tips of wings and legs on poultry,
which would cook before larger
parts.,,
Arcing. Sparks caused by too much metal in the
microwave oven or metal touching the side of the oven
or foil that is not
molded
to food.
Prick Foods to Release Pressure. Steam builds up
pressure in foods that are tightly covered by a skin or
membrane. Prick foods, such as potatoes (as you do
conventionally), egg
yolks
and chicken livers, to
prevent bursting.
Rotating.
Occasionally, repositioning a dish in the oven
helps food cook more evenly. To rotate 1/2 turn, turn
the dish
until
the side that was to the back of the oven is
to the front. To rotate 1/4 turn, turn the dish until the
side that was to the back of the oven is to the side.
Basic Microwave Guidelines
Density of Food. In both conventional and microwave
cooking, dense foods, such as potatoes, take longer to
cook than light, porous foods, such as rolls, bread or
pieces of cake.
Round Shapes. Since microwaves penetrate foods to
about one inch from top, bottom and sides, round
shapes and rings cook more evenly. Corners receive
more energy and may overcook. This may also happen
when cooking conventionally.
Delicacy. Foods with a delicate texture, such as
custards, are best cooked at lower power settings to
avoid toughening.
Natural Moisture of food affects how it cooks. Very
moist foods cook
evenly
because microwave energy is
attracted to water molecules. Food that is uneven in
moisture should be covered or allowed to stand so heat
can disperse evenly.
Piece Size. Small pieces cook faster than large ones.
Pieces that are similar in size and shape cook more
evenly. With large pieces of food, reduce the power
setting for even cooking.
Shape of Food. In both types of cooking, thin areas
cook faster than thick areas. This can be controlled in
microwaving by placing thick pieces near the outside
edge and thin pieces in the center.
Starting Temperature. Foods taken from the freezer or
refrigerator take longer to cook than foods at room
temperature. Timings in our recipes are based on the
temperatures at which you normally store the foods.
Quantity of Food. In both types of cooking,
small
amounts usually take less time than large amounts. This
is most apparent in microwave cooking, where time is
directly related to the number of servings.
Shelf (on models so equipped). Use the shelf to heat
more than one dish at one time. Take the shelf out when
you are not using it.
9

Microwave Cookware Guide & Microwave Adapting
~Pe
of Cookware Microwave Uses
Foil-1ined paper bags and boxes
Foil baking trays
Aluminum foil
Metal or partially metal pots, pans,
thermometers, skewers and twist ties
Glass jars and bottles
Microwave plastics
Paper or Styrofoam plates and cups
Oven glass and ceramic
Dinnerware
Paper towels, paper napkins and
wax paper
Plastic wrap, cooking bags, boil-in
bags and storage bags
Paperboard trays used for frozen
entrees and dinners
Plastic trays and plates used for frozen
entrees and dinners
Straw, wicker and wood
Avoid using.
You can use foil trays that are no higher than 3/4-in. (Foil or metal will
reflect microwaves and cause uneven heating.) Arcing can occur if foil
is closer than 1 inch to oven walls.
Use for shielding.
Do not use. Microwave-safe thermometers and
Generallv.
glass
iars
can be used to warm food
skewers are available.
However, do not heat
baby
foo~
fi
jar;,
even without lids, because food will heat unevenly.
Do not warm foods in narrow-necked bottles because pressure can
build up.
Cooking and heating.
Heating and serving of foods and beverages. Styrofoam will melt if
food is too hot or if food is cooked for a long time.
Cooking and heating.
Heating and some cooking. Follow dinnerware manufacturer’s
recommendations. Avoid using dishes with metal trim.
Absorbing moisture, and preventing spatters. Heating and serving of
sandwiches or appetizers. Light covering to hold in steam. Do not use
paper towels that have synthetic fibers, such as nylon, woven into them.
Synthetic fibers may cause the towel to ignite. Avoid using recycled
paper.
Covering to hold in steam
Heating (storage bags).
Cooking and heating.
Warming.
(wrap). Cooking (cooking and boil-in bags).
Cookware Tips
● Always check the cookware manufacturer’s
recommendations before using any cookware
in the oven.
● Before purchasing cookware or preparing food in
cookware, check its size to make sure it will fit
in the oven.
● For best cooking results select a dish that matches
the size or amount of food being prepared.
10

Heating or Reheating Guide
1.
Directions below
are for heating or reheating already-cooked
4. Be sure foods are heated throughout before serving. Steaming or
foods stored in refrigerator or at room temperature. Use bubbling around edges of dish does not necessarily mean food is
microwave-safe cookware.
heated throughout.
2. Cover most foods for fastest heating. Exceptions are some
sandwiches, griddle foods and baked items.
3.
Bubblirr~
around
edges
of dish is normal. since the center is the
last to h;at. Foods h;ated to
160°F.
to
165°F.
will provide safe,
palatable results. Adjust temperatures to suit your personal taste,
Let foods stand a few minutes before serving.
If you use a meat thermometer while cooking, make sure it
is safe for use in microwave ovens.
Item
Amount
Time
Appetizers
Dips: cream or processed cheese
1/2
cup 2fi to
3X
min
I cup
3 to 5 min.
Pastry bites: small pizzas, egg
rolls,
etc. 2 to 4 servings
2 to 4 min.
Saucy: meatballs,
riblets,
1
to 2 servings
2 to 4 min.
cocktail franks, etc.
3
to 4 servings
3 to 5 min.
(1/2 cup per serving)
Tip: Cover saucy appetizers with wax paper. Cover dips with plastic wrap. Microwave pastry bites uncovered to retain their crispness.
Bakery Foods
Cake, coffee cake, doughnuts, sweet rolls,
I
piece
nut or fruit bread
2
pieces
4 pieces
9-in. cake or
I 2 rollsor
doughnuts
Dinner rolls, muffins
1
2
4
6
to 8
Pie: fruit, nut or custard
1 slice
I slice= l/8 of 9-in. pie 2 slices
(use minimum time for custard) 4 slices
9-in. pie
1/4
to
1/2
min.
1
to 1
X
min.
1
X
to 2 min.
4 to 5 min.
l/4 to
1/2
min.
1/2
to
1
min.
I to 1
X
min.
1
to 2 min.
1/2
to 1 min.
1
to
I
X
min.
2X
to 3 min.
5 to 7 min.
Beverages
Cocoa, other milk based
(6 OZ./CUp)
1
to 2 cups
3 to 6 min.
(9 oz./cup)
I
to 2 cups
5 to 7 min.
Coffee, tea, cider
(6
OZ./CUp) I to 2 cups
I
M
to 3 min.
(9 oz./cup)
1
to 2 cups
3 to 5 min.
Gravies & Sauces
Desserts: chocolate, butterscotch, etc.
1/2 cup
1
to
I
X
min.
1
cup
I
X
to 2fi min.
Gravies: giblet or creamy
1/2
cup
1 to 2 min.
1
cup
2 to 3 min.
Meat or main dish sauces, such as
1/2
cup
I
X
to 2 min.
spaghetti sauce, etc.
1 cup
3 to 4 min.
I
can (I6 oz.)
4 to 6 min.
Tip: Cover food to prevent spattering
Griddle Foods
Pancakes, french toast or
waMes:
Plain, no topping
2 or 3 pieces
1 to I
k
min.
Syrup & butter 2 or
3
pieces
I
to I
L
min.
Tip:
Do not cover.
11

Heating or Reheating Guide
(continued)
Item
Amount
Time
Meats and Main Dishes
Chicken pieces
1
to
2 pieces 2 to 3 min.
3
to 4 pieces
3 to 4 min.
Hamburgers or meatloaf
1
to
2 servings I
X
to 2 min.
(4
oz.
per serving)
3
to 4 servings
2X
to
3X
min.
Hot dogs and sausages
I
to 2
I to I
K
min.
3
to 4
1
X
to 3 min.
Rice and pasta
I to 2 servings I to
3
min.
(2/3-3/4 cup per serving)
Saucy, main dishes: chop
suey.
spaghetti.
1 to 2 servings 4 to 7 min.
creamed chicken, chili, stew, macaroni
and
3
to 4 servings
8
to I 2 min.
cheese, etc.
1
can
(16 oz. ) 6 to
8
min.
(3/4-1 cup
per
serving)
Steaks, chops, ribs, meat pieces
I
to 2 servings
2fi to 4 min.
3
to
4 servings 6 to
8
rein,
Thinly-sliced meat
1
to 2 servings
(3 to 4
oz.
per serving)
3 to 5
min.
3 to 4 servings 5 to 8 min.
Topped or mixed with sauce
1
to
2
servings 4 to 6 min.
(2/3-3/4 cup per serving)
3
to 4 servings
8
to
12
min.
Tip: Cover saucy main dishes with plastic
wrap,
Cover other
main
dishes and meats with
wax
paper.
When heating
or
reheating
3
to 4 servings
of
meat
slices or pieces, rotate dish I/2 turn after half of cooking time.
Plate of Leftovers
Meat plus 2 vegetables
1 plate
3 to 5 min.
Tip: Cover plate of food with wax paper or plastic wrap,
Sandwiches
Meat-cheese filling: with 2 slices of
bread
I to 2 servings
2 to 4 min.
3 to 4 servings 4 to 6 min.
Moist filling: Sloppy
Joes,
barbecue,
hzm
salad,
1
to 2 servings
2 to 4 min.
etc. in bun ( I/3 cup per serving)
3 to 4 servings 4 to 6 min.
Tip: Use paper towel or napkin to cover sandwiches.
soups
Milk-based (6
oz.
per serving) I to 2 servings
4 to 7 min.
3 to 4 servings 9 to 13 min.
I
can
(10 oz. ) 7 to 9 min.
Water-based (6 oz. per serving) I to 2 servings
2 to 6 min.
3 to 4 servings
6 to
10
min.
I can (10 oz. ) 5 to 6 min.
Tip: Cover soups with wax paper or plastic
wrap.
Vegetables
Large pieces or whole: asparagus spears.
corn on the cob, etc.
Mashed
( 1/2
cup per serving)
Small pieces: peas, beans. corn, etc.
(
1/2
cup per serving)
Tip: Cover vegetables
for
most even heating.
1 to 2 servings
3 to 4 servings
1
can (16 oz. )
I to 2 servings
3
to 4 servings
1 to 2
servings
3
to 4 servings
1
can
(16 oz. )
1
X
to 3 min.
3 to 6 min.
5 to 6
min.
2 to 4 min.
6 to 8 min.
I to
2X
min.
2X
to
3X
min.
3X
to
4X
min.
12

Defrosting Guide
1. Food packaged in paper or plastic may be defrosted without 3. Be sure large meats are completely defrosted before cooking.
unwrapping. If food is foil wrapped, remove foil and place food
4.
When defrosted,
food should be cool but softened in all areas. If
in cooking dish for defrosting, still slightly icy, return to microwave oven very briefly, or let
2. After first half of defrosting time, unwrap package and check
stand a few minutes.
food. Turn food over, if necessary; break apart or separate food if
possible. Shield any warm areas with small pieces of foil.
First Half Second Half
Time, Min. Time, Min. Comments
Food
I
(
,
Breads, Cakes
Bread, buns or rolls
(8
to
16
OZ.)
Cake, frosted, 2 to
3
layer
(I7 oz.)
Cake, plain, I layer
Cheesecake, plain or
fruit-topped (I7 to 19 oz.)
Coffee cakes
( I
I
to
14X
oz.)
Cream or custard pie
(I4 oz.)
Crunch cakes & cupcakes
Doughnuts
(1
or 2)
(4 to 6)
French toast (2 slices)
Fruit or nut pie
(8 in. )
Pound cake ( I I
X
oz.)
Sweet rolls
(8X
tO
12 OZ.)
2 to
3
I
to 2 Remove metal twist tie. Turn over after first half of time
Let stand 5 to 10 minutes before serving.
Let stand 5 minutes before
serving.
2 to
3
2 to 3
3
to 6
none
none
6 to
7
I to 2 I to 2
Reposition after first half of time. Let stand 5 minutes before serving.
1/2
to
3/4
each
1/2
to
1
1
to 2
2
7 to 9
2 to 4
2 to 3
Rearrange after first half of time.
Turn over after first half of time.
Let stand 5 minutes before serving.
Rearrange after first half of time.
none
1
to 2
I
none
none
2 to 3
Fish & Seafood
Fillets:
Pre-packaged (1 lb.)
Freshly frozen ( I lb,) Place unopened package in oven. (If fish is frozen in water, place in
cooking dish. ) Turn package over after first half of time. After
second half of time, hold under cold water to separate.
4 to 5
4 to 5 5 to 7
5 to 7
Shellfish, blocks:
Crab meat
(6-02. package)
Oysters (12-02. can)
Place block in casserole. Turn over and break up with fork after first
half of time.
Place block in casserole. Break up with fork after first half of time.
Place block in casserole. Turn over and breakup after first half of
time.
4 to 6
4 to 6 4 to 6
4 to 6
Scallops ( l-lb. package)
Shellfish, large:
Crab legs,
I
to 2
(8 to 10 OZ.)
2 to 3 2 to 3
Arrange in cooking dish with light-underside-up. Turn over after
first half of time.
Arrange in cooking dish, with meaty-side-down. Turn over after
first half of time,
Spread shellfish in single layer in baking dish. Rearrange pieces
after first half of time.
Let stand a few minutes to finish defrosting.
Place fish in cooking dish. Turn over after first half of time. After
second half of time, rinse cavity with cold water to complete
defrosting.
Lobster tails,
1
to 2
(6
tO
9 OZ.)
3 to 4 3 to 4
Shellfish,
small
pieces
(1 lb.)
Steaks (6 to 12 oz.)
Whole fish (8 to
10
oz.)
3 to 4
3
to 4
2 to 3
3
none
2
to 4
13

Defrosting Guide
(continued)
Food First Half Second Half
Time, Min. Time, Min. Comments
Fruit
Fresh (10
to
16
oz.) 2 to
3
2
to
3
Place package in oven. Remove foil or metal. After minimum time,
break up with fork. Repeat if necessary.
Plastic pouch—1 to 2
I to 3
3
to 4 Place package in oven. Flex package once.
(
10-oz.
package)
Meat
Bacon (1 lb.)
Franks ( 1
lb.)
Ground: beef & pork
( 1 lb. )
(2 Ibs.)
(5 Ibs.)
Roast:
beef,
lamb,
veal
(3
to 4 Ibs.)
Roast,
pork
(3
to 4
lbs,
)
Sausage,
bulk
( l-lb. tray)
( I -lb. roll)
Sausage,
links
(1 to
1X
Ibs.)
Sausage, patties
(12-oz.
package)
Spareribs,
pork
(2 to
3
Ibs.)
Steaks, chops & cutlets
2 to
3
per lb.
2 to
3
3 to 4
6 to 7
12
to
13
8
to 10 per lb.
6 to
8
per lb.
2 to 3
2 to 3
2
2
2 to 4
per
lb.
3
to 5 per lb.
2 to 3 per lb.
2 to 3
3 to 4
6 to
7
12 to
13
8 to 10 per lb.
4 to 6 per lb.
2 to 4
3 to 4
I
x
to
2X
2 to 3
2 to 4 per lb.
3 to 5 per lb.
Place unopened package in oven. Let stand 5 minutes after defrosting.
Place unopened package in oven. Microwave just until franks can be
separated. Let stand 5 minutes, if necessary, to complete defrosting.
Turn meat over after first half of time.
Turn meat over after first half of time. Scrape off softened meat
after second half of time. Set aside. Break up remaining block and
microwave 1 to 2 minutes more.
Turn meat over after first half of time. Scrape off softened meat
after second half of time. Set aside. Microwave 6 to 8 minutes
more. Scrape and set aside. Break up remaining block and
microwave 3 to 5 minutes more.
Place unwrapped roast in cooking dish. Turn roast over after first
half of time. Defrost for second half of time. Let stand for 30
minutes to I hour in refrigerator.
Place unwrapped roast in cooking dish. Turn roast over after first
half of time. Defrost for second half of time. Let stand for 30
minutes to I hour in refrigerator.
Turn over after first half of time. Let stand 5 minutes.
Turn over after first half of time. Let stand
15
minutes.
Rotate package 1/4 turn after first half of time. Let stand 5 minutes.
Turn over and separate after first half of time. Remove patties as
they thaw.
Place unwrapped ribs in cooking dish. Turn over after first half of
time. After second half of time, separate pieces with table knife. Let
stand to complete defrosting.
Place unwrapped meat in cooking dish. Turn over after first half of
time and shield warm areas with foil. After second half of time,
separate pieces with table knife. Let stand to complete defrosting.
Poultry
Chicken, broiler-fryer,
9 to 11
Cut
Up
(~~~
to 3 Ibs. )
Chicken, whole
12
to
15
(2X
to 3 Ibs. )
Cornish
hen 5 to 6 per
lb.
Duckling 4 to 6
per lb.
~rkey
breast (4 to 6 Ibs. )
4 to 5 per lb.
9 to
1
I Place wrapped chicken in dish. Unwrap and turn over after first half
of time. After second half of time, separate pieces and place in
cooking dish. Microwave 2 to 4 minutes more, if necessary. Let
stand a few minutes to finish defrosting.
12
to 15 Place wrapped chicken in
dish.
After first half of time, unwrap and
turn chicken over. Shield warm areas with foil. To complete
defrosting, run cool water in cavity until giblets can be removed.
5 per
lb.
Place unwrapped hen in oven breast-side-up. Turn over after first
half of time. Run cool water in cavity until giblets can be removed.
4 to
6
per lb. Place unwrapped duckling in oven. Turn over after first half of
time. Shield warm areas with foil. Run cool water in cavity until
giblets can be removed.
4 to 5 per lb.
Place unwrapped breast in microwave-safe dish breast-side-down.
After first half of time, turn breast-side-up and shield warm areas
with foil. Defrost for second half of
time.
Let stand
1
to 2 hours in
refrigerator to complete defrosting.
14

Cooking Guide
Breads
Crust on breads will be soft and the outsides will not brown. brown color on upside down breads, line dish before microwaving
If desired, sprinkle top of batter with cinnamon-sugar mixture,
with brown sugar-caramel mixture or savory topping,
such as
chopped nuts or other topping for brown color. To increase crushed, canned, French-fried onion rings.
Food
Container
Cover Time
Comments
Coffee cakes 8-in. round dish
No
9 to I I min.
Corn bread
8-
to
9-in. tube
No 1 I
to
13
dish*
min.
No
Mu
ffIns
Paper-lined
(1
Muffin) muffin cups
1 to 1
Y,
min.
(2 to 4 Muffins)
(Do not use 1
to
2X
min.
(3
to 6 Muffins)
foil liners. ) 2Z
to
4F
min.
Quick breads,
8-
to 9-in. tube
No
9
to I 2 min.
from a mix
dish*
Place batter in greased dish.
Sprinkle cooking dish with finely
chopped, canned, French-fried onions
before microwaving. Turn out of pan
upside down to serve.
Use microwave-safe
mufiin
container or
homemade mutin cups, made by cutting
down hot
drink
paper cups. Some
muf]ns
may be done before others. Remove
mufiins
as they
we
done, and continue cooking
remaining
muff]ns
a few seconds
longer.
When
done, toothpick inserted near
center will come out clean. Let stand 15
minutes before turning out of dish. Cool.
*If tube dish is unavailable, microwave in 8-in. round dish with drinking glass
placed
open-end-up in center.
Cakes and Desserts
1. Always use microwave-safe cookware. 4. Cool cake in dish set directly on heat-proof surface or wooden
2. Before adding measured amount of batter, grease dishes or line board 10 to 15 minutes before inverting.
tbem with wax paper. (Do not flour. )
5. Crust on cakes will be soft. [f cake is to be frosted, refrigerate
3. Cakes are done
when toothpick
or long skewer inserted into
cake for an hour to firm exterior surface.
center comes out
clean.
6. Chiffon and angel food cakes are not recommended for
microwaving.
Food
Container
Cover Time
Comments
Baked apples or
pears
Bar cookies
Commercial mix
18
to
20 Oz.
Cupcakes—(6)
Pineapple upside
down cake
Microwave-safe
dish or
casserole
S-in.
round
baking dish
8-in, round dish
Paper-lined
cupcaker
8-in. round
dish
Lid
or
2
to
4 min.
Pierce fruit or peel to prevent bursting.
plastic wrap per piece Core and fill center of apple with 2
No
10
to
No
2
min
tablespoons sugar, I teaspoon butter and
1/8
teaspoon cinnamon. Add 2
tablespoons water for each piece of fruit.
3
min. Grease dish before adding batter. Cut
when cool.
Grease dish before adding batter. Let
5 to 7 min.
stand 5 to 10 minutes to cool before
inverting,
No
3
to 4 min. When cooking several cupcakes, some
will be done before others. Remove
cupcakes
as
they
are
done and continue
cooking
the rest a few seconds longer.
No
10 to I 2 min.
When done, toothpick inserted in center
comes out clean. Invert cake onto plate:
let dish stand over
cake
a few minutes.
15

Cooking Guide
(continued)
Candies
1.
Always
use microwave-safe cookware.
For easy clean-up, melt
2.
Candies which are boiled
become very hot; handle cooking
chocolate in paper wrappers seam side up, or place chocolate in container carefully.
paper bowl to melt.
Food Container Cover Time Comments
Caramel apples 2-cup measure No
2 to 3 min. Unwrap half of a
14-oz.
package of
or
I-qt.
caramels into measuring
cup. Add I
casserole tablespoon water. Microwave, stirring
every minute. Dip 4 apples into mixture.
Chocolate bark 1
X-qt.
casserole
Yes
Place
12
oz. semi-sweetchocolate
piecesin
or bowl container. Microwave to melt. Add
I
cup
whole toasted almonds. Spread over wax
paper on cookie sheet. Chill until
firm.
2 to
2X
min.
Marshmallow crisp Large glass
Yes
bowl
I
min. to In large glass bowl, melt
1/4
cup butter.
melt butter,
Add
10-oz.
package marshmallows,
2X
to 3fi min. cover with wax paper and microwave to
to
melt
melt. Stir in 5 cups crispy rice cereal.
marshmallows Press firmly into buttered 2-qt. oblong
glass dish.
S’Mores Paper napkin or No
15
to 25 Cover graham cracker with chocolate
paper plate
seconds and marshmallow.
Cereal and Rice
1. Always use microwave-safe cookware. 4. Stir or rearrange after half of cooking time.
2. For minute rice, use the same amount of water needed for 5. Microwave time and conventional boiling time are about
conventional boiling. Add regular amount of salt. the same.
3. Cover rice while microwaving. When using plastic wrap,
turn back one corner to
vent.
Food
Container
Cover Time
Commen@
Oatmeal,
I-qt.
casserole No
3 to 5 min.
Increase casserole size for more than one
old
fashioned
or bowl
per serving serving. Increase time about
I
Y,
minutes
for each additional serving you are
cooking. Stir after half of cooking time.
Note: To microwave single-serving packet of instant oatmeal, follow package directions
for amount of water and microwave at High for 1/2 to
I
minute.
Rice, minute 2-qt. casserole
Lid or
6
to 7 min. Add
I
kcups water. Stir after 4 minutes.
( 1
x
cups)
plastic wrap
16

Cheese and Eggs
1. Eggs may be prepared many ways in the microwave oven. Always 3. Cook eggs just until set. They are delicate and will toughen if
pierce whole yolks before microwaving to prevent bursting.
2. Never cook eggs in the shell. Do not reheat hard cooked eggs in
overcooked.
the shell. They will explode.
Food Container Cover Time Comments
Cheese
Fondue
2-qt.
casserole
Cover or To make
MakeBasicWhiteSauce,substituting
plastic wrap sauce
wine for milk. Add cheese and
5 to 7 min.
microwave at High for 6 to 8 minutes,
6 to 8 min.
whisking every 2 minutes.
Eggs
Basic Eggs
Buttered
Plastic wrap I to I
X
min. Puncture membrane of yolk to prevent
custard cup
per egg bursting.
Omelet 9-in. pie plate
No
Melt butter Sprinkle cheese over omelet. Microwave
1
min. 1/2 to 1 minute until cheese is slightly
7 to 9 min. melted.
Poached eggs
1
fi-qt.
casserole Casserole
6 to
8
min. Heat 2 cups hot tap water 5 to 6 minutes
(4 maximum)
cover
Boil 2 cups
on High, Break eggs onto plate, puncture
water.
membrane. Swirl boiling water with
[/2
to
I
X
min.
spoon,
slip
in eggs gently. Cover.
per
egg
Microwave at High
1/2
to 1 min. per egg.
Let stand in water a few minutes.
Quiche 9-in, pie plate No
8 to 10 min.
Pour filling into precooked shell,
Scrambled
Glass
No
314
to I x
Scramble eggs
with I teaspoon butter and I
measuring cup min. per egg
tablespoon milk per egg. Place in oven and
or casserole,
microwave for
hdf
of total time. Stir set
portions from the outside to the center. Let
stand 1 or 2 minutes to
tinish
cooking.
Fish and Seafood
1. Fish is done when it flakes easily when tested with a fork. Center 2. Cook fish with or without sauce. A tight cover steams fish. Use a
may still be slightly translucent, but will continue cooking as fish lighter cover of wax paper or paper towel for less steaming.
stands a few minutes after cooking. 3. Do not overcook fish. Check at minimum time.
Food Container Cover Time Comments
Fillets or steaks
Round dish Wax paper or 5 to 7 min.
Microwave until fish flakes easily. Turn
(1 lb.)
plastic wrap steaks over after half of cooking time.
Shrimp—1 lb.
Pie plate Plastic wrap
4 to 7 min.
Brush with garlic butter before cooking.
(peeled) Rearrange after 4 minutes.
Shrimp—1 lb.
2-qt.
casserole
Lid or
4 to 7 min.
Place
shrimp in casserole. Add 2
cups
(unpeeled)
plastic wrap hottest tap water. Cover. Stir after
5 minutes.
17

Cooking Guide
(continued)
Gravies & Sauces
1.
Cover thick, chunky sauces to prevent spattering.
3. Vary basic white sauce by adding cheese, egg yolks, cream, wine
2. Whisk sauces vigorously with wire whisk once or twice
or herbs.
while microwaving.
Food Container Cover Time Comments
Gravies and
sauces
thickened with
flour or cornstarch
(1 cup)
Melted butter
sauces, clarified
butter (1/2
cup)
Thick spaghetti,
barbecue or
sweetisour sauces
(2
cups)
Thin, liquid sauces
(Au jus, clam, etc.)
( I cup)
Casserole
No
5 to 8 min. Microwave fat,
flour and salt together to
melt and blend. Whisk in liquid and
finish cooking. Increase time I to 2
minutes per additional cup of sauce.
Glass measure No I to 2 min. Microwave butter just to melting. For
clarified butter, bring to boiling then let
stand until layers separate. Pour off and
use clear, top layer.
Casserole
Yes
5 to 7 min.
Prepare as directed in recipe. Microwave,
stirring after half of cooking time. Let
stand 5 to 10 minutes to develop flavor.
Casserole
No
6 to 8 min.
Add flour-water mixture to heated
ingredients. Stir well and microwave
to finish.
Meats
1. Always
use a cooking bag when cooking beef, lamb, pork or veal
3. Allow about 10 minutes standing time for most roasts before
roasts. See package instructions for proper use of cooking bag.
2. After enclosing roast in cooking bag, place in microwave-safe
carving.
dish.
If you use a meat thermometer while cooking, make sure it is
safe for use in microwave ovens.
Time
Food Container Cover (or Internal Temp.) Comments
Beef
Ground,
crumbled
(for casseroles
or soup)
(1 lb.)
(I%
Ibs.)
Meatballs
(1 lb.)
(2 lb.)
Meatloaf
(Round
loaf>
Patties
(4 patties
per lb.)
I to 2 patties
3
to 4 patties
Pot roasts
(Up to
~
Ibs.
)
Tender roasts (rib,
high quality rump,
sirloin tip)
Casserole
Round dish
Pie plate
Ceramic dinner
plate
Pie plate
Pie plate
No
Wax paper or
plastic wrap
Plastic wrap
Wax paper
Cooking bag
Cooking bag
5 to 7 min.
7 to 9 min.
6 to 8 min.
9 to
12
min.
26 to 29 min.
2 to 4 min.
5 to 7 min.
22 to 25 min.
per lb.
Minutes Internal
per
lb.
Temp.
Stir after half of cooking time. Add sauce
or casserole ingredients and finish. To
cook frozen block, microwave 10 to
15
minutes, breaking up and stirring every
5 minutes. Let stand 5 minutes.
Arrange 3/4 to I in. apart in circle around
edge of dish.
Make a well between the edge of meat
mixture and dish to eliminate spill-over
of juices during cooking. Let stand 10
minutes after cooking.
Cover with wax paper or cook uncovered
and turn patties over. If desired add
browning sauce.
Add
1/2
cup water to cooking bag. Turn
over after half of time. Add vegetables if
desired after half of cooking time. Recover
and finish.
Turn roasts over after half of cooking time.
Let meat stand 10 minutes before carving.
Rare
Medium 13 to
16
160°
Well
T
10
to
12
140°
16 to
19
1700
18

Meats
Time
Food Container Cover (or Internal Temp.) Comments
Lamb
Roast, leg or
Pie plate
Cooking bag
Minutm
shoulder
per lb.
Medium
]8
to22
Well
24 to 28
Chops & cutlets
Round dish No 8 to 10 min.
(1 in. thick) 4 chops
Pork
Bacon Microwave-
(per slice) safe plate
Canadian bacon
Microwave-
2 slices safe cookware
4 slices
6 slices
Ham,
precooked:
Pie plate
canned
Ham, slices & steaks Round dish
(1 to 2 in. thick)
Pork chops: 3/4
in.
2
4
Pork roast
Pork sausage
raw (link)
Pork sausage
Microwave-
safe cookware
Pie plate
Microwave-
safe cookware
Microwave-
raw (1/2 lb.: 4 patties) safe cookware
Paper towel
Wax paper
Cooking bag
Wax paper
Plastic wrap
Cooking bag
Wax paper
Wax paper
Internal
Place roast fat-side-down in microwave-
Temp.
safe dish. Turn over after half of cooking
time. Let roast stand 10 minutes before
160°
carving.
170°
Brush
chops lightly with oil. Turn meat
over after half of cooking time.
3/4 to 1 min.
Arrange in single layer on paper towels.
Cover with a paper towel.
Arrange in single
layer.
I to
I
X
min.
2 to
2X
min.
2fi to 3 min.
15 to 19 min.
Place fat-side-down in dish. Turn ham
per lb.
over after half of cooking time.
18
to 27 min. Turn over after 10 minutes.
Brush with barbecue sauce or browning
5 to 18 min.
agent, if desired. Turn over after half of
8 to 20 min.
cooking time. Let stand covered 5 to 10
minutes before serving.
5 to 18 min.
Turn roast over after half of cooking
per lb.
time. Microwave to an internal -
temperature of
170°F.
1
to
I
X
min. Arrange in single layer. If cooking 6 or
per link
more links, rearrange after half of
cooking time.
5 to 7 min.
Arrange in single layer. Turn over after
half of cooking time.
Veal
Chops
See
lamb
chops
above.
Roast
2-qt.
oblong
Cooking bag 18 to 22 min. Place roast fat- or cut-side-down. Turn over
(shoulder)
dish per lb. after half of cooking time. Let roast stand
10 minutes before carving.
Slice
thinly.
19

Cooking Guide
(continued)
Poultry
I I
If
you
use a meat thermometer while cooking, make sure it is
safe
for
use in microwave
o“{ens.
Food Container Cover Time Comments
Chicken
Pieces Plate or round
Wax paper 2 to
2X
min.
Arrange in single layer in cooking dish
dish
per piece so thickest meaty pieces
are
to outside
edges of dish. Turn pieces over and
rearrange after half of cooking time.
Whole
Round dish
Cooking
bag
10 to I 2 min.
Slit
bag
near
closure to vent. Close
(unstuffed) per lb.
securely with plastic tie. Cook breast-
side-down. Turn over after half of
(stuffed) Round dish Cooking bag I 7 to 20 min.
cooking time. Cook to
190°F.
internal
per lb. temp. Let stand 5 to 1 () minutes.
Cornish Hens
Halves
Round dish Wax paper
11 to I 3 min.
Arrange skin-side-up in dish, on bed of
per lb.
stuffing, if desired.
Whole (stuffed
Round dish
Wax paper
9 to I I min. Place breast-side-down
in dish. Turn
or unstuffed) per lb.
over after half of cooking time. Shield
tips of wings and legs with
foil,
Vegetables
1. Always use microwave-safe cookware. 4. Cover vegetables when cooking. If using plastic wrap, turn back
2. Salt vegetables after cooking. Salting before cooking may cause one corner to vent.
darkening and dehydration of surface. 5. Larger vegetable pieces will take longer to cook than
3. Arrange vegetables, such as asparagus, with the thickest pieces to smaller pieces.
the outside of the dish, 6. For more even heating, stir or rearrange vegetables
during cooking.
Vegetable
Amount
Time
Comments
AsQaragus
(fresh cut)
(fresh spears)
(frozen spears)
Beans
(fresh green)
(frozen green)
(frozen lima)
Beets
(fresh, whole)
Broccoli
(fresh cut)
(fresh spears)
(frozen, chopped)
(frozen spears)
[
lb.
(3
CUPS)
CUt
into I - to 2-in. pieces
1 lb.
10-oz.
package
I lb. cut in half
10-oz. package
10-oz. package
1 bunch
1 bunch
(1X to 1
X
Ibs.)
I bunch
(1X to I
X
lbs.)
10-oz. package
10-oz. package
5 to 9 min.
6 to
10
min.
6 to 10 min.
12 to
15
min.
7 to 9 min.
9 to I I min.
25 to 30 min.
I I to 13 min.
12 to I 5 min.
6 to
8
min.
7 to 9 min.
In 2-qt. casserole, place 1/4 cup water.
In
I-qt.
casserole.
In I
fi-qt.
casserole, place
1/2
cup water.
In I -qt. casserole, place 2 tablespoons water.
In I -qt. casserole, place
1/4
cup water.
In IX- or 2-qt. casserole, place
1/2
cup water
In 2-qt. casserole, place 1/4 cup water.
In 2-qt. oblong glass baking dish, place
1/4
cup water,
In I -qt. casserole,
In I -qt. casserole, place
3
tablespoons water.
20
Table of contents
Other GE Microwave Oven manuals

GE
GE JKP69 User manual

GE
GE Spacemaker HDM1853 User manual

GE
GE JES1334 User manual

GE
GE DVM1850DM User manual

GE
GE Spacemaker II JEM23F Installation instructions

GE
GE JGHP66GEN User manual

GE
GE Hotpoint RE1440H Use and care manual

GE
GE Monogram ZMC1095 Series User manual

GE
GE JES1033 User manual

GE
GE jes1290 User manual
Popular Microwave Oven manuals by other brands

HOMEDEPOT
HOMEDEPOT VISSANI VSCMWE11S2SW-10 Use and care guide

Silvercrest
Silvercrest SMW 900 EDS B2 Brief informations

Magic Chef
Magic Chef MCD991R operating instructions

Perfect Aire
Perfect Aire 2WSSM11 user manual

Kenmore
Kenmore 721.80522 Use & care guide

ACP
ACP Amana HDC18SD2 Quick start & reference guide