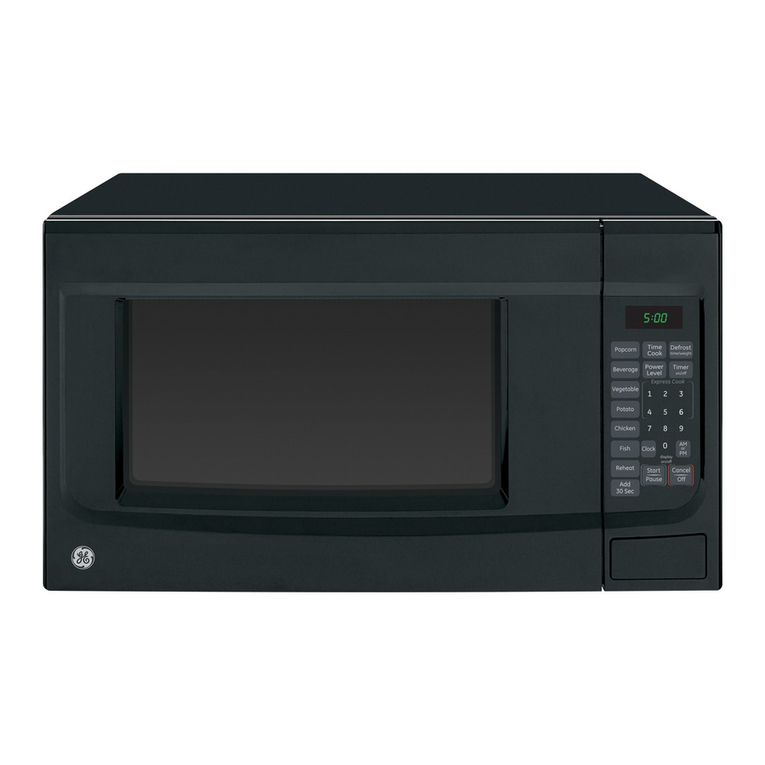
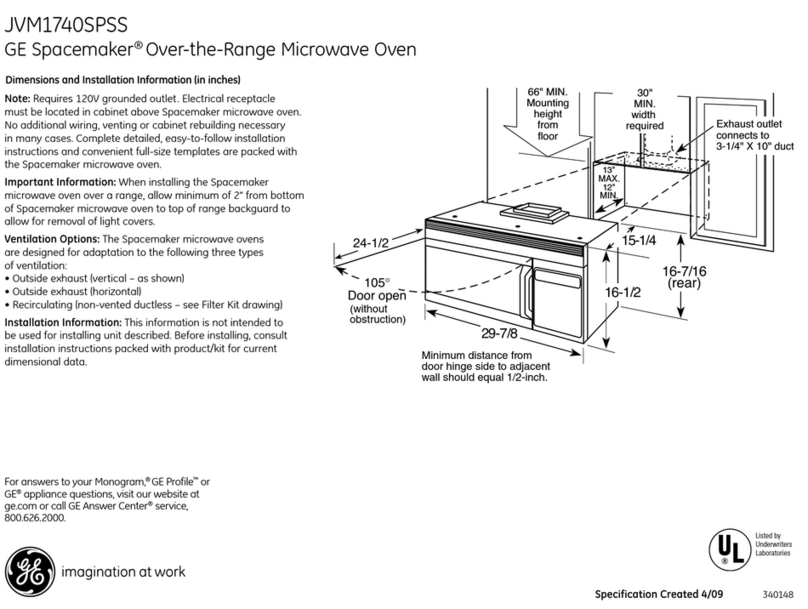
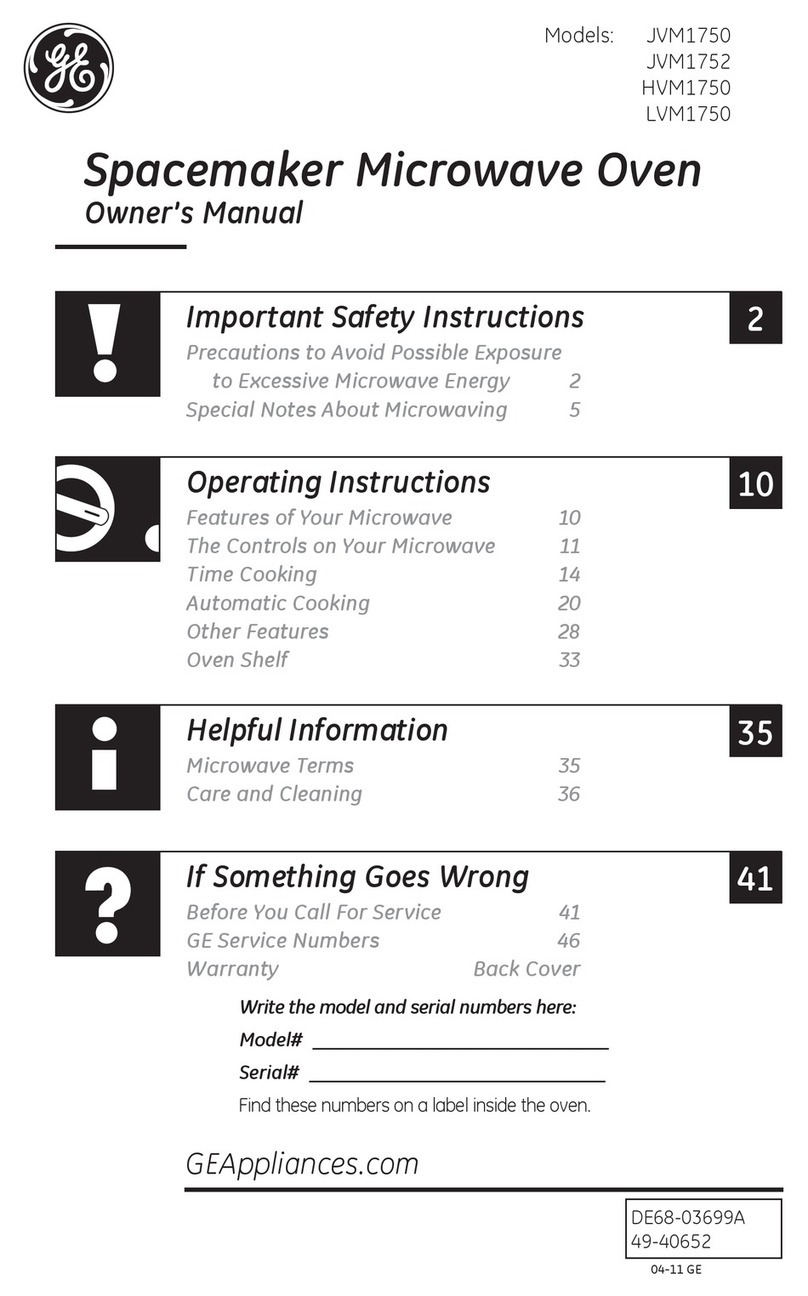
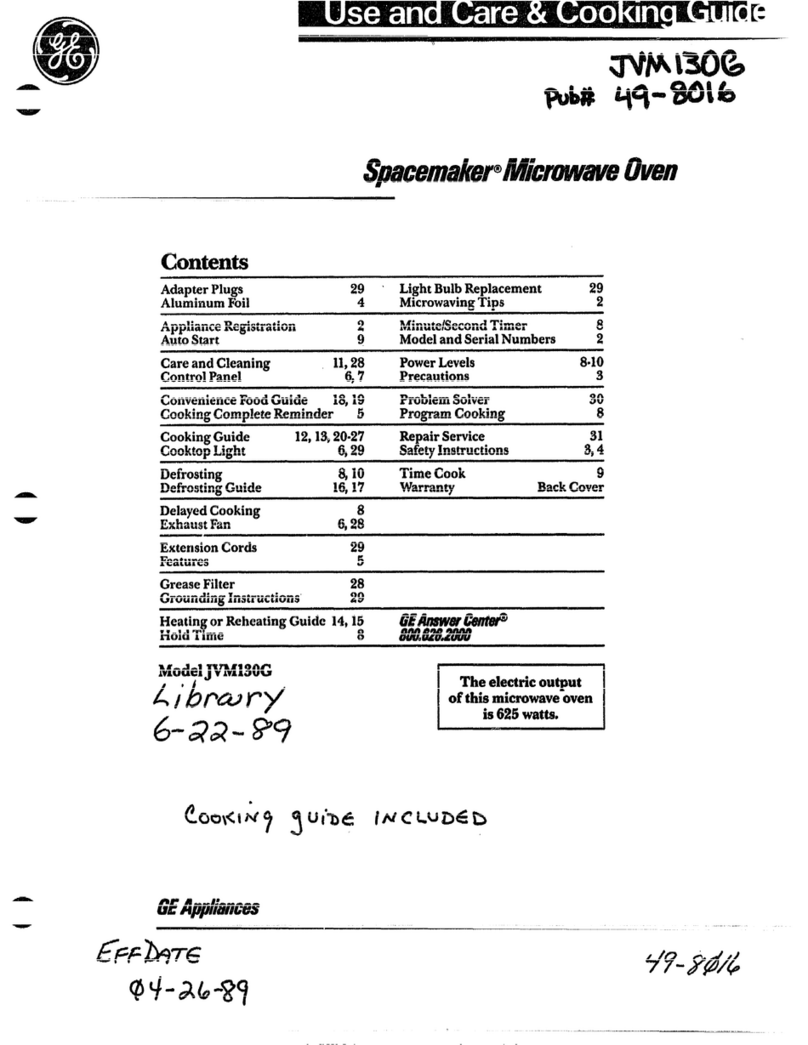
GE JE740 User manual

700Watts
Model: JE740
Microwave Oven
Owner's Manual
Important Safety Information
t4__<:" <">" ............ " L
[] 2
Operating Instructions
2
Helpful Information
H
If SomethingGoes Wrong
[]
GEAppliances

READ ALL SAI_}2TY
INFORMATION BEFORE USING
For \,otlr S_llel_, lhe ill[[_I'lll_tdoll ill ]his llla/ltl_l]
musl be lollowed to minimize ihe risk of fire
PI:?IgI'_A 1FIYK) 7_]'q or explosion or ,o prevent property damage,
FII_IaF-IUIlLI2_O personM injure° or loss of lift,.
TO AVOID OoNotAttempt
7"0EX(_2SSIVE
MICR 0 WAVE
;Y
lo operaw this oven
with dw door open
since open-door
operallOll Call restll|
in harmfld exposure
Io lnicrowaxe cnerg}.
his illlpor/_ll| 11Ol to
detk'at or tamper with
llle said'Iv inlcrlocks.
Do Not Operate lhe oven
if il is damaged, 1| is
parlicularly important
thai/he OVell door close
properly and lhm 1here
is no dmna_e lo lhe:
Idoo_ bcmk
2hinges and la|ches
(broken or loosened L
311oo_ seals mM sealillg
SLII'ID (e,'_
Do Not Place ally' obiect
be Iween /he oven h'on_ The Oven Should Not
late and Ihe door or be adjusted or repaired
allow soil or clealler b}, all_-Olle exceln
residue 11 accumulate properly qualilied

Start Here!... Before using your Microwave
Write down the model
and serial numbers here.
Th('v arc (m a label inside
t|/o ()\ell
Model number
Serial number
Date of purehase
Staple your receipt to the
inside back co ver of this
manual You will need it
to make a warranty claim.
Read this manual.
It co]ltains Jllstrtlctions to
help you use and maintain
VO/IF llli( I?OW;-IV(' properly.
ff you received a damaged
oven.. ,immediately contact
the dcah'r (or bufl(h'r)
that sold you the oven.
Save time and money.
Check the section tith'd
"If Sometlfi_g (;oes
Wrong." This section
helps you solve COlIlIIlOI/
problems that might occm:

READ ALL SAA 2TY
INFORMATION BEFORE USING
ii This inicrowave oven is
ii not approved or tested
)for inarine use,
•Read and/ollow tile
spe(ific "I)re(autions to
A_oid Possibh' Exposure
to Excessive Microwave
Energ)" on page 2.
• This appliance must be
grom_ded. Collnect olllv
to properly groml(led
omlet. See (;roml(ting
Instru(tions sec6on on
t)age 9.
• I)o n()t m(mm dlis
at)t)lian(e over a sink.
•Install or locate this
appliance only in
accordance with the
provided Installation
hlstl?llCtions.
• Be certain to place the
t_'ont sm:/i_ce of die door
three in(hes or more
ba(k t_'om the (omltertop
edge to avoid ac(i(h'mal
upping ot die appliance
in normal usage.
• DO not l//Ollllt tl/e
microwave oven over
or near any t)ortion of
a beatiDg or (()()king
at)pliam e.
• I)o not store an?dhing
dire(tly on top of the
mi(rowave oven sm:L_(e
wbeD tl'm oven is iD
ot)erat]Oll.
• Do not operam any
heating or cooking
appliance beneath
this mi(rowave.
• Use this at)t)liance only
/or its linen(led else as
described in this guide.
Do not use corrosive
chemicals or vat)ors in
this appliance. This
mi(rowa_e men is
sl)ecifically designed to
heal dl_ ' or cook/ood,
and is not linen(ted
/i)r laboratory or
industrial use.

I!1
• Do not operate this
appliance if it has a
dan/aged power cord or
plug, if it is not working
properly or if it has been
damaged or dropped.
• Do not cover or block
any openings on the
appliance.
• Do not store this
appliance outdoors.
Do not use this product
near watet--/br example,
in a wet basemem, near
a swimming pool, near
a sink or in similar
locations.
• Keep power cord away
Dora heated surtaces.
• Do I/or il/ll//erse power
cord or plug in water.
• Do not Metpower cord
hang o_er edge of table
or COtllltel%
• To reduce the risk of fire
in the oven cavitu:
-- Do not overtook tood.
Carefifllv attend
appliance when paper,
plastic or other
combustible materials
are placed inside the
o_en while cooking.
-- Remove wire twist-ties
and metal handles
fi'om paper or plasli(
containers be/ore
placing them in the
()Veil.
-- Do not use the o_en
tor storage ptlrt>oses.
Do not Heave paper
products, cooking
utensils or tood in the
oven when IJ,ot in use.
-- If materials inside oven
ignite, kee t) the oven
door (lose(l, tunJ, the
ovelJ, oil _++nd(liSCOllll('Ct
the l)ovver cord, or shut
oil pov, er at the fllse or
cir( uit breaker panel.
If the door is opeiled,
the fire may spread.
• See door sur/hce
cleaning instructions in
the Care and Cleaning
section(s) of this guide.
• (',E does not support
any servi(ing of the
microwave. We strongly
recomlnelld that you do
not attempt to servi(e
the mi( rowave yourself.
• As with any appliance,
close supervision is
ne(essarx when used
bv childretL
SAVE THESE INSTRUCTIONS

SPECIAL NOTES ABOUF MICRO WAVING
Ar(ing is the l//i( FO+V+r_l+x+e
term tot st)arks in the
the STOP/CLEARpaa men. Ardng is (aused by:
and correct the problem. • Metal or foil tou(hing
the side of the o'_ell.
• Foil not molded to tood
(utmn:ned edges a(t like
amemlas).
• Metal, such as twist-ties,
poultry pins, or gold-
rimmed dishes, in
the II/i cF()wt+lvt.'+
• Recycled 1)al)er towels
containing small metal
pieces being used in
the lilic]x)w;4ve+
• Do not pop popcorn in
your microwave oven
unless in a special
microwave popcorn
accessory or tmless you
use l)Op(orn labeled tor
use in microwave ovens.
• Sol//e t)lTodHcts Stlch as
whole eggs and sealed
eOl/tail/ers 1()17 exalill)le ,
closed jars--are able to
explode and should not
be heated in this
mi_ rowa_e o_en. Such use
of the microwave oven
could resuh in injury.
•Do not boil eggs in a
mi(rowave oven. Pressure
will build up inside egg
yolk and will (ause it to
burst, possibly resulting
in illjury.
• Operating the microwave
with no tood inside for
more than a minute or
two lIlay eatlse (Jail/age to
the o_ell _ll/d Co/lld stal't a
fire. It increases the heat
arom_d the magneu:on
and can shorten the lilt'
of the ovel/.
• Foods with unbroken
outer "skill" such as
potatoes, hot dogs,
S_I/IS_Igcs, t()Ifl_tt()es,
apples, chicken li_ers
and other giblets, and
egg yolks should be
t)ier(ed to allow steam
to escape during
(()()king.

I!1
SAFETYFACT
SUPERHEATED WATER
Liquids, such as water,
coffee or tea are able to
he overheated beyond
the boiling point without
appearing to he boiling.
Visible bubbling or boiling
when the container is
removed from the microwave
oven is not always present.
THIS COULD RESULT
IN VERY HOT LIQUIDS
SUDDENLY BOILING OVER
WHEN THE CONTAINER IS
DISTURBED OR ASPOON
OR OTHER UTENSIL IS
INSERTED INTO THE LIQUID.
To 1"++'(1metilt' risk ot iniury
to persons:
-- I)o not o_erlleat tile
liquid.
-- Stir tile liquid both
be/ore and hal['wav
through heating it.
-- Do not use straight-sided
containers with narrow
necks.
-- Atter heating, allow tile
container to stand in
tile n/icrowa_e oven tor
a short time belore
tel/loving tile contailleF.
-- Use extrel//e care when
inserting a spoon or
other utensil into tile
container.
•A\ old heating baby J+ood
in glass jars, even with
tile lid off. Make sm:e all
inihm tbod is thoroughly
cooked. Stir ]+ood to
distribute tilt' heat evenly.
Be careful to prevent
scalding when warn/ing
[orulula. The container
Ula_ teel cooler than tile
tbrulula really is. Alwms
test tile tbrumla t)e/i)re
teeding tile baby.
•Don't det_'ost t_'ozen
beverages ill narrow-
necked bottles (especially
carbonated beverages).
Even if tile container is
opened, t)ress/lre Call
build up. This can cause
tile COlltainer to btlFSt,
possibly resulting in
inj/u).
• t lot tbods and steam
Call cause burns. Be
careflll when opening
rely containers of hot
fi)od, inchlding popcorn
bags, cooking pouches
mid boxes. To prevent
possible il_im:}, direct
steam (_%_r(l_'/i'()'_ hmlds
and /hce.
•I)o not overcook
potatoes. They could
dehydrate and catth
/ire, causing damage
to your o_en.
•Cook meat and poultr}
thoroughly-meat to
at least an IN I'ERNAI,
tenll)erature o/I60'F
and poultry to at least an
INTERNAl temperature
of 180°E Cooking to these
tenlperat ures usually
protects ag_dnst tbodborne
ilh/ess.

SPECIAL NOTT2S ABOU£ MICRO WAWNG
Make sure all cookware
/leed ill VO/IF//licrowa_e
o_en is suitable fi)r
lnicrowaviug. Most glass
casseroles, cookiug dishes.
lIieasllrJllg ClipS, ctlstard
ClipS, potter} or (l/ilia
dlllllevware which does not
l/a\e tnetallic trim or glaze
with a metallic slleeu cat
1_' llae([. _Ol//e cook_are
is labeled "s/lira|lie t(lI"
l/licrowa VIII_.
HOW I0 test for a microwave
safe dish
•[I ",ou are 1J,ot sttre Jla
dish v, microwa\e-sali.'.
use thia test: Place ill the
()Veil l>ot]l time dish volt
are testhlg al/d a glass
uleasuring CUll filled with
|Oil l) O/ ]*(ater--eet time
uleaeuring CUll either
ill or I/ext to time dish.
Microwave ] l//Jlltlte at
high. /f the dish heats.
it should uol be ttaed
t()r //liCrOWaVillg.
If tile dish remains cool
and only tile water ill tile
CUll heats, then tile dish
is microwa_ e-sat_'.
•If you /lee a l/lea[
thern/ometer while
cooking, make sm:e
it is sale tor use ill
microwave ovens.
• Do not use recycled
paper tlroducts. Recv( led
paper towels, napkins
all(t waxed tlaller call
contain metal flecks
which may cause arcing
or ignite. Paller llroducts
(ontaining nylon or
nylon filaments should
be avoided, as they lna_
also ignite.
•SOl//e stvro]_)am tlTa_,_;
(like those that meat is
t/aekaged on) ha\e a thin
strill of metal embedded
ill tile bottom. When
lllicrowave(I, tile llletal Call
burn the floor of the oven
or ignite a t/aper towel.
• I)o not use tile microwa\e
to (tr} newsllallers.
• Not all t)lastic wral) is
suitable tor use ill
nlicrowave o\ ens. Check
tile t/ackage R)r t/rot/er use.
• Paller towels, waxed
tlal/er and t/lastic wrap
call be used to cover
dishes ill order to retain
l//oistm?e a11d prevellt
spattering, ge sure to
Vellt plastic wrall so stealll
Call escape.
• Cookware lilav becollle
hot because of heat
transti'rred /i'on/ the
heated/ood. Pot holders
mm be needed to handle
tile ( ookware.
• "Boilable" cooking
pouches and tightly
closed plastic bags should
be slit, tlierced or vented
as directed by tlackage.
If they are not, t)lastic
co/lld tlllrst during or
inunediatelv atier
cooking, l/ossitlly resulting
ill il_jur}. Also, tllastic
storage containers should
be at least partially
uncovered because they
/orm a tight seal. When
cooking with containers
tightly covered with
tllastic wrap, remove
covering carefllllv and
direct steal// awav ]i'ol//
hands and time.

I'.1
• Use foil only as directed
in this guide. TV dumers
IIIAV be nlicrowaved ill
{oil tra}_s less than 3/4"
high; remove the lop/oil
cover and return the tray
to the box. When using
toil in the mi(rowave
oven, keep the toil
at least 1" awa_/i'om
the sides of the oven.
GROUNDING
• Plastic cookware--Plastic
cookware designed tor
microwa_a • cooking is very
useflfl, but should be used
(areflfll}. E_en mi(mwa\e-
sate plasti( may not be as
tolerant of o_'rcooking
conditions as are glass or
ceramic materials and may
so/ien or char if sut!iected
to short t_elJo(ts of
o_'rcooking. In longer
ext)oSlll?es to ovel'cooking,
the/ood and cookware
couM ignite.
Follow fllese guidelines:
IUse microwa\e-sa/_'
plasti(s only and use
them in stri(t (omplian(e
with tile cookware
l//[-in/lt_t( |/lrer's
recol//lilen(tations.
2[)o not II/icrowave el//l/tV
conrail lers.
3Do not t/ennit children
to use plastic cookware
without (omplete
supervision.
INSTR UCTYONS
i !i(
WARNING
Improper use of the
grounding plug can result
in a risk of electric shock.
This al/t)liance must be
grounded. In tile event of
an electrical short (ir(uit,
grom/(ling red uces the
risk of electric shock b_
providing an escape wire
tot the ele(tric current.
This appliance is equit_ped
with a power (ord having
a gr(mnding wire with a
gr(mnding t/lug. The l/lug
must be t/lugged imo an
outlet that is t_roperly
installed and gromlde(t.
Consuh a qualitied electrician
or setMce technician il tlle
g_xmn(ting instructions are
not completely mlderstood,
or il (Ioul)t exists as to
whether the applian(e is
t/rol/efly gTom/ded.
If the outlet is a standard
2-t/rong wall outlet, it is
your t/ersonal resl/onsibility
and ot)lig_ltion to ha_e it
replaced with a prollerly
gr(mnded 3-prong wall
outlet.
Do not m/(ter any
circmnstances cut or
remove the third
(gromld) prong/i'om
the t/ower (ord.
For best operation,
phtg this al_pliame into
its own electrical outlet to
prevent flickering of lights,
blowing of fi_se or tripping
of circuit breaker.

C,R0 UNDINC, INS TR UC TIONS
TEMPORARY METHOD
(Adapter plugs not
permittediacanada) [
Align large _ (_I I_ ]
_J Ensur_propergrourTd
_andfirrnc_onnection
]"T beforeuse.
Usage situations where
appliance's power cord will
be disconnected hdrequently.
l_),.'(atls(' of ])otelltial saJet}
hazer(Is [[iI(l('r certHill
conditions, we strongly
recouunend agahlst the
use of ml adapter plug.
Itowever if}ou still elect
to use an adapter, _dlere
local codes permit,
a "IEMPOI_ \P,Y
CONNECI'ION l/la_
be made to a properly
grouIlded two-prong wall
re(et)ta(le b) the use ola
U[, listed adapter which is
available at most local
har(lware s[ores.
The larger slot ill the
_ld2q)[t:r l/Ills[ lie aligned
'_ith die larger slot ill the
wall recel/tacle t() proxide
i:)roper i)olarit? ill the
(Olllle(tiOll ot the I)()x_er
cord.
CAUTION: Attaching die
adaptor ground terminal
to tile wall receptacle cover
screw does IIOt grotllld the
appliailce uIlless the co_er
screw is lUetil], and llot
insulated, and the wall
receptacle is grounded
through the house wiring.
'_ilu should have die
circuit checked 1)x a
(lualified electriciall to
make stlre the receptacle
is properly grounded.
Whell disconne(ting tile
p(mer cord h'om the
adapte_; alwa}s hold tile
adapter with Olle halld. If
this is not doIle, tile adapter
ground terminal is very
likely to break with repeated
use. Should this happen,
D() NOT IjSE tile appliance
until a proper gromld has
again been established.
Usage situations where
appliance's power cord will
be disconnected frequently.
Do not use an adapter plug
in these situations because
flequellt disconnection of
the power cord places
undtt(! strain (m the adapter
and leads to eventual tailure
of the adapter ground
terminal. "_)u should l/axe
tile txxo-prong wall
receptacle replaced with a
three-prong (grounding)
receptacle 1U a qualified
electriciall belore using
the appliance.
A short power supply cord is
provided to reduce the risks
resultiilg fi:om becoming
entangled in or tripping over
a longer cord.
l_:xmnsion cords may be used
it _ou are carefifl in using
them.
If an extension cord is used--
IThe marked electrical
rating of the extension
cord should be at least as
great as the electrical
rating of the appliance;
2The extension cord l/l/IS[
be a grounding-bile
34xire cord and it Intlst
be phlgged into a 3-slot
outlet;
3The extensiol_ cord
should be arranged so
that it _ill n()t drape over
tile comltertop or tal/letop
where it call lie pulled (m
b} childreIl or tripl)ed
o\er Wlil/telltiOl/all\.
lfyo/l /lse aI/ exteI/SiOll COIX/,
the illterior light ma} flicker
ail(] th(' blow('r s()ttl/d ilia} r
var} wlleI/ tile luicr()wa'_'
ow:n is on. Cooking times
l/la} rbe longel, too.
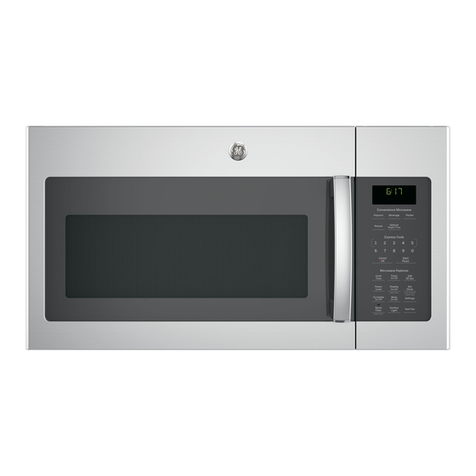
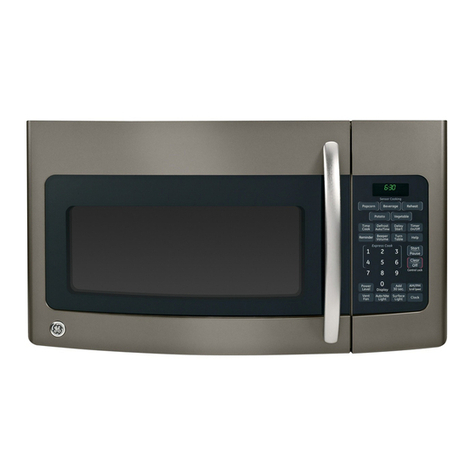
1 Door Latches.
2 Window with Metal
Shield. S€reen allows
cooking to be viewed
while keeping
microwaves confined
in the o_en.
3 Touch Control Panel
Display.
4 Door Latch Release.
Press latch r('h'_sc
to open door.
5 Removable Turntable.
Turnmbh' and support
must be in ])lace wh('n
using tlle o_en. The
ttlrntable iilav be
removed tbr cleaning.
6Convenience Guide.
NOTE: Rating ])late, oven
vent(s) and oven light are
located on file inside walls
of the microwa_,e oven.

The Controls on Your Microwave Oven
(Tlnw,'gt_o_,'l this ma?tual, .fi_alun_s and al)l)eara+_ce ma) va_3./i_z )our model.)
You Call
microwave by
time or with the
convenience
features,
ATimeFeatures
Press Enter
TIME COOK (Press Once, twice or three times) Amount of (ooking time.
30 SEC. St;cll:tS _l/ltOlll_l[i(_lll_!
POWER LEVEL t)()_%r(__level 1-9
(aUtOlIl_lti(_llly Set at [ Ji).

ge
ConvenienceFeatures
Press Enter
POPCORN .....
;).:)oz., ;).0 oz. or 1.75 oz. pa(kage
PIZZA 1-3 sli( es
BEVERAGE ] (up (8 oz.) or2 (ups (16 oz.) bexerage
POTATO 1_ serxings
VEGETABLE 1_ (ups
REHEAT Food type, serving size
AUTODEFROST Food Wt)(!,t()od Weight

@ @®
_'nteri,lg me t_'amre
time tor TIME (OOK,
ii 2 Enter Cooking time.
3 Press POWER LEVEL.
ii4Select desired powe'
:level I-9.
Variable power levels add
flexibility to microwave
cooking. The power levels
el/ Ill(' l//i( row}l_e OVel/
can be compared to the
surthee units on a range.
Power level Iti or flfll
power is the thstesl way to
cook and gi_es you 100%
t)ower. E_tch t)ower level
gives you microwave
el/erg} a certaill t)ercellt ot
tile time. Power level 7 is
microwave energy 70% of
die time. Power level 3 is
energy 30% of the ume.
A high selling will cook
t_sIer l)uI t()od Iil_l_ lleed
more/i'equem stirring,
rotatil/g or ttlrllil/g OVel2
Most cooking will be done
on power level Ill. A lower
seeing will cook more
e_enlv and need less
sdrring or rotating of
tile/ood.
Sol//e t()ods l//_lV have
belier [laver textllre or
appearance if one of die
lo_*er seuings is used. Use
a lower power level when
cooking/oods that have
awn(teHcy to t)oil oveL
smh as scalloped potatoes.
Rest periods (when the
mi(rowave energy (ycles
oil) give lime tor tile tood
Io 'equalize" or lralist;t'r
heal _<+ tile inside ol tile
/ood. An eXmnl/le o/this is
NI/oVvll wilh power level A--
tile de/kosl _• (le. II
i//i(row_l_,e el|el'_'*v (Jill 1101
CVt-]e 011. lhe olltside O/tile
lilod w(luht cook t/clbre
tile inside \*as detrosted.
/lere are Nellie exal/lples
el tiNeS /()r V_lriOHS pOWer
levels:
PowerLevel BestUses
Hi Fi_,h.ba_c,n.
vcgeta bh,s.
boiling liquids.
Med-High 7 Gentle
_ uokiIlg (I1
I[ICD| alld
poultry;
bakiJ _
casseroles
and rehealimL
Medium 5 Slow cooking
mM lend( t+izing
such as
SleWS )Ilia l(_aa
tellder tills
ot lnt ii.
Low2or3 Deti'osling
withoul
cooking;
simmerin#,;
delicate sauces.
Warm I K_,_ping tbod
_,va Fin !villIol
overcooking;
s_mening
butten

Time Features
a,
®®®
®®®
®®®
®
@
::Time Cook allows you
iitO I,r0granJ UP tO three
ditIerent cooking stages.
{:In addition, you Can ;:
::also set One Auto
Defrost stage tor a total
of tour stages. See ti!e
iiAuto Defrost section
toT instructions On how
i to set Auto Defl'ost.
::1Press TIME COOK.
::2 Enter cooking time.
i_ iiii
::3ChangepowerteveI
:: if you don't want full
power. (Press POWER ,
Time Cook I
/\]lows VO/I tO lIli/row}tve
tor any time up to 99
minutes mid 9{} seconds.
Power level I{i is
automatically set, but
you ma} change it tor
more/lexibilitv.
You may ol/en the door
during Time (:ook to
check the/ood. Close the
door and press S'IAP.T
to resume cooking.
Time Cook II & III
I x'ts you /hange l)ower
levels automatically during
cooking. Here's how to
do it:
I Press TIME C()()K.
2Enter the first cook time.
3Change the power level
if you don't want full
t}owel: (Press POWER
I J_;VEI, Select a desired
power level 1-9.)
4Press TIME COOK
again.
5 Enter the se/ond cook
time.
6Change file power level
if you don't want lull
t}owel: (Press P()WER
I,EVEI, Sele/t a power
level 1-9.)
7Press ST\R'I, or, to set
a third cooking stage,
Tel)eat steps 4-6 and
press START
Time Cook / will count
down tirsi,/i)ll()we/t l}v
Time Cook II, then Time
Cook III. If an Auto
Del]'ost stage was set,
it will com/t down belore
the Time Cook stages.

Cooking Guide for 7 me Cook
NOTE:Use powerlevel Hi unless otherwisenoted.
Vegetable Amount Time Comments
Asparagus
(li'est! Spears) In l I/_(It.(_lsserole, pla(e 1,/4 (up _%r_'.
] lb.
(ti'ozen spears) lO-oz, pa(kage
Beans
(ti-esh grccn) ] lb. (ut in half
(li'ozen green) lO-oz, package
(ti'ozen lima) lO-oz, package
Beets
(ti'csh, _holc) 1 l)u,/(h
Broccoli
(fi-est! ci!t ) ] t/1111(:1/
(1V_ m 1½ lbs.)
(fi'est ! spears ) ] bmlch
(1V_ m 1½ lbs.)
(ti'ozen, 1 O-oz. package
chopped)
(li'ozen spears) lO-oz, package
Cabbage
(n-_.sh)
(+vedges)
I medimn head
(about 2 lbs.)
Carrots
(Ii'csl_, sliced) 1 lb.
(Ii'ozen) 10-oz. pa(kage
7 to 10 rain.,
Med-I tigh (7)
5 t() 8 min.
12to 17rain.
6 to 9 rain.
In 1-qt. (asserole.
6 to 9 rain.
18 to 2:5 rain. In 2-qt. (asserole, pla(e 1/2 (up water.
In 1_/_<tt. (asserole, place 1+/2 (up water.
5; •
In 1-qu (as._erole, pla(e 2 tablespoons
'e+rater.
In 1-qu (asserole, pla(e 1/4 (up t_ater.
In 2-qt. (asserole, l>la(e 1/2 (up water.
In 2-qt. (asserole, pla(e 1/2 (up water.
In 1-qt. (asserole, pla(e 2 tablespoons
W_lt (!l'.
Cauliflower
(flo-_erets) I medium head
(li'esh, vd!ole) ]me(titan head
(fi'ozen) 1 O-oz. t)a(kage
9 t() 14 min.
9 to 17 min.
5 to 8 min.
6 t() 9 min.
5 to 8min.
In 1½-qt. (asserole, t)la(e 1/4 (up water.
In 1-(it. (asserole, pla(e 2 tablespoons
W_lt (!l'.
In 1_/_,-or 2-qt. (asserole, pla(e 1/4 (up
W_I t (!l'.
In 2- or 3-qt. (asserole, pla(e 1/4 (up
8to 13 min.
7to 14 min.
9to 13 min.
5to 8 min.
5to 8 min.
7 to 10 min.
In 2-qt. (asserole, pla(e 1/4 (u t) water.
In 1-qt. (asserole.
In 1-(it. (asserole, t)la(e 3 tablespoons
W_lt (!l'.
In 2-qt. (asserole, pla(e 1/2 (u t) water.

Corn
ifi'ozen kernel, ]O-oz. package
Corn on the cob
(]i'esh
(]rozeIl }
Mixed
vegetables
(lrozell )
lear
] O-oz. package
Peas
(Jresh. shelled) 2 lbs. unshelh'd
([7"ozel]) ]!)-oz. t)a(kage
Potatoes
_J resh. (t/bed, 41 t)oltlloes
\_hilel t{ tO _ OZ. etl(h
dt'esh, whole. ] _; io _ oz.)
sweet or white,
Spinach
(li'eshl 10 to 16 oz.
:rozelL l (}-oz. t);'ckage
ehoplJed
mid leal,
Squash
(fi'esh. summer 1 lb. sliced
;4lid yellow,
_Willlelk aCOl'U ] to 2 s(llltlsh
or bmler]mil _d)out 1 lb. each)
4to 8 rain.
3 to 5 rain.
)er ear
5 to 7 rain.
2 ill 4 rain.
)er e_lr
4 ill 8 rain.
9 ill l 2 rain.
4 ill 8 rain.
ll to14min.
2to 5 rain.
5ill 8rain.
5ill 8rain.
4 ill 7 rain.
7 ill 11 rain.
In 1-qt. casserole, t)lace 2 tablesl)oons
water.
In 2-qt. glass baking dish, place corn.
If corn is in husk, use no water; if
corn has been husked, add 1/4 eell)
water. Rearrange a/ler half of time.
Place in 2-qt. glass 1)aking dish.
Cover with vetoed t)lastic wrat).
Rearrange alter half of time.
In 1-(tt. casserole, t)lace 3 tablesl)oons
water,
In l-qt. casserole, t)lace l/4 eu l) w;'aer.
In 1-qt. casserole, t)lace 2 tablest)oons
water.
Peel and cut into 1 inch cubes. Place in
2-(it. casserole with 1/2 cup watet_ Stir
a/let half of time.
Pierce with cooking tork. Place in
center of tile ovell. Iet stand 5 l//in/lleS.
In 2-qt. casserole, t)laee washed st)inach.
In 1-qt. casserole, place 3 tablest)oons
water.
In 1½-(U" casserole, place 1/4 cu l) wate/_
Cut in half and remove fibrous
membranes. In 2-qt. glass baking dish,
place squash cut-side-down. "I'm:n
cut-side-up a/let 4 minutes.

7 me Features
Yoll (_tl/ /lse this fe_ttllre
[WO W_tX; S;
•/t will add 30 seconds 1o
the time counting down
each lime the pad is
pressed.
•It can be used as a qui(k
wa_ to set 30 seconds ot
(()()king time.
Convenience Features
Use only with prepackaged
microwave popcorn weigh!ng
1.75 to 3.5 ounces.
How to Use the
Popcorn Feature
1Follow package
instructions. Place
the package of t)ot)eorn
in the center of the
microwave.
2Press POPC()RN once
/i)r a 3.5 (mnce package
of pOl)COrll, twice/i)r
a 3.0 (mn(e 1)a(kage
or three {lines {()r a
1.75 omlce t)ackage.
The OVel/ Sl_tr|s
automatically.
The I)izza t_ature is for
reheating 1-3 sli(es ot
Pr(ss PIZZ\ one(/k)r on(
slice of pizzas, ink(/or mo
slices or three times lot
tin:(( slices. Th( ox(n starts
automatically.

ii i _ i i _£ i i i
The B('_erage ti'atare works
best tk)r heating a beverage
that is at room temperature.
I)ress BEVER,\(;E once tor
1 (u]:) (8 oz.), or tvvi(e for
2 cups (16 oz.). The ()',1'_]
starts automatically.
Beverages heated with the
Beverage feature may be
very hoL Remove the
container with care,
\
potat9
The Potato ftamr{ cooks up
to/k)ur 8-10 ounce t)otato{ s.
Press POT\T(). T]]{'
S{'lWil/g siz{' is _+.tltOl//:ati( ;+d|_'
set at l, but: can be changt'd
by 1)ressing PO'L\T( ) a
s(}Colld time {i)r 2 potatoes,
a third time/_)r 3 potatoes
or a 1{)/11?I11 til_}e {i)r 4
potatoes. The oven starts
amomaiicall_;

Convenience Features
Use the _getal)le t_ature
to cook Itl) to 4 cups 1)[
fix:sh xegetables.
Press X)X;E'IABI E once
to cook 1 cup of _vgetables,
twice to cook 2 cups,
three times to cook 3 cups
Or ]()tit fillies to cook
4 cups. The oven starts
m_tomati( all>
The Reheat/('at ure reheats
previously cooked tbods.
Press REHEX[" once to
reheat aplate of le/]oxers
9-3 R)ods) or twice to
reheat pasta (8-10 oz.).
The OVOll slarls
automatically.
20
Other manuals for JE740
4
Table of contents
Other GE Microwave Oven manuals

GE
GE PSA2201RSS User manual

GE
GE JES82TW Use and care manual

GE
GE SpacemakerXL JVM1640 User manual

GE
GE Monogram ZE2160SF User manual

GE
GE JEM31BF - Spacemaker II Microwave Oven User manual

GE
GE JES1453SSSS Manual

GE
GE JET322G Installation instructions

GE
GE JET86 Installation instructions

GE
GE JVM1190 User manual

GE
GE JES0738DP Manual