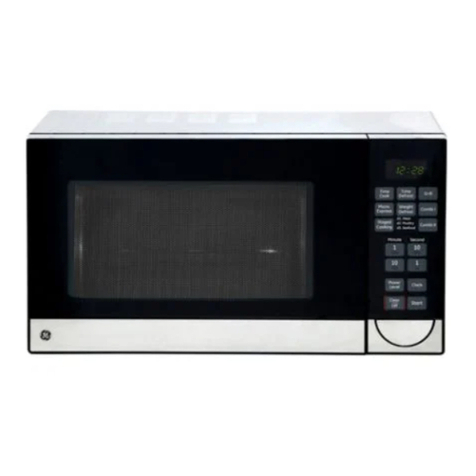
GE JE740 User manual

700Watts
Model: JE740
Microwave Oven
Owner's Manual
Important Safety Information
Pyeca_do_sto AvoM Posodbl_f_poa_re
to E_oessi_e Microwave E_e_#y
RBeofMNotes Abo_t Mfot'owa_=i#g 2
6
Helpful Information
Microwave Z_
Caye _%
If Something Goes Wrong
L_fN#t'vH_eN#_D_t_ d_
GEAppfiances
3828W5A8483 49-40489 01-06JR

READ ALL SAbt 2TY
INkDRMA TYON BEFORE USING
l_ For your safety the information in this manual
must be fbllowed to minimize the risk of fire
pp_j, _ ....... oi" explosion oi" to prevent property damage,
(_Z_JL U'! I ON5' personal inj my or loss of" lifE.
TO AVOID oo Not Attempt Oo Not Operate the oven
to operate this oven if it is damaged. It is
POSSIBLE with the door open particularly important
EXPOS K.d_LJL_r_ since open-door that file oven 6ooi" close
operation can result properly and that there
--vZO EXCESSIVE in harlnful exposure is no dalnage to the:
to imcrowave energy. /door (bent).
MICRO WAV_ It is importan, not to 2hinges and latches
defeat or tamper with _broken or loosened ).
ENERGY the safety interlocks. 3door seals and sealing
Do Not Place any object surf'hces.
between the oven h'ont The Oven Shou]d Not
face and the door or be adjusted or repaired
allow soil or cleaner by anyone except
residue to accumulate properly qualified
on sealing surfaces. seInzice personnel.

Start Here!... Before using your Microwave
Write down the model
and serial numbers here.
They are on a lahel inside
the oven.
Model number
Serial number
Date ofpurchase
Staple your receipt to the
inside back cover of this
manual You will need it
to make a warranty claim.
Read this manual,
It contains instructions to
help you use and maintain
your microwave properly.
If you received a damaged
oven...immediately contact
the dealer (or builder)
that sold you the oven.
Save time and money.
Check the section titled
"If Something Goes
Wrong." This section
helps you solve common
problems that might occur.

t 2AD ALl, SAkETY
INt'DRMA TYON BEFOt 2 USING
• Read and tollow the
specific "Precautions to
Avoid Possible Exposure
to Excessive Microwave
Energy" on page 2.
• Tlfis appliance must be
grounded. Connect only
to properly grounded
outlet. See Grounding
Instructions section on
page 9.
• Do not mount tlfis
appliance o_w a sink.
Install or locate this
appliance only in
accordance with the
proxided Installation
Instructions.
• Be certain to place the
front surfi_ce of the door
three inches or more
llack flon/ the countertop
edge to avoid accidental
tipping of the appliance
in norn/al usage.
• Do not n/ount the
n/icrowave ()veil over
or near any portion of
a heating or cooking
appliance.
• Do not store anytl-fing
directly on top of the
microwave ()veil sllrJ,lce
when the oven is in
operation.
• Do not operate any
heating or cooking
appliance beneath
this microwave.
• Use this appliance only
lot its intended use as
described in this guide.
Do not/lse COrrOSi_,_
cl-lemicals or w_pors in
this appliance. This
n/icrowave ()veil is
specifically designed to
heat, dry or cook tood,
and is not intended
lot lal!oratory or
industrial use.

•Donotoperatethis
applianceifit hasa
damagedpowercordor
plug,ifitisnotworking
properlyorifithasbeen
damagedordropped.
•Donotcoverorblock
anyopeningsonthe
appliance.
•Donotstorethis
applianceoutdoors.
Donotusethisproduct
nearwatertorexample,
inawetbasement,near
aswimmingpool,near
asinkorinsimilar
locations.
• Keep power cord away
Dora heated surfi_ces.
• Do not immerse power
cord or plug in water.
• Do not let power cord
hang over edge of table
or CO/lllter,
• To reduce the risk of fire
in the oven caviW:
-- Do not ovcrcook tood.
Carefidly attend
appliance when paper,
plastic or other
combustible materials
are placed inside the
oven while cooking.
-- Remove wire twist-ties
and metal handles
flom paper or plastic
containers belore
placing them in the
()veil.
Do not use the oven
lot storage purposes.
Do not leave paper
products, cooking
utensils or tood in the
oven when not in use.
If materials inside oven
ignite, kee I)the oven
door closed, turn the
oven off and disconnect
the power cord, or shut
off power at the filse or
circuit breaker panel.
If the door is opened,
the fire may spread.
• See door surl_ce
cleaning instructions in
the Care and Cleaning
section(s) of this guide.
• GE does not support
any servicing of the
microwave. _\_ strongly
recommend that you do
not attempt to service
the microwave yourself.
•As with any appliance,
close supervision is
necessary when used
by children.
SAVE THESE INSTR UC770NS

m
SPECIAL N07??,S ABO UF MICRO WAVING
the STOP/CLEAR pad
i! and Correct the probleml _i
Arcing is the microwave
term tot sparks in the
oven. Arcing is caused by:
• Metal or toil touching
the side of the oven.
• Foil not molded to food
(upturned edges act like
antennils).
• Metal, such as twist-ties,
poultry pins, or gold-
rimmed dishes, in
the microwave.
• Recycled paper towels
containing small metal
pieces being used in
the microwave.
Do not pop popcorn in
yO/lr microwave ovell
unless in a special
microwave popcorn
accessory or unless you
use popcorn labeled Jot
tlse ill ii/icrowave ovens.
• Some products such as
whole eggs and sealed
containers tor example,
closed.jars--m_e able to
explode and should not
be heated in this
microwave 0_11, Sllch use
of the microwave oven
could result in il/jury.
• Do not 1)oil eggs in a
microwave oven. Pressure
will build up inside egg
yolk and will cause it to
burst, possibly resulting
in il/jury.
• Operating the microwave
with no tood inside Jot
more than a ii/ill/lte or
two may cause damage to
the oven and could start a
fire. It increases the heat
around the magnetron
and can shorten the lilt
of the oven.
• Foods with unbroken
outer "skin" such as
potatoes, hot dogs,
Sa/lsages, tomatoes,
apples, chicken livers
and other giblets, and
egg yolks should be
pierced to allow steam
to escape during
cooking.

SAFETYFACT
SUPERHEATEDWATER
Liquids,suchas water,
coffeeor tea are able to
be overheatedbeyond
the boilingpoint without
appearingtobe boiling.
Visiblebubblingor boiling
whenthe containeris
removedfromthemicrowave
ovenisnotalways present.
THISCOULDRESULT
IN VERYHOTLIQUIDS
SUDDENLYBOILINGOVER
WHENTHECONTAINERIS
DISTURBEDORA SPOON
OROTHERUTENSILIS
INSERTEDINTO THELIQUID.
To reduce the risk of il/jury
to persons:
-- Do not overheat the
liquid.
-- Stir the liquid both
beti)re and haltkvay
through heating it.
-- Do not use straight-sided
containers with narrow
necks.
--After heating, allow the
container to stand in
the microwave oven tk)r
a short time 1)el_)re
removing the container.
-- Use extreme care when
inserting a spoon or
other utensil into the
container.
• Avoid heating baby ti)od
in glass jars, even with
the lid off. Make sure all
inlant t_)od is thoroughly
cooked. Stir ti)od to
distribute the heat evenly.
]Be carefifl to prevent
scalding when warming
t_)rmula. The container
may teel cooler than the
t_)rmula really is. Always
test the ti)rmula beJi)re
teeding the baby.
• Don't deJi'ost ti'ozen
beverages ill narro_v-
necked bottles (especially
carbonated beverages).
Even if the container is
opened, pressure C}lll
build up. This can cause
the container to burst,
possibly resulting in
il/jury.
• Hot ti)ods and steam
can cause burns. ]Be
carefifl when opening
any containers of hot
t_)od, including popcorn
bags, cooking pouches
and boxes. To prexvnt
possible il/.iury, direct
steam away ti'om hands
and lace.
• Do not overcook
potatoes. They could
dehydrate and catch
fire, causing damage
to yO/Ir oven.
• Cook meat and poultry
thoroughly-meat to
at least an INTERNAL
teI_/pel_ature of 1('_()°F
and pouhry to at least an
INTERNAL mmpemmre
of 180°E Cooking to these
tempel_amres usually
protects against tt_odborne
illness.

m
SPECIAL N07??,S ABO UF MICRO WAVING
Make sure all cookware
used in your microwave
oven is suitable tot
microwaving. Most glass
casseroles, cooking dishes,
measuring cups, custard
cups, pottery or china
dinnerware which does not
have metallic trim or glaze
with a metallic sheen can
be used. Some cookware
is labeled "suitable tot
microwaving."
How to test fora microwave-
safe dish.
• If you are not sure if a
dish is microwave-sate,
use this test: Place in the
oven both the dish you
are testing and a glass
measuring cup filled with
1 cup of water--set the
measuring cup either
in or next to the dish.
Microwave 1 minute at
high. If the dish heats,
it should not be used
tot microwaving.
If the dish remains cool
and only the water in the
cup heats, then the dish
is microwave-sate.
If you use a meat
thermometer while
cooking, make sure
it is sale Jot use in
microwave ()veils.
• Do not use recycled
paper products. Recycled
paper towels, napkins
and waxed paper can
contain metal flecks
which may cause arcing
or ignite. Paper products
containing nylon or
nylon filaments should
be avoided, as they may
also ignite.
• Some stvroi_)am tl_ay:s
(like those that meat is
packaged on) have a thin
strip of metal embedded
in the bottom. YVlJen
microwavcd, the metal can
1)urn the floor of the oxen
or ignite a paper towel.
• Do not use the microwave
to dry newspapers.
• Not _dl plastic wlap is
suital)le Jot use in
microwave ovens. Check
the package tot proper use.
• Paper towels, waxed
paper and plastic wrap
can be used to cover
dishes in order to retain
moisture and prevent
spattering. Be sure to
vent plastic wrap so steam
can escape.
• Cookware may 1)ecome
hot 1)ecause of heat
transicrred ti'om the
heated tood. Pot holders
m_V be needed to handle
the cookware.
• "Boilable" cooking
pouches and tightly
closed plastic 1)ags should
be slit, pierced or vented
as directed 1)y package.
If they are not, plastic
could burst during or
immediately after
cooking, possil)ly resulting
in injury. Also, plastic
storage containers should
be at least partially
uncovered because they
torm a tight seal. ¼"llen
cooking with containers
tightly covered with
plastic wrap, remove
covering carefiflly and
direct steam away ti'om
hands and ti_ce.

•Usetoilonlyasdirected
intl-fisguide.TVdinners
maybemicrowavedin
foiltrays,lessthan.,/4_ "
lfigh; remove tile top toil
cover and return tlle tray
to the box. ¼'l-len using
loll in the microwave
oven, kee I) the loll
at least 1" awa) from
the sides of the oven.
• Plastic cookware_Plasfic
cookware designed tbr
microwave cooking is very
usefifl, but should be used
careflflly. Even microwave-
sate plastic may not be as
tolelant of ovcrcooking
conditions as are glass or
ceramic materials and may
soften or char if subjecmd
to short periods of
ovcrcooking. In longer
exposures to ovcrcooking,
the tood and cookware
could ignite.
Follow these guidelines:
IUse microwave-sale
plastics only and use
them in strict compliance
with the cookware
Ill Jill/lille HI re r's
recom n/elldatiolls.
2Do not microwave empW
containers.
Do not permit children
to use plastic cookware
without complete
supervision.
GROUNDING INSTRUCTIONS
PREFERRED
METHOD
AWARNING
Improper use of the
grounding plug can result
in a risk of electric shock.
Tl-fis appliance must be
grounded. In tile event of
an electrical short circuit,
grounding reduces tile
risk of electric shock by
providing an escape wire
tor the electric current.
Tl-fis appliance is equipped
with a power cord having
a grounding wire with a
grounding plug. The plug
must be plugged into an
outlet that is properly
installed and grounded.
Consuh a qualiiied electrician
or service teclmician if the
grounding instructions are
not completely understood,
or if doubt exists _ts to
whefl-mr fl-m appliance is
properly grounded.
If tlle outlet is a standard
2-prong wall outlet, it is
your personal responsibility
and obligation to have it
replaced with a properly
grounded 3-prong wall
outlet.
Do not under any
circ/lll/StallCeS tilt OF
remove the third
(ground) prong ti'om
the power cord.
For best operation,
plug this appliance into
its own electrical outlet to
prevent flickering of lights,
blowing of filse or tripping
of circuit breaker:

GR 0 UNDING INS TR UC TIONS
TEMPORARY METHOD
(Adapter plugs not _----_..__
permitted in Canada) I __ _/_
Align large _ _(| m'_ i l
Prongs/slots ,_;_k..t- j i l
_and firm connection
FT before use.
Usagesituationswhere
appliance'spowercordwill
be disconnectedinfrequently.
Because of potential sate b'
hazards under certain
conditions, we strongly
recommend against the
use of an adapter plug.
However, if you still elect
m use an adaptor, where
local codes permit,
a TEMPO ILM_,Y
CONNECTION may
he made to a properly
grounded two-prong wall
receptacle hy the use of a
UI, listed adapter which is
availahle at most local
hardware stores.
The larger slot in the
adapter must he aligned
with the larger slot in the
wall receptacle to provide
proper polariS, in the
connection of the power
cord.
CAUTION:Attaching the
adapter ground terminal
to the wall receptacle cover
screw does not ground the
appliance unless the cover
screw is metal, and not
insulated, and the wall
receptacle is grounded
through the house wiring.
You should have the
circuit checked hy a
qualified electrician m
make sure the receptacle
is properly grounded.
When disconnecting the
power cord fiom the
adapte_; always hold the
adapter with one hand. If
this is not done, the adapter
ground terminal is very
likely m hreak with repeated
use. Should this happen,
DO NOT USE the appliance
until a proper ground has
again heen esmhlished.
Usagesituations where
appliance'spowercordwill
be disconnectedfrequently.
Do not use an adapter plug
in these situations hecause
fiequent disconnection of
the power cord places
undue strain on the adapter
and leads to eventual tailure
of the adapter ground
terminal. You should hmv
the two-prong wall
receptacle replaced with a
three-prong (grounding)
receptacle hy a qualified
electrician heft)re using
the appliance.
A short power supply cord is
provided to reduce the risks
resulting fiom hecoming
entangled in or tripping over
a longer cord.
Extension cords may he used
if you are carefid in using
them.
10
If an extension cord is used--
1The marked electrical
rating of the extension
cord should he at least as
great as the electrical
rating of the appliance;
2The extension cord must
he a grounding_pe
3-wire cord and it must
he plugged into a 3-slot
outlet;
3The extension cord
should he arranged so
that it will not drape over
the cotmtertop or tahletop
where it can he pulled on
hy children or tripped
over uninmntionall>
If you use an extension cord,
the inmrior light may flicker
and the hlower sound may
vmT when the microwave
oven is on. Cooking times
may he longer, too.
Features of Your Microwave
(Tlm)ugllout this manual, ,fi,atu_,s and appearan(w
mcO' vao' fivm your model.)
EZ2
g
7O0Watts
1
2
Door Latches.
Window with Metal
Shield. Screen allows
cooking to be viewed
while keeping
microwaves confined
in the oven.
3 Touch Control Panel
Display.
4 Door Latch Release.
Press latch release
to ()pen door.
5 Removable Turntable.
Turntable and support
must be in place when
using the o_vn. The
turntable may be
removed for cleaning.
6 Convenience Guide.
NOTE" Rating plate, oxen
vent(s) and oven light are
located on the inside walls
of the microwave oven.
11

The Controls on Your Microwave Oven
(71rroughout this mm_ual, ,fi,atu'_s and ap[_earance may va'_3_.fi_*myour modal.)
You can
microwave by
time or with the
convenience
features,
've'
ATime Features
Press Enter
TIME COOK (Press oncel twice or three times) Amount of cooking time.
30 SECI Starts automaticall) !
POWER LEVEL Power lmel 1-9
(automaticall} set at Hi).
12

,Vgeta le ehea)t
AConvenience Features
Pross E.tor
POPCORN 3.5 oz., 3.0 oz. or 1.75 oz. package
PIZZA 1-3 slices
cS
BEVERAGE 1 cup (8 oz.) or _ cups (16 oz.) bmerage
POTATO 1-4 ser_ings
VEGETABLE 1-4 cups
REHEAT Food tH)e , serving size
AUTO Food tH)e, food weight
13

\,hriable power lmels add
tlexibility to microwave
r0we cookingThepowerle,els
onthen,icrow,,,eo,en
can be compared to tile
@ ® ®
® ®® surface nnits on a range.
Power lmel Hi or tull
power is tile fastest wa) to
cook and gixes )on 100%
power. Each power lexel
gi_es )on microwave
energ 3 a certain percent of
tile time. Power lmel 7 is
microwaxe energ) 70% of
tile time. Power lmel 3 is
The power level may
be entere d 0 r Changed
immediately after
i i
entering the feature
time tot TIME COOK.
energy 30% of tile time.
A lligll setting will cook
faster but food ma? need
5PressSTART.
iili
14
to "'equalize" or transtcr
heat to the inside of the
tbod. An example of this is
shown with power level 3
the deli'ost cycle. /f
microw,tve eneru'v did not
cycle otE the outside of the
tbod would cook betbre
the inside \_as deti'osted.
Here Are sonle examples
{)t /ISeS t{}r vitri{}tlS power
levels:
Power Level Best Uses
more ffeqnent stirring,
rotating or turning over.
Most cooking will be done
on power level Hi. A lower
setting will cook more
evenly and need less
stirring or rotating of
tile tood.
Hi Fish. bacon.
vegetables.
boiling liquids.
Med-ltioh 7 Gentle
cooking of
nleat and
poultry;
baking
casseroles
and reheating.
Modium 5 Slow cooking
and tenderizing
such as
srews and less
Sonle t{}(}ds n/Ay have tender cuts
better tlav{}r, texture {}r of meat.
appearance if one of the Low2 or3 Defi'osting
lower settings is used. Use widmut
a lower power level when
cooking fi}ods that have
a tendency to boil {}vet Warm I
such as scalloped potatoes.
P,est peri{}ds (when tile
microwave energy cycles
off) give time tbr tile tbod
cooking;
simmering;
delicate sauces.
Keeping fbod
warm without
overcooking:
softening
butter.

7 me Features
®®®
®®®
®®®
@
Time Cook allows you
to program up to three
difterent cooking stages.
In addition, ) ou can
also set one Auto
Defi'ost stage tbr a total
of fbur stages. See the
Auto Defrost section
tbr instructions on how
to set Auto Defi'ost.
I Press TIME COOK.
2 Enter cooking time.
3 Change power level
if you don't want full
power. (Press POWER
LEVEL.Select a desired
power level 1-9.)
4Press START
Time Cook I
Allows you to microwave
tor any time up to 99
minutes and 99 seconds.
Power level Hi is
automatically set, but
you may change it tor
more flexibility.
_km may ()pen the door
during Time Cook to
check the tood. Close the
door and press STAP, T
to resume cooking.
Time Cook II & III
Lets you change power
levels automatically during
cooking. Here's how to
do it:
1Press TIME COOK.
2Enter the first cook time.
3Change the power level
if you don't want flfll
power. (Press POWER
LEVEL. Select a desired
power level 1-9.)
4Press TIME COOK
again.
5Enter the second cook
tim e.
6Change the power level
if you don't want fifll
power. (Press POWER
I.EVEI. Select a power
level 1-9.)
7Press STAP.T, or, to set
a third cooking stage,
repeat steps 4-6 and
press START.
Time Cook I will count
down first, tollowed by
Time Cook IX, then Time
Cook III. If an Auto
Deti'ost stage was set,
it will count down beJore
the Time Cook stages.
15

Cooking Guide for 7 me Cook
NOTE."Usepower level Hi unlessotherwise noted.
Vegetable Amount Time Comments
Asparagus
(fresh spears) 1 lb.
(frozen spears) 10-oz. package
Beans
(fresh green, 1 lb. cut ill half
(frozen green ) l()-oz, package
Ifrozen lima) 10-oz, package
Beets
Ifresh. whole) 1 bunch
Broccoli
(fresh cut) 1 bunch
,1V_to 1½ lbs.)
(fresh spears) 1 bunch
•l V_to 1½ lbs.)
Ifrozen. 10-oz. package
chopped_
(frozen spears )
Cabbage
(fresh
(wedges
10-oz. package
1 medium head
¢ S
,about 2 lb,'.)
Carrots
(fresh. sliced) 1 lb.
Ifrozen_ 10-oz, package
Cauliflower
(floweretsl 1 medium head
(fresh. whole) l medium head
Ifrozen_ l 0-oz. package
7 to 10 rain.,
Med-High (7)
5 to 8 rain.
12 to 17 rain.
6 to 9 rain.
6 to 9 rain.
18 to 25 rain.
7 to 10 rain.
9 to 13 rain.
5 to 8 rain.
5 to 8 rain.
8 to 13 min.
7 to 14 min.
6 to 9 min.
5 to 8 min.
9 to 14 min.
9 to 17 min.
5 to 8 min.
In 1½-<it.casserole, place 1/4 cup water.
In 1-qt. casserole.
In 1½-<it.casserole, place 1/2 cup water.
In 1-qt. casserole, place 2 tablespoons
water.
In 1-qt. casserole, place 1/4 cup water.
In 2-qt. casserole, place 1/2 cup water.
In 2-qt. casserole, place 1/4 cup water.
In 1-qt. casserole.
In 1-qt. casserole, place 3 tablespoons
water.
In 1½- or 2-qt. casserole, place 1/4 cup
water.
c(
In 2- w3-qt. casserole, place 1/4 cup
watel'.
In 1½-<lt. casserole, place 1/4 cup water.
In 1-qt. casserole, place 2 tablespoons
water.
In 2-qt. casserole, place 1/2 cup water.
In 1-qt. casserole, place 2 tablespoons
water.
16

Vegetable Amount Time Comments
Corn
Ifl'ozen kernel) lO-oz, package
Cornonthe cob
(flesh J] to 5 ears
(fi'ozen _ ] ear
2 to 6 ears
Mixed
vegetables
ifl'ozen')
Peas
(fl'esh. shelled
l O-oz. package
2 lbs. unshelled
4 to 8 rain.
3 to 5 rain.
per ear
5 to 7 rain.
2 to 4 rain.
per ear
4 to 8 rain.
9 to 12 min.
In 1-qt. casserole, place 2 tablespoons
water.
In 2-qt. glass baking dish, place corn.
If corn is in lmsk, use no water; if
corn has been husked, add 1/4 cup
water. P,earrange after half of time.
Place in 2-qt. glass baking dish.
Cover with vented plastic wrap.
P,earrange after half of time.
In 1-qt. casserole, place 3 tablespoons
water.
In 1-qt. casserole, place 1/4 cup water.
(flozen) lO-oz, package
(flesh, cubed,
white)
(flesh, wh0!e,
sweet or white)
4 potatoes
(6 to 8 oz. each
] (6 to8oz.)
(flesh)
(fl0zen;
chopped
and leaf)
10 to 16 oz.
10-oz. package
(flesh, summer
and yellow)
(wintei; acorn
or butternut)
1 lb. sliced
)c
1 t_ 2 squash
(about 1 lb. each)
4 to 8 rain.
ll to 14min.
2 to 5 rain.
5 to 8 rain.
5 to 8 rain.
4 to 7 rain.
7 to 11 rain.
In 1-qt. casserole, place 2 tablespoons
water.
Peel and cut into 1 inch cubes. Place in
2-qt. casserole with 1/2 cup water: Stir
after half of time.
Pierce with cooking tork. Place in
center of the oven. Let stand :5minutes.
In 2-qt. casserole, place washed spinach.
In 1-qt. casserole, place 3 tablespoons
water.
In 1½-qt. casserole, place 1/4 cup waten
Cut in half and remove fibrous
membranes. In 2-qt. glass baking dish,
place squash cut-side-down. Turn
cut-side-up after 4 minutes.
17

7 me Features
_*km can use this tcatnre
tWO WayS:
• It will add 30 seconds to
the time counting down
each time the pad is
pressed.
• It can be used as a quick
wa) to set 30 seconds of
cooking time.
Convenience Features
How to Use the
Popcorn Feature
1Follow package
instructions. Place
Use on!y with prepackaged
microwave popcorn weighing
1.75 to 3.5 ounces.
the package of popcorn
in the center of the
n/ic Fowa*, e.
2Press POPCORN once
for a 3.5 ounce package
of popcorn, twice tot
a 3.0 ounce package
or three times tot a
1.75 ounce package.
The oven starts
automatically.
_i/_i i i_I/III_ _ ii ii
i ii i i
!(ii @!! !
The Pizza teatnre is for
reheating 1-3 slices of
pizza.
Press PIZZA once %r one
slice of pizza, twice %r two
slices or three times tot
three slices. The oxen starts
automatically.
18

The Beverage tcature works
best t_)r heating a bevclage
that is at room tempelature.
Press BEVEIL_kGE once t_)r
1cup (8 oz.), or twice t_)r
2 cups (1(3 oz.). The oven
starts automatically.
Beverages heated with the
Beverage feature may be
very hot. Remove the
container with care.
The Potato feature cooks up
to fi)ur 8-10 ounce potatoes.
Press POTATO. The
serxing size is automaticall}
set at 1, but can be changed
by pressing POTATO a
-) c
second time f( r 2 potatoes,
a third time J_)r 3 potatoes
or a J_)urth time J_)r 4
potatoes. The oven starts
au tom atically.
19

Convenience Features
V getaNe
Use the Vegetable feature
to cook up to 4 cups of
fiesh xegetables.
Press VEGETABI,E once
to cook 1 cup of vegetables,
twice to cook 2 cups,
three times to cook 3 cups
or t()ur times to cook
4 cups. The oven starts
au tom atic ally.
The Reheat teature reheats
prexiously cooked foods.
Press REHEAT once to
reheat a plate of lefloxers
(2-3 foods) or twice to
.......................... reheat pasta (8-10 oz.).
The oxen starts
automatically.
20
Other manuals for JE740
4
Table of contents
Other GE Microwave Oven manuals

GE
GE JES1289 User manual

GE
GE JES1095 User manual

GE
GE Spacemaker JVM1740SMSS Manual

GE
GE JKP9027 User manual

GE
GE JVM6175SFSS Operating manual

GE
GE Profile Spacemaker PVM2070DMWW User instructions

GE
GE JES1142SPSS User manual

GE
GE Appliances CEB1590 User manual

GE
GE Spacemaker JVM1540 User manual

GE
GE JES934 User manual
Popular Microwave Oven manuals by other brands

AEG
AEG MICROMAT_DUO 3534 E operating instructions

Whirlpool
Whirlpool AMW 479 Instructions for use

Kenmore
Kenmore Countertop Microwave Oven 565.61202 Use and care guide

Tristar Products
Tristar Products Power AirFryer Oven360 S.AFO-001 owner's manual

Beko
Beko BMCB25433X user manual

Panasonic
Panasonic NNH724 - MICROWAVE -1.6 CU.FT operating instructions