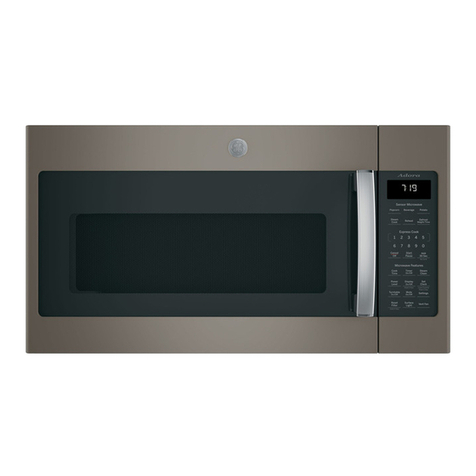
GE JES636 User manual

0www.GEAppliances.com
©
Safety Information
Adapter l'hNs ....... 9
Arcing .............. 4
Extension Cords .... 10
Foods ............ 4, 5
Grounding
Instructions ......... 8
Microwave-Safe
Cookware ......... 6, 7
Precautions to Avoid
Possible Exposure to
Excessive Microwave
Energy .............. 2
Safety Precautions..2, 3
Operatil_g Instructions
(;are and
Cleaning ........ 25, 26
Changing tile
Power Level ........ 13
Convenience
Features ........ 19-21
Cooking Guide .. 15, 16
Defiosting Guide ... 18
Features of Your
Microwave Oven 11, 12
Microwave Terms ...24
()tiler Features .. 22-24
Time Features .. 14-19
Write themodelandserial
numbershere:
#
#
l/ind these mn-nbers on
a label inside the oven.
Troubleshooting Tips
Before You Call
For Ser_qce ......... 27
Things That Are
Normal With Your
Microwave Oven .... 28
Co,uumer Support
Consumer
Support .... Back (;over
Product
Registration ..... 29, 30
Warranty ........... 31
JES636
164D3370P161 49-40170 12-00JR

IMPORTANTSAFETYINFORMATION.
READALLINSTRUCTIONSBEFOREUSING.
iiii!ii!{{{iiiiiiiHiiiiiiiiii{[[ii
WARNING!
For your safe_ the information in this manual must be
followed to minimize the risk of fire or explosion, electric
shock, or to prevent property damage, personal injury, or
loss of life.
PRECAUtiONSTOAVOIDPOSSIBLE
EXPOSURETOEXCESSIVE
MICROWAVEENERGY
Do IlletAttemptto operate
this oven with tile door open
since open-door operation
can resuh in harmful
exposure to microwave
energ)'. It is important not
to deteat or tamper with the
sately interlocks.
De Net Place any object
between the oven li'ont tace
and the door or allow soil
or cleaner residue to
accumulate on sealing
surtaces.
Do Not Operate tile oven if it
is damaged. [t is particularly
irnportant that tile oven
door close properly and that
there is no damage to tile:
door (bent),
_linoeso_.ndlatches
...............(broken or loosened),
:_ door seals and sealing
....................surtaces.
NTheOvenShouldNot be
a(!justed or repaired by
anyone except properly
qualified service personnel.
SAFETYPRECAUtiONS
This microwave oven is not approved or tested for
marine use.
Read and lollow tile specific
precautions in tile Precautions
toAvoid PossibleExposureto
ExcessiveMicrowave Energy
se/lion above.
, This appliance must be
gTounded. Connect only
to a properly grounded
outlet. See the &ounding
Instructions section on page 8,
Install or locate this appliance
only in accordance Mth tile
provided Installation
Instructions.
Be certain to place tile front
Sllrtace of the door three
inches or more back ti'om
the countertop edge to avoid
accidental tipping of the
appliance in normal usage,

www_GEApp[&nse_som
Use this appliance only for its intended purpose as
described in this Owner's Manual.
Do not mount tiffs appliance
over a sink.
DO not IllOlln[ the microwave
oven over or near an}-portioll
of a heating or cooking
appliance.
Do not store anything directl)
Oil top of tile microwave (:),,'ell
surt_(ce when the microwaxw
oven is in operation.
, Do not operate this appliance
if it has a damaged power
cord or plug, flit is not
working properly, or itit has
been damaged or dropped.
If the po_vr cord is damaged,
it must be replaced by
General Electric Service or
an authorized service agent
using a power cord available
Fern General Electric.
, Do not cover or block any
openings on the appliance.
, Use this appliance only tar
its intended use as described
in this manual. Do not use
corrosive chenficals or vapors
in this appliance. This
microwave oven is specifically
designed to heat, dUor cook
R)od, and is not intended R)r
laboratopi or industrial use.
, Do not store this appliance
outdoors. Do not use dfis
product near water--tbr
example, in a wet basenlent,
near a swinnning pool or
near a sink.
, Keep power cord awWfl'om
heated surt_tces.
Do not immerse power cord
or plug illwater.
, I)o not let power cord hang
over edge of table or COllnter.
, To reduce tile risk attire in
tim oven {avity:
- Do not overcook toad.
Carefully attend appliance
if paper, plastic or other
combustible materials are
placed inside tile oxwnwhile
cooking.
-- Remove wire twist-ues and
metal handles fl'om paper
or plastic containers betore
placing then1 ill tile oven.
-- I)o not use tile oven lor
storage purposes, I)o not
leave paper prodtuts,
{ookir, g utensils or food ill
theo.er,whennotilluse. ii:_
-- I£materials inside the oven
sllo.ldignitekeept'le,,,ell
door dosed, tl.lrn tile oven off
anddis.,nr,e.diepo,, er
.ird, s l.t po,,-eratthe
*,,seo.i .itbreakerpanel=11the door is opened, the tire
See door surlace deaning
instructions ill file Careand .........................................
cleaning of the microwave oven
section of this manual. _i
This appliance shouM be
serviced onl} by qnalified
service personnel. (2)ntact
nearest authorized service {{}{{{{{
repair or a(!iusunent.
"_As with an, appliance, closesupervision is necessa D when
used b) chiMren.
2
IMPORTANTSAFETYINFORMATION.
READALLINSTRUCTIONSBEFOREUSING.
WARNING!
ARCING
If you see arcing, press the CLEAR/OFF pad and correct
the problem.
Arcing is the mi( rowave tem_
is caused b}:
N Metal or t0il touching the
side ot the oven.
, Foil not rooMed to t0od
(upturned edges act like
antennas).
Metal, such as twist.ties.
pouhi 7 pins, or gold-rirnnled
dishes, in the microwave.
Recycled paper towels
containing small metal pieces
being used in tile microwave.
iiiii!ii!iiiiiiiiiii/iiiiiiii_ii{i_ii
FOODS
Do not pop popcorn in your
rnicrowave oven Ill]less in a
special microwave popcorn
accesso Uor unless }_)lluse
popcorn labeled tor use in
l-nicrowave ovells.
, Some products such as
whole eggs and sealed
container,>-tbr exm-nple,
closed jar,v--will explode and
should not be heated in this
microwave oven, Such use of
the micro_ave oven could
resuh in injury.
"_ I)o not boil em s in a
microwave oven. Pressure will
build up inside egg yolk and
will cause it to burst, possibly
resuhing in injm7,
Operating tile microwave
with no tood inside t0r more
than a nlil-ltlte or t_\x) l-nay
cause dm-nage u) the oven
and could start a fire. It
increases the heat around the
magnetron and can shorten
the li_eot the oven.
Foods with unbroken outer
"skin" sudl as potatoes, hot
dogs. sausages, tomatoes,
apples, chicken livers and
()tiler giblets, and e_,'o_yolks,
should be pierced to allow
steam to escape during
cooking-

vvvvw.GEAppl_nce_com
SUPERHEATEDWATER
Microwaved water and other
liquids do not always bubble
when they reach the boiling
point They can actually get
superheated and not bubble
atall.
Superheated liquid will bubble
up out ofthe cup when iris
moved or when something like
a spoon or tea bag is put into it.
Toprevent this from happening
and causing injury, do not heat
any liquid for more than 2
minutes per cup. After heating,
letthe cup stand in the
microwave for 30seconds
before moving it or putting
anything into it.
Avoid heating baby tood in
_,-lassars even with the lid off"
Make sure all intimt food is
thoroughl} cooked. Stir tood
to distribute the heat evenly.
Be careflll to prevent scalding
when warming tornmla. The
container may teel cooler
than tile tormula reallyis.
Always test the tormula beti)re
feeding the bab).
, Don't deti"ost ti'ozen
beverages in narro'_necked
bottles (especially carbonated
beverages). Even if ttle
container is opened, pressure
can build up. This can cause
the container to burst,
poss )lvresultin_,-in niurv
" , ' o, ,*
Spontaneous boiling_U nder
certain special circumstances,
liquids may start to boil
during or shortly after
removal ti"om the microwave
oven. To prevent burns ti'om
splashing liquid, we
recommend ttle tollowing:
bet_)re removing,- tile
container ti'onl tile oven,
allow ttle container to stand in
the oven ti)r 30 to 40 seconds
after the (wen has shut otl. Do
not boil liquids in narro'_=
necked containers such as soft
drink bottles, wine flasks and
especially narro'_mecked
cottee cups. Even it tile
container is opened, excessive
smam can build up and cause
it to burst or overflow.
Hot ti)ods and steam can
cause burns. Be careflfl when
) rllrlO rl-"
oI e " ga }contmnersofhot
t_)od, including popcorn bags,
cooking pouches and boxes.
To prevent possible injury,
direct steam away ti'om hands
and tilce.
Do not overcook potatoes.
They could dehydrate and
catch fire, causing damage
tO yollr oveIl.
Cook meat and poultry
thoroughlx_meat to at
least an INTERNAL
temperature ot 160°K
and poulu?" to at least an
INTERNAL temperature
ot 180°F. Cooking to
these temperatures
usuall} protects against
t_odborne illness.
iiil!iii iiiii
iiiiii!iiii iiiiii!ii
5

IMPORTANTSAFETYINFORMATION.
READALLINSTRUCTIONSBEFOREUSING.
WARNING!
iiiii!ii!iiiiiiiiiiiliiiiiiii_ii{[[ii
MICROWAVE-SAFECOOKWARE
Make sure all (ookware used [11
"}t)llr _![cr{ }_'(1_ e {}xetl is suitat)le
casseroles, (ook[ng dishes,
measuring (ups, (ustard (x_ps,
potte_) or c[)illa ditltlel'w;_ffe
which does not have metallic
u4m or glaze with a metaNc
slleen can be used. Some
cookware is labeled "alitable
Ityou are not sure it a dish is
nlicrox_'ave-sa[e, use this test:
Place in the oven both the
dish you are testing and a
glass measuring cup tilled
with 1 cup of water-set the
nleasuring cup either in or
next to tile dish. Microwave
1nfinute at high. It the dish
heats, it should not be used
tiT)r microwavino-
It the dish remains cool and
only the water ill the cup
heats, then the dish is
nlicrowave-sat¢'.
[i yOll llSe a rneat
thermometer while cookino-
l-hake sure it is sale tor use
in microwave ovens.
I)o not use reQvled paper
products. Recycled paper
towels, napkins and wm-_ed
paper can contain metal
tlecks which ma} cause arcing
or igrfite. Paper products
containing nylon or nylon
t]laments should be avoided,
as tile)ma) also ignite.
, Some st)rotoam trays (like
those that meat is packaged
on) have a thin strip ot metal
embedded in the bottom.
When microwaved, the metal
can blAri1the tloor of the oven
or ignite a paper towel.
, I)o llOt rise the nlicrowave to
dl)" newspapers.
, Not all plastic wrap is suitable
tot use in microwave ovens.
Check the package tor
proper use.
Paper towels, waxed paper
and plastic wrap call be used
to cover dishes in order to
retain moisture and prevent
spattering. Be sure to vent
plastic wrap so steam Call
escape.
, Cookware may become hot
because ot heat transterred
ti'om the heated tood. Pot
holders may be needed to
handle the cookware.

GEApM&nces,com
., "Boilable" cooking pouches
and tighdy dosed plastic bags
should be slit, pierced or
vented as directed by
package. If they are not,
plastic could burst during or
immediately after cooking,
possibly resulting in injut).
Also, plastic storage
containers should be at least
partially uncovered because
the) form a tight seal. When
cooking with containers
tightly covered with plastic
wrap, remove covering
carefully and direct steam
away fl'om hands and tace.
Use tbil only as directed in
this Dfide. TV dinners may
be microwaved in toil trays
less than 3/4" high; remove
the top toil cover and return
tile tray to tile box. When
sin( i....
ll _" g 011111the microwave
oven, keep ttle ioil at least
1inch awW fl'om tile Odes
of the oven.
, Plastic cookware-Plastic
cookware designed tbr
microwave cooking is very
useful, but should be used
carefully. Even microwave-
sa_' plastic may not be as
tolerant ot overcooking
conditions as are glass or
ceramic materials and may
sotien or char it sut)jected
to short periods ot
overcooking. In longer
exposures to overcooking,
the tood and cookware
could ignite.
Followthoso guidolinos:
{ Use microwave-sale
plastics onl', and use
them in strict compliance
with the cookware
l-nantlfactllrer' s
recommendations.
Ilo not microwave erupt?
cont ail-leys.
Do not pernfit children
tOuse plastic cookware
without complete
supervision.
II___:;{{{
7

IMPORTANTSAFETYINFORMATION.
READALLINSTRUCTIONSBEFOREUSING.
WARNING!
Improper use of the grounding plug can result in a risk of
electric shock.
iiiii!ii!iiiiiiiiiiiliiiiiiii_ii{itii
GROUNDINGINSTRUCTIONS
This a!)pliance must be gTounded, in tile e,em ofa_l eJectrk:al short
dr(tilt, gro].mdi_lg reduces tile risk of electrk shock by providing an
escape wife foF the elecuic ClllTe[lt,
This applia_lce is equipped with a po'_er cord having a gromlding
wire whh a groundi_lg plug. The plug must be plugged imo an
oudet that is properly insta!led and grounded.
Conallt a qualified elecu'ician or sel'vice technician if the grounding
illSU'tl(i[h)_lsare not completely understood, or ifdoubt exists as to
whether the appliance is proper1) grounded.
if the outlet is a standard 2-prong wall oudet, itis Tour personal
responsibility and obligation to have it replaced with a proper1}
gTounded B-prong wall outlet.
I)o not under any (:ir(xnnstances cut or remove tile third (gTound)
prong fi:om the p{)vde[_COF(L
We do not recommend using an exmnsi()n cord with this appliance.
if'the power cord is too short, have a qualified electrician or sen'ice
technician insta!I all outlet near the appliance. (See WARIV/NG--
EXTENSIONCORDSsecdon.)
For best o])eratio_'_, plug this applhm(e itlto itsov,n electrical outlet
to prex em flickering of lights, t)h)willg ofthse or wipphlg of (:h'cuit
breaker.

www_GEAppt&nse_som
ADAPTERPLUGS
Usagesituafionswhereappliance'spowercordwillbedisconnec_d
in#equently.
gecause of poterltiaI salely
hazards trader certain conditions, (Adapterplugsnot
we stronglyrecommendagainstthe perm!nedinCanada)
use of an adapter plug. However, if Afignlarge ](_ ]]
you soil ele(t to use an adapter, prengs/siots _ I_11
,,Tllere local ( odes pernlit, a __''_- "
made to a properl)grounded two- TEMPORARY andfirm connection
prong w_dl re(eptacle by tile rise era METHOD beforeuse.
UL listed adapter which is available
at l-nest local hardware stores.
The larger slot in the adapter must be aligned widl the larger slot in
the wall receptacle to provide proper polarity in the connecOon ot
the power cord.
CAUTION:achingtheadaptergroundterminaltothewall
receptacle cover screw doesnot groundthe appliance unlessthe cover
screw is metal,andnot insulated,andthe wall receptacle isgrounded
through the housewiring.
You should have the circuit checked i)ya qualified electrician to
make sure the receptacle is properly grounded.
When disconnecting the power cord Fern the adapter, always hold
the adapter with one hand. If dos is not done, the adapter ground
terminal isvery likely to break with repeated use. Should this
happen, DONOrUSEthe appliance unO1 a proper ground has again
been established.
Usagesituationswhere appliance'spower cordwill be disconnected
frequently.
Donotuseanadapterplugin these simaOonsbecause ti'equent
dis(onrle(Oorl of the power cord pla(es tmdue strain on the adapter
and leads to eventual t_olure ot the adapter ground terminal. You
should have die two-prong wall receptacle replaced widl a three-
prong (groundirN) receptacle by a qualilied electrician belore
using the appliance.
iiiiiiiii_!iiiiii!i!_il
iiilliH! !ii!il!
iiiiiii iiiii!
9

IMPORTANTSAFETYINFORMATION.
READALLINSTRUCTIONSBEFOREUSING.
WARNING!
iiiii!ii!iiiiiiiiiiiliiiiiiii_ii(i_ii
EXTENSIONCORDS
A short power supply (ord is provided to redu(e the risks resultir N
ti'om becornir N entangled in or u'il)pir N over a lorNer (ord.
Extension cords may be used iiyou are careful in using them.
II an extension cord is used-
.... The nlarked electrical radng of the extens on cord should be at...... ,.....
least as great as the electrical rating ot tile appliance;
Tile extension cord must be a aoundirN-type 3-wire (ord and it
nmst be plugged into a 3-slot outlet;
Tile extension cord should be arranged so that it will not drape
over tile countertop or tabletop where it can be pulled on by
children or tripped over unintentionally.
liyou use an extension cord. ttle interior light may fli(ker and the
blower sound may vmy when the nficrow_ve oven is on. Cooking
times nlav )e lonu-er too
READANDFOLLOWTHISSAFETY
INFORMATIONCAREFULLY.
SAVETHESEINSTRUCTIONS

About thefeaturesof
yOUr microwave ove_, _w, GEApp/iances.com
Throughout this manual, features and appearance may vary from
your model,
650 Wa_s
Featuresof the Oven
WindowwithMetal Shield.Screenallows (o()king to 1)e
viewed while keel)in Kmkrowaves tenth-led in tl{e oven.
{{ TouchControlPanelDisplay.In the event era power
........................... failure, or iIthe microwave has been unplugged,
PEx_{llbe display,ed and the clock must be reset.
{OoorLatch Release. Press latch release to open door.
{
{: RemovableTurntable.Ttlrntable and support mustbe
in place when using the oven.The mrmal)le ma_be
removed tbr cleaning.
ConvenienceGuido.
NOTE:Ratingplate,oven vent(s)and ovenlightare locatedon the inside
walls of the microwave oven. 71iii!!_Ii___:;{{{
//

iittl!
Aboutthe features of yourmicrowave oven.
Youcan microwave by time or with the convenience features.
",,,,,66 6
TIME COOK TIME DEFROST
DD
POWER
LEVEL
mDD
POPCORN REHEA1
i ,,,i1-.
o66
BEVERAGE AUTO DEFROB1
I
iiii!ii_!iiiiiiiiiMiiiii@
12
CookingControls
Check the Convenience Guide before you begin.
:: TimeFe.tt,res
Press Enter
TIME COOK Amount of cooking time
{Press eeee or twice}
TIME DEFROST Amount of defrosting time
EXPRESS {;{)OK Starts immediately!
30SEC, Starts immediately!
POWER LEVEL Power level 1-10
Press Enter Option
POPCORN Starts immediately! 3.5oz. 3 oz. or 1,75oz.
(pressonce, twice orthree times) more/bss time
REHEAT Foodtype 1-7 Servingsize
BEVERAGE Starts immediately! 4 oz.,8oz_or 12 oz.
(pressonce, twice or threetimes)
AUTO BEFROST Foodweight

Aboutchangingthe power level, www.GEAppliances.com
k
LEVEL
DDD
The pox_er lexeI ma_ be entered or cha_lged
hmnediatel) after entering tile feature time for
TIME COO& TIME BEFROSTor EXPRESS COOK.The power
lexel ma} also be changed during time (()El[ltd(}'_r_{].
iii@il!iii:iii]iiiii
!iiiii ;;:;iill
START/PAUSE
Press STARE
\ arial)le poweF lex els add fleibilitx to micFowa'_ e
cooking. The power levels on tile microwave oven am be
compared to tile surface Emits O_l arange. Each pox_er
leveI £ives }x_nmicrowave enexg'} a certain percent of the
time. Power level 7 is microwave ener£3" 70% of t]le dine.
Power level 3is ener£} 31)'_ o_the dine. Most cooki_lg
will be done on High (power level _0)which gives }on
J00% p( _x\rer. Power level t0 will cook liister belt _ood
ma} need more flequem sth]Ti_lg, rotati_lg or tmxfi_lg
over. A lov, er setring v,ill cook more evenly and need less
stirring or rowring of tile leo(]. Some leeds may have
better flavor, texttlre or appearance if one of the lower
settings is used. Use a lower power level when cooking
fbods that have a tendenc} to boil over, such as scalloped
potatoes.
Rest periods (when the microv, ave energ 7 (:}des el!)
oixe time fi)r the toed to ' eqtmlize" or trander heat to
the inide of the lbod. An example of this is shov, rnwith
power level 3-the deh'ost Qde. if microwave energ 7 (lid
not (:_cle eli, the outside of the tbod would cook beiore
tile inide was deli'osted.
Here are some examples of uses for various power levels',
Nigh lO: Nslh bacon, vegetables, !)oilhlg liquids.
Med-High 7: Gentle cooking of meat and poultry; baking
casseroles aild reheating.
Medium 5: SIOW cook[Ilg a[ld tenderizing tor ste'ws ;iHld
less te_lder €tits of meat.
Low& Deflx_sting; simmering; delicate sauces.
Wau_ l: Keeping fi_od warm; softening butter.
i_iiii{iiii!!_"ll___:;{{{x_iiiii
13

iitt/!
;;;;;;;;;;;;;;;;;;;;;;;;;;;;;;;;;;;;;;;_
About the time features.
[ 1
TIME COOK
Io o,11o, o,11oo ,ol
mmm
D
START/PAUSE
Time Cook
time CookI
.5,HO_.VS }_)ll t() I]]iCrOW_lV_ _t)[" _ll]_ [il]le ll !) 1() t..)9 rnfi]_.]tes
and 99 seconds.
Power Jevel tO(High)is amom;_ti( aii? set bm _ u ha?
change i,_tbr more flexibilit},
PressTIMECOOK.
[)o_arel "]@_e] I LO,)
Yi>_._m3} o!2,e[] the door (]t]rh]g rime Cook _ocheck
the _bo(l. (lose die door and press STABTto remme
Tinle Cook tt
[Jets}ou ch:_mge pov,er lexels automaficall} (ho'ing
cooki'ag. Here's how to (I(t it:
Press TIMECOON
;;;;;;;;;;;;;;;;;;;;;;;;;;;;;;;;;;;;;;;_
74
power level I [0.)
Press TIMEcoogagafi].
i _jiii
pov'r@l"le'el I [ 0.)
At the e_]d of Time Cook LTime Cook ]] com]ts do'w_].

www.GEAppliances.com
Cooking Guide for -time Cook
NOTE"Use power level High (10) unless otherwise noted.
Amount Time Comments
Asparagus
(fresh spears) 1 lb. 8to 10 nfin.,
Med-High (7)
(frozen spears) lO-oz, package 6 to 8 rain.
Beaus
(fresh green) 1 lb. cut in half 13to 17min.
(frozongreen) lO-oz, package 7 to 9 min.
(frozenlima) lO-oz, package 7 to 9 min.
In 1!_qt. casserole, place 1/4 cup
water.
In l-qt. casserole,
In 1!4_-(tt,casserole, place 1/2 cup
_-ater.
In l-qt. casserole, [)lace
2 tablespoons water.
In l-qt. casserole, place 1/4 cup
water.
Beets
(fresh, whole) 1 bunch 20 to 25 mill. In 2-qt. casserole, place 1,/2 cup
water.
Broccoli
(freshcut) 1bunch 8 to 10 rain.
(11/4to 1_/2lbs.)
(freshspears) I btmeh 10to 13mill.
(11/4to 1'/2lbs.)
(frozen, lO-oz, package 6 to 8 min.
chopped)
(frozenspears) lO-oz, package 6 to 8 rain. In l-(/t. (asserole, pla(e
3 tablespoons water.
Cabbage
(fresh) 1medium head ll to 13 rain. In 1_/_or 2-qt, t asserole, pla(e
(about 2 lbs.) 1,/4 cup water.
(wedges) 14to 16 min. Ira2- or 3-(tt. casserole, [)lace
1/4 cup water.
Carrots
(fresh, sliced) llb. 7 to 9rain. ha 1K_-qt.casserole, place 1/4 cup
water.
(frozoo) lO-oz, package 6 to 8 rain. In l-qt, casserole, place
2 tablespoolas water.
1mediumhead lOto 14min.
1medium head 10 to 17 min.
lO-oz, package 6 to 8 min.
Cauliflower
(flowerets)
(fresh,whole)
(frozen)
Ira2-qt. casserole, place 1,/2 cup
water.
In 2-qt. casserole, place 1,/4 cup
water.
Ira l-qt. casserole,
In 2-qt. casserole, place l/2 cup
water.
In 2-qt. casserole, place 1/2 cup
water.
In l-qt. casserole, [)lace
2 tablespoons water.
iiii;iiHiHilil!iiiiiiiiiiii
!iiiii ;;:;iill
i_ii]iiiiii!!_"ll___:;iii]i_iiiii
/5

iitt/!
;;;;;;;;;;;;;;;;;;;;;;;;;;;;;;;;;;;;;;;_
iiii!ii!{{{iiiiiiiHiiiiiiiiii{i_ii
;;;;;;;;;;;;;;;;;;;;;;;;;;;;;;;;;;;;;;;_
About the time features.
Amount Time Comments
Corn
(frozenkernel) lO-oz,package 5 to8 mill. In l-(tt, casserole,pla(e
9 tablespoons water.
Corn on the cob
(fresh) 1to 3 ears 4 to 5 mill.
per ear
(frozen) 1ear 6 to 7 min.
2to3 ears 3 to4 rain.
per ear
Mixed
vegetables
(frozen) lO-oz, package
Peas
(fresh,shelled) 2 lbs. unshelled
(frozen) lO-oz, package
5to 8 rain.
10 to 12 rain.
5to 8rain.
Potatoes
(fresh, cubed, 4 potatoes 12to 14 rain.
white) (6 to 8 oz. each)
(fresh, whole, 1 (6 to 8 oz.) 3 to 5rain.
sweet or white)
Spinach
(fresh) 10to 16oz.
(frozen, chopped 10-oz. package
and leaf)
Squash
(fresh, summer I lb. sliced
and yellow)
(winter, acorn 1 squash
orbuttemut) (about l lb.)
6to8min.
6to8min.
5to 7min.
8to 11 min.
In round glass baking dish, place
(orn. Itcorn is in husk, use no
water; if corn has been husked,
add 1/4 cup water. Rearrange
after hall of time.
Place in round glass baking dish.
Cover with vented plastic wrap.
Rearrange after half ot time.
In 1-(tt. casserole, place
3 tablespoons water,
In 1-(it. casserole, place 1/4 cup
water.
In 1-(tt. casserole, pla(e
2 tablespoons water.
['eel and (altinto 1-inch cubes.
['lace in 2-(it.casserole Mth 1/2
(a_pwater. Stir after halt of time.
Pierce with cooking t(wk. ['lace
in center of the oven. let stand
5 minutes.
In 2-qt. casserole, place washed
spinach.
In 1-(tt. casserole, place
3 tablespoons water.
In 1_k-qt.casserole, place 1/4
(_lp water.
Cut in hall and remove fibrous
meml)ranes. In round glass
1)aking dish, place squash cut-
side<lown. Turn cut-side-up
after 4 minutes.
16

www.GEAppliances.com
77meDefrost
\,,._.__ _ Allows you to det_'ost (br a selected leng-t]Eof tinle.
•TIME D[IRE{T" Seethe DefrostingGuidefor suggestedtimes.
PressT,,,,,D,,,D,,.
[][][]
Fq[] q
[--q
STARTPAUSE
Power level is atltolnaticall_ set at 3. belt can be c]lanoed
You can defl'ost small items quickly by raising the power
level alier entering the ume. Power level 1cuts the total
tr s mf H "de ost" g t" nem about half: powerleve110 _uts the
total time to appro×imately 1/3. Ho_wver, todd will
need more ii'equent attention than USEEal.
dtfll tlmmI ) n__noise may, be heard durin g-defrostino-o.
This is normal when oven is not operating at Highpo_vr.
DefrostingTips
, l;oods t_'ozen in paper or plastic can be deti'osted in
the package. Closed packages shotEld be slit, pierced
or vented AI_TER ibod has partially defl'osted. Plastic
storage containers should be partiall} tmcovered.
, Family-size, prepackaged ti'ozen dinners can be
detmsted and microwaved. If the todd is in a ibil
COlltainer, trallstor it to aillicrowave-sate dish.
Foods that spoil easil} should not be allowed to sit
out tor more than one hour alier det_'osting. Room
temperature promotes the growth of harmful
bacteria.
For more even deti'osting of larger foods, such as
roasts, use Auto Defrost. Be sure large meats are
complete b deti'osted betore cooking.
, When defrosted, R)od shotEld be cool but sotiened
in all areas. If still slightly iW, return to the microwave
veUbriefly, or let it stand atow mintEtes.
iiii;iiHiHilil!iii:iiiiiiiii
!iiiii ;;:;iill
II___:;{{{
77

iitt/!
;;;;;;;;;;;;;;;;;;;;;;;;;;;;;;;;;;;;;;;_
iiii!ii!{{{iiiiiiiHiiiiiiiiii{i_ii
;;;;;;;;;;;;;;;;;;;;;;;;;;;;;;;;;;;;;;;_
About the time features.
Defrosting Guide
18
Time
Breads, Cakes
Bread, buns or rolls (I piece) 1]fire.
Svveet rolls tapprox. 12oz.) 4to 6 rain.
Comments
Fishand Seafood
Fillets, frozen (I IbJ 9to 12 _.
Shellfish, smaflpieces (1 lb.) 6to 8 ndn. Place ])lock in casserole. Turn over
and break up alter halt the time.
Frail
Plastic pouch--1 or 2 4 to 7rain.
(10-oz. package)
Meat
Bacon(I lb.)
Franks(I lb./
4to 6 rain.
4to 6 rain.
Groundmeat(I/bj
RoasL"beef,lamb, veal,pork
Steaks,chopsandcutlets
Poultry
Chicken,broiler-fryer
cutup(2½to3/bs.)
Chicken,whole
(2½to3Ibs.)
Cornishhen
Turkeybreast (4 to 6 IbsJ
6to 8 min.
12 to 16 min.
per lb.
6to lOmin.
per lb.
Placeunopened package in oven.
I_etstand 5minutes after deii'osting.
Placeunopened package in oven.
Microx_avejustuntil fl'ankscan be
separated. I_etstand 5 minutes, if
necessaiT, to complete deimsting.
Turn meat over after halt the time.
Use powerlevel1.
Place unwrapped meat in cooking
dish, Turn over after halt file time
and shield warm areas with tbil.
When th-dshed, separate pieces and
let stand to complete defrostino
18to 22min.
24 to 28 rain.
10 to 16 min.
per lb.
6to 10 min.
per lb.
Place wrapped chicken in dish. Unwrap
and turn over aher hall the time. "When
finished, separate pieces and microwave
2 to 4 nfinutes more, if necessa U. I_et
stand to tinish deti'osting.
Place wrapped chicken in dish..M'ter half
dm time, unwrap and turn chicken ox_r.
Shield warm areas with toil. Nnish
defl'osting. It necessa U, run cold water
in the cavity until giblets can be removed.
Place unwrapped hen in the oven
breasl-side-up. Turn over after half
the time. Run cool _ater in the
cavil} until giblets can be removed.
Place unwrapped breast in dish breast-
side-dox_a-LAfter half the time, turn over
and shield warm areas with t6il. Finish
defl'osting. I_et stand 1 to 2 hours in
reti'igerator to complete deti'osting.

www.GEAppl_nce_com
Express Cook
Thisisaquick wayto setcookingtime for 1-6minutes.
Press(me at tile ExpressCookpads (fl'om l to 6) t()r 1
to 6mirmtes of looking atpowerlevel I0. ]_orexample,
press tile 2pad tor 2 nlinutes at looking tinle.
The power level can be changed as time is (ounting
down. Press POWER LEVELand enter 1-10.
iiii;iiHiHilil!iii:iiiiiiiii
!iii,ii ;;:;iill
30 Seconds
Youcan usethisfeature two ways,"
h will add 30 so(ends to the time ( otn-lthlg down each
time file pad is pressed.
It can be used as a quick wa) to set 30 seconds at
cooking tinle.
4hoot the convenience feature&
Useonlywithprepackaged
microwavepopcornweighing
1.75to3.5ounces.
Popcom
To use tile Popcornteature:
[followpackage instI'tRtiOllS, USillg TimeCookiftile
package is less than 1.75 ()in-ices or larger dlall 3.5
ounces. Place the package of popcorn in the center
of tile microwave.
12 Press POPCORNonce for a 3,5 ounce package at
"- popcorn, twice for a 3.0 ounce package or three
tinles for a 1.75 ounce package. Tile oven starts
immediatel}.
How toAdjustthePopcornProgramtoProvidea Shorteror
LongerCookTime
It you find dlat the brand at popcorn }x)uuse underpops
or overcooks consistendy, ?x)u can add or subtract 20
seconds to die automatic popping time.
Toaddtime:
After pressing POPCORN,press 9immediately after tile
(Well starts ti)r ai1extra 20 seconds.
Tosubtract time:
Atier pressing POPCORN,press I inlmediately after
the oven starts t0r 20 seconds less cooking time.
iiilliH! !ii!il!
iiiiiii iiiii!
19

iitt/!
Abouttheconveniencefeatures.
REHEAT
START/PAUSE
Reheat
The Reheat teature reheats man) previousl)
(ooked the(is,
Press REHEAT
i ii4i_
Sele(t food type 1-7 tor one serving (see Reheat
Guide l)elow)'.
For tbod types 1 6, press 2or 3 to reheat 2 or
::::::::::::::3 servings,
iiii!ii!{{{iiiiiii/iiiiiiiiii{i_ii
NOTE: The serving size may be changed or added after
pressing STARTby pressing number pads 1,2 or 3
Serving size for food type 7 cannot be changed.
ReheatGuide
1 Pasta
2 Meats, casseroles, pizza
3 Fruits and vegetables
4Beverages, 8-I0 oz.
5 Saucesandgravies
6 PinTa(pieces)
7 Plate of leftovers
(2 to 3 foods, 4oz.each)
Comments
Cover with lid or vented plastic x_Tap.
Cover with lid or vented plastic wrap.
(;over with lid or vented plastic wrap.
Use wide mouth mt N.
(;over with lid or vented plastic wrap.
Do not cover.
(;over with vented plastic _Tap.
] ,,,
BEVERAGE
Beverage
ToUse the Beverage Feature:
Press BEVERAGEonE e ti)r a 4 oz. beverage, twice t0r an
8 oz. beverage or fl_ree times tilr a 12 oz. beverage.
Drinks heated with the Beverage feature may be very but
Remove the container with care.
2O
Table of contents
Other GE Microwave Oven manuals