manuals.online logo
Brands
  1. Home
  2. •
  3. Brands
  4. •
  5. GE
  6. •
  7. Microwave Oven
  8. •
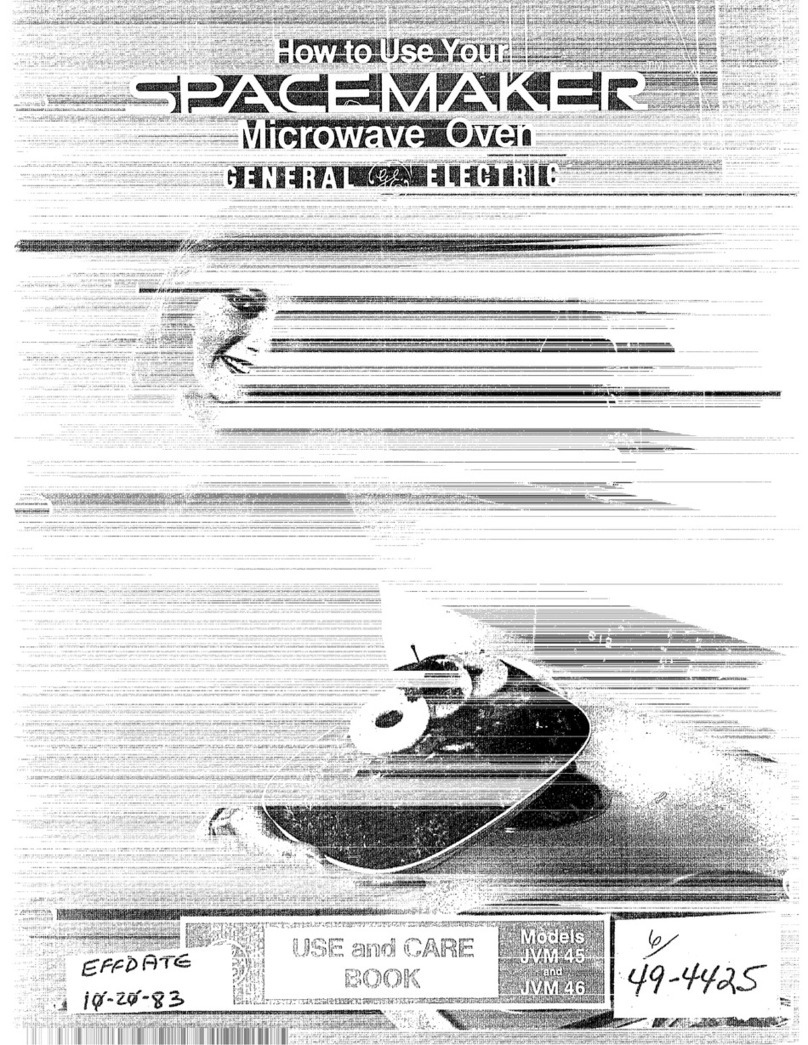
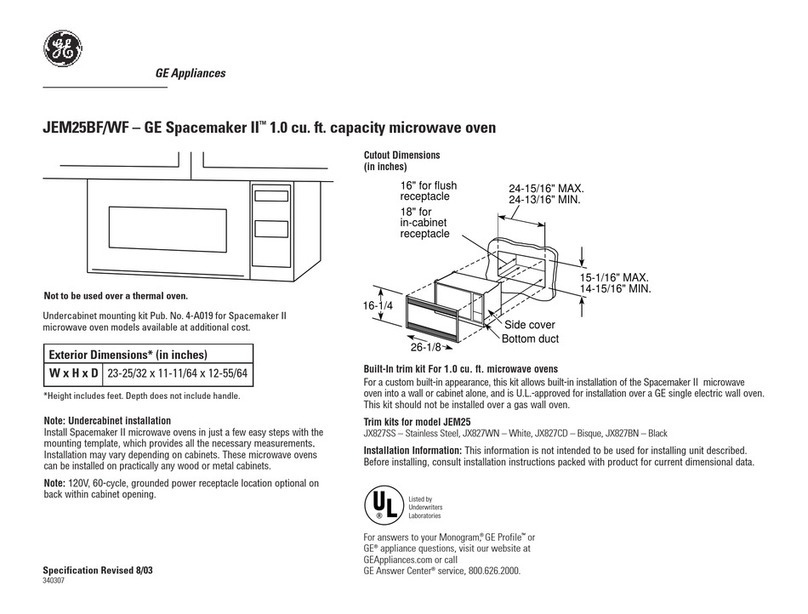
  9. GE Spacemaker II Use and care manual

GE Spacemaker II Use and care manual

lus@andC@reqC_Wng-Gu~6eI
.’ , , : ‘.. .’
.. ,
i, ,., ..
.. ,, -
. ,. ,.
.. ...
hlsmmtioms....................3-5
Precautionsto AvoidPossibleExposure
to ExcessiveMicrowave Energy,......,.....2
-rips
Add 30 Seconds...........................................12
AluminumFoal.......................4,17,27
AutoCook...............................................21-25
Auto CookControlGuide...................24,25
Auto Defrost...........................................16,17
Auto Reheat......................20, 21,23
Auto Roast...............................18,19
Auto Simmer.....................................19
Auto Start/Reminder ........................12
Clock..~-m_.w....m.ww-m.ww.......................8
Containersand Covers............................23
ControlPanel.......-..-ti. .....................8,9
CookingbyTime ..............................11,12
CookingComplete Reminder......................7
CookingGuide...................................30
Cookware...........................6,23-25
DefrostingbyTime ...............................14
DefrostingGuide.................................29
DelayedCooking. . . . . . . . ..........................10
Double DutyT’’Shelf
...........,......4,5,7,13, 20,21,24,26,27,31
ExpressCook Feature.................................12
Features__._w__..=_uv=_.......,.......................7
Glossaryof Microwave Terms..................27
Heating or ReheatingGuide......................28
bloldThllemv..v....fiG.fiG .........................10
Microwaving T~~s...................................6
Minute Pad.....................................................10
Minute/Second Tin~er................lO
Popcorn...tH.......H..ti. ..........................13
poWJerLeve~s. ... .8-_i114-i6, 18,28-30
F’rogram(lmkinq .-..................,.........................9
Tcn2pcr2{ure Cooking .................................15
‘~~n~p~r~~ur~~ro~~
.........................4;7, S, 10, 15,18, 1S,31,34
...............................34
More questions?...call
GEAnswercen@r@80D6262000
.....................31,32
ControlPanel.u.u..M....... .....................31
DoubleDutymShelf .....................................31
OvenLamp Replacement..........................32
imstaiiatiom._.mw-.m.m.m ...32,33
Adapter Plugs.................................33
ExtensionCords.................................33
GroundingInstructions....................32,33
.........35
Appliance Registration.. . ............................2
Important PhoneNumbers ............35
Model and Serial Number Location...........2
Warran~ .......................BackCover
I(lEC’-7O5Mt7ocedure)
I
,,.
\“> ‘1
)’
BeforeusingyourOven,
readthisbookcareflwye
It is intendedto help you operate
and maintainyour new microwave
ovenproperly.
Keep it handy for answersto your
questions.
If you don’tunderstandsomething
or need more help, write (include
your phonenumber):
ConsumerAffairs
GE Appliances
AppliancePark
Louisville,KY 40225
write‘dWvnthen-midand
serial
YoLI’!Ifindthem on alabel inside
the oven.
These numbers are also on the
Consumer Prodwt Ownership
~egistra[ion Card that came with
yoLw microwave oven. Before
sending in thiscard, please write
these numbers here:
Model Number
Serial Number
IJSLIlhcst~ numbers in any
L’01-I-eSj3(JllLlellCe or service calls
Concerning )’0111”microwave ()\’cn.
BeSUme your
oven isIregisterede
It is importantthatwe know the
locationof your microwaveoven
shouldaneed occurfor
adjustments.
Yoursupplieris responsiblefor
registeringyou as the owner.
Please check with your supplierto
be surehe has done so; also send
in your ConsumerProduct
Ownership RegistrationCard. If
you move, or if you are not the
originalpurchaser,please write to
us, stating model and serial
numbers.
This appliancemustbe registered.
Please be certain that it k.
Write to:
GE Appliances
Range product Service
Appliance Park
Louisville, KY 40225
n’you.receiveda
‘oven...
Immediately contact the dealer (or
builder) that sold you the oven.
savetimeandmoney.
Beforeyou rq.wst serticee..
Check the ProblemSolverin the
back of thisbook. It listscauses of
minoroperatingproblems that you
can correct yourself.
All-thesethingsare
withyour oven.
~Steam or vaporescapingfrom
aroundthe door.
~Light reflection arounddoor or
outer case.
~Dimming oven light and change
in blower soundmay occur while
operatingat power levels other
than high.
eDull thumping sound while oven
is operating.
0Some TV-Radiointerference
might be noticed while using
your microwave oven. It’s
Similmt. the interference caused -~-,
by other small appliances and
does not indicate aproblem with %&$$”~
-.”
your oven. i-
[-.
i
,:—
1
..
1
-...>- :
\
1
!
I
,- —..—.———-—..—.-..... —..-.———..-—-————..-—-————.—-—— —— —.——-——— !
I
—— ,
Whenusingelectricalappliances,basicsafety
precautionsshouldbefollowed,irduding the
following:
~AW~~~-Toreducet~,etiskof
bums,electricshock,fire,injuryto persons
orexposureto excessivemicrowaveenergy:
~Read and fO]lOVVthespecific“Precautionsto
AvoidPossibleExposureto ExcessiveMicrowave
Energy” on thepreviouspage.
~This must be Connect
onlytoproperlygroundedoutlet.SeeGounding
Instructionssectionin thebackof thisbook.
euse this appliance onlyfor its intended use as
described in this mmuaLDo notuse corrosive
chemicalsor vaporsin this appliance.This
m“cmwaveovenis specificallydesignedto heat
or cookfood, andis notintendedfor laboratory
or industrialuse.
eFor best plug thisappliance into
itsown ekctrkd outlet,to‘preventMckering
-n
.@>+.
_4s&3%< d’ IightsyMowingdfuseor trippingofcircuit
.&#Jiy I!_m23ker.
...,
‘\
~Do not this over asink. Install
or locate this appliance only in accordance with
[hc proviclcd installationInstructions.
@lieep powercordawayMm heatedsurfaces.
eDonotM-powerMM”(,Ehang overedge‘oftam
Uw
Cm.ww.
@D() @Op(?ra$ethis if it hasa
damaged pmwwcord or plug,ifit isnot
working properly, or if it hasbeen damaged
or
oSeedoorsurfacecleaninginstructionsinthe I
CareandCleaningsection(s)ofthisbook.
oThis SIMM&lbe serviced only by
servicepersonnel.Contactnearest
authorizedservicefacilityfor examination,
repairoradjustment.
~ASwith any close is
necessarywhenusedbychildren.
~lb reducetherisk offirein.theovencavity:
—Donot overcookfood, Carefullyattend
applianceif paper,plasticor othercombustible
materialsareplacedinsidetheovento facilitate
cooking.
—Removewire twist-tiesfrompaperor plastic
bagsbeforeplacingbags in oven.
—Do not use ym.M ‘ovento dry
—Do not use recycled paper products. Recycled
papertowels,napkinsand waxedpapercan
containmetalfleckswhichmay causearcing
or ignite.Paperproductscontainingnylonm+
nylonfilamentsshouldbe avoided,as they
may also ignite,
—Do not pop popcorn in yourn]iemwaveoven
unlessin aspecialmicrowavepopcornaccessory
or unlessyou use popcornlabeledfor use in
microwaveovens.
—lx) -flatoperate the oven while empty to avoid
damage to moven ad. the danger of fire. If
by accidentthe oven shouldrun empty aminute
or two,no harmisdone.Ekmwver,try to avoid
operatingthe oven empty at all times-it saves
energyand pro~ongsthe lifeof the oven.
Tl).~j>d
--,=,) .A=,Gfj-$+~~”~-jgj~’:p9Mw2s.They could dehydrak
WI(IC:ltCh
fii-e.musing diHTlagCk}YOU]”OVti3.
.-
-
(continued) —
—DonotR.kw theownforSwigt? pq$oseso Do
notleavepaperproducts,cookingutensilsorfood
intheovenwhennotinuse.
insideovenshould ignite,keep
ovendoorclosed,turnovenoff,anddisconnect
powercord,orshutoffpoweratthefuseor
circuitbreakerpanel.
eSome prcxh,m’suchasWhoIt?eggsand$ea~ed
e
e
contai&m-for example,closed-j-ws—will
explodeand shouldnotbe heatedin this
microwaveoven.Suchuseofthemicrowave
ovencouldresultin injury.
Avoidheating baby food inglassjars, even
withouttheirlids;especiallymeatandegg
mixtures.
Don’tdefrostfrozenbeveragesin narrow
neckedbottles(especiallycarbonatedbeverages).
Even if thecontaineris opened,pressurecanbuild
up.This can causethecontainerto burst,possibly
resukingin injury.
QUse metal (relyas directed in this book. TV
dinnersmay be microwavedin foiltrayslessthan
3/4”high;removetop foi~coverandreturntraj’to
box.When usingmetal in the microwaveoven,
keep metail(other than mid shd~ at kast 1
!kKhaway I“romsides doven.
*
<.”’:.+>-’p
%- e‘cdmwe mayhwme hot
-~ becauseof heattransferredfrom
theheatedfood.Potholdersmay
beneededto handle the cookware.
onotuse athermometerin
foodyouaremicrowavingunlessthethermometer
is designedor recommendedforusein the
microwaveoven.
eRemovethe probefromh? oven
whennotusing itto wok with. If youleavethe
probeinsidethe ovenwithoutinsertingit in the
foodor liquid,andturnon themicrowaveenergy,
itcan createelectricalarcingin theovenand
damageovenwalls.
~Plastic mmkware--Plastic cookwaredesigned
for microwavecookingis veryuseful,but should
beusedcarefully.Evenmicrowave-safeplastic
maynotbe as tolerantof overcookingconditions
asare glassor ceramicmaterialsandmay soften
or charif subjectedto shortperiodsof
overcooking.In longerexposuresto overcooking,
thefoodandcookwarecouldignite.For these
reasons:1)Use microwave-safeplasticsonlyand
usethemin strictcompliancewiththecookware
manufacturer’srecommendations.2)Do not
subjectemptycookwareto microwaving.
3)Do notpermitchildrento useplasticcookware
withoutcompletesupervision.
QWhen cooking pork?followthe directions i
exactlyand alwayscookthemeatto an internal
~
;
temperatureof at least 170°F.Thisassuresthat,in
~
theremotepossibilitythattrichinamaybe present
i
I
in the meat,it willbe killedandmeatwillbe safe
/
to eat.
;
1
i
*Dol-notboil eggsinamicrowaveoven.Pressure
~
willbuild Llpinsideegg yolk and will causeit to
burst,possiblyresultingin injury.
I
\
-
@
Foods W&h outer
66skin99suchaspotatoes,
sausages,tomatoes,apples,
chickenliversandothergiblets,
I
andegg yolks(seeprevious
caution)shouldbe piercedto
allowsteamtoescapeduring
cooking.
eNotd] plasticwrapissuitableforusein
.-
.’
.-%.=l
.s
microwave ovens. Checkthepackagefor
properuse.
w
~$pon~neom boiling-Under
.. certainspecialcircumstances,
liquidsmay startto boilduring
or shortlyafterremovalfromthe
microwaveoven.Topreventbums
from splashingliquid,stirthe
liquidbrieflybeforeremovingthe
containerfromthemicrowave
oven.
e~~~~fl~~]pc~~kjngpouchesand -tightly~~~~~~
plasticbagsshouldbeslit,piercedorventedas
directedbypackage.Iftheyarenot,plasticcould
burstduringor immediatelyaftercooking,possibly
resultingininjury.Also,plasticstoragecontainers
shouldbeat leastpartiallyuncoveredbecausethey
formatightseal.Whencookingwithcontainers
tightlycovered with plastic wrap, removecovering
carefdly anddirectsteamawayfromhands
and face.
L“/‘n~ ~EM foodsandsteamcan cause
-52+
*F burns.Becareftd whenopening
&,,,@.@ any containersof hotfood,
including~30pcornbags,cooking
pouchesand boxes.Toprevent
possibleinjury,directsteam away
from handsand face,
oUseofthe DOUBLE IN.J’I’YTMshelf’accessory.
—Removetheshelffromovenwhennotin use.
—Donot storeor cookwith shelfonfloorof oven.
Productdamagemayresult.
—Usepotholderswhenhandlingtheshelfand
cookware.Theymaybehot.
—Do notusemicrowavebrowningdishon shelf.
The shelfcouldoverheat.
—Usethe shelfonlywhencookingon two levels.
—Besure thatthe shelfis positionedproperly
insidetheovento preventproductdamage.
Use of shelfwithAutoCook,AutoReheator
Popcornfeatureis notrecommended(seethe
AutoCook,AutoReheator Popcornsections).
AvailableatextracostfromyourGEsupplier.
04-A019HangingKitallowsthisoventobemounted
underacabinet.
JX37BInstallationKitconvertsthisovento abuilt-in
walloven.
SAVElrlEnEsE
...
f
,.
../ I
.——.—..—...—.-——,...,—....— —.--..-.——-__—.,-.-——.—.-.-..
”..... -——-—
~Make sure all cookwareusedin your microwave
oven is suitablefor microwaving.Most glass
casseroles,cookingdishes,rneas~tingcups, custard
cups, potteryor chinadinnerwarewhich does not
have metallictrim or glazewith ametallic sheen
can be used. Somecookwareis labeled “suitable
for microwaving.”
*E’you are not
sure if adish is
microwave-safe,
use thistest: Place
in the ovenboth
the dishyou are
testingand aglass
measuringcup
filled with one cup
*Paper towels, waxedpaperandplasticwrapcan
be used to cover dishesin ordertoretain moisture
and preventspattering.Be sureto vent plasticwrap
so steamcan escape.
sSome microwaved foods require stirring9rotating
or rearranging.
~Mean buildsup pressurein foods whichare
tightlycovered by askin or membrane.Pierce
potatoes,egg yolks and chickenliversto prevent
bursting.
If youuseameatthermometerwhilecooking,make
sureitis safeforuseinmicrowaveovens.
water—setthe measuringcup eitherin or nextto the
dish, Microwave 1minuteat high.If the dish heats, it
shouldnot be used for microwa~ing.If the dish
remainscool and only thewater in~hecup heats,
then thedish is microwave-safe.
mYou
To obtain service, see the Consumer Services page in
the back of this book.
We’re proud of our service and want you to be
pleased. If for some reason you are not happy with the
service you receive, hereare three stepsto follow for
furtherhelp.
FJJ?ST,contact the people who serviced your
appliance.
cases. this Explain why you are not pleased. In most
will sotvc the problem.
NEXT’,if you are still not pleased, write all the
details—includingyour phone number—to:
Manager, Consumer Relations, GE Appliances
Appliance Park, Louisville, KY 40225
FINALLY,if your problem is stillnot resolved, write:
Major Appliance Consumer Action Panel
20 North Wacker Drive, Chicago, IL 60606
.—..—.———.—..—-...... -. -. . ... ..—..-——...——---——————. -..-. —.—.—— ..— . .. ..
..--
-. cooking completeReminder
(For all cooking featuresexceptAuto Roast code4)
Toremindyou thatyouhavefood in the oven,the
oven willbeep once aminuteuntilyou either open the
oven dooror touch theCLEAR/OFFpad.
43$
.> \&
.—
.——.—-—
—:-=-=_=
-—=
==—
—.—.—..—
II
II
6m?Ewq-
Mm
mmmu au IIWm4
V#sxlmKS
wIn m
kmsl
El
&!5-i!!!%
mm
---
Emz-om
EIEElml
❑E3H
‘“H
Door Latches. 5.
-’--43
Temperature Probe. Use with 8.
Tcmp Cook& Hold and Auto
Roast functions Ody. 9.
DOUBLE DU’HP’ shelf.
Lets you microwave several
foods at once. (See Safety
instructions and How to Use
the Double DutyT’fi’Shelf.)
Door openlhltton. Push to
open door.
Glass Cooking l’my. Tray
must be in place when using
the oven. Cooking performance
will be unsatisfactory without
the tray in place. The tray may
be removed for cleaning.
Food microwa~;esbest when
placecidirectly on the oven
fioor. Usc this shelf only when
cooking foods on two levels.
10. Cooking Guide.
Quick reference codes for
many frequently prepared
foods.
NCHI’E:Rating plate, oven vents(s)
and oven light are located on the
inside walls of the microwave
oven.
~—;i
i’
.-
——...---. -....--.-...—,....——— —— ———- ——.—.
The Touch(hntrd Rand al~owsyou to set the oven controlswith
the touchof afinger.It’sdesignedto be easyto use and understand.
“Error’9Appears onDisplay:
oDuringAuto Cook,Reheator Popcornprogram,
the doorwas openedbefore steam could be detected.
oNo steamwas detectedby sensorwithin four
minutesand 10secondsafter startof Popcorn
program.
“PROBE”Appears on Display:
“Probehasbeen forgottenwhen Auto Roast or Temp
Cook &Hold functionis beingused.
oProbeis not securelyseated in oven wall receptacle.
1.
2.
3.
4.
5.
&
7.
:>
(>.
I
r
1
..
DISPLAY.Displaystime of day,time or
temperatureduringcooking functions,power
levelbeing used, cookingmode and instructions.
TIME DEFROST.Gentle thawing at automatic
power levei 3(Low).
TIME COOK I&11.Microwave for aselected
amountof time using automaticpower level 10
(High).
POWER LEVEL. Touch thispad after you
enter thecooking time if you want to change
fromautomatic power level 10(High) for
cookingor power level 3(Low) for defrosting.
MH%%13C‘l’IME$?.This feature uses no
microwaveenergy. 1[functionsas either akitchen
(imcr.:1saholding period after defrost or as a
de]u~rlimcr before time or temperature cooking.
AIJTOCOOK.Touchthis pa(i and then a
numberpad f’or(iesiredcode number, and oven
a[lton]tl[ically microw:~vcsat pre-programmed
p(jt}crIcvc]s:mddctermirmsthe properamount
01”uN)kinj..[imm un(i1{k f-oodis done and oven
Sh[llsof’l-.
i>~)~’~[)~?~.‘Ii}uch[hispad md $j’l”ARl”.and the
x)pu)rn SCIISIJI-~ietcrmincs (hcright cooking time.
h’ l~]icr(~w:l~cpopcorn f’eatumis ciesignecito be
I.w’cionly ivi[h prqxlck+gxi miurow~lvepopcorn
,}~ciyhin: 3,0 tt).3.7t)unccs.
~?i~i]i?it!$~C[>[]k ‘]’OLIChlh~ number ]thI.OLILJfl
ip:~dsi’L)rito 5minLIlcs ofcook ins at po\vt2r
L‘IL’I I(). F’(}1.cxw]]plc i(~t~ch 2IIIcn START for
III
iII IIiCIS :\[ p(lf~’cr Ic[’cl I(~.
9. CIX9CK. Touchthispad to entertimeof day
or checktime of day whilemicrowaving.To set
clock,first touch CLOCK pad andthen enter time
of day.For example, if time is 1:30,touchnumber
pads 1,3, and Oand “1:30” willappearin display.
Then touch STARTor CLOCK pad. Toreset or
changetime, simplyrepeat thisprocess.
10.ADDI30 SECONDS. Press thispad to add
30 secondsto the cook time asit’scountingdown.
~~.AUTO START/REMINDER. AllowsyOUto
programyour oven to begin cookingat alater
time of day—upto a12-hourdelay.The Reminder
featurecan be used like an alarmclock.
12. START. After all selectionsare made, touch this
pad to start the oven.
13.AUTO DEEROST’.Touch thispad and enter food
weight. The oven automaticallysets power levels
and defrosting time.
14. TEMI? COOK &HOLD. Use the temperature
probe to cook by using apreset temperature. Once
food reaches preset temperature, oven switchesto
HOLD setting and maintainsthat temperature
until you touch the CLEAR/OFF pad.
15. AUTO ROAST’.Insert probe, touch thispad,
and desired number pad for code to slow-cook
or temperature cook meat with automatic preset
program.
16. AUTO REHEAT. Use Auto Reheat for quick
reheating of avariety of foods using different
times and power levels.
1’7.NUMBER PADS. Touch these pads to enter
cooking, defrosting time, time of day, temperature,
power level, Auto Codes or food weights for ALItO
Defrost.
18.NIINUTE. Use with number pads to enter whole
minutes. For example, for 4minutes touch 4and
MINUTE.
19, CLEAR/01%’. When touched, it shuts off the
oven and erases all settings (except time 0[ chy).
,.
---.—-———.———..—....—.— —-...—-————-—————.—_.-—...——.a—---,...-—... —-—.....--.
,—-”....-+— . . . . . . . . . . . .
..-
-ENTER FOODTEMP COOK NWATCH
WEIGHTLBS. DEF TIME I II CODE
\
*
G9-’-
43-
49--
tD----
fE3----
--@iElmw
SensorControls
GUIDEBEHINDDOOR I
EEIEIEIW
GiaGl[“’”’i @
——— I
dI
[Jstiyour TtNIchControl Panel to Au[o~oo~,Auto ~rea[eyourownprograms to suityour individual
R():isi, Auto I<chcat:~[ld/iLlto Defrost-with the cooking style.FOI.example: program ahold time
OVCIIscttin: [he power Icvelsand cooking or heatin: between ‘rinleDefrost and Time Cook I&II; set
(il]lcs:to Tcn]pCo{)k&Hold. usi[]gJ’tNirchoice o~. Time Cook 1&11for atwo-stage programusing
Ict]]~~cr:lllirc;10Time Cook or “1’inwDefrost, using (iii-ltircnttimes and power levels; or use the
}’OLII.Choiucof powcl-IevclsfI”onlI(Imvcst)to 10 h/~inute/SecondTimer to delay the startof a
(1]i~hcst): t(l~’x[cndcookinig[ilnc by 30 seconds usin: cooking function,such as Temp Cook &Hold.
;\(l(!.10Sc~’olldspild:((}sc[ Ihc clock: :mdtotinw
‘;il\ Ik’S(.’[,
-. . .....—..—-——— —.—-..—...——...—.———
sequence
touching
——
at left
TOIX3E m
me Timer using aml-m!
Ike Minute/SecondTimerhas threetiming The Minute/SecondTimercan also be used to
functions: programa“holdingtime”between microwave
~It opel*atesas aminute timer. cookingfunctions.The time can rangefrom one
secondto 99 minutesand99 seconds.Aholding
~Itcan be set to delay cooking. or standingtimemay be found in someof your
~Itcan be used as aholdsetting after defrosting. own recipesor in acookbook.
The Minute/SecondTimeroperateswithout
microwaveenergy,
HowtoTim! a3-Mimm Phonecan DelayedCooking
Step 1: TouchMIN/SEC TIMER pad. Todelay cookingup to 99 minutesand 99 seconds,
Step 2: Touch3and MINUTE pad (for 3minutesand touch eitherTIME COOKI&XI,TEMP COOK &
no seconds), HOLD orAUTOROAST and enter cook time,
temperatureor code.TouchMIN/SEC TIMER and
Step 3: TouchSTART.Display shows time counting
down. The timer signalswhen time is up. enter numberofminutesto delay cooking.When
delayingIkrnpCook& Holdor AutoRoast
cooking,be sure probeis in food. TouchSTART.
Timer will countdown to zero and cookingwill begin.
HwvtoDefrost,MM andmm! Chk
Lct’s say you want to defrost afrozen casserole for
15minutes. hold for 10minutes and then Time Cook
fOl”25 minutes. Here’s how to do it:
Step 1: Take casserole from freezer and place in oven.
Step2:Touch T1lME
,m ‘EFROsTp’ld
1MINU”I”E1M[NLJTEpwi Ior 15minutes
(icfrostiIIg tiHw.(Ekf”rostingis
IMIN/SEC
‘ilMER I
Step 5: Touch 1,0
ten minutes.
n
TIMECOOK
I8!II
Step‘7:Touch 2, :
01’COOkinglime.
n
START
Step 4: Set standingor hold time
by touching MIN/SEC TIMER
pad.
md MIhTUTEpad to hold for
Step 6: Touch TIME
COOK I&Hpad.
md MINUTE pad for 25 minutes
Step 8: Touch S“I’ART.As
each function is automatically
performed, oven display shows
instructions entered and the
function. When time is up, the
OVtHI signals and flashes “End.”
————.—.-- ——.—. ..........-............................ .....-....-.,.-.”.....--- ——.-—-- —..-—-..,
....,.-
mm?cook I
-.
‘~
.
TimeCook Wows youto microwavefor aselected
amountof time.
Power level 10(High)isrecommendedfor most
cooking,butyou may changethisfor more flexibility.
Tobecomebetter acquaintedwith time cooking,make
acup of coffeeby followingthe stepsbelow.
Step 1:Fill acup
2/3 fullof water,add
1teaspoonof instant
coffee and stir to
dissolve.Use acup
thathas no metal
decorationand is
microwave-safe(refer
to MicrowavingTips
section).Place cup in
oven and close door.
Step 2: TouchTIME
COOK I&II pad.
Step 3: Select your time. Touch 1
MINUTE and MINUTE pad for one minute.
Becauseautomaticpowerlevel 10is recommended
for thiscup of coffee, thereis no need to changethe
powerlevel.(If power level 10is notappropriate,see
“How to ChangePower Level” below.)
mStep 4: Touchthe STARTpad.
Step 5: When time is up, the oven signalsand flashes
“End.” The oven,light and fan shutoff.
Step 6: Open the door.
If you interruptTime Cook to check the food, simply
closethe door and press STARTto resume cooking.
If thereis not timeremaining on the timer you must
reset the timer to resume cooking.
How tochange Power Level
1.Press TIME COOK I&II.
2. Selectcooking time.
3. Press POWER LEVEL.
4. Select power.
5. Press START.
-usingthemmcook nFeature?
The Time Cook 11feature lets you set two time
cooking functions within one program. This is ideal if
you want to change power ICVCISduring your cooking
operations. Here’s how to do it.
S@p l: f]laccfmxl in {lvcnin microwave-safe
container :mclclose the door.
StQP~: ‘l-ouch“I”IMEC(X)K
pzfl ‘&”
How to (hinge PowerLevel
1. Press TIME COOK I&H.
2. Select cooking time.
3. Press POWER LEVEL,
4. Select power.
5. Press START.
~A-%w,%---
-—.
—A Step 7: “POWER 10,”is displayed and “COOK
SiL~p3: Selectyour first cook tinqc.FOI-example,
Iouch 2. 1find.5for t~vominutes and 15seconds.
TIME 1“counts down.
Step 8: At the endof ●’COOKTIME1,”thesecond
,“,
;’;tcp ●$:Tm!chTiMECOOKI&11. po~tw level is displayed and “COOK TIME U“ is
shown counting down.
f+J.~.,,Cg*
,1;<,(J.1.~L’f),){)U1”w!cofldc(N)k[illlc. Step 9: When time is Lip,the oven signals and flashes
(‘1]’mgct}lcpo\\~Q~-jgv~[.
:W-!p(1:. . , “EIK1,”The oven, light and fan shut off.
Step 1[):Opcn the door.
1[you interrupt Time Cook to check the food, simply
close the door and press START to i.esul~lecooking.
If there is not time remaining on the timer yOLl must
reset (k tinm- to i-csunlecoo!<ing.
‘-2
iGBY
(continued)
TIN?Expresscook E’ef.mre Add 30Swxmds
The ExpressCook featureis ashort-cutmethodto set
m
The Add 30 Secondsfeature
timefor 1-5minutes. ADD 30 providesaconvenientway to
ToExpressCook your foodor beverage: SECONDS extend cookingtime by 30
Step 1: Touchanumberpad (from 1to 5) that secondswhile the oventimer is
countingdown.It will add 30
correspondswith the amountof your desired cooking
time(in minutes).For example,touch the 2pad for 2secondsto the time shown each
time the pad is touched.
minutesof cookingtime.
Step 2: Touchthe STARTpad.
The oven will automaticallysignal,flash “End” and
shutoff at the end of theprogrammed time.
Howtouse Autostart
The Auto Start featureallowsyou to programyour Step 2:Enter the time you want the oven to start.
oven to begincooking at apreset time of day—up (Be sureyour microwave oven clock showsthe
to a12-hourdelay. correct time of day.)
ToUse AutoStart Step 3: Enter your desired cooking program.
Step 1:Touch AUTO Step 4: Touch STARTpad. The oven will
AUTO START START/REMINDERpad. automatically start at the desired time.
REMINDER
How-k)use
‘1%42Remindw feature cm be usedlike an alarm
clock. without starting the oven.
!I
AUT()START ST~R’F/l<EMINDER@.
—....-———.—...
REMINDER
Step 3: Touch START
pad. The reminder is
now set at the time you #=fPn#j[
programmed, and will IT E\#~
sign:llyou at that time
with abeeping sound
until you open the door or touch the CLEAR/OFF
pad. The display will show REM until the oven
door is opened or CLEAWOFF is touched. The
oven will signal continuously for up to 30 minutes.
The REMinder time may be displayed by touching
the AUTO START/REMINDER pad. The time-of-
day may be displayed by touching the CLOCK pad.
..
. . .
———_...—.—.—— ———..—— ......... -.........-...-.-....-—--.-----...-——— ———.. .——.—.——-—.——-
“..,
.,
“~Q~” flashes.After
4seconds,“START”
flasheson display.
ThePopcornfeature isdesignedto be used only 1
withprepackagedmicrowavepopcorn weighing
m
Step 4: TouchSTART.The
3.0 to 3.7 ounces. popcorn sensorautomatically
Step 1:Removethe outerwrapperfrom the calculatesthe cookingtime.
microwavepopcorn. 6d
Step 2: Open oven doorand place package of popcorn
in the center of the ovenfloor as directed by the
manufacturer’sinstructions.Close oven door.
1’ 1Step 3: TouchPOPCORN pad.
POPCOI?N ICOOK
TlfVIE
After the popcorn
sensordetects steam,
the oven signalsand
displaysremaining
cookingtime needed.
$tep 5: When cooking
is completed, the oven
signalsand flashes
“End.” Open the
door and remove
the popcorn,
Howto thePOP toProvideashorterorLongerCook Time
If your favoritepopcorn is not completely popped, If your favorite popcorn is overcooked, there is
there is asimple adjustmentyou can make. another adjustmentyou can make.
Touch the POPCORN
pad and then touch
number pad 9. The
word “POP” will
appear on the display
with aplus sign beside
it. The plus sign
indicates 20 seconds
more cooking time is
being provicicd.
Touch the POPCORN
pad and then touch
number pad 1.The
word “POP” will
appear on the display
with aminus sign
beside it. The minus
sign indicates20
seconds lesscooking
time isbeing provided.
cmIuse regular’popcorn withmePop(xml
feature‘inmy mimmaveova-l?
No. This automatic function is designed to be used
only with prepackaged microwave popcoi.n.
.————.————.—— -—-—
..— ..-..-—.
Time (PowerLewd3)
Time Defrostisdesignedforspeedythawingof
frozenfoodand is oneofthe greatadvantagesof
amicrowaveoven.
UsetheTimeDefrostsettingtoquicklythawfoods
suchasbread,rolls,vegetables,fruitsandfrozen
dinners.TheAuto Defrostsettingispreferred
formeatandpouky becausetheovensetsthe
defrostingtimeandpowerlevelsforyou.
oPowerlevel3is automaticallysetwhenyoupress
TIMEDEFROSTpad,butyou maychangethisfor
moreflexibility.
How to Change Power Level
LPressTIME DEFROST.
2. Select defrosting time.
3. Press POWER LEVEL.
4. Selectpower.
5. Press START.
Tobecomebetteracquaintedwiththedefrostfimction,
defrosta10oz.packageoffrozenstrawberriesby
followingthestepsbelow.
Step 1:Placepackageoffrozenstrawberriesin theoven
andclosedoor.Be surepackagecontainsnometal.
m
Step2:TouchTIMEDEFROST.
TIME
DEFROST
Step3: Selectonehalfof thetotaldefrostingtime
recommended.Forexample,touch4andMINUTE
pad for4minutes.
m
Step 4: TouchSTART.When
START thecycleiscompleted,theoven
signalsand flashes“End,”then
automaticallyshutsoff.
Step 5: Turnthepackageover,closethedoorandrepeat
Steps2and3to setremaininghalfof defrostingtime
andtouchST~T.
Step 6: Whentheovensignalsandflashes“End,”open
thedoor,removethepackageand separatestrawberries
to finishdefrosting.
~Foods frozen in paper or plastic can be defrostedin *For even defrosting,some foodsneed to be broken
(11(?J)ackage. up or separated part of the way throughthe
defrostingtime.
‘e .-
..-’
=Family-six. pm-packaged frozen dinners can be
defrosted and Inicrow;lved,1fthe food is in afoil QFoods that spoil easily,such as milk, eggs, fish,
conf[]irwr.[ransferit to a1~~icI-o\+’:i\~c-safedish. stuffings,poidtry and pork should not be allowed to
sit out for-morethan one hour afterdefrosting. Room
u
temperature promotes the growth of ha.nmfulbacteria.
.,
b/’
-.
(-
‘. -.. -~
—--------------.............—..- ...... . .---.—,.,.-_—— ——-—----- —.——
‘{
.,
=;
,..
,.+
....
BY
—. Internal temperatureis the best test of doneness TemPCook& Holdtakestheguessworkout of
for many foods. coo~ing,becausetheoven aut~maticallyswitches
Use T’empCook& Hold to cookavarietyof foods to “Hold” settingafterreachingthe preset food
to the desiredfinished foodtemperature.The Time temperatureand maintainsthat temperaturefor up
Cook 1&11setting is recommendedfor batters, to onehouror untilyou touch the CLEAR/OFF pad.
doughs,frozen foodsand foodswhich aredifficuBt NOTE:Oven automaticallyswitchesto “Hold”
to cookprecisely with theprobe. whenpresetfood temperatureis reached.
TheTemperatureProbe
The temperatureprobe is afood thermometerthat
gauges the internal temperatureof your food. (Its Cable
appearance may vary from picture at right.) The probe End
must be used when using TempCook &Hold or Auto
Roast. To use the probe properly,follow directionsin
the Automatic Roasting section.
How tomm-lpcook aBeefRib Roast toMedilm’1
~~ep 1: ~nscrttemperature probe and attach probe
m
Step 5: Touchthe STARTpad. If
securely in oven wall. Close the door. START internaltemperature of the roast
Step 2: TouchTEMP COOK
‘Ho’”pad
is less than 90”F.,display will
show “COOL”; if temperature is
90”F.or above,display shows
u1Iu L-u
~temperaturecounting up.
Step 6: When 160°F.is reached, the oven will sound
Step3:Touch1,6and0for 160”F. and display “Hold.” The oven will then hold the
Step4:Touch POWERLEVEL temperature.
POWER pad. Touch 5for medium.power.
LEVEL
m
Step 7: Touch the CLEAR/OFF
CLEAR pad to stop the cycle.
OFF
Step 8:Remove probe and food from the oven.
f-;Q&~~~g ‘rips
o~Jst’;I]o\vL’rJX)WC1.kwi; [.()()(is *13csure frozen food has been ~Cover foods ioosely for moisture
\,i1]~l<!:l[lll~jr~’t:VC1l@[hOU@ completely ciefrostec]before control and quick, even heating.
rcqliiring more Iinm. inserting probe. Probe may break
off-if used in fI’OZellfoods.
AutoDefrost
Withthe Auto Defrostfeature, Use the Auto DefrostGuideon the The ovencalculatesdefrosting
the oven autornaticaHysets the nextpage.Enterthefoodweightin timeandchangespowerlevels
defrostingtimesand power poundsandtenthsofapound(see duringdefrostingtogiveeven
levelsfor you. ConversionGuidebelow).Then defrostingresults.
touchSTARTpad.
HowtosetAutoDefrost
Beforeyou begin, check the guidelocated at front
of oven when you open the door.It shows minimum
and maximumfood weightsfor avariety of foods.
Youwill need to know your food weightbefore
settingAuto Defrost.
Step 1: Remove food from package,place in oven on
microwave-safedish and close door.
Step 2:Touchthe AUTO
mDEFpad
EIlmlcm Step 3: Enter weight. For
example, touch number pads 1
~~~~~ and2forweichtof l.2pounds
(1 pound, 3o;nces. Se;
Conversion Guide below.)
Step 4: TouchSTARTpad.
mCountingdown
Display showsdefrost time
T3vice during
defrosting,the oven
beeps4times and 7P Iff=ff
‘6T’URn”flashes. IL~ IQl~t
Followthe directions in
the Auto Defrost Guide ~
for what to do at the first and second signal.Then
closethe door and touch START.(Defrosting
continuesduring “TURn” display.)
Whendefrostingtimeis completed,“End” flashes
and oven beeps 4times. “End” remains on display
and oven beeps every minute until door is opened
or CLEAR/OFF pad is touched.
stand Time
,-
fconversimGuide
Iftheweightoffood is statedin
poundsand ounces,the ounces
mustbe convertedto tenths
(.1)of apound.
Ounces Pounds
1-2 .1
3.2
—.
4-5 .3
6-7 .4
8.5
9–1(-) .6
:1 .7 -
12–13 I.8
14-15 I.9
.—..
‘
(’
j
‘<. ,,
-..
FOODS MIN.-MAIL
WEIGHT FIRST SIGNAL SECXINDSIGNAL EYFANDTIME
Chops 0.1 -6.0 lbs. Turn over. Separate and shield
where necessary. 5minutes
Frankfurters,Sausage I0.1-6.0lbs. Separate. Remove defrosted
pieces.
Remove defrosted areas
and break apart.
2minutes
0.1 -6.0 lbs.GroundMeat Turn over. 5minutes
Beef Patties I0.1 -6.Olbs. Turn over. Separatepatties. 5minutes
Roast I0.1 -6.0 lbs. Turn over and
shield. Shield if necessary. 90 minutes
10minutesRibs 0.1 -6.0 lbs. Turn over. Remove defrosted
pieces. Shield if
necessary.
Steak I0.1 -6.0 lbs. Turn over. 5minutes
Separate and remove
defrosted pieces.
0.1 -6.0 lbs.
Stew Turn over and
separate. 5minutes
.“_ ., ‘!”
..
,&&5a. Whole Chicken 0.1-6.0lbs. Turn over and
shield. Turn over and shield. 10minutes;
run cold water
in cavity.
Shield where
necessary. 20 minutes
in refrigerator;
run cold water
in cavity.
Turkey Breast
(breast side up) 0.1-6.0 Ibs. Turn over.
0.1 -6.0 lbs. Separate and remove
defrosted pieces. 5minuteschick(2Jl Piw’cs Turn over.
Cornish Hens (whole) ().1-6.0ills. Remove wrapper
anclturn over. 10minutes;
run cold water
in cavity.
Tu!-nOVCI”. 5minutes
Turn over. 5minutes
().I - 6.()Ibs. Separate and remove
defrosted pieces. 5minutes
TLII-n over and
0.1 -6.() 11-):;. Hold under
cold rurming
water.
shield tail ancl
IIL!N1.
.. ...—-.——.-.—...-..-.....-......-——— .——..- .-.--..,-.
”---...- .-=...... -—..—
TIC
Auto Roastusesthe temperatureprobeto cook. Just as in regularroasting,only tenderroasts should
to thedesiredservingtemperature.Unlike Ternp be Auto Roasteduntil specifiedinternaltemperatures
Cook &Hold, -whichusesasinglepower level, arereached.Less tenderroastsshouldbe microwaved
Auto Roastuses up to 3powersettingswhich by time.
automaticallyswitch duringroastingythus
providingeven, tendercookingresuMswithout
overcooking.
Preparing Roasti for Auto Roasting
Place tenderbeef
roast in cooking
bag on trivetin
microwave-safe
dish. (Refer to
package
instructionsfor
Place pork roast
in cookingbag
and place in
microwave-safe
dish.
properuseof
cooking bag.) insert probe through cooking bag
horizontallyinto the center meaty area not touching
bone or fat. IMakesure the handle does not touch the
food or top or sides of the oven.
Place meat in oven I
with probe to the
right.Insertcable ml’
end of probe firmly
into receptacleon
oven wall.
HowtoAuto RoastBed’to
Step ~:TOLIChAUTOROAST
pad.Touchnumberpad 1.Touch AUTO ROAST
S“l’ART.(See the “Auto Roast A
fi[[idc” for comp]ete listof
I“ccollllncndcd(x)dcs.)
Step 3: After a~
pre-programmed f_t I‘1 !‘1
food temperature is I~L~~K[
reached, oven beeps
4times and “1-IOLd” CODE
rwornwBJIioLldlillg appears on the display. II
—
[hc ALJTOROAST 1=( 1“f lz ~
—f~-1~ SteP~: Foodwill be
p:d ~Juringcooking. held at this temperature
llw mca[ in[crmd FOODTWIP for 60 minutes. The
ici]]pcri~turcwiIl be CODE oven then beeps 4times
(Ksph[ycd.(“cool .“’ and “End” appears.
~vi11[Xdis~)l:lycduntil nw:][rcachcs 90”F.)When p:ld
is r-clcmcd.dorwness code I-c[lppearson the display,
----,
(“
)
...—./
—---
...
AutoRoast‘Guide
ePlace meatsin acookingbag in microwave-safe ~Recommendedcodes are shownon guidebehind
dish. (Refer to packageinstructionsfor proper use door,on front of oven.
of cookingbag.) QInsertprobe as describedelsewherein thissection.
Doneness
Display
Appmx. Time
(minutesperpound) Hold*
Minutes
IIMinimum Final
Food Code Temp.
Beef (5lb.max.)
TenderRoast
Medium 1160°E
Well 2170”F. 13-15
15-17 0
5-1o
Pork (5lb.max.)
LoinRoast I2I170”F. 15-19 10 WELL
~oukry (6lb.llKIX.)
TurkeyBreast 3185”F.
(Insertprobehorizontally
intomeatiestarea.)
17-20 10-15 WELL
‘Recommended standing time before serving.
Oven switchesto Hold
at 180°F.,and continues
holding at 180”F.until
you remove food and
touch CLEAR/OFF
pad. If stirring is
. .
Total time includestime to bring food to 180°F.,and
hold at that temperature untildone.
Set Auto Simmer like 1—1
Auto Roastas explained !Z! jif’-+
in this section. Display —f i$ Ilf
shows “SIM”and CODE
“CODE4.’. CODE recommended, you can restart oven by touching the
STARTpad again. Touch CLEAR/OFF pad to turn
offoven:
Comments
A~idenoughliquid to$justcover meat, If addingvegetables,
nxk sw they :~recompletely covered by liquid.
Precook meat. Placeprobe 1inch from top surface. Stir after
3houi-s, if possible.
JW’F4 5-.7
1M)(’t~. S-3
1
so‘i’. -l_&}
—...—.—.. ----
/:{()“[:.I/-()
——..,. ..
“ ., .-.————
I
..-.–--...-1 --.–———— ——.——. .... - --
.. .-
1
..
...-...
AutoReheatletsyou touchjust 2padsto bring Becauseall cookingcontainersmustbe coveredduring
previouslypreparedfoodsto servingtemperature.With automaticreheating,thisfeatureis bestwithfoodsyou
manyleftovers,thereisno needto lookup reheating wantto steamor retain moisture.SeeContainersand
timesin acookbookor torelyon guesswork. Coverssection.
By actuallysensingthesteamthatescapesas food! I
heats,this featureautomaticallyadjuststhe oven’s INOTE:Useofthemetal.DoubIeDutyTMsheifwith
heatingtime to varioustypesand amountsof Auto ReheatisNO’Trecommended.
pre-cookedfood.
Foods
Awide variety
of previously
prepared foods
includingleftovers
can be Auto
Reheated.
Auto Reheat is
recommended for
single-servingsof
food or plates of
leftovers.
FoodsNot
Bread products,
foods that must
be reheated
uncovered,
foodsthat require
constant attention,
and foods calling
for adry look or
crisp surface after
reheating should
not be Auto
Reheated. It is
best to use Time
Cook I&II.
Easytouse KeepDoor msdl
Simplytouch AUTOREHEATandSTART. Donotopentheovendoorwhiletheword “RHEAT”
isdisplayed—steamescapingfromtheovencan
affectreheatingperformance.If thedooris opened,
closethedoorandtouchSTARTimmediately.
r——..
I[“[)()[)
I—,——— —
FOOD
‘“RHEAT” shows on
.,-.-—...—...-...—-.-.—----
.. ..
“RI-IEAT”and “FOOD”
are displayed.
Beep soundswhen steam
is sensedand “REH3AT”
isreplacedbytime
countingdown.Rotate
orstirfoodifnecessat-y.
close doorand touch
STARTto finish heating.
When ck)lle,oven
displays “End” and
beepseveryminuk
until CkX)r is OpCiled01”
(J ~~AJ</.(j]:’p i:; @Ll&~
. .
.....
./.
/
\,
..

Other manuals for Spacemaker II

1

Other GE Microwave Oven manuals

GE Spacemaker JVM1630WK User manual

GE

GE Spacemaker JVM1630WK User manual

GE CVM2072SMSS User manual

GE

GE CVM2072SMSS User manual

GE JE1530 Use and care manual

GE

GE JE1530 Use and care manual

GE spacemaker III User manual

GE

GE spacemaker III User manual

GE JE740DRWW User manual

GE

GE JE740DRWW User manual

GE JVM1650CH - 1.6 cu. Ft. Spacemaker Microwave... User manual

GE

GE JVM1650CH - 1.6 cu. Ft. Spacemaker Microwave... User manual

GE JVM2070 H How to use

GE

GE JVM2070 H How to use

GE Spacemaker JVM230 User manual

GE

GE Spacemaker JVM230 User manual

GE JE1423H User manual

GE

GE JE1423H User manual

GE MW636 User manual

GE

GE MW636 User manual

GE Profile PVM1790 User manual

GE

GE Profile PVM1790 User manual

GE JVM6172RFSS Operating manual

GE

GE JVM6172RFSS Operating manual

GE ZMW2OOOB User manual

GE

GE ZMW2OOOB User manual

GE Appliances JES1456 User manual

GE

GE Appliances JES1456 User manual

GE Spacemaker JVM1752SPSS Manual

GE

GE Spacemaker JVM1752SPSS Manual

GE Spacemaker-3 JEM4KWA Use and care manual

GE

GE Spacemaker-3 JEM4KWA Use and care manual

GE CVM1750 User manual

GE

GE CVM1750 User manual

GE PVM9179BRTS User manual

GE

GE PVM9179BRTS User manual

GE JES1142 User manual

GE

GE JES1142 User manual

GE Profile PVM9005 Series User manual

GE

GE Profile PVM9005 Series User manual

GE Profile PEM31SF4SS User manual

GE

GE Profile PEM31SF4SS User manual

GE JES1039BJ User manual

GE

GE JES1039BJ User manual

GE JESl140 User manual

GE

GE JESl140 User manual

GE PVM9195 User manual

GE

GE PVM9195 User manual

Popular Microwave Oven manuals by other brands

Wolf MW24 Use & care guide

Wolf

Wolf MW24 Use & care guide

Zanussi ZSG25224 user manual

Zanussi

Zanussi ZSG25224 user manual

Jenn-Air M130 use and care manual

Jenn-Air

Jenn-Air M130 use and care manual

Daewoo KOR-137ES Operating instructions & cook book

Daewoo

Daewoo KOR-137ES Operating instructions & cook book

Samsung NQ50K5137 Series user manual

Samsung

Samsung NQ50K5137 Series user manual

Daewoo KOR-631G5 operating instructions

Daewoo

Daewoo KOR-631G5 operating instructions

Baumatic BTM20.5SS user manual

Baumatic

Baumatic BTM20.5SS user manual

Frigidaire FGMC2765KB - Gallery 27" Microwave Combination... Wiring diagram

Frigidaire

Frigidaire FGMC2765KB - Gallery 27" Microwave Combination... Wiring diagram

Electrolux EI30BM55HSB installation instructions

Electrolux

Electrolux EI30BM55HSB installation instructions

Daewoo KOR-6C175S Service manual

Daewoo

Daewoo KOR-6C175S Service manual

Miele M 637-45 ECR operating instructions

Miele

Miele M 637-45 ECR operating instructions

Whirlpool Estate TMH14XMB0 Use & care guide

Whirlpool

Whirlpool Estate TMH14XMB0 Use & care guide

KitchenAid KMCS324P Use & care guide

KitchenAid

KitchenAid KMCS324P Use & care guide

Sencor SMW 3917 instruction manual

Sencor

Sencor SMW 3917 instruction manual

KitchenAid YKCMS1555 Use & care guide

KitchenAid

KitchenAid YKCMS1555 Use & care guide

Samsung MW71C Owner's instructions

Samsung

Samsung MW71C Owner's instructions

Sharp R-899R Operation manual

Sharp

Sharp R-899R Operation manual

Sharp KB6015KK - 1.0 cu. Ft. Microwa Operation manual

Sharp

Sharp KB6015KK - 1.0 cu. Ft. Microwa Operation manual

manuals.online logo
manuals.online logoBrands
  • About & Mission
  • Contact us
  • Privacy Policy
  • Terms and Conditions

Copyright 2025 Manuals.Online. All Rights Reserved.