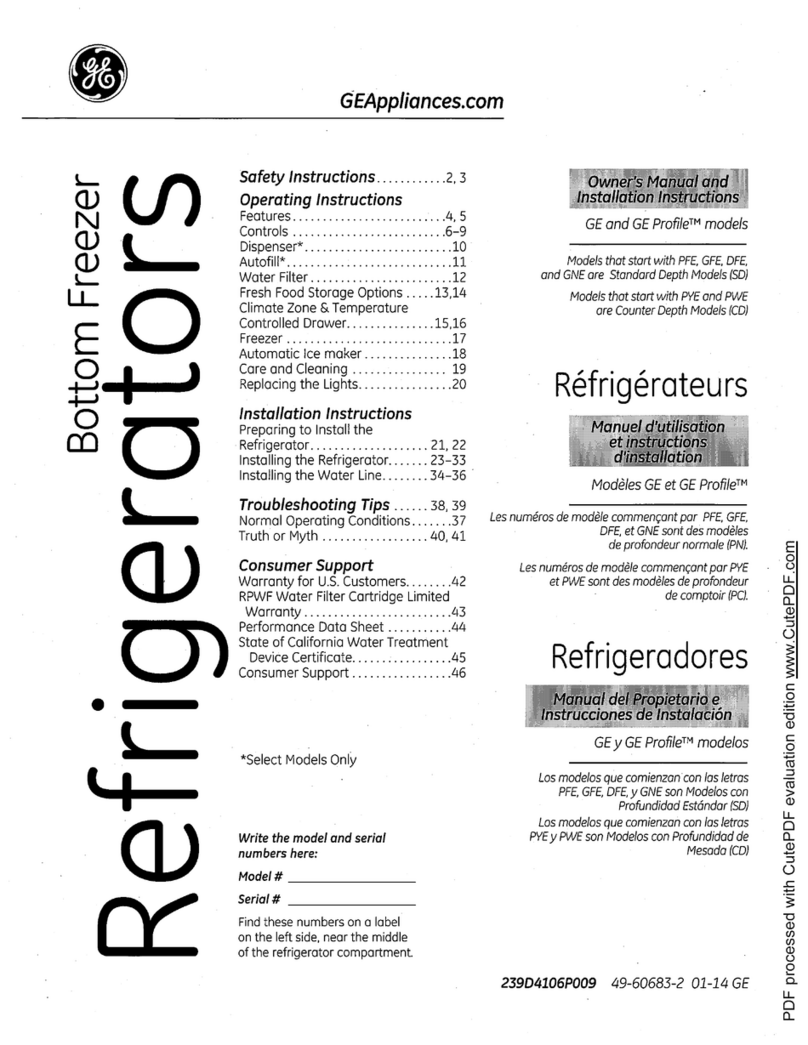
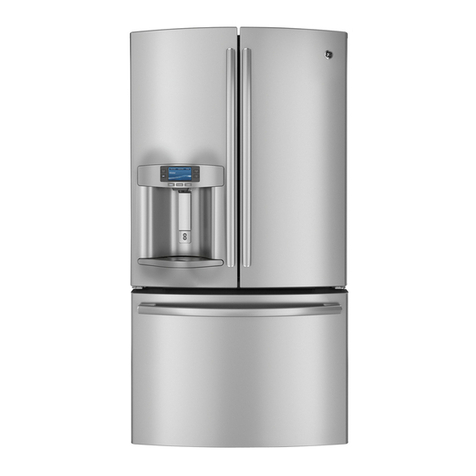
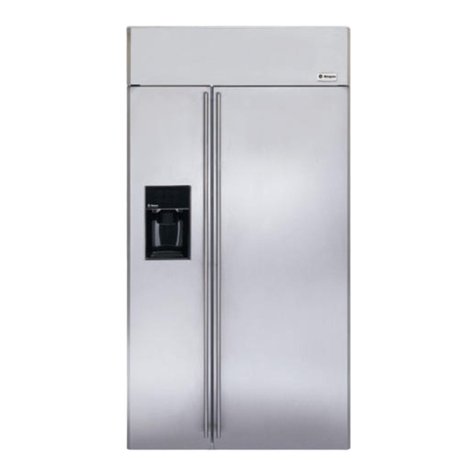
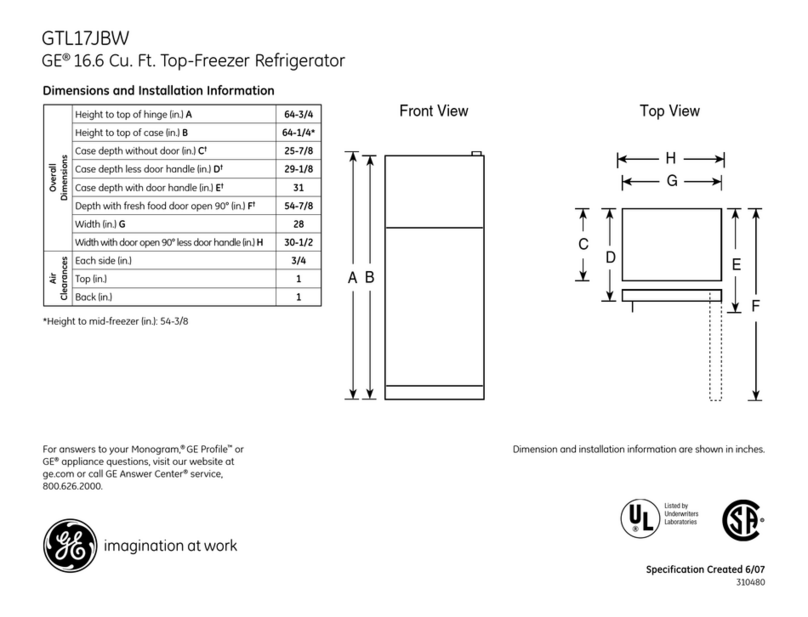
GE ZIC36ON Series How to use

g
g
PUB # 31-9079 12/01
MODEL SERIES:
ZIC36ON
TECHNICALSERVICE GUIDE
GE Consumer Home ServicesTraining
Monogram BMNF Refrigerators with
Electronic Controls
GEA01198

IMPORTANT SAFETY NOTICE
The information in this service guide is intended for use by
individuals possessing adequate backgrounds of electrical,
electronic, and mechanical experience. Any attempt to repair a
major appliance may result in personal injury and property
damage. The manufacturer or seller cannot be responsible for the
interpretation of this information, nor can it assume any liability in
connection with its use.
WARNING
To avoid personal injury, disconnect power before servicing this
product. If electrical power is required for diagnosis or test
purposes, disconnect the power immediately after performing the
necessary checks.
RECONNECT ALL GROUNDING DEVICES
If grounding wires, screws, straps, clips, nuts, or washers used
to complete a path to ground are removed for service, they must
be returned to their original position and properly fastened.
GE Consumer Home Services Training
Technical Service Guide
Copyright © 2001
All rights reserved.This service guide may not be reproduced in whole or in part
in any form without written permission from the General Electric Company.
!

– 1 –
TABLE OF CONTENTS
TECHNICALDATA .................................................................................................................... 3
MODELNOMENCLATURE ........................................................................................................ 4
RATING PLATE........................................................................................................................ 4
MINI-MANUAL .......................................................................................................................... 4
SERIALNUMBER ..................................................................................................................... 5
COMPONENTANDCONNECTORLOCATOR VIEWS .............................................................. 6
CABINET................................................................................................................................... 9
Cabinet............................................................................................................................... 9
Machine Compartment ................................................................................................... 10
Door Closure Mechanism.................................................................................................11
Fresh Food Door and Hinges...........................................................................................11
Freezer Drawer ................................................................................................................11
Door and Drawer Gaskets...............................................................................................11
Rollers and Leveling....................................................................................................... 12
ICEMAKER.............................................................................................................................. 12
Water Valve and Water Line ......................................................................................... 12
AIRFLOW ............................................................................................................................... 14
Damper ............................................................................................................................ 14
Evaporator Fan ................................................................................................................ 15
Condenser Fan ................................................................................................................ 18
Drain Pan Fan ................................................................................................................. 19
DEFROSTSYSTEM ................................................................................................................ 19
Adaptive Defrost .............................................................................................................. 19
Normal Operating Characteristics.................................................................................. 20
Abnormal Operating Characteristics ............................................................................. 20
Liner Protection Mode .................................................................................................... 20
Defrost Heater..................................................................................................................21
Evaporator Thermistor .................................................................................................... 21
Defrost Overtemperature Thermostat ............................................................................ 21
CONTROLSYSTEM ............................................................................................................... 22
Touch Panel and Temperature Control Board.............................................................. 22
Main Control Board ......................................................................................................... 23
Main Control Board Locator Tables ............................................................................... 26
Thermistors ...................................................................................................................... 30
ELECTRICALSYSTEM ........................................................................................................... 31
Door and Drawer Switches............................................................................................. 31
Sabbath Switch ............................................................................................................... 31
Temperature Overload Device (TOD)............................................................................. 31
Schematic ........................................................................................................................ 32
REFRIGERATIONSYSTEM ............................................................................................... 33
Compressor ...................................................................................................................... 33
Condenser........................................................................................................................ 33

– 2 –
Table of Contents (cont.)
Condenser Loop .............................................................................................................. 33
Dryer................................................................................................................................. 34
Evaporator ....................................................................................................................... 34
Auxiliary Lines ................................................................................................................ 35
Refrigerant Charge ......................................................................................................... 35
DIAGNOSTICMODE............................................................................................................... 36
DIAGNOSTICFLOWCHARTS ................................................................................................ 37
PARTS LIST ........................................................................................................................... 47
WARRANTY ............................................................................................................................ 57

– 3 –
TECHNICAL DATA
DISCONNECT POWER CORD BEFORE SERVICING
IMPORTANT - RECONNECT ALL GROUNDING DEVICES
All parts of this appliance capable of conducting
electrical current are grounded. If grounding wires,
screws, straps, clips, nuts or washers used to
complete a path to ground are removed for service,
they must be returned to their original position and
properly fastened.
IMPORTANT SAFETY NOTICE
This information is intended for use by individuals
possessing adequate backgrounds of electrical,
electronic and mechanical experience. Any attempt
to repair a major appliance may result in personal
injury and property damage. The manufacturer or
seller cannot be responsible for the interpretation
of this information, nor can it assume any liability
in connection with its use.
CAUTION
To avoid personal injury when servicing the
condensing unit, stand on a ladder which will give
enough support to allow removal of the top panel
and safely allow access to service the unit.
Max Defrost Control
W/ o Door Openings .................... 60 hrs. @ 40 min
Evap Defrost Thermo Disc ............................... 65-45°F
Light Thermostat. .......................................... 190-130°F
Electrical Rating: 115V. AC 60 Hz. ................... 9.0 amp
Maximum Current Leakage............................. 0.50 mA
Maximum Ground Path Resistance .......... 0.14 Ohms
Energy Consumption ................................ 571 KWhr/yr
ELECTRICAL SPECIFICATIONS
NO LOAD PERFORMANCE
CONTROL POSITION 3 -0°F and
AMBIENT TEMPERATURE OF
0°F90°F
Fresh Food, °F .............................. 36-42 ............... 34-40
Frozen Food, °F ........................... (-3) -3 .............. (-3) -3
Percent Running Time ................. 25-37 ............... 45-57
REFRIGERATION DIAGNOSIS
To access the low pressure side of the system, install a
WR86X009 valve only on the process tube extending
from the compressor case.
Temperature Control ............................... WR55X10098
Relay ......................................................... WR07X10033
Overload .................................................. WR08X10022
Run Capacitor (15 uF) ............................... WR62X0080
Lamp Overtemperature Thermostat ..... WR50X10003
Defrost Heater Overtemperature
Thermostat ........................................... WR50X10030
Defrost Heater ......................................... WR51X10015
Condenser Fan Motor ............................. WR60X10053
Condenser Fan Blade .............................. WR60X10049
Evaporator Fan Motor ............................ WR60X10043
Evaporator Fan Blade ............................. WR60X10050
Main Board .............................................. WR55X10056
Thermistors (2-FF, 1-FZ, 1-EV) ................ WR55X10028
Drain Pan Fan Motor ............................... WR60X10051
Damper .................................................... WR09X10065
Evaporator ............................................... WR85X10007
Compressor ............................................. WR87X10041
Condenser ................................................ WR84X10030
Dryer ........................................................... WR86X0096
REPLACEMENT PARTS
Compressor ................................................. 830 BTU/hr
Minimum Compressor Capacity
Vacuum, ..................................................... 26 inches
Minimum Equalized Pressure
@ 70°F.......................................................... 71 PSIG
@ 90°F........................................................ 104 PSIG
R134a Refrig. Chg. ................................................ 13 oz
REFRIGERATION SYSTEM
BLACK
GREE
(GROU D)
TO CABI ET
WIRI G
OVERLOAD
RU
CAPACITOR
RELAY
S
32
R
C
ORA GE
RED
–4 –
RATING PLATE
The rating plate, located inside the fresh food
compartment under the right-hand storage
drawer, contains the model and serial numbers.
Additionally, the rating plate specifies the
minimum installation clearances, electrical
voltage, frequency, maximum amperage rating,
refrigerant charge, and type.
MINI-MANUAL
The mini-manual is located behind the grille panel at
the top of the unit. It is taped to the left side wall of the
machine compartment. When done, return the mini-
manual to its original location for future use.
MODEL NOMENCLATURE
Brand/Product
Z-Monogram
Style
I - Built In
Configuration
C - Bottom Mount
Color
S - Stainless
Blank- Trim Model
Size
360 - 36 Inches Wide
Engineering
A- Initial Design
B - 1st Revision
C-2ndRevision
D-3rdRevision
Etc.
Door Type
F - Flat
R - Right
L- Left Door Swing
Icemaker/Exterior
N-NonDispenser
Model Year
L - 2001 Pre Energy
M - 2001 Energy
ZICS360 NMA LH

–5 –
SERIAL NUMBER
Theserialnumberconsistsoftwo letters, followedbysixnumerals. Thetwoprefixletters of the
serialnumberindicatethemonth andyeartheproductwasmanufactured. The year ofmanu-
facturedoesnotcorrespondwiththe model year ofthemodelnumber.
Refrigeratorsusinganumberfour(4)asthefirstdigitoftheserialnumberaredesignatedas
Celyaproduction.
NAJBEFRAMRPAYAMNUJLUJGUAPESTCOVONCED
0002ZAZDZFZGZHZLZMZRZSZTZVZZ
1002AAADAFAGAHALAMARASATAVAZ
2002DADDDFDGDHDLDMDRDSDTDVDZ
3002FAFDFFFGFHFLFMFRFSFTFVFZ
4002GAGDGFGGGHGLGMGRGSGTGVGZ
5002HAHDHFHGHHHLHMHRHSHTHVHZ
6002LALDLFLGLHLLLMLRLSLTLVLZ
7002MAMDMFMGMHMLMMMRMSMTMVMZ
8002RARDRFRGRHRLRMRRRSRTRVRZ
9002SASDDFSGSHSLSMSRSSSTSVSZ
0102SASDDFSGSHSLSMSRSSSTSVSZ
1102TATDTFTGTHTLTMTRTSTTTVTZ
2102VAVDVFVGVHVLVMVRVSVTVVVZ
3102ZAZDZFZGZHZLZMZRZSZTZVZZ
4102AAADAFAGAHALAMARASATAVAZ
5102DADDDFDGDHDLDMDRDSDTDVDZ
6102FAFDFFFGFHFLFMFRFSFTFVFZ
7102GAGDGFGGGHGLGMGRGSGTGVGZ
8102HAHDHFHGHHHLHMHRHSHTHVHZ
9102LALDLFLGLHLLLMLRLSLTLVLZ
0202MAMDMFMGMHMLMMMRMSMTMVMZ
1202RARDRFRGRHRLRMRRRSRTRVRZ
2202SASDDFSGSHSLSMSRSSSTSVSZ

–6 –
COMPONENT AND CONNECTOR LOCATOR VIEWS
Figure 1 - Machine Compartment –Side View
Compressor Dryer Condenser Fan
Run Capacitor
Capillary
Figure 2 - Evaporator
Evaporator
Defrost Heater
Defrost
Overtemperature
Thermostat
Accumulator
Evaporator
Thermistor
Woodpecker Clip

–7 –
Figure3-CompressorOverload/PTCRRelay
Overload
PTCR Relay
Capacitor
Figure4-MachineCompartment
Front View
Evaporator Fan Motor
Evaporator Fan
Connector Figure 5 -
EvaporatorFan
Main Control
Board Cover
Sabbath Switch
Water Filter Water Valve
Relay/Overload
Cover

–8 –
Figure 5 - Fresh Food Compartment
P000337
6
Freezer Drawer Switch
Icemaker
Freezer Thermistor
Figure 6 - Freezer Compartment
P0003329
Fresh Food
Thermistors
Temperature Touch Panel
Sabbath Switch
Door Switch
Damper
Air Duct
ColdAir
Outlets
Main Control
Board

–9 –
CABINET
Cabinet
The outer case is made of galvanized steel. The
fresh food and freezer liners are painted metal with
a smooth finish. Individual fresh food and freezer
compartments provide separation and enhanced
individual control between the compartments. The
metal liner provides a thermal break between the
interior of the refrigerator and freezer
compartments and reduces the transfer of heat
from the room into the fresh food and freezer
compartments. The liner is not removable or
replaceable.
Machine Compartment
The machine compartment is located on the top of
the unit and has a movable chassis that can be
extended from the front of the unit to provide
access to the refrigeration system and
components.
Caution: Avoidkinking therefrigerationlines when
sliding the chassis out and back in.
To extend the chassis:
1. Raise the grille panel to stop position.
2. Remove the wire guard and rocker switch
panel.
3. Disconnect the door closure mechanism
spring from the pin and remove the pin by
turning it counterclockwise.
4. Remove 3 screws securing the water filter
mounting bracket.
5. Remove 3 (7/16-in.) bolts from chassis
bottom.
6. Loosen 2 (7/16-in.) chassis track bolts.
7. Pull the chassis forward until it reaches the
stops in the tracks, working the refrigeration
tubing as you pull the chassis out.
Note. When sliding the chassis back into position,
be certain the lines and wiring have not fallen
behind the chassis.
Bolts Track Bolt
Right Side of Machine Compartment
Bolt
Track Bolt Screws
Left Side of Machine Compartment
Raise
Grille
Panel
to Stop
Position
Remove Screws
Each Side to

–10 –
Door Closure Mechanism
The door closure mechanism uses a spring to
provide positive door closure from 30 degrees.
The door closure mechanism actuator arm has a
spring attached to the rear and is supported by
guide rollers on either side of the base channel.
The roller circumferences and the actuator arm
detents are matched for smooth operation. The
arm is attached to the door with an Allen head
shoulder bolt.
The closure mechanism allows easy opening to
approximately 90 degrees, where the arm has a
detent to permit the door to remain open at 90
degrees with minimal tension. Once the door is
opened beyond 90 degrees, the closure
mechanism pulls the door open until the closure
arm engages the door stop at approximately 130
degrees. The reverse action occurs when the door
is closed.
Note: The door closure mechanism and the top
door hinge are held by the same bolts. Take the
necessary precautions to secure the fresh food
door when the door closure mechanism is being
removed.
•The actuator arm is spring loaded with moderate
spring tension.
To remove the door closure mechanism
1. Remove the 3/16-in.Allen head bolt and
spacer from the door and actuator arm.
2. Disconnect the spring from the pin on the top
of the cabinet and pull the actuator arm from
the closure mechanism.
3. Remove 4 (3/8-in.) bolts and the door closure
mechanism.
Spring
AllenHeadBolt
Bolts
ActuatorArm

–11 –
P0003336
Fresh Food Door and Hinges
WARNING: Use the appropriate safety equipment
and lifting techniques.
Caution: Use wood or a heavy plastic sheet to
protect the floor where the door will be placed.
Note: Unit must be removed from its installation
to remove center hinge.
Door
The door is of one-piece construction with foam
insulation. One-piece construction provides
superior thermal performance and reduces air
infiltration.
The inner door panel and outer door panel cannot
be separated and must be replaced as an
assembly.
1. Remove all food and bins from the inner door
liner.
2. Tape door to cabinet.
3. Remove the door closure mechanism (see
previous procedure).
4. Remove the upper hinge.
5. Remove tape and lift the door off center hinge.
6. Remove 4 T-27 Torx screws and center hinge.
Freezer Drawer
1. Loosen 4 screws connecting each side of the
freezer door to the slide/support assemblies.
2. Lift door up and out to remove.
Door and Drawer Gaskets
The fresh food door and freezer drawer have
magnetic gaskets that create a positive seal to the
front of the steel cabinet. The magnetic door
gaskets are secured to the fresh food door and
freezer drawer by a barbed edge that locks into a
retainerchannel.
1. Starting at any corner, pull the old gasket out of
the retainer channel.
2. Soak the new gasket in warm water to make it
pliable.
3. Push the barbed edge of the gasket into the
retainerchannel.
CenterHinge
Screws
Screws
Slide/Support
Assembly
Door
Left Side of Freezer Door

–12 –
Rollers and Leveling
This model has 4-point leveling provided by
adjustable rollers on the rear and leveling legs on
the front. It also has 2 nonadjustable front rollers
that are used only for unit positioning.
To level the unit:
1. Turn the 7/16-in. hex nut located above the
front rollers to adjust the roller on the rear of
the unit. Turn clockwise to raise,
counterclockwise to lower.
2. Turn the front legs with a 1-1/4 in. open end
wrench to adjust the front of the unit. Turn
clockwise to raise, counterclockwise to lower.
ICEMAKER
The icemaker is mounted to the upper left wall of
the freezer cabinet. Under normal operating
conditions, temperatures, door openings, and food
load, the icemaker is capable of producing
approximately 100 to 130 cubes in a 24-hour
period.
Note: The freezer door light switch, located on
the back wall of the freezer, also serves as an
icemaker interlock (or kill) switch. It will open the
circuit to the icemaker any time the freezer drawer
is open.
To service the icemaker, refer to GE Publication
31-9063.
Water Valve and Water Line
The water valve is mounted to the side of the
water filter bracket in the machine compartment.
A plastic water line is routed from under the unit,
up the back of the cabinet, into the machine
compartment, and to the water valve.
A low-pressure plastic water line supplies water to
the icemaker from the water valve. The plastic
water line is routed from the water valve, out the
back of the machine compartment, down the back
of the cabinet to the fill tube grommet. The
icemaker fill tube is also plastic.
To Replace the Water Valve
Note: Some water may leak from the water supply
line and valve when they are disconnected.
1. Shut off the water supply to the freezer.
Icemaker
Feeler Arm
Power Switch
Green
Power Light
Hex Nut
Wheel
Leveling Leg
P0003393
Water Valve
Water Filter Bracket

–13 –
2. Raise the machine compartment cover panel.
3. Remove 2 Phillips screw attaching the water
valvecover.
4. Remove 2 Phillips screw attaching the water
valve to the filter bracket.
5. Disconnect the wiring harness connector and
2 water lines from the water valve and remove.
To Replace the Water Line from the Water Valve to
the Fill Tube Grommet
Note: Some water may leak from the water supply
line and valve when they are disconnected.
1. Shut off the water supply to the freezer.
2. Remove the unit from its installation.
3. Remove 14 (1/4-in.) screws and the metal
access cover.
4. Disconnect the water line at the quick
connector by pushing in the white collar on the
quick connector while pulling the water line out.
5. Loosen the clamp at the fill tube grommet and
remove the water line.
P0003413
P
Screw
Water Valve
Access Cover

–14 –
AIRFLOW
Damper
The fresh food compartment receives chilled air via an electronic damper that is positioned at the top
rear of the fresh food compartment. The damper is controlled by the main control board and when
open, allows the evaporator fan to push chilled air from the evaporator into the fresh food compartment.
To remove the damper
1. Remove the light cover.
2. Remove 8 Phillips screws and the light
assembly.
3. Disconnect the damper wiring.
4. Remove 2 Phillips screws and the damper.
P0003387
Screws
Screws
LightAssembly
P0003380
Screws
Damper

–15 –
Evaporator and Condenser Fan Resistors
Evaporator FanAdjustment
Evaporator Fan
The position of the fan blade in relation to the
shroud is critical. Refer to evaporator fan
adjustment graphic for specifications.
If the fan shorts, it will damage the main control
board. If the resistor on the main control board is
burnt, you must replace the fan and the board (see
photo).
GEA01197
5/16 +/- .03
Airflow
Bad Evaporator Fan Resistor
GEA01196
Pin 1 J8
Compressor
Pin 1 J9
Defrost Heater
Pin 1 J11
Line
Evaporator Fan Tach.
J2 Pin 1
Personality Input 5
Pin 2
Fan Common
Pin 3
Evaporator Fan
Pin 4
Condenser Fan
Pin 5
FF Fan
Pin 6
QuickChill Damper1 +
J5 Pin 1
QuickChill Damper1 -
Pin 2
QuickChill Damper2 +
Pin 3
QuickChill Damper2 -
Pin 4
+5V
Pin 5
QuickChill Thermistor
Pin 6
QuickChill Fan
Pin 7
Fan +12V
Pin 8
FF1 Thermistor
J1 Pin 1
FF2 Thermistor
Pin 2
FZ Thermistor
Pin 3
Evaporator Thermistor
Pin 4
+5V
Pin 5
Personality Input 1
Pin 6
Personality Input 2
Pin 7
Personality Input 3
Pin 8
Personality Input 4
Pin 9
Damper - Blue
J3 Pin 1
Damper - White
Pin 2
Damper - Red
Pin 3
Damper - Yellow
Pin 4
FF Encoder Select
Pin 5
Comm. Tx/Rx
J4 Pin 1
Comm. +12V
Pin 2
Comm. Common
Pin 3
Discrete Disp. Input 1
Pin 4
Discrete Disp. Input 2
Pin 5
FZ Encoder Select
Pin 6
Encoder Signal
Pin 7
Encoder Signal
Pin 8
Encoder Signal
Pin 9
Encoder Signal
Pin 10
Pin 1 J12
Monogram Drain Pan Heater
Pin 9 J7
Neutral
Pin 8
NIC
Pin 7
FZ Door Switch
Pin 6
FF Door Switch
Pin 5
QuickChill Heater
Pin 4
Auger Motor Interlock
Pin 3
Water Valve
Pin 2
Crusher Solenoid
Pin 1
Auger Motor
Pin 1
QuickChill Htr.
Pin 2
QuickChill Htr.
LowVoltage DC
120VAC
J2 Connector
GEA01140
Evaporator Fan Resistor
Condenser Fan Resistor

–16 –
The evaporator fan utilizes a permanent magnet, 4-pole, DC motor that can operate at three different
speeds: high, medium, and low (medium and low are the same speed, controlled by the main control
board). The speed of the fan is controlled by the voltage output from the main control board. Voltage
output from the control board to the fan is 12.6 VDC; however, in order to regulate the speed of the fan,
the control board uses Pulse Width Modulation (PWM) during low speed and medium speed operation.
When operating in low and medium speed, voltage is sent in pulses (much like a duty cycle) as
opposed to an uninterrupted flow. This pulsing of 12.6 VDC produces effective voltage being received at
the motor, which is the equivalent to a reduction in voltage. Fan speed will be selected and maintained
by the control board regulating the length and frequency of the 12.6 VDC pulse.
One complete revolution of the motor is comprised of all 4 poles. To determine the rpm of the fan:
Measure the frequency being applied to the motor. Multiply this number by 15 (60 seconds divided by 4
poles). For example, a frequency measurement of 200 Hz multiplied by 15 would show a fan speed of
3000 rpm (15 x 200 = 3000). Temperature may cause some fan speed variation. Fan speed may vary
+/- 5%, depending on the temperature, with higher temperatures causing slightly higher speeds.
The evaporator fan motor uses a 4-wire connection, utilizing a common wire (white), feedback/rpm
wire (blue), supply wire (red), and a signal wire (yellow).
High Speed (12 VDC measured)
Medium Speed (8 VDC measured)
Low Speed (4 VDC measured)
EVAPORATOR FAN SPEEDS
12 VDC
8 VDC
4 VDC
12 VDC
0 VDC
0 VDC
0 VDC
12VDC
12 VDC
GEA01139
High Speed (12 VDC measured)
Medium and Low Speed (8 VDC measured)

–17 –
White Wire (DC Common)
The white wire is the DC common wire used for
testing. During repairs, DC polarity must be
observed. Reversing the DC polarity will cause a
shorted motor and/or board.
Red Wire (Supply)
Each motor uses an internal electronic controller
to operate the motor. Supply voltage from the
main control board remains at a constant
12 VDC.
Blue Wire (Feedback/RPM)
The blue wire feeds rpm (speed) information to
the main control board, allowing the board to
maintain consistent fan speeds. Loss of feedback
from the blue wire will result in the fan accelerating
to maximum speed. Measure the fan rpm using
the frequency between the blue and white wires.
Note: Fan operates at the same speed in low and
medium.
High speed - 195 to 200 Hz
Medium speed - 145 to 160 Hz
Low speed - 145 to 160 Hz (same as medium)
Yellow Wire (Signal)
The yellow wire is the input wire from the main
control board. The main control board provides
8.1 VDC effective voltage for low speed, 8.1 VDC
effective voltage for medium speed, and 12.6 VDC
for high speed. The fan will operate in low speed
only when the fresh food thermistor is satisfied.
Note: When testing these motors:
•You cannot test with an ohmmeter.
•DC common is not AC common.
•Verify 2 voltage potentials:
a. Red to white - power for internal controller.
b. Yellow to white - power for fan.
•Observe circuit polarity.
•Motors can be run for short periods using a
9-volt battery. Connect the white wire to the
negative (-) battery terminal only. Connect the
red and yellow wires to the positive (+) battery
terminal.
GEA01196
Pin 1 J8
Compressor
Pin 1 J9
Defrost Heater
Pin 1 J11
Line
Evaporator Fan Tach.
J2 Pin 1
Personality Input 5
Pin 2
Fan Common
Pin 3
Evaporator Fan
Pin 4
Condenser Fan
Pin 5
FF Fan
Pin 6
QuickChill Damper1 +
J5 Pin 1
QuickChill Damper1 -
Pin 2
QuickChill Damper2 +
Pin 3
QuickChill Damper2 -
Pin 4
+5V
Pin 5
QuickChill Thermistor
Pin 6
QuickChill Fan
Pin 7
Fan +12V
Pin 8
FF1 Thermistor
J1 Pin 1
FF2 Thermistor
Pin 2
FZ Thermistor
Pin 3
Evaporator Thermistor
Pin 4
+5V
Pin 5
Personality Input 1
Pin 6
Personality Input 2
Pin 7
Personality Input 3
Pin 8
Personality Input 4
Pin 9
Damper - Blue
J3 Pin 1
Damper - White
Pin 2
Damper - Red
Pin 3
Damper - Yellow
Pin 4
FF Encoder Select
Pin 5
Comm. Tx/Rx
J4 Pin 1
Comm. +12V
Pin 2
Comm. Common
Pin 3
Discrete Disp. Input 1
Pin 4
Discrete Disp. Input 2
Pin 5
FZ Encoder Select
Pin 6
Encoder Signal
Pin 7
Encoder Signal
Pin 8
Encoder Signal
Pin 9
Encoder Signal
Pin 10
Pin 1 J12
Monogram Drain Pan Heater
Pin 9 J7
Neutral
Pin 8
NIC
Pin 7
FZ Door Switch
Pin 6
FF Door Switch
Pin 5
QuickChill Heater
Pin 4
Auger Motor Interlock
Pin 3
Water Valve
Pin 2
Crusher Solenoid
Pin 1
Auger Motor
Pin 1
QuickChill Htr.
Pin 2
QuickChill Htr.
LowVoltage DC
120VAC

–18 –
To remove the fan
1. Remove the drawer (see procedure).
2. Remove 5 screws securing the rear duct.
3. Disconnect the freezer light and light thermostat
wiring and the remove duct.
4. Disconnect the wire connector from the fan motor.
5. Remove 2 screws from the fan motor bracket and
remove the evaporator fan motor.
Condenser Fan
The condenser fan utilizes a DC motor that operates
at a single speed and is mounted in the machine
compartment. When the fan is operating, air is pulled
through the condenser, drawing air through the coils.
The air is then exhausted past the compressor and out
the front of the refrigerator on the right side.
Inlet air is available through the left front and left rear of
the machine compartment.
If the fan shorts, it will damage the main control board.
If the resistor on the main control board is burnt, you
must replace the fan and the board (see photo page 15).
The condenser fan is mounted with screws to a fan
shroud and mounting bracket in back of the
condenser.
To remove the fan
1. Extend the machine compartment chassis (see
Machine Compartment).
2. Disconnect the condenser fan wiring at the
harness connector.
3. Remove 4 screws and fan assembly.
4. Remove fan blade, 2 screws from the fan
mounting bracket, and fan motor.
Note: A magnetic tip screwdriver may be required to
install the condenser fan mounting screws.
To install lower fan mounting screw:
1. Pull back foam insulation to visually locate screw
hole.
2. Locate hole with fingers of left hand.
3. Place screw on the tip of the screwdriver.
4. Use your right hand to maneuver the screwdriver
and use your left hand to guide the screw into the
hole.
Screws
Wiring Harness Connector
Housing
Fan
Motor
0.375"
1/2"
Air Flow
0.50" ± 0.05
Bracket
GEA01148
Condenser FanAdjustment
+/-.100
Airflow
P0003374
Screws
Insulation
Table of contents
Other GE Refrigerator manuals

GE
GE GFE27GSDSS User manual

GE
GE PFSE1N User manual

GE
GE TCX18 User manual

GE
GE GIE18ISH Manual

GE
GE TBX16SIBAA User instructions

GE
GE Monogram ZDBC240NBS User guide

GE
GE TBG16NACBRWW Training manual

GE
GE PFSS5NFY - Profile 25.1 cu. Ft. Bottom-Freezer... Manual

GE
GE GDSL3KCYLLS Manual

GE
GE GFSS6KEXSS - r 25.8 cu. Ft. Refrigerator Manual

GE
GE Refrigerator Service manual

GE
GE TBXK17 Installation instructions

GE
GE Monogram ZIF36N LH User manual

GE
GE 16 Operating instructions

GE
GE GSL25XGWSS Safety guide

GE
GE PSSS7RGX - Profile 26.5 cu. Ft User manual

GE
GE TFM20JRB AA User manual

GE
GE Profile PFSF2MIY Manual

GE
GE PSCS3TGXSS - 23.3 cu. ft. Refrirator Manual

GE
GE TFX22R User manual