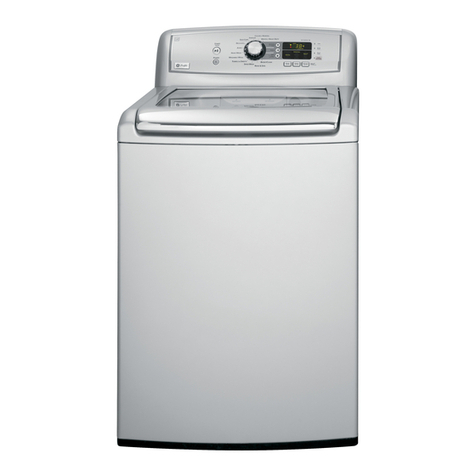
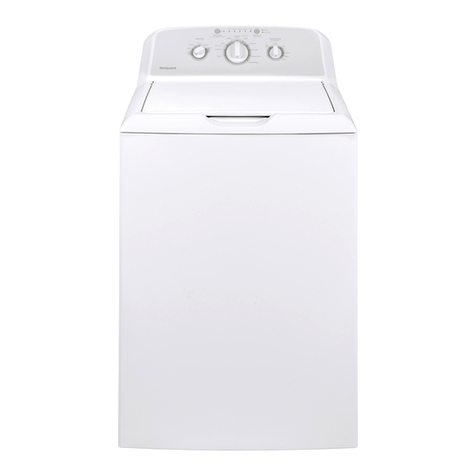
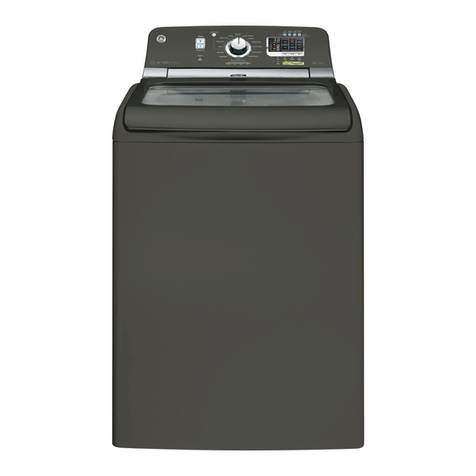
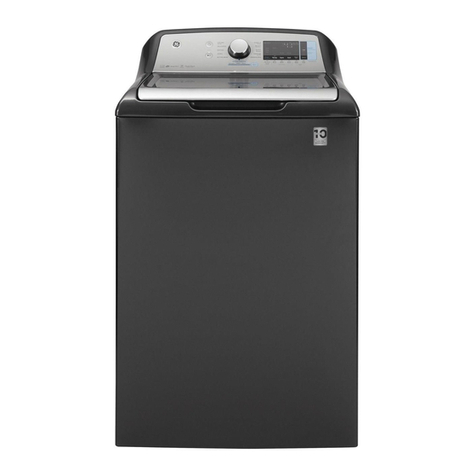
GE WBSR1060T User manual

GEAppliances
WBSRIO60T
WBXR1060T
PartNo. 175D1807P17_qPu b.NO,49-;_922

Congratulations!
YouAreNow PartoftheGEFamily.
Welcome to the GE family.
We're proud of our quality
products and we are
corr_afitted to providing
dependable service. You'll
see it in this easy-to-use
Owner's Manual and you'll
hear it in the friendly voices
of oua customer :service
department.
Best of all, you'll experience
these' values each time you
do the laundry. That's
important, because your
new washer will be part of
your family for many years.
And we hope you will be
part ()fours for a long time
to colne.
We thank you for buying
GE. We appreciare your
purchase, and hope you
will continue to rely on us
whenever you need quality
appliances for your home.
Staplesales slip orcancelled
check here.
Proof of the original purchase date
is needed to obtain service under
the warrantg
2
Write the modeland serial
numbershere.
#
#
Youcan find thembehind the top edge
of the controlpanel. •

GE& You,
A ServicePartnership.
Ask any GEappliance owner and they will
tell you we stand behind our products with
unmatched quality service. However, did
you ,know that most questions result from
simple problems that you can easily fix
yourseff injust a few minutes? This
Owner's Manual can tell you how.
ReadthisManual
Inside you will find many
helpful hints on how to use and
maintain your washer properly.
Just a little preventive care on
your part can save you a great
deal of time and money over the
life of your washer.
ReviewtheSectionon
Troubleshootingtips
You'll find many answers to
common problems here.
If you review our chart of
Troubleshooting Tips first,
you may not need to call for
service at all.
4
If YouNeedService
ffyou do need service, you can
relax kno_ng help is only a
phone call away. A list of toll-free
customer service numbers is
included in the back section.
Or you can always call the
GE Answer Center ®at
800.626.2000, 24 hours a day,
7days a week. .

IMPORTANTSAFETYINFORMATION.
READALLINSTRUCTIONSBEFOREUSING.
WARNING!
For your safety, the information in this manual must be
followed to minimize the risk of fire or explosion, electric
shock, or to prevent property damage, personal injury, or
•loss of life.
WATERHEATERSAFETY
Under certain conditions hydrogen gas may be produced
in a water heater that has not been used for two weeks
or more. Hydrogen gas can be explosive under these
circumstances.
tithe hot water has not been used for two weeks or more, prevent
the possibility of damage or injury by turning on all hot water
faucets and allowing them to run for several minutes. Do this
before using any electrical appliance which is connected to the
hot water system. This simple procedure will allow any built-up
hydrogen gas to escape. Since the gas is flammable, do not smoke
or use an open flame or appliance during this process.
4

PROPERINSTALLATION
Thiswasher must be properly installed and located in
accordance with the Installation Instructions before it is
used. ff you did not receive an Installation Instructions
sheet, you can receive one by calling us toll-free at the
GEAnswer Center_,800.626.2000.
g Install or store where it will not
be exposed to temperatures
below freezing or exposed to
the weather.
m Properly ground washer to
conform with all governing
codes and ordinances. Follow
details in Installation
Instrucfionsl
YOURLAUNDRYAREA
Keep the area underneath
and around your appliances
free of combustible materials
such as lint, paper, rags,
chemicals, etc.
I Close supervision is necessary
if this appfiance is usecl by or
near children. Do not 'allow
children to play on, with, or
inside this or any other
appliance.
.

IMPORTANTSAFETYINSTRUCtiONS.
READALLINFORMATIONBEFOREUSING
WARNING!
Use your washer only for its intended purpose as described
in this Owner's'ManuaL
WHENUSINGTHEWASHER
Never reach into washer while
it is moving. Wait until the
machine has completely
stopped before opening
the lid.
Do not mix chlorine bleach
with ammonia or acids such
as vinegar and/or rust
remover. Mixing different
chemicals can produce a toxic
gas which may cause death.
D Do not wash or dry artides
that have been cleaned in,
washed in, soaked in, or
spotted with combustible or
explosive substances (such as
wax, oil, paint, gasoline,
degreasers, dry, cleaning
solvents, kerosene, etc.)
which may ignite or explode.
Do not add these substances
to the wash water. Do not use
or place these substances
around your washer or dryer
during operation.
N The laundry process can
reduce the flame retardancy
of fabrics. To avoid such a
result, carefully follow the
garment manufacturer's
wash and care instructions.
m To minimize the possibility
of electric shock, unplug this
appliance from the power
supply or disconnect the
washer at the household
distribution panel by
removing the fuse or
switching off the circuit
breaker before attempting
any maintenance or cleaning.
NOTE:Turning the Cycle
Selector knob to an off
position does NOTdisconnect
the appliance from the
power supply.
mNever attempt to operate this
appliance if it is damaged,
malfunctioning, partially
disassembled, or has missing
or broken parts, including a
damaged cord or plug.
6

WHENNOTINUSE
m
m
Turn offwater faucets to
relieve pressure on hoses and
valves and to minimize
leakage if a break or rupture
should occur. Check the
condition of the fill hoses;
they may need replacement
after 5 years.
Before discarding a washer,
or removing itfrom service,
remove the washer lid to
prevent children from
hiding inside.
mDo not attempt to repair or
replace any part of this
appliance unless specifically
recommended in this
Owner's Manual, or in
published user-repair
instructions that you
understand and have the
skills to carry out.
m Do not tamper with controls.
REMEMBER...
Your continued health and safety are important to us.
Please read and follow this Safety Information carefully.
We want you to remain a happy and healthy part of our
GE family.
SAVETHESEINSTRUCTIONS

Aboutthewashercontrolpanel
Youcanlocate your model number behind the top edge of the control paneL,
Model WBSRIO60T
LOAD SI;._E_ _.MPERATURE COTFONS
,\ REGULAR
WARM .
Lk._GE COL9 COLD HOT
Model WBXRIO60T
LOAD SIZE TEMPERATURE
MEDfUM WARM
E]t"IRA EXTRA COLD COLD HOT
COTTONS
REGULA_
8
/

C,ontrolSettings
_ ,LoadSize
The water level should just cover the clothes. Adjust the
load size accordingly. Loosely load clothes no higher than
the top row of holes in the washer tub.
Wash/RinseTemp -
Select the water temperature for the wash and rinse cycles.
Always follow fabric manufacturer's care label or
instructions when laundering. Follow the water
temperature guide on washer lid.
Wash Cycle
The wash cycle controls the length of the washing process.
The chart below will help you match the wash cycle setting
with your clothing.
COTTONSREGULARForheawtolightlysoiledcottons,householdlinens,
workandplayclothes.
PERMANENTPRESSForeasycareandwrinkle-resistantitems.
KNITSSpeciallydesignedfornormalsoilknits.
DEUCATESForlingerieanddelicatefabricswith
lighttonormalsoil.

Aboutthewasherfeatures.
NOTE:Not all features are available on all washer models.
LiquidBleach Dispenser(onsome models)
The dispenser dilutes liquid chlorine bleach before it
reaches into your wash load.
Check clothing care labels for speci_d instructions.
Measure liquid bleach carefully, following
instructions on the bottle.
::Before starting the washer, pour measured amount
of bleach directly into bleach dispenser. Avoid
splashing or over-filling dispenser. If you prefer to
use powdered bleach, add it into the wash basket
with your detergent.
..........................................................................................................................

ili ii!i
_:!i_i_i_i!ii_i_iii_ii_iiiii_i_iii_!ii_i!ii_i_!iiii!_ii_iiiiiiii:_%_iii_i!!iii_i_iiii_i:ii_)i_ii_!_ii_i!i_iiii_iii!iii_!!
TheAgitator CaporFabric SoftenerDispenser
(dependingon model)
The agitator cap fits into the top of the agitator, flit
accidentally comes off, simply put it back On .
Thefabric softenerdispenserautomadcally releases liquid
fabric softener at the proper time during the cycle.
Touse, follow these steps:
Make sure dispenser is securely attached to agdtator.
Use only liquid fabric softener. Pour into dispenser,
_I_ using amount recommended on package.
. .............. _ Add water to dispenser until it reaches the
':": ....... __:.... _ maximum fill line.
Donot_topi_o d.ringlt_e_#msp_n.i:_s_:;i'iZcaitsethe:;
oitoe_p_too_oon.......... _ ......................
:": " Noverpour_bric SoftenerdirectlyOnciOth__.lima) stain:theiri2i
11

Aboutthe washer features.
NOTE."Not all features are available on all washer models.
Cleaningthe FabricSoftenerDispenser
(onsome models)
_ Remove the dispenser from the top of the agitator.
_ Separate the dispenser cup from the cover by
grasping the top and pushixlg down on the inside of
the cup with your fingers. Dispenser cup will pop
free from the cover.
To clean dispenser, soak both the dispenser cup
and the dispenser cover in the following solution:
[] 1USgallon(3.8liters)warm water
I1/4cup(60ml)heavydutyliquid detergent
[] I cup(240ml)bleach
ffnecessary, loosen build-up with a clean, soft cloth
after soaking. Do not use a stiffbrush; you may
roughen the surface of the dispenser.
Rinse and reassemble dispenser. Place dispenser
back on the agitator.
12

Loadingand usingthe washer.
Always follow fabric manufacturer's care label when laundering.
SortingWashLoads
,ProperUseofDetergent
Add detergent and start the washer before adding clothes so that
the detergent can work effectively. Follow the detergent pactcage
directions. Using too little detergent is a common cause of laundry
problems. Use more detergent if you have hard water, large loads,
_Feasy or oily soils or lower water temperature.
LoadingYourWasher
Load dry items loosely, no higher than the top row of holes in the
washer tub. When loading wet items make sure you set the
load/water level high enough to allow the items to move freely.
Water level should just cover the clothes. To add items after washer
has started, push in Cycle knob and submerge additional items next
to the agitator. Close the lid and pull Cycle knob out to restanx
/3

Loadingandusingthewasher.
CareandCleaningof theWasher
Wash Basket Leave the lid open after washing to allow moisture
to evaporate. If you want to clean the basket use a clean soft cloth
dampened with liquid detergent, then rinse. (Do not use harsh or
gritty cleaners.)
Fill Hoses: Hoses connecting washer to faucet should be replaced
every 5 years.
/ant Fi/ter. The lint filter is located under the agitator. It is
self-cleaning and requires no maintenance.
Exterior. Immediately wipe off any spills. Wipe with clamp cloth.
Try not to hit surface with sharp objects.
Moving and Storage: Ask the service technician to remove water frorc.
drain pump and hoses. Do not store the washer where it will be
exposed to the weather. Call the GE Answer Center _, 800.626.2000
for information on how to keep the tub stationary when moving t2he
washer,
Long Vacations:Be sure water supply is shut off at faucets. Drain all[
water, from hoses if weather will be below freezing,
14

Beforeyoucall forservice...
Troubleshooting tips
Save :timeand money/.Review the charts on the following pages
first and you may not need to call for service.
Possible Causes What ToDo
Washer_Won't Washer is unplugged
ii!iii!!iiiiiiiilli!iii!!!
ili:i_i_ii_iiii_i_iiiiili!!i_iii;iiii_iiii_ifillili!:ii!iiiili_iiiiiiiiiiiiiiiiiiii!i_iiii_!i!iiiii!;i!i_ii_iiiiiiii;iii!ililili!iiiiiiiiiiii:iiiii_iiiii_ililil
Controls are not set
properly
°Make sure cord is plugged
securely into a working
outlet.
*Turn both hot and cold
faucets fully on.
* Check controls and
make sure Cycle knob is
pulledout to 0Nposition.
Lid is open
Circuit breaker/fuse is
tripped/blown
Close lid and pull Cycle
knob out to ONposition.
Check house circuit
breakers/fuses. Replace
fuses or reset breaker.
Washer should have
separate outlet.
Control is not set properly * Check water temperature
control and adjust.
Water supplyis turned off *Turn both hot and cold
or improperly coimected faucets fully on and make
sure hoses are colmected
to correct faucets.
Water valve screens are
stopped up * Turn off the water source
and remove the water
connection hoses from
the upper back of the
washer. Use a brush or
toothpick to clean the
screens in the machine.
Reconnect the hoses and
turn the water back on.
House water heater is
not set properly Make sure house water :
heater is delivering water "
at 120°F.-140°F.
(48oc.-60oc.):
15

Beforeyoucall forservice...
Troubleshooting tips
Possible Causes What ToDo
Drain hose is kinked or _'
improperly connected Straighten drain hose and
make sure _rasher is not
sitting on it.
Top of drain outlet should
be less than 8 ft. above
floor.
Fill hoses or drain hose is
improperly connected
Make sure ihose:
connections are tight at
faucets and make sure end
of drain hose is correctly
inserted in and secured to
drain facility.
•Household drain may
be dogged
• Check household
plumbing. You may need
to call a plmnber.
Constant water pressure •Tighten hoses at the
to the fill hoses at the faucets and mrn the water
water source off after each use.
• Check condition of the fill
hoses; the)' may need
replacement after 5 years.
Washer is uneven • Make sure washer is level,
and firm to the floor.
Washer load is
unbalanced Push the Cycle knob in to
stop the musher, open the
lid and redistribute the
load evenly. Close the lid
and restart.
The washer normally pauses
between washing steps
Incorrect cycle selected • Make sure the ,cycle
selected matches the load
you are washing.
-k

Possible Causes What To Do
Incorrect sorting
Washing too long *
:i
Separate lint producers
from lint collectors.
Wash small loads for a
shorter time than larger
loads.
Detergent not dissolving Add detergent as wash
basket fills with water,
before you load clothes.
* Try a liquid detergent.
Use warmer water
temperature.
Overloading Load clothes no higher
than the top row of holes
in the washer tub.
Make sure load size
selector matches clothes
load size.
Incorrect use of fabric
softener Check fabric softener
package for instructions
and follow directions for
using dispenser.
Incorrect use of fabric
softener Check fabric softener
package for instructions
and follow directions fi_:r
using dispenser.
Pretreat stain and rewash.
Dye transfer _'Sort whites or lighdy
colored items from dark
colors.
17

Beforeyou call forservice...
Troubleshooting tips
Possible Causes
Overloading or
incorrect water level
Incorrect wash and
drycycles
What ToDo
"Avoid mixing heavy items
(like work clothes) with
light items (like blouses).
Try a fabric softener.
Load your washer so
clothes have enough roor
to move freely.
Match Cycle selection to
the type of fabric you are
washing (especially for ea
care loads).
Repeated washing in
water thatis too hot
Type of detergent
r
Verysoftwater
Pins, maps, hooks, sharp "
buttons, belt buckles
tippers, and sharp objects ,
left in pockets
Wash in warm or cold _m
with plenty of detergent:
Switch to :alower sudsing
detergent brand and
follow instructions on
package.
"Try less detergent.
Fasten snaps, hooks,
buttons, !rod zippers.
Remove loose items like
pins, objects in pockets
and sharp buttons. -
• Turn knits (which snag
easily) inside out.
Undiluted chlorinebleach * Check bleach package
instructions for proper
amount,
-Never add undiluted
bleach U)wash or allow
clothes-to come in con ta :t
with undiluted bleach..
Chemicals like hair bleach
or dye, permanent wave
solution
,, Rinse items that may hm'e
chemicals on them befol:e
washing. - : "
- _- :"..

Pillingi::::ii i:ii.:
Possible Causes What ToDo
Result of normalwear on •
poly.eotton blends and
fuzzy fabrics
While this is not cause{t by
the washer, you can slow
the pilling process by
washing garments inside
out.
Not enough detergent • Use more detergent
(especially with larger
loads).
Hard water * Use a water conditioner
like Calgon brand or install
a water softener.
Water is not hot enough Make sure water heater is
delivering water at
120°F.-140°F.
(48°C.-430°C.).
Washer is overloaded
Detergent is not
dissolving
Dye transfer
• Select load size to match
clothes load.
Add detergent as wash
basket fills with water
before you load clothes.
Sort dothes by color. If
fabric label states wash
separately, unstable dyes
may be indicated.
z19
k
-r

Notes
2O
i
This manual suits for next models
1
Table of contents
Other GE Washer manuals

GE
GE Profile WHSB9000 User manual

GE
GE Profile Prodigy WBSE2090 User manual

GE
GE GFWS1700 Original instructions

GE
GE GTWP2250DWW Assembly instructions

GE
GE WISR106 User manual

GE
GE Profile ENERGY STAR WPDH8800J How to use

GE
GE GFWS1705 Original instructions

GE
GE GFW450SSM User manual

GE
GE WlSR2070 User manual

GE
GE 175D1807P283 User manual