manuals.online logo
Brands
  1. Home
  2. •
  3. Brands
  4. •
  5. General
  6. •
  7. Air Conditioner
  8. •
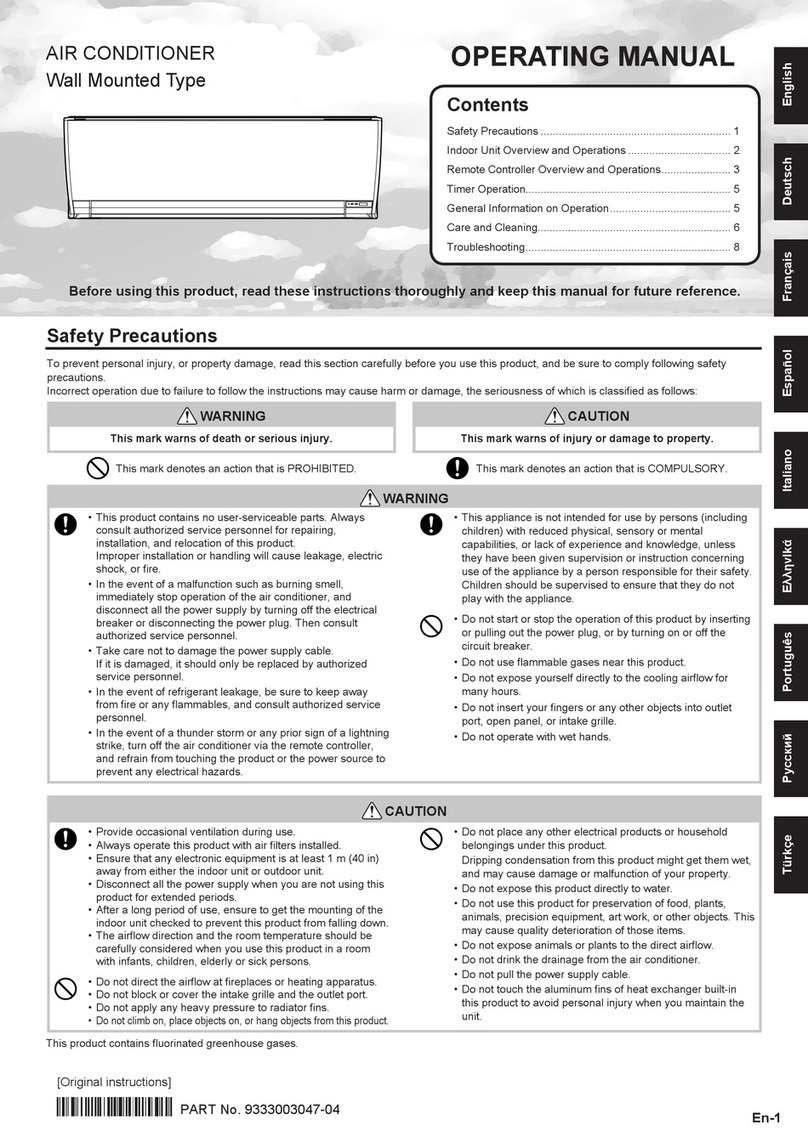
  9. General ASWG09JMCA User manual

General ASWG09JMCA User manual

En-1PART No. 9333003160
hsilgnE
Safety Precautions
To prevent personal injury, or property damage, or property damage, read this section carefully before you use this product, and be sure to comply
following safety precautions.
Incorrect operation due to failure to follow the instructions may cause harm or damage, the seriousness of which is classi ed as follows:
WARNING CAUTION
.ytreporpotegamadroyrujnifosnrawkramsihT.yrujnisuoiresrohtaedfosnrawkramsihT
This mark denotes an action that is PROHIBITED. This mark denotes an action that is COMPULSORY.
WARNING
•This unit contains no user-serviceable parts. Always consult
authorized service personnel for repairing, installation, and
relocation of this product.
Improper installation or handling will cause leakage, electric
shock, or re.
•In the event of a malfunction such as burning smell,
immediately stop operation of the air conditioner, and
disconnect all the power supply by turning off the electrical
breaker or disconnecting the power plug. Then consult
authorized service personnel.
•Take care not to damage the power supply cable.
If it is damaged, it should only be replaced by authorized
service personnel.
•In the event of refrigerant leakage, be sure to keep away
from re or any ammables, and consult authorized service
personnel.
•If you see lightning or hear thunder, there might be a
lightning strike.
To prevent electric shock hazard, turn off the air conditioner
by using the remote controller, and do not touch the unit or
the power plug during thunderstorm.
•Do not install the unit in area lled with mineral oil such as a
factory or area containing a large amount of splashed oil or
steam such as a kitchen.
•Do not start or stop the operation of this product by inserting
or pulling out the power plug, or by turning on or off the
circuit breaker.
•Do not use in ammable gases near the unit.
•Do not expose yourself directly to the cooling air ow for
many hours.
•Do not insert your ngers or any other objects into outlet
port, open panel, or intake grille.
•Do not operate with wet hands.
CAUTION
•Provide occasional ventilation during use.
•Always operate the unit with air lters installed.
•Ensure that any electronic equipment is at least 1 meter
away from either the indoor unit or outdoor unit.
•Unplug the power supply cable when not using the indoor
unit for an extended period.
•After long period of use, check whether the installation stand
does not deteriorate to prevent the unit from falling down.
•The air ow direction and the room temperature should be
carefully considered when you use this product in a room
with infants, children, elderly or sick persons.
•This appliance is not intended for use by persons (including
children) with reduced physical, sensory or mental
capabilities, or lack of experience and knowledge, unless
they have been given supervision or instruction concerning
use of the appliance by a person responsible for their safety.
Children should be supervised to ensure that they do not
play with the appliance.
•Do not direct the air ow at replaces or heating apparatus.
•Do not block or cover the intake grille and the outlet port.
•Do not apply any heavy pressure to radiator ns.
•Do not climb on, place objects on, or hang objects from the unit
.
•Do not place vase or water container on the unit.
•Do not place any other electrical products or household
belongings under indoor unit or outdoor unit.
Dripping condensation from the unit might get them wet, and
may cause damage or malfunction of your property.
•Do not expose the unit directly to water.
•Do not use this product for preservation of food, plants,
animals, precision equipment, art work, or other objects. This
may cause quality deterioration of those items.
•Do not expose animals or plants to the direct air ow.
•Do not drink the drainage from the air conditioner.
•Do not pull the power supply cable to disconnect the plug.
•Do not touch the aluminum ns of heat exchanger built-in
the indoor or outdoor unit to avoid personal injury when you
install or maintain the unit.
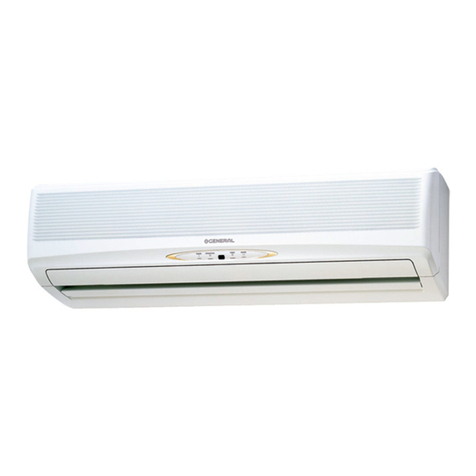
Indoor Unit
ASWG09JMCA
ASWG12JMCA
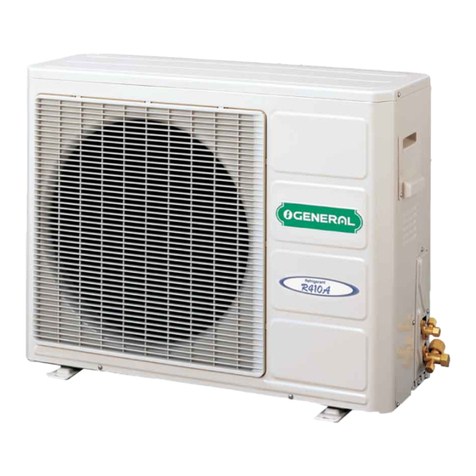
Outdoor Unit
AOWG09JMCA
AOWG12JMCA
AIR CONDITIONER
Wall Mounted Type
COOL MODEL OPERATING MANUAL
Before using this product, read these instructions
thoroughly and keep this manual for future reference.
Contents
Safety Precautions ..........................................................En-1
Indoor Unit Overview and Operations .............................En-2
Remote Controller Overview and Operations..................En-3
Care and Cleaning...........................................................En-5
Troubleshooting...............................................................En-7
En-2 OPERATING MANUAL
1 Intake grille
Before starting operation, make sure that the intake grille has been
shut completely. Incomplete closing might have an effect on the
proper working or performance of the product.
2 Manual AUTO button
Use when you lost the remote controller or remote control malfunction
occurs.
Status Action Mode or operation
In operation Press more than 3 seconds. Stop
Stopping Press more than 3 seconds and
less than 10 seconds.
AUTO
Press more than 10 seconds.
(Only for servicing.*)
Forced cooling
After cleaning Press less than 3 seconds. Filter indicator reset
*:To stop forced cooling, press this button or START/STOP button on
the remote controller.
3 Front panel
4 Vertical airflow direction louver
Each time you press SET button on the remote controller, the angle
of the vertical airflow direction louver moves as follows:
1
2
3
4567
COOL, DRY or FAN mode
12
3765
**
4
*: Default setting in each mode.
• Do not adjust by hand.
• At the beginning of AUTO mode, it may stay position 1 for a while
for adjustment.
• If you set the angle to position 4–7 for more than 30 minutes in
COOL or DRY mode, they automatically return to position 3.
In COOL or DRY mode, if the angle is set to position 4–7 for many hours,
condensation may be formed, and the drips may wet your property
.
5 Power diffuser
In conjunction with movement of the vertical airflow direction louver,
the angle of the power diffuser moves as follows:
Vertical airflow
direction louver
Power diffuser
376
5
4
2
1
321 4
• In SWING operation, power diffuser does not move.
6 Drain hose
7 Remote control signal receiver
CAUTION
For appropriate signal transmission between remote controller and
the indoor unit, keep the signal receiver away from following items
:
- Direct sunlight or other strong light
- Flat-panel television screen
In rooms with instantaneous fluorescent lights, such as in-
verter type ones, the signal may not be transmitted properly. In
such a case, consult the store that you purchased the product
.
8 ECONOMY indicator (green)
Lights in ECONOMY operation.
9 TIMER indicator (orange)
Lights in TIMER operation, and blinks slowly when the timer setting
error is detected.
As for the timer setting error, refer to “Auto-restart function” on page 4.
10
OPERATION indicator (green)
Lights in normal operation.
6
1
3
4
5
8
9
10
11
13
2
12
7
11
Horizontal airflow direction louvers
CAUTION
Before you adjust the horizontal airflow direction, make sure that
the vertical airflow direction louver has been stopped completely
.
Adjust two knobs by hand.
See page 5
12
Air filter
Easy-to-care air filters resist mildew growth.
See page 6
13
Air cleaning filters
Purify or deodorize the air, and provide fresh airflow.
Indoor unit accessories
Remote
controller
Batteries Air cleaning filters Filter holders
Remote controller
holder
Tapping screws
(M3 × 12 mm)
WARNING
Take care to prevent infants and young children from acciden-
tally swallowing the batteries.
Remote controller holder installation
Slide up
Pull out
3
Insert
Press in
2
Screws
1
Indoor Unit Overview and Operations
9333003160_OM.indb 29333003160_OM.indb 2 2015/9/17 9:49:422015/9/17 9:49:42
En-3
AIR CONDITIONER Wall Mounted Type
OPERATING MANUAL
CAUTION
• To prevent malfunction or damage of the remote controller:
- Place remote controller at where will not be exposed to
direct sunlight or excessive heat.
- Remove batteries if the product is not going to be used for
an extended period.
- Exhausted batteries must be removed immediately, and
be disposed according to the local laws and regulations of
your region.
• If leaking battery fluid comes in contact with your skin, eyes,
or mouth, immediately rinse with plenty of clean water, and
consult your physician.
• Obstacles such as a curtain or wall between the remote
controller and the indoor unit may affect the appropriate
signal transmission.
• Do not apply strong shocks to the remote controller.
• Do not pour water on the remote controller.
• Do not attempt to recharge dry batteries.
Battery (AAA/R03/LR03 × 2) loading
Notes:
• Use specified type of battery only.
• Do not use new battery and used battery together.
• Batteries can be used about 1 year in ordinary use.
• If the remote control range noticeably got shorten, replace the
batteries, and press RESET button.
123
You can quickly start the operation with following 3 steps:
1 START/STOP button
2 MODE button
Switches operation mode in following order.
AUTO COOL DRY FAN
3 SET TEMP. (temperature) buttons
Set desired temperature.
Temperature setting range
AUTO 18–30 °C
COOL/DRY 18–30 °C
*:Temperature control is not available in FAN mode.
4 FAN button
Controls the fan speed.
AUTO HIGH MED LOW QUIET
• When AUTO is selected, the fan speed is automatically adjusted
according to the operation mode.
5 SET button
Adjusts the vertical airflow direction.
6 SWING button
Starts or stops automatic swing of the vertical airflow direction louver.
• Each time you press the button, the vertical airflow direction louver
swings as follows:
1
2
3
4567
12376
5
4
COOL, DRY or FAN1
mode
FAN2
mode
Note:
• SWING operation may stop temporarily when the fan in the unit is
rotating at very low speed or stopping.
• In FAN mode, either of swing direction 1 3 or 4 7 is performed
in accordance with the vertical airflow direction previously set before
you start the SWING operation.
Remote Controller Overview and Operations
5
6
15
12
11
13
14
23
16
4
10
7
1
9
8
7 RESET button
When you press the RESET button, press it gently by using the tip of
a ballpoint pen or other small object in correct direction as shown in
this figure.
RESET
8 TIMER CANCEL button
Cancels the set timer.
9 ON TIMER button
Each time you press the button, the time changes as follows:
hours
0.5 1.0 1.5 2.0 ... 9.0 9.5 10 11 12
• Set the time while the indicator on the remote controller display
is blinking.
10
OFF TIMER button
Each time you press the button, the time changes as follows:
hours
0.5 1.0 1.5 2.0 ... 9.0 9.5 10 11 12
• Set the time while the indicator on the remote controller display
is blinking.
: The setting must be done within about 3 seconds during the indi-
cator stays solid.
: The button is controllable only when the air conditioner is on.
(continued)
9333003160_OM.indb 39333003160_OM.indb 3 2015/9/17 9:49:432015/9/17 9:49:43
En-4 OPERATING MANUAL
Program timer (combined use of the ON timer and the OFF timer)
You can set an integrated ON–OFF or OFF–ON timer as follows:
ON–OFF Set the ON timer first.
Then set the OFF timer by the air conditioner starts opera-
tion controlled with the ON timer earlier set.
OFF–ON Set the OFF timer first.
Then set the ON timer by the air conditioner stops opera-
tion controlled with the OFF timer earlier set.
The timer that is set later starts counting down after the counting
down of the preceding timer is finished.
Note:
If you change the setting value for the timer after the program timer is
set, the counting down of the timer will be reset at that moment.
11
SLEEP TIMER button
Each time you press the button, the time changes as follows:
1.0 2.0 3.0 5.0 7.0
CANCEL hours
9.0
• Set the time while the indicator on the remote controller display
is blinking.
To repeat the timer, press the button when the indicator is not
displayed.
To help you to fall asleep comfortably and prevent excessive
cooling in sleep, the SLEEP timer controls the temperature setting
automatically in accordance with the set time shown as follows. The
air conditioner completely turns off after the set time has elapsed.
Set
temperature
In COOL or DRY mode
Set time
1 hour
1 °C 2 °C
Note for TIMER settings:
Any interruption of the power supply, such as a blackout or cutting off
of a circuit breaker, makes the set internal clock go wrong. In such a
case, the TIMER indicator on the indoor unit blinks, and you need to
readjust the setting.
12
TEST RUN button
Only used for the initial test in the unit installation.
Do not press this button under normal use because it will cause
incorrect operation.
• During the test run, the OPERATION indicator and the TIMER
indicator blink simultaneously.
• To quit the test run that is started unintentionally, you need to turn
off the air conditioner by pressing the START/STOP button.
13
ECONOMY button
Starts ECONOMY operation that saves more electricity consumption
than the other operations with a conservative adjustment of the room
temperature.
When you press the button, the ECONOMY indicator on the indoor
unit turns on.
• In COOL mode, the room temperature will be adjusted at a few
degree higher than the defined temperature.
• Especially in COOL mode, you can have improved dehumidification
without significantly lowering the room temperature.
Notes:
• In COOL mode, the maximum output of this operation is
approximately 70 % of usual air conditioning operation.
• This operation cannot be performed during temperature monitoring
by AUTO mode.
14
POWERFUL button
Starts POWERFUL operation that enables quick cooling down of the
room.
When you press the button to start the POWERFUL operation, the
indoor unit emits 3 short beeps.
POWERFUL operation is automatically turned off in the following
situations:
• Adjusted room temperature reached to the defined temperature in
temperature setting in COOL or DRY mode.
• 20 minutes have passed after finishing the POWERFUL operation
mode setting.
It is not turned off automatically during setting of the POWERFUL
operation.
Notes:
• The airflow direction and the fan speed are controlled automatically.
• This operation cannot be performed simultaneously with ECONOMY
operation.
To return to normal operation, press the button again. Then the indoor
unit emits 2 short beeps.
15
Remote controller display
In this section, all the possible indicators are displayed for description.
In actual operation, the display is linked with the button operation, and
only shows the necessary indicators for each setting.
16
Signal transmitter
Aim to signal receiver of the indoor unit properly.
• Signal transmit indicator on the remote controller display shows
that signal from the remote controller is being transmitted.
• Operating range is approximately 7 m.
• You will hear a beep if the transmitted signal has been sent properly.
If there is no beep, press the button on the remote controller again.
Auto-restart function
In event of power interruption such as a blackout, the air
conditioner stops once. But it restarts automatically and
performs previous operation when the power supply is resumed.
If any power interruption occurs after the timer is set, counting
down of the timer will be reset.
After the power supply is resumed, the TIMER indicator on the
indoor unit blinks to notify you that there has been a timer fault.
In such a case, reset the timer for your opportune time.
Malfunctions caused by other electrical devices:
Use of other electrical appliances such as an electric shaver or
nearby use of a wireless radio transmitter may cause the malfunction
of the air conditioner.
If you encounter such a malfunction, turn off the circuit breaker once.
Then turn it on again, and resume operation by using the remote
controller.
Remote Controller Overview and Operations
9333003160_OM.indb 49333003160_OM.indb 4 2015/9/17 9:49:442015/9/17 9:49:44
En-5
AIR CONDITIONER Wall Mounted Type
OPERATING MANUAL
Care and Cleaning
CAUTION
• Before cleaning the indoor unit, be sure to turn it off and all the power supply has been disconnected.
• Before starting operation, make sure that the intake grille has been shut completely. Incomplete closing of the intake grille might have an
effect on the proper working or performance of the air conditioner.
• Do not touch the aluminum fins of heat exchanger built-in the indoor unit to avoid personal injury when you maintain the unit.
• Do not expose the indoor unit to liquid insecticides or hair sprays.
• Do not stand on slippery, uneven or unstable surfaces when you maintain the unit.
Daily care
When cleaning the indoor unit body, mind the following:
• Do not use water hotter than 40 °C.
• Do not use scouring cleanser, volatile solvents such as benzene or
thinner.
• Wipe the unit gently by using soft cloth.
Cleaning the intake grille
1Open the intake grille in direction of the arrow a. While gently
pressing the left and right mounting shafts of the intake grille
outward b, remove the intake grille in direction of the arrow c.
a
a
b
c
b
c
2Wash the intake grille gently with water or wipe it gently with a
soft cloth moisten with warm water.
Then wipe it with a dry and soft cloth.
3While holding the grille horizontal, set the left and right mounting
shafts into the pillow blocks at the top of the panel a. To latch
each shaft properly, insert the shaft until it snaps.
Then close the intake grille b.
a
a
bb
4Press 4 places on the intake grille to close it completely.
Cleaning the air filters
Mind that you have a periodical cleaning of the air filters to prevent
reducing the operation efficiency of the product.
Using of clogged air filter with dust will lower the product performance,
and may cause airflow reduction or increase of operating noise.
Clean the air filters once every 2 weeks under normal use.
1Open the intake grille.
(Refer to
aof step 1 in “Cleaning the intake grille”.)
2While holding the intake grille with your hand, pull up the handle
a of the filter in direction of the arrow and release the 2 claws b.
Then pull the filter out with gently sliding it downward c.
a
bb
a
c
3Filter holder and air cleaning filter are attached on the rear side
of the air filter. Remove them from the air filter by unlatching each
corner of the filter holder d.
d
d
d
d
4Remove dust by using a vacuum cleaner or by washing the filter.
When you wash the filter, use neutral household detergent and
warm water.
After rinse the filter well, dry it throughly in a shaded place before
you reinstall it.
5Attach the air cleaning filter and the filter holder to each air filter.
6Attach the air filter with aligning both side of the filter with the front
panel, and push in the filter fully.
Note:
Make sure that 2 claws are firmly snapped to the guide holes on
the panel.
7Close the intake grille firmly.
(Refer to step 4 in “Cleaning the intake grille”.)
9333003160_OM.indb 59333003160_OM.indb 5 2015/9/17 9:49:452015/9/17 9:49:45
En-6 OPERATING MANUAL
Following 2 types of air cleaning filters are used in this product.
When you replace them, purchase dedicated air cleaning filters for this
product.
APPLE-CATECHIN FILTER: UTR-FA16
(1 sheet)
With using static electricity, purifies the air by removing fine particles
or dust such as tabacco smoke or plant pollen.
• This filter is disposable. Do not wash or reuse it.
• Once you open the package, use it as soon as possible. The
cleaning effect is reduced if the filter is left the package opened.
• Replace the filter once every 3 months under normal use.
• With setting the fan speed high, the air cleaning effect increases.
ION DEODORIZATION FILTER (light blue): UTR-FA16-2
(Light blue, 1 sheet)
Contained super micro-ceramic particles produce negative air ions,
that is considered to have deodorizing effect, absorb and reduce
room smell.
• To maintain the deodorizing effect, clean the filter once every 3
months as follows:
1. Remove the ion deodorization filter.
2. Flush the filter with high-pressure hot water until the surface of
the filter is covered with water.
3. Wash the filter gently with diluent neutral detergent. Do not wash
it by wringing or rubbing to prevent reducing the deodorizing
effect by damage.
4. Rinse the filter well with water flow.
5. Dry the filter throughly in shaded place.
6. Reinstall the ion deodorization filter to the indoor unit.
• Replace the filter once every 3 years under normal use.
After extended non-use of the unit
If you have shut down the indoor unit for 1 month or more, perform the
FAN operation for half a day to dry the internal parts throughly before
you perform normal operation.
Additional inspection
After long period of use, accumulated dust inside the indoor unit may
reduce the product performance even if you have maintained the unit
with instructed daily care or cleaning procedures written in this manual.
In such a case, the product inspection is recommended.
For more information, consult authorized service personnel.
Replacing the air cleaning filter
1Remove the air filter. (Refer to step 1 in “Replacing the air filter”.)
2Release 2 latches aof the filter holder, and turn over the holder
in direction of arrow b.
Remove the soiled air cleaning filter c.
Note:
Air cleaning filter is attached on each air filter.
aa
b
c
3Attach new or maintained air cleaning filter d to the filter holder.
New air cleaning filter can be attached to either of the right holder
or the left holder.
d
4Latch 2 corners of the filter holder eto the air filter firmly.
ee
5Reinstall the air filter. (Refer to step 6 in “Cleaning the air filter”.)
6Close the intake grille firmly.
(Refer to step 4 in “Cleaning the intake grille”.)
Care and Cleaning
9333003160_OM.indb 69333003160_OM.indb 6 2015/9/17 9:49:462015/9/17 9:49:46
En-7
AIR CONDITIONER Wall Mounted Type
OPERATING MANUAL
WARNING
In following events, immediately stop operation of the air conditioner, and disconnect all the power supply by turning off the electrical
breaker or disconnect the power plug. Then consult your dealer or authorized service personnel.
As long as the unit is connected to the power supply, it is not insulated from the power supply even if the unit is turned off.
• Unit smells of something burning or emits smoke
• Water leaks from the unit
Following symptoms do not indicate the product malfunction, but they are normal functions or characteristics of this product.
Symptom Cause See page
Operation is delayed after
restart.
To prevent blowout of the fuse, the compressor will not operate during the protection circuit is working
for about 3 minutes after sudden OFF→ON operation of the power supply. –
Noise is heard. • During the operation or immediately after stopping the air conditioner, refrigerant flowing sound
may be heard. And it is particularly noticeable for 2–3 minutes after starting operation.
• During the operation, a slight squeaking sound produced by the minute expansion and contraction
of the front panel caused by temperature change may be heard.
–
Smell coming from the unit. Absorbed room smell generated from interior textile, furniture, or cigarette smoke into the air condi-
tioner may be emitted. –
Mist or steam is emitted from
the unit.
In COOL or DRY mode, a thin mist generated by condensation formed with sudden cooling process
may be emitted. –
Airflow is weak or stops In DRY mode, the indoor unit operates at low fan speed to adjust the room humidity, and may stop
from time to time. –
When the fan speed is set to “QUIET”, the fan rotates at very low speed and the airflow is reduced. –
When monitoring operation is performed in AUTO mode, the fan rotates at very low speed. –
Before you call for or request servicing, troubleshoot a problem by performing following checks:
Symptom Diagnostic See page
Does not operate at all. Has the circuit breaker been turned off?
Has there been a power outage?
Has a fuse blown out or the circuit breaker been tripped?
–
Is the timer operating? 3
Poor cooling performance. Is the air filter dirty? 5
Is the intake grill or outlet port of indoor unit blocked? –
Is the room temperature adjusted appropriately? 3
Is a window or door left opened?
Is direct or strong sunlight shinning into the room in cooling operation?
Are there other heating apparatus or computers operating, or too many people in the room in cool-
ing operation?
–
Is the fan speed set to “QUIET”?
When the fan speed setting is set to “QUIET”, noise reduction is prioritized and the air-conditioning
performance may become lower. If the volume of provided airflow is not agreeable to your prefer-
ence, set the fan speed to “LOW” or higher fan speed.
3
The unit operates differently
from the remote controller
setting.
Are the batteries used in the remote controller exhausted?
Are the batteries used in the remote controller loaded properly? 3
Immediately stop operation and turn off the electrical breaker in following cases. Then consult authorized service personnel.
• The problem persists even if you perform these checks or diagnostics.
• The OPERATION indicator and TIMER indicator blink while the ECONOMY indicator is blinking fast.
Troubleshooting
9333003160_OM.indb 79333003160_OM.indb 7 2015/9/17 9:49:462015/9/17 9:49:46
9333003160_OM.indb 89333003160_OM.indb 8 2015/9/17 9:49:462015/9/17 9:49:46
Tc-1
零件編號 9333003160
安全注意事項
為了防止人身傷害或財物受損,使用本機之前,請仔細閱讀本章節,並遵守以下安全注意事項。
因未能遵守指示而引起的錯誤操作可能導致傷害或損壞,其嚴重性分類如下:
警告 注意
。險危的損受物財或害傷有示表誌標此。險危的害傷重嚴或亡死有示表誌標此
此標誌表示禁止行為。 此標誌表示必須執行的行為。
警告
• 本機組內沒有配備用戶可自行維修的零件,請務必聯絡
經授權的維修技术人員進行修理、安裝及移機。
安裝或操作不當會導致漏電、觸電或火災。
• 若發生故障,如聞到燒焦味等,請立即停止空調機運
轉,關閉斷路器斷開所有電源或拔下插頭,然後與
經授權的維修技术人員聯絡。
• 注意不要損壞電源電纜。
若電源電纜已損壞,必須由經授權的維修技術人員進行更換。
• 在製冷劑外漏的情況下,請務必遠離火或任何易燃物,並與經
授權的維修技術人員聯絡。
• 如果看到閃電或聽見雷聲,可能是打雷。
為了防止觸電,請在雷雨期間使用遙控器關閉空調機,且不要
觸碰機組或電源插頭。
• 請勿將機組安裝在充滿礦物油、含有大量濺油或蒸氣的區域,
如工廠、廚房等。
• 請勿透過插拔電源插頭或打開 /關閉斷路器來啟動或停止空調
機運轉。
• 請勿在機組附近使用易燃性氣體。
• 請勿長時間讓冷風直接吹到身上。
• 請勿將手指或其他物件插入出風口、開放面板或進風口格柵。
• 請勿用濕手操作空調機。
注意
• 使用時要不定時地進行室內通風。
• 必須裝上空氣過濾網後才能使用。
• 必須讓任何其他電子設備與室內或室外機組保持 1 米以上的距
離。
• 長期不使用室內機組時請拔下電源電纜。
• 長期使用後,請檢查安裝支架是否老化,以防機組掉落。
• 如果室內要嬰兒、兒童、老年人或病人,請細心設定風向和溫度。
• 本機並非設計給身體、感覺或心智功能不足者(包括孩童)、或
缺乏經驗及知識者使用,除非有能確保其安全者給予監督或指
導,才能使用本機。兒童應在適當的監督下使用本機,以避免
讓孩童戲玩本機。
• 請勿讓氣流直接吹向壁爐或取暖設備。
• 請勿阻塞或遮蓋進風口格柵和出風口。
• 請勿向散熱片施加重壓。
• 請勿攀爬到機組上或在其上放置、懸掛物件
。
• 請勿在機組上放置花瓶或盛水容器。
• 請勿將其他任何電器或家用品放在室內機組或室外機組下方。
機組滴水可能會把它們弄濕,而且可能造成財產損壞或故障。
• 請勿將機組直接置於有水的環境中。
• 請勿用於儲藏食品、動植物、精密儀器設備、藝術品或其他物
件等用途,否則可能會導致這些物品變質。
• 請勿讓氣流直接吹向動植物。
• 請勿飲用空調機排出的水。
• 請勿拉扯電源電纜來拔下插頭。
• 安裝或保養機組時,請勿接觸室內或室外機組內置熱交換器的
鋁片,以防止受傷。
室內機組
ASWG09JMCA
ASWG12JMCA
室外機組
AOWG09JMCA
AOWG12JMCA
空調機
壁掛式
冷氣機型 使用說明書
使用本機之前,請仔細閱讀這些說明,並妥善保管本說明
書,以便日後參考。
目錄
安全注意事項....................................................................Tc-1
室內機組概述與操作 .........................................................Tc-2
遙控器概述與操作.............................................................Tc-3
清潔與保養........................................................................Tc-5
故障排除 ...........................................................................Tc-7
Tc-2 使用說明書
1 進風口格柵
運轉開始時,請確認進風口格柵完全關閉。否則可能會影響空調機的
動作或性能。
2 強制自動按鈕
萬一遙控器丟失或發生故障時,可以使用此按鈕。
狀態 動作 模式或運轉
運轉中 按住 3 秒鐘以上。 停止
停止中 按住 3 至10 秒鐘。 自動
按住 10 秒鐘以上。
(僅限維護中。*)
強制製冷
清潔後 按住不足 3 秒鐘。 過濾網指示燈重設
*:若要停止強制製冷,按此按鈕或遙控器上的開 /關按鈕。
3 前面板
4 垂直風向導向板
每按一次遙控器上的 SET 按鈕,垂直風向導向板的角度按如下順序變
化:
1
2
3
4567
製冷、除濕或送風模式
12
3765
**
4
*:各模式的預設設定
• 不要用手調整。
• 在自動模式開始運轉後,導向板可能停留在位置 1 片刻,以進行調整。
• 在製冷或除濕模式期間,如果方向設定在位置 4-7 超過 30 分鐘,導
向板將自動返回位置 3。
在製冷或除濕模式期間,如果保持在位置 4-7,可能會導致形成凝結,且
水滴可能使財物受損。
5 擴散風葉
配合垂直風向導向板的動作,擴散風葉的方向按照以下順序改變:
垂直風向導向板
擴散風葉
376
5
4
2
1
321 4
• 在搖擺運轉中,擴散風葉的方向不改變。
6 排水管
7 遙控器信號接收器
注意
為了正常傳達遙控器與室內機組之間的信號,信號接收器應遠離:
-直射陽光或其他強光
-平面電視螢幕
在有熒光燈(倒相熒光燈等)的房間內可能無法接收到信號。
在此情況下,請諮詢您購買產品的商店。
8 省電指示燈(綠色)
省電運轉時亮起。
9 定時指示燈(橙色)
定時運轉時亮起,偵測到定時設定錯誤時緩慢閃爍。
關於定時設定錯誤,請參閱第 4頁「自動重新啟動功能」。
10
運轉指示燈(綠色)
正常運轉時亮起。
6
1
3
4
5
8
9
10
11
13
2
12
7
11
水平風向導向板
注意
調整水平風向導向板之前,確保垂直風向導向板已完全停止。
用手調整左右兩個調節桿。
請參見第 5 頁
12
空氣過濾網
易保養,有效抑制霉菌滋生。
請參見第 6 頁
13
抗菌過濾網
淨化或消除不良氣味,提供鮮風。
室內機組附件
遙控器
電池 抗菌過濾網 過濾網框架
遙控器座 自攻螺絲
(M3 ×12 mm)
警告
注意不要讓嬰幼兒誤吞入電池。
安裝遙控器座
向上滑動
拉出
3
插入
推入
2
螺絲
1
室內機組概述與操作
9333003160_OM.indb 29333003160_OM.indb 2 2015/9/17 9:49:472015/9/17 9:49:47
Tc-3
空調機 壁掛式
使用說明書
注意
• 防止遙控器發生故障或損壞:
-請將遙控器放在不會受到直射陽光或過熱的地方。
-長時間不使用遙控器時,請取出電池。
-盡快取出電量已耗盡的電池,並根據當地法律法規進行廢棄。
• 若洩漏的電池電解液接觸皮膚、眼睛或口腔,請立即用大量清
水沖洗,並儘快就醫。
• 如果遙控器與室內機組之間有窗簾或牆壁等障礙物,可能無法
正確傳達信號。
• 請勿強烈撞擊遙控器。
• 請勿使水進入遙控器。
• 請勿試圖對電池充電。
裝入電池(AAA/R03/LR03 ×2)
註:
• 僅使用指定類型的電池。
• 請勿混用新舊電池。
• 在正常使用條件下,電池的使用壽命約 1 年。
• 若遙控器的有效操作距離範圍顯著變小,請更換電池,並按下
RESET 按鈕。
123
請按照以下 3 個步驟,快速啟動運轉:
1 START/STOP 按鈕
2 MODE 按鈕
按照以下順序切換運轉模式。
AUTO
(自動 )
COOL
(製冷 )
DRY
(除濕 )
FAN
(送風 )
3 SET TEMP.(溫度)按鈕
設定所需的溫度。
溫度設定範圍
AUTO (自動) 18–30°C
COOL/DRY (製冷/除濕)18–30°C
*:送風模式中,無法使用溫度控制。
4 FAN 按鈕
控制風速。
AUTO
(自動 )
HIGH
(高速 )
MED
(中速 )
LOW
(低速 )
QUIET
(靜音 )
• 選擇自動時,風速會根據運轉模式自動調整。
5 SET 按鈕
調整垂直風向。
6 SWING 按鈕
啟動或停止垂直風向導向板的自動搖擺。
• 搖擺運轉範圍因運轉模式而異,如下所示:
1
2
3
4567
12376
5
4
製冷、除濕或送風 1
模式
送風 2
模式
註:
• 當室內機組風扇以極低的速度運轉或停止時,搖擺運轉可能會暫時停
止。
• 在送風模式中,根據開始搖擺運轉之前設定的風向,決定搖擺運轉範
圍是 1 3 或4 7。
遙控器概述與操作
5
6
15
12
11
13
14
23
16
4
10
7
1
9
8
7 RESET 按鈕
按RESET 按鈕時,用圓珠筆或其他細小物件按照下圖所示方向輕輕按
下。
RESET
8 TIMER CANCEL 按鈕
取消設定定時。
9 ON TIMER 按鈕
每按一次按鈕,時間按照以下順序更改:
小時
0.5 1.0 1.5 2.0 ... 9.0 9.5 10 11 12
• 當遙控器顯示屏上的 指示燈閃爍時設定時間。
10
OFF TIMER 按鈕
每按一次按鈕,時間按照以下順序更改:
小時
0.5 1.0 1.5 2.0 ... 9.0 9.5 10 11 12
• 當遙控器顯示屏上的 指示燈閃爍時設定時間。
:指示燈維持亮起時,必須在約3秒鐘內完成設定。
:只有在空調機開啟時才能控制此按鈕。
(續)
9333003160_OM.indb 39333003160_OM.indb 3 2015/9/17 9:49:492015/9/17 9:49:49
Tc-4 使用說明書
程序定時(組合使用開機定時和關機定時)
可以設定開 –關或關 –開定時組合,如下所述:
開–關先設定開機定時。
然後設定定時開機運轉之後的關機定時。
關–開先設定關機定時。
然後設定定時關機之後的開機定時。
前一定時的倒計時結束後,設定時間較晚的定時開始倒計時。
註:
如果在設定了程序定時之後變更定時的設定值,定時的倒計時將會在
此時重置。
11
SLEEP TIMER 按鈕
每按一次按鈕,時間按照以下順序更改:
1.0 2.0 3.0 5.0 7.0
取消 小時
9.0
• 當遙控器顯示屏上的 指示燈閃爍時設定時間。
若要重複定時,當未顯示指示燈時,按睡眠定時按鈕。
為了讓您睡得更舒適以及防止睡眠期間過冷,睡眠定時器會依據如下
所示的設定時間自動控制溫度設定。設定時間到達後,空調機將完全
關閉。
設定溫度
在製冷或除濕模式
設定時間
1 小時
1 °C 2 °C
關於定時設定的注意事項:
電源中斷如斷電或切斷斷路器,會導致設定的內部時鐘不準確。在此
情況下,室內機組上的定時指示燈閃爍,需要重新調整設定。
12
TEST RUN 按鈕
僅限用於機組安裝的初始測試。
請勿在正常使用時按下此按鈕,因為會造成誤操作。
• 試運轉期間,運轉指示燈和定時指示燈將同時閃爍。
• 若要退出不小心啟動的試運轉,必須按下 START/STOP 按鈕以關閉
空調機。
13
ECONOMY 按鈕
啟動省電運轉,可比調低室溫的其他運轉節省更多耗電量。
按省電按鈕,室內機組上的省電指示燈亮起。
• 在製冷模式中,室溫會比設定溫度略高幾度。
• 尤其在製冷模式中,可以改善除濕而不用顯著降低室溫。
註:
• 在製冷模式中,省電運轉的最大輸出約是空調機在正常運轉時的
70%。
• 在自動模式的溫度監控期間,無法執行省電運轉。
14
POWERFUL 按鈕
啟動強力運轉,可讓房間快速降溫。
按此按鈕啟動強力運轉時,室內機組將發出 3 聲短嗶聲。
在以下情況下,強力運轉會自動關閉:
• 在製冷或除濕模式中,室溫達到溫度設定中定義的溫度。
• 設定強力運轉模式後經過 20 分鐘。
在強力運轉設定期間,強力運轉不會自動關閉。
註:
• 風向和風速會自動控制。
• 無法同時執行此運轉和省電運轉。
若要回復到正常運轉,再次按此按鈕。室內機組將發出 2 聲短嗶聲。
15
遙控器顯示屏
為了方便說明,在本章節中顯示所有適用的指示燈。但在實際操作時,
只顯示適用於當前操作的指示燈。
16
信號發射器
將信號接收器正確對準室內機組。
• 遙控器顯示屏上的信號發射指示燈 顯示正在發射遙控器的信號。
• 有效操作距離約 7 m。
• 若發射的信號正常發出時,會聽到嗶聲。若未聽到嗶聲,再次按下遙
控器上的按鈕。
自動重新啟動功能
當空調機由於斷電等電源故障而停止運轉時,電源恢復後,空調
機將自動按此前的模式重新啟動。
如果設定了定時之後發生電源斷電,定時的倒計時會被重置。
電源恢復後,室內機組上的定時指示燈閃爍,提示您定時發生故
障。在此情況下,請重新設定定時。
其他電器設備導致的故障:
同時使用其他電器設備如電動剃鬚刀或在附近使用無線電信號發射器
時,可能會導致空調機故障。
在這種情況下,請先關閉斷路器,隨後再打開,然後用遙控器恢復運
轉。
遙控器概述與操作
9333003160_OM.indb 49333003160_OM.indb 4 2015/9/17 9:49:502015/9/17 9:49:50
Tc-5
空調機 壁掛式
使用說明書
清潔與保養
注意
• 清潔室內機組之前必須將其關閉,並斷開所有電源。
• 運轉開始時,請確認進風口格柵完全關閉。否則可能會影響空調機的動作及性能。
• 保養機組時,請勿接觸室內機組內置熱交換器的鋁片,以防止受傷。
• 請勿使室內機組接觸液體殺蟲劑或噴髮膠。
• 保養機組時,請勿站在打滑、不平坦或不穩定的表面上。
日常保養
清潔室內機組本體時,請注意:
• 請勿使用溫度超過 40° C 的熱水。
• 請勿使用除垢清潔劑、揮發性溶劑,如苯或稀釋劑等。
• 用軟布輕輕擦拭機組。
清潔進風口格柵
1依箭頭 a所示方向打開進風口格柵,輕輕向外側 b按壓進風口
格柵的左、右固定軸,依箭頭 c所示方向拆下進風口格柵。
a
a
b
c
b
c
2用水輕輕沖洗進風口格柵,或用沾濕溫水的軟布輕輕擦拭,
然後用乾的軟布擦乾。
3水平握住格柵,將左、右固定軸放入面板 a頂部的枕塊。要使各
軸妥善固定,插入軸直至插入到位,
然後關閉進風口格柵 b。
a
a
bb
4按壓進風口格柵的 4 處,以完全關閉。
清潔空氣過濾網
請記住要定期清洗空氣過濾網,以防止產品的運轉效率降低。
使用有灰塵堵塞的空氣過濾網,不僅會降低產品性能,還會導致氣流減
弱或運轉噪音變大。
在正常使用條件下,空氣過濾網必須每 2 週清潔一次。
1打開進風口格柵。
(請參閱「清潔進風口格柵」步驟 1 的a。)
2用手握住進風口格柵,按照箭頭所示方向向上拉過濾網手柄 a,
鬆開 2 個卡爪 b,然後輕輕地向下滑動過濾網,將其拉出 c。
a
bb
a
c
3過濾網框架和抗菌過濾網已安裝在空氣過濾網反面。鬆開過濾網框
架d的每個角,從空氣過濾網上拆下抗菌過濾網。
d
d
d
d
4用真空吸塵機或水洗的方式清除灰塵。
水洗過濾網時,請使用中性家用洗滌劑和溫水。
過濾網沖洗乾淨後,先將其放在陰涼處徹底晾乾,再裝回。
5將抗菌過濾網和過濾網框架安裝到各空氣過濾網。
6安裝空氣過濾網時,使過濾網的兩側與前面板對齊,將過濾網完全
推入。
註:
確保 2 個卡爪牢牢卡入面板的導孔。
7關緊進風口格柵。
(請參閱「清潔進風口格柵」的步驟 4。)
9333003160_OM.indb 59333003160_OM.indb 5 2015/9/17 9:49:502015/9/17 9:49:50
Tc-6 使用說明書
本機使用以下 2 種抗菌過濾網。
請購買本機專用的抗菌過濾網進行更換。
苹果茶素抗菌過濾網:UTR-FA16
(1 片)
苹果茶素抗菌過濾網使用靜電來清洁含微粒和灰塵的空气,例如香煙
霧或看不見的花粉。
• 本過濾網屬於一次性產品。請勿清洗或重複使用。
• 包裝打開後 應盡快使用。打開包裝后﹐閒置不用,會降低過濾網的
抗菌效果。
• 在正常使用條件下,過濾網必須每 3 個月更換一次。
• 將風速設定為高速,會增強空氣淨化效果。
負离子除臭過濾網(發藍光):UTR-FA16-2
(發藍光,1 片)
本過濾網包含陶瓷超微粒,可產生具有除臭效果的空气負离子,能吸
收並緩和家中異味。
• 為保持除臭效果,請按以下方式每 3 個月清潔一次過濾網:
1. 拆下負离子除臭過濾網。
2. 用高壓熱水淹沒過濾網,直到過濾網表面被水覆蓋。
3. 請用稀釋後的中性洗滌劑清洗。請勿刮擦,否則會損害除臭效果。
4. 水流沖洗。
5. 放在陰涼處晾乾。
6. 將過濾網裝回室內機組。
• 在正常使用條件下,過濾網必須每 3 年更換一次。
長時間不使用機組後
如果要將室內機組關閉 1 個月以上,進行正常運轉前,請首先以送風模
式運轉大約半天,使內部各部分充分乾燥。
其他檢查
長期使用後,室內機組裡面會積聚灰塵,可能會降低空調機性能。即使
您按照本說明書中記載的日常保養或清潔步驟來維護本機,
我們還建議您定期檢查本機。
如需詳細資訊,請聯絡經授權的維修技术人員。
更換抗菌過濾網
1拆下空氣 過濾網。(請參閱「更換空氣過濾網」的步驟 1。)
2鬆開過濾網框架的 2 個卡鎖 a,按照箭頭方向翻轉框架 b。拆下
髒的抗菌過濾網 c。
註:
抗菌過濾網已安裝在各空氣過濾網上。
aa
b
c
3將新的或保養過的抗菌過濾網 d安裝到過濾網框架。
新的抗菌過濾網可以安裝到右框架或左框架。
d
4將過濾網框架的 2 個角 e牢牢卡入空氣過濾網。
ee
5裝回空氣過濾網。(請參閱「清潔空氣過濾網」的步驟 6。)
6關緊進風口格柵。
(請參閱「清潔進風口格柵」的步驟 4。)
清潔與保養
9333003160_OM.indb 69333003160_OM.indb 6 2015/9/17 9:49:522015/9/17 9:49:52
Tc-7
空調機 壁掛式
使用說明書
警告
在以下情況下,請立即停止空調機運轉,關閉斷路器斷開所有電源或拔下插頭,然後聯絡經銷商或經授權的維修技术人員。
由於機組連接到電源,即使機組關閉,也並未徹底關閉電源。
• 聞到燒焦味或冒煙
• 機組漏水
以下現象並非產品故障,而是本產品的正常功能或特性。
現象 原因 參考頁
重新啟動後,無法立即運轉。 為了防止保險絲燒斷,當電源突然從關到開後,在 3 分鐘之內保護電路將發揮作用,此時壓縮機不會運
轉。 –
聽見噪音。 • 在運轉過程中或空調機剛停止時,可能會聽到製冷劑流動的聲音。另外,開始運轉後的 2 至3 分鐘內,
噪音可能特別明顯。
• 在運轉過程中,可能會聽到輕微吱吱聲。這是由於溫度變化引起前蓋發生微小伸縮的結果。
–
機組發出異味。 可能是由於房間內的織物、家具、香煙等氣味被吸入空調機後散發的異味。 –
冒煙或冒出蒸汽。 在製冷或除濕模式中,由於排出的空氣突然冷卻形成冷凝而發出淡淡的煙霧。 –
風量較弱或停止。 在除濕模式中,室內機組以低速風速運轉以調整房間濕度,並可能不定時停止。 –
當風速設定為「QUIET」時,風扇以極低的速度運轉,且風量減弱。 –
執行自動模式中的監控運轉時,風扇以極低的速度運轉。 –
在請求維修服務之前,請先進行如下檢查:
現象 診斷 參考頁
完全無法運轉。 是否將斷路器關閉?
是否停電?
是否保險絲被燒斷或斷路器已斷開?
–
是否定時正在發揮作用? 3
製冷性能不佳。 空氣過濾網是否變髒? 5
室內機組的進風口格柵或出風口是否堵塞? –
室溫調整是否正確? 3
門窗是否開著?
在製冷運轉時,是否有直射或強烈陽光射入房間?
在製冷運轉時,房間內是否有其他加熱設備和電腦?或有許多人?
–
是否將風速設定為「QUIET」?
風速設為「QUIET」時,噪音減弱功能優先,空調機性能可能下降。如果風量未能達到您的要求,將風
速設為「LOW」或更高風速。
3
機組運轉與遙控器設定不同。 遙控器的電池電量是否已耗盡?
遙控器的電池是否安裝正確? 3
在以下情況下,請立即停止運轉,並關閉斷路器,然後與經授權的維修技术人員聯絡。
• 進行上述檢查或診斷後故障仍然存在。
• 省電指示燈快速閃爍時,運轉指示燈和定時指示燈閃爍。
故障排除
9333003160_OM.indb 79333003160_OM.indb 7 2015/9/17 9:49:522015/9/17 9:49:52
9333003160_OM.indb 89333003160_OM.indb 8 2015/9/17 9:49:532015/9/17 9:49:53

This manual suits for next models

3

Other General Air Conditioner manuals

General ASH14FSBCW User manual

General

General ASH14FSBCW User manual

General ASG17USCQ User manual

General

General ASG17USCQ User manual

General ASH9LSACW User manual

General

General ASH9LSACW User manual

General ASHA30LCC User manual

General

General ASHA30LCC User manual

General AOHG90LRLA User manual

General

General AOHG90LRLA User manual

General ASH9USCCW User manual

General

General ASH9USCCW User manual

General ASH18LMA-W User manual

General

General ASH18LMA-W User manual

General AWHZ14LBC User manual

General

General AWHZ14LBC User manual

General ABG18FBBJ User manual

General

General ABG18FBBJ User manual

General ASH9USBCW User manual

General

General ASH9USBCW User manual

General AUXG07KVLA Service manual

General

General AUXG07KVLA Service manual

General ASWG09LMCA User manual

General

General ASWG09LMCA User manual

General ARHA24LATU User manual

General

General ARHA24LATU User manual

General AMH13F User manual

General

General AMH13F User manual

General ASHG07KGTA User manual

General

General ASHG07KGTA User manual

General AUH54LUAS User manual

General

General AUH54LUAS User manual

General ASG7MI-LM User manual

General

General ASG7MI-LM User manual

General ARH9LUAB User manual

General

General ARH9LUAB User manual

General ABG54FBAG User manual

General

General ABG54FBAG User manual

General ASH9RSJCW User manual

General

General ASH9RSJCW User manual

General AUHG36LRLA User manual

General

General AUHG36LRLA User manual

General ASH7FSBCW User manual

General

General ASH7FSBCW User manual

General ASH13PSCCW User manual

General

General ASH13PSCCW User manual

General AOHG14LAC2 User manual

General

General AOHG14LAC2 User manual

Popular Air Conditioner manuals by other brands

American Standard 4A6V8024A1000B Service facts

American Standard

American Standard 4A6V8024A1000B Service facts

Frigidaire FAC064K7A2 Factory parts catalog

Frigidaire

Frigidaire FAC064K7A2 Factory parts catalog

CH CH-PDH12AC1 owner's manual

CH

CH CH-PDH12AC1 owner's manual

Frigidaire FFPA1422R1 use & care

Frigidaire

Frigidaire FFPA1422R1 use & care

Honeywell CL30XC owner's manual

Honeywell

Honeywell CL30XC owner's manual

Mitsubishi Electric PLA-M100EA installation manual

Mitsubishi Electric

Mitsubishi Electric PLA-M100EA installation manual

Sears Kenmore P/N93SR-D02 owner's manual

Sears

Sears Kenmore P/N93SR-D02 owner's manual

Panasonic PZ2 Series operating instructions

Panasonic

Panasonic PZ2 Series operating instructions

INVENTOR Neo N2UVO-09 user manual

INVENTOR

INVENTOR Neo N2UVO-09 user manual

Mitsubishi Electric MSZ-DM25VA operating instructions

Mitsubishi Electric

Mitsubishi Electric MSZ-DM25VA operating instructions

AHRI SUPERIOR Series Installation, operation & service manual

AHRI

AHRI SUPERIOR Series Installation, operation & service manual

Hitachi RAS-E10HB instruction manual

Hitachi

Hitachi RAS-E10HB instruction manual

Friedrich Chill CP18 Installation and operation manual

Friedrich

Friedrich Chill CP18 Installation and operation manual

Hitachi RAK-18QXD Service manual

Hitachi

Hitachi RAK-18QXD Service manual

Mitsubishi Electric PLA-SP BA Series Operation manual

Mitsubishi Electric

Mitsubishi Electric PLA-SP BA Series Operation manual

Hitachi RAK-18PSPA installation manual

Hitachi

Hitachi RAK-18PSPA installation manual

Diplomat DX-80CHRC instruction manual

Diplomat

Diplomat DX-80CHRC instruction manual

DeLonghi EX Series Instructions for use

DeLonghi

DeLonghi EX Series Instructions for use

manuals.online logo
manuals.online logoBrands
  • About & Mission
  • Contact us
  • Privacy Policy
  • Terms and Conditions

Copyright 2025 Manuals.Online. All Rights Reserved.