5. Plug the ATX cable of your power supply unit into the ATX
connector on the mainboard. Make sure you check
beforehand that your power supply fits the minimum
requirements for the operation of all your chosen system
components.
Important: Please make absolutely sure that the power plug
of your power supply is not connected to an electrical outlet.
6. Connect your mouse and keyboard to the USB ports on
the back of your computer case. Please note that USB
cables can only be connected in a specific direction. If you
cannot easily fit the connector in the port, rotate your USB
connector by 180 degrees and try again.
Important: Depending on the type and design of your mouse
/ keyboard you may be required to use a USB hub. This
also applies if you intend to use more than two USB de ices
in parallel.
7. In order to use the sound capabilities of the EFIKA
mainboard, plug your headphones, sound speakers,
microphones or other audio sources into the appropriate
ports on the back of your computer case.
8. In order to connect your system with a wired network,
please plug an ethernet cable into the appropriate port on
your computer's back panel.
9. As the final step of the installation, insert the power plug
into your power supply unit and a wall outlet. Your EFIKA
system is now fully assembled and ready for operation.
Mis ellaneous
For inspecting the Open Firmware boot functions and the
output of your running Linux kernel, you may use a serial
connection with another computer to access this information.
Please connect a serial cable to your EFIKA and configure
your terminal software to use the setting 115200 8N1.
The same method also allows to access the EFIKA without a
keyboard and/or graphics adapter.
SOFTWARE INSTALLATION
In order to simplify the installation of Linux on your EFIKA,
we pro ide Linux images for download which ha e been
alidated on the EFIKA. Furthermore, we also supply up to
date installation instructions. In order to access these files,
please isit the following website.
www.efika.info
For news about product updates and important customer
notices, please isit the same web address.
IMPORTANT NOTICES
If you ha e no in-depth knowledge on how to assemble
computers, please ha e a qualified professional do it for you!
Faulty installation can damage your EFIKA mainboard as well
as all connected hardware.
Install your mainboard only if the main power is unplugged and
there is no flow of electricity. Otherwise, you are risking
DANGER TO LIFE!
Electrostatic discharge can damage electronic components
permanently. Please take appropriate security measures, such
as wearing an anti-static wristband.. Also, assemble your
hardware at a workplace which is protected from electrostatic
interference.
HARDWARE INSTALLATION
1. Install 2.5 inch hard disk dri e as described in its bundled
user manual. Firmly mount the hard disk on the mainboard with
the fitting screws pro ided.
2. Install your EFIKA in an adequate system case. Insure that
the mounting screws fit properly into the mounting brackets of
the case.
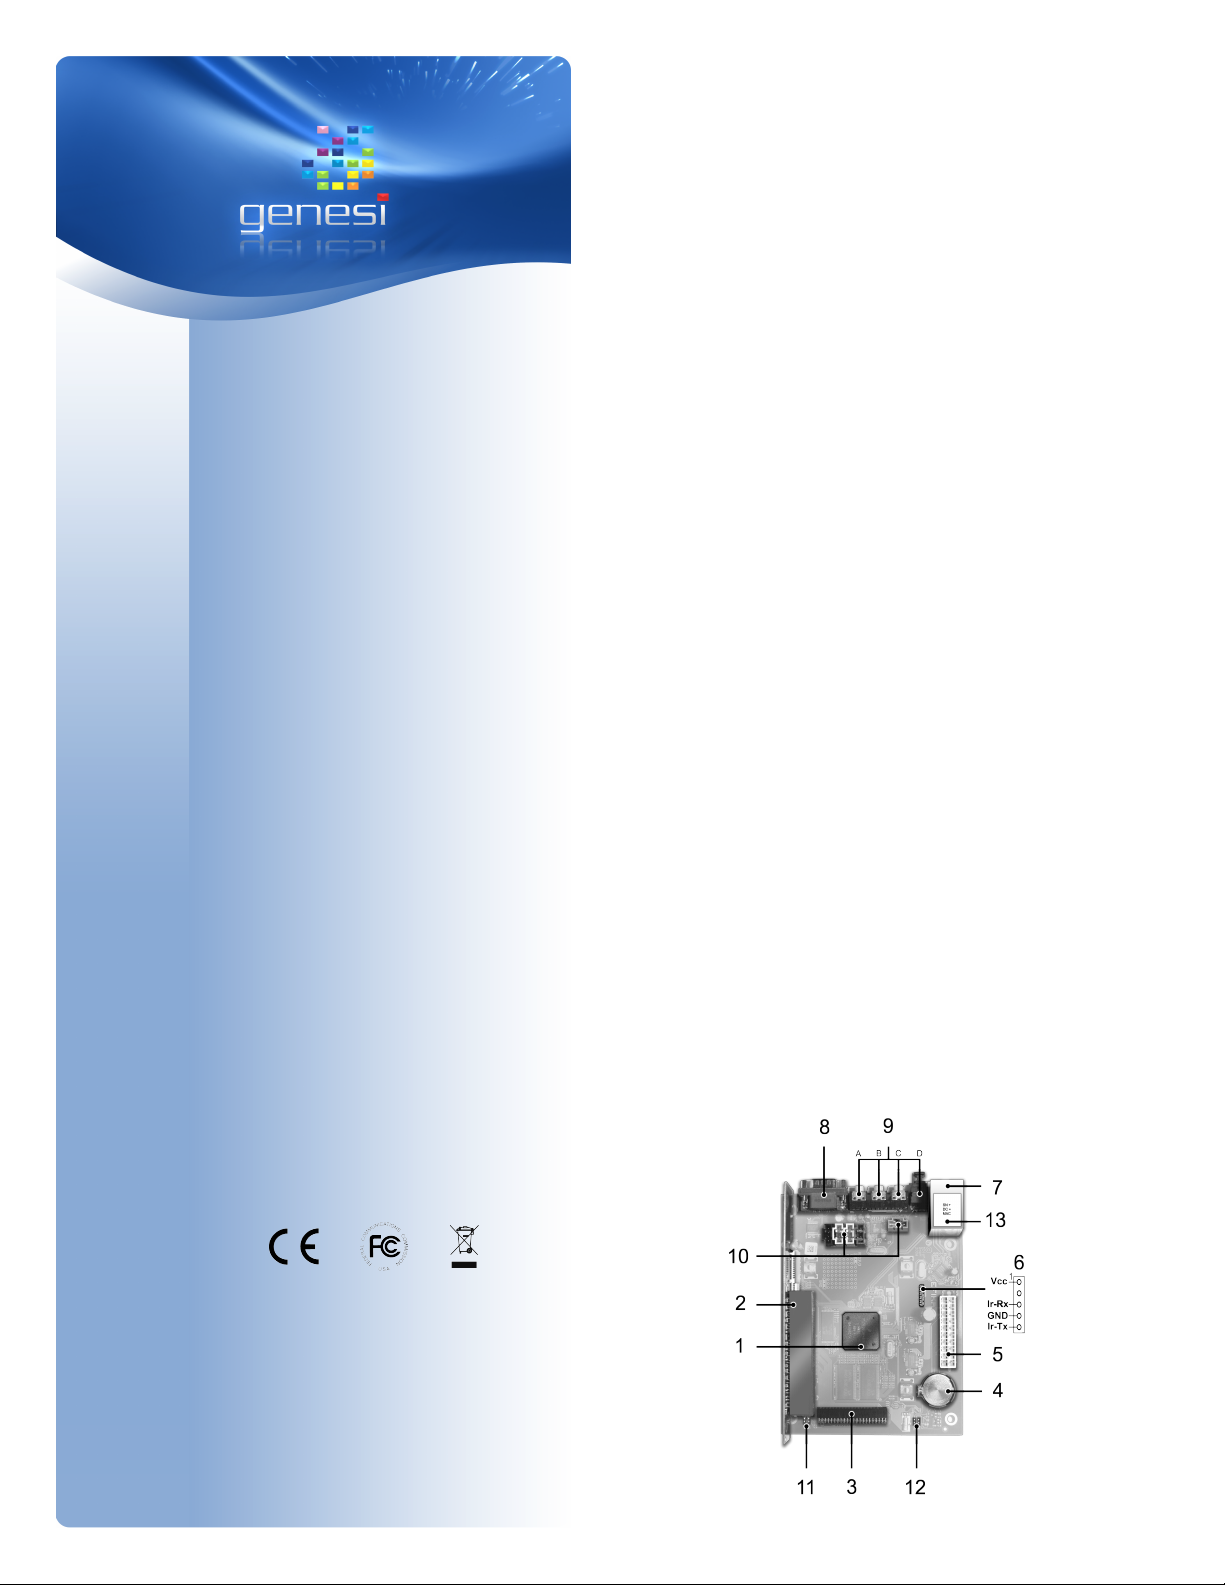
3. Connect the power / reset buttons and LED lights of your
case with the mainboard. Please note the information on the
following graphic:
4. OPTIONAL - install PCI extension card. Insure the card is
pro ided with 3.3 Volts in operation and mounted as shown in
the illustration below.
Owners of low profile AGP graphics cards may use the optional
Riser adapter to use their graphics card with the on-board PCI
extension slot. Please make also sure that your graphics card
runs on 3.3 Volt and is plugged in as seen on the illustration
abo e.
Important: By improperly installing PCI or AGP hardware or
using cards which do not operate at 3.3 Volt, you will damage
your EFIKA mainboard. Please take notice that this will
in alidate the guaranteed product warranty immediately.