Geosoft Oasis Montaj 7.0 User manual

Oasis montaj 7.0 Viewer
The core software platform for working
with large volume spatial data
QUICK START™ TUTORIAL
www.geosoft.com

The software described in this manual is a completely free software environment
that you can distribute freely to any recipient with whom you need to share your
earth science results and ideas.
Manual release date: 17/01/2008.
Written by, Nancy Whitehead. Please send comments or questions to
Copyright ©Geosoft Inc. 2008. All rights reserved. No part of this publication
may be reproduced, stored in a retrieval system or transmitted, in any form, or by
any means, electronic, mechanical, photo-copying, reading, or otherwise, without
prior consent from Geosoft Inc.
Program Copyright©Geosoft Inc. 2008. All rights reserved.
Geosoft and Oasis montaj are registered trademarks of Geosoft Inc. GEOSOFT,
Oasis are trademarks of Geosoft Inc.
Windows®, and Windows NT™ are either registered trademarks or trademarks of
Microsoft Corporation.
Geosoft Incorporated
8th Floor
85 Richmond St. W.
Toronto, Ontario
M5H 2C9
Canada
Tel: (416) 369-0111
Fax: (416) 369-9599
Web Site: www.geosoft.com
E-mail: [email protected]

Contents
Oasis montaj 7.0 1
Software and Hardware Requirements 1
Installing Oasis montaj Viewer 2
Install from the Oasis montaj Viewer CD ROM 2
Install from the Web 2
Authorizing Your Internet Communication Settings 3
Authorize Internet Communication Dialog 3
Internet Trust Relationship Dialog 3
Setting High-Resolution Graphics 4
Configuring Oasis montaj Settings 4
Finding More Help Information 5
Contacting Geosoft 5
Tutorial 1: Getting Ready to Work 6
Welcome to the Oasis montaj Environment 6
System Files 7
Creating a Working Directory 7
Before you Begin 7
Creating a Project 8
Changing Default Settings 9
Finding Help 12
Tutorial 2: Working with Data 13
Oasis montaj Databases 13

Opening a Database 13
Adding Compression to your Database 14
Displaying Data Files in an Oasis montaj Database 15
Displaying/Hiding Channels (Columns) in the Spreadsheet 16
Displaying Basic Channel Statistics 18
Displaying Profiles in the Spreadsheet 19
DataBase Tool Bar 22
Y-Axis Options 22
Plotting Profile Windows 23
Metadata 24
Viewing and Editing Metadata 24
Metadata Tool 26
Drag-n-Drop 27
Oasis montaj Maps 28
Displaying a Map 28
Adding Map Comments 28
Displaying a ArcGIS MXD File 28
Using the View/Group Manager Tool 29
Rendering Options 30
Other Tool Options 30
Using the Viewer Tool Bars 32
Standard Bar 32
Map Layout Bar 32
Map Tools Bar 35
Displaying Grids and Images on a Map 38
Auto Recolour Grids 40
Create Snapshots 40
How to Create a Snapshot 40
How to View a Snapshot 41

Managing Your Snapshots 41
DAP (Data Access Protocol) 42
Find Data with Dapple 43
Find DAP Data 45
Using the Metadata Tool 47
3D Tool 49
3D Viewing Tools 49
Display Tab 52
Planes Tab 54
3D Voxel Tab 56
Voxel Types 57
3D Surfaces Tab 59
Copying and/or Converting Grid Files 60
Grid Properties 61
Sending E-maps 63
Unpacking an E-map 63
Exporting Data 64
Exporting Databases 64
Export Geosoft XYZ Data Format 64
Export CSV Format 65
Exporting Maps 66
Printing Maps in Oasis montaj 67
Printer Setup 68
Page Setup 68
Print a Map 69
Appendix 1: Geosoft Concepts 71

Oasis montaj Viewer 71
What is Oasis montaj? 72
Viewer Capabilities 73
Projects 73
Data and Profiles 73
Maps, Grids and Images 73
Online Help and Technical Support 73
Keeping you in touch with your data 74
Projects and the Project Explorer 75
What you need to know about Project files 76
Open Workspace (.gws) Files 76
Metadata 77
Viewing and Editing Metadata 77
Databases and high-volume data processing 78
Spreadsheets are the windows to your database 80
How the Spreadsheet Displays Project Data 81
Profiles and viewing your data graphically 82
Maps are more than printed sheets of information 83
ArcGIS MXD Files in Oasis montaj 85
Dynamically link data and information to knowledge 87
Geosoft Algorithms and Techniques 88
Process Maker technology links data processing 89
Appendix 2: Displaying Data Formats 90
Geosoft XYZ File Format 90
ASEG-GDF File Format 91
Geosoft GBN (Binary Data File) Format 92

Oasis montaj 1
Oasis montaj 7.0
Oasis montaj 7.0 is the latest major release from Geosoft. Oasis montaj is available in
two versions – a free Viewer and a licensed Mapping and Processing System.
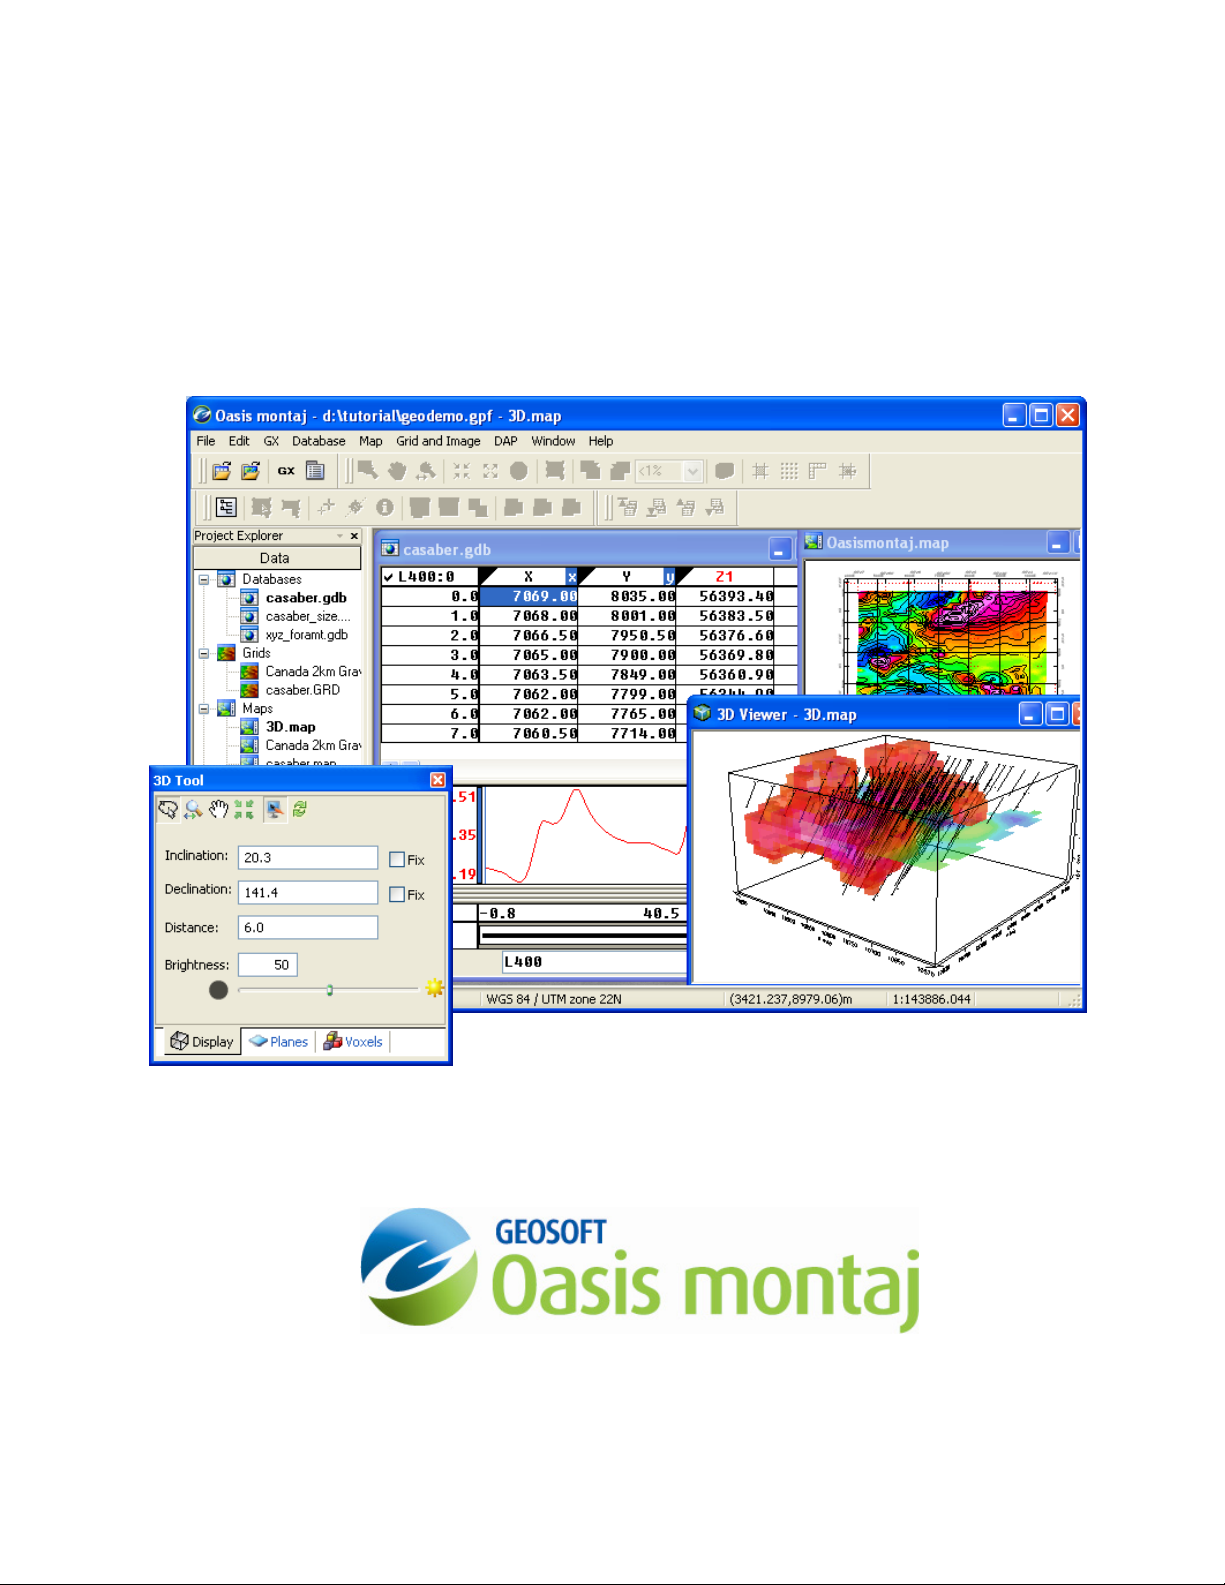
The Oasis montaj Viewer is a free software product that enables you to view Geosoft
data (databases, profiles, grids, voxels, maps), ArcGIS MXD files (Note: The installation
of ArcMap or ArcEngine is required to view MXD files in Oasis montaj), and a variety of
common image and data exchange formats. Specifically, this version provides you with
the following capabilities:
•Access Geosoft project data (databases, profiles, grids, voxels, maps, ArcGIS
MXD files), tools (3D Tool and Project Explorer), and Geosoft tool bars
(Database Tools, Map Layout, Map Tools, and Standard)
•Evaluate data, information and interpretations by viewing and performing
specific tasks using Geosoft databases, profiles, maps, and grids as well as
Geosoft and third-party images (including Geosoft PLT, AutoCAD DXF,
MapInfo TAB, ArcView SHP, ArcGIS LYR, and Microstation DGN files)
•Verify data quality, analyses and interpretations by tracking processes applied to
databases and maps
•Perform selected processes made available through Geosoft menus or third-party
GXs
•Share results and knowledge by viewing and/or sending E-maps and 3D PDF
files (see the Export To PDF 3D for more details) to team members and other
professional contacts
•Prepare reports by exporting to 3D PDF or using clipboard image copying
capabilities
Software and Hardware Requirements
To run Oasis montaj, you require the following software and hardware:
Operating System XP required (2000,95,98,ME,NT not supported), Vista Business
Edition under compatibility testing
CPU No requirement on a specific CPU type. An Intel Celeron
processor is not recommended
RAM 2 GB recommended, 512 MB required
Graphics 256MB 3D (DirectX and OpenGL) Accelerated graphics card
recommended.
Printer/Plotter Any Windows®supported colour printer. Hewlett Packard®large-
format ink-jet plotters are recommended
Installation Oasis montaj MUST be installed by a user with Local
Administration rights on the machine.
Installation Disk Space 1 GB or more of free space on the Program Files drive is required
for the installation process

2 Oasis montaj
Data Disk Space Data disk space depends on the volume of project data to be
processed and the printer driver you are using, however 100 GB is
recommended. This is largely based on your business and data
requirements.
Internet To use the Internet capabilities in Oasis montaj, you will need to
install Internet Explorer 5.0 or later. This does not mean that you
have to have Internet Explorer as your default browser; Oasis
montaj just uses the Internet connection technology supplied in
IE5
Installing Oasis montaj Viewer
The Oasis montaj Viewer can be installed from a CD-ROM or downloaded from the web
and installed via an EXE file.
To use the Internet capabilities in Oasis montaj, you will need to install Internet Explorer
5.0 or later. This does not mean that you have to have Internet Explorer as your default
browser; Oasis montaj just uses the Internet connection technology supplied in IE5 to
connect to the web.
Install from the Oasis montaj Viewer CD ROM
Please note that your installation procedure will vary slightly depending on the operating
system you are using. When installing Oasis montaj users MUST be logged on as
Administrator.
1. Insert the Oasis montaj CD into your CD-ROM drive. The Geosoft Install
Package setup dialog is displayed and tells you that the system is preparing the
installation.
2. When ready, the program displays the Geosoft Oasis Montaj Viewer – Setup
Wizard Welcome screen. To continue, follow the directions on the screens that
appear.
3. When the "Installation Completed" dialog is displayed, you can check the boxes
provided to launch Oasis Montaj Viewer and view the release notes.
4. Click the [Finish] button to complete the installation process.
Install from the Web
The Oasis montaj Viewer can be downloaded from the Geosoft website at
(www.geosoft.com/downloads/index.asp#free).
Please note that your installation procedure will vary slightly depending on the operating
system you are using.
When installing Oasis montaj users MUST be logged on as Administrator.
1. Download the Oasis montaj Viewer (*.exe) file from the Geosoft website
(www.geosoft.com/downloads/index.asp#free).

Oasis montaj 3
2. Run the self-extracting file (Oasis montaj Viewer.zip), the InstallShield Wizard
Setup dialog is displayed and tells you that the system is preparing the
installation.
3. When ready, the program displays the Geosoft Oasis Montaj Viewer –
InstallShield Wizard Welcome screen. To continue, follow the directions on the
screens that appear.
4. When the "Installation Completed" dialog is displayed, you can check the boxes
provided to launch Oasis Montaj Viewer or view the release notes.
5. Click the [Finish] button to complete the installation process.
Authorizing Your Internet Communication Settings
The Authorize Internet Communication dialog box enables you to authorize what
communication takes place between your Oasis montaj system and the Geosoft Internet
Server. The Internet Trust Relationship dialog box enables you to select the default
setting for authorizing all future communication with the server.
All communication with the Geosoft Server is encrypted for your privacy and security.
Authorize Internet Communication Dialog
This dialog box is displayed when Oasis montaj tries to communicate with an internet
server. For example, when you try to download data from the Geosoft DAP server and
your authorization is set to Verify (the default setting).
•Click the [Authorize] button to authorize the communication and connect to the
server.
•Click [Deny] to cancel the communication. The server will not be accessed.
•Click [Security] to view the Internet Trust Relationship dialog box and change
your default authorization setting (see below).
Internet Trust Relationship Dialog
This dialog box enables you to set the type of access you want when communicating with
an internet or external server to download data.
You can select from three levels of access that will define how the Geosoft Server will
communicate with your computer:
Trusted
This setting will automatically authorize all communication with the server. This means
that you will not be prompted to verify everytime you connect with the Geosoft server. All
communication with the server saved in a log file on your local computer so that you can
check to see what information was sent and received.

4 Oasis montaj
Verify
This setting will ask you to verify all communication with the server before proceeding
with a download. This means that whenever you access the server, the server will show
you what is being downloaded and ask you to authorize it.
Click the [Accept] button to give permission and download the file(s) or click the [Deny]
button if you do not want to download the file(s).
All communication with the server saved in a log file on your local computer so that you
can check to see what information was sent and received. This is the default setting
Restricted
This setting will not authorize any communication with the server. This means that you
do not want any communication with the server to take place. With this setting, you will
not be able to download any data from the server.
Tip: You can modify your Internet Trust Settings at any time by clicking the
Global Settings/Internet menu item from the GX menu.
Setting High-Resolution Graphics
In order to view the colours in your maps and grids correctly, you may have to change
your video card settings.
1. Click right mouse button on desktop screen.
2. On the Properties menu, click Settings.
3. Set the Colour Palette to Medium Colour 16-bit or Highest Colour 32-bit.
Configuring Oasis montaj Settings
Before you begin working with Oasis montaj, you may want to configure your other
default settings. The General Settings can be accessed from the GX/Global Settings menu
option. For information on the different settings available in Oasis montaj, see the
SETTINGS GX help topic in the online help system.

Oasis montaj 5
Finding More Help Information
There are several other functions included in the basic Oasis montaj help system that
may be useful to your work. The entire documentation for the system is available through
the online help system. This electronic library of information enables us to constantly
update the information and provide you with the most up-to-date information available.
The best way to find information in this system is to use the Search tab to perform a full-
text search of all help topics. If you still can’t find the information you’re looking for, all
of the Geosoft Manuals and Tutorials are available online,
www.geosoft.com/resources/tutorials/
Contacting Geosoft
The list below provides contact information for Geosoft offices around the world. Note
that, technical support is for Licensed Users Only.
North America
Geosoft Inc.,
85 Richmond St. W., 8th Floor
Toronto, Ont.,
Canada
M5H 2C9
Tel. (416) 369-0111
Fax (416) 369-9599
Email:[email protected]
Europe and North Africa
Geosoft Europe Ltd.
20/21 Market Place, First Floor
Wallingford, Oxfordshire
OX10 OAD United Kingdom
Tel: +44 1491 835 231
Fax: +44 1491 835 281
Email: [email protected]
South America
Geosoft Latinoamerica Ltda.
Praça Floriano 51 / 19º Andar
CEP: 20031-050, Centro
Rio de Janeiro, RJ, Brasil
Tel: (55-21) 2111-8150
Fax: (55-21) 2111-8181
Email: [email protected]
Australia and Southeast Asia
Geosoft Australia Pty. Ltd
Unit 14, 100 Railway Road,
Subiaco WA 6008
Australia
Tel 61 (8) 9382 1900
Fax 61 (8) 9382-1911
Email: [email protected]
South and Central Africa
Geosoft Africa Ltd.
Buren Building, Second Floor
Kasteelpark Office Park
c/o Nossob & Jochemus Streets
Erasmuskloof X3, Pretoria
Tel: 27 12 347 4519
Fax: 27 12 347 6936
Email: [email protected]

6Tutorial 1: Getting Ready to Work
Tutorial 1: Getting Ready to Work
In this tutorial, we will guide you through the steps you need to know to start working
with your new software. At this point you should have already installed Oasis montaj.
You should begin by starting Oasis montaj.
TO START USING OASIS MONTAJ
1. On the Start menu bar click Programs and then click Geosoft and then click Oasis
montaj Viewer|Oasis montaj Viewer.
or
2. Double click on the Oasis montaj Viewer icon in Windows Explorer or File
manager or the icon located on you desktop screen.
Welcome to the Oasis montaj Environment
When you run Oasis montaj, the system opens the Oasis montaj interface window.

Tutorial 1: Getting Ready to Work 7
System Files
As you work with the system, you will become familiar with a variety of standard files
used for specific functions. The following list provides a short summary of the more
important files.
Oasis montaj System Files System File Extensions
Geosoft Database File *.GDB
Map File, including Plots and Grids *.MAP
Geosoft Grid File *.GRD
Geosoft Voxel Files *.GEOSOFT_VOXEL
Geosoft Metadata files *.XML
Colour Information for Grids/Images *.AGG
*ArcGIS MXD file *.MXD
Geosoft eXecutable *.GX
Geosoft Script File *.GS
Oasis Menu, Oasis Sub-Menu *.OMN, * .SMN
Geosoft Project File *.GPF
Geosoft Projection Information File (for
maps)
*.GI
Geosoft Map file (used in the MapInfo
software to distinguish a Geosoft map file
from a MapInfo (*.map) file
*.GM
*To access ArcGIS MXD files in Oasis montaj requires ArcMap or ArcEngine to be
installed on your computer.
Creating a Working Directory
The system enables you to access files anywhere but it is a good strategy to carefully
organize your data (project information and files) before carrying out any processing.
To start this tutorial, please create a working directory called D:\Tutorial. A general rule
to follow in working with Geosoft applications is to avoid working in the directory where
Oasis montaj was installed. In this tutorial, we will follow this rule by keeping all the
working data files in D:\Tutorial.
Before you Begin
This tutorial uses sample data (casaber.gdb, casaber.grd, casaber.grd.gi, Oasis
montaj.map, oasismontaj.map.gm, and xyz_format.xyz) which is available on the
Geosoft website http://www.geosoft.com/pinfo/oasismontaj/free/montajviewer.asp.
Before you begin the tutorial, download and copy the data files to your working directory
D:\Tutorial.

8Tutorial 1: Getting Ready to Work
Creating a Project
To work in Oasis montaj requires an open Project. An Oasis montaj "Project"
encompasses every item in your working project; from the data files in your project
(databases, maps, and grids), to the tools used (including 3D tool and the Project
Explorer), to the project setup including the menus you have displayed and whether you
are working on a map or profile and the state in which you left it the last time you used it.
The project also controls your working directory. Projects are saved as (*.gpf) files. If you
open an existing project from a directory, the system assumes that all your project files are
located in the same directory. To streamline your work, as well as keep it organized, you
may wish to make sure that your project file is in the same directory as the other files you
want to use. We recommend that each project you work on have its own project (*.gpf)
file.
The Project Explorer tool enables you to browse as well as open any project item. The
Project Explorer has two windows, the Data window that includes all data files included
in the project and the Tools window that organizes and maintains the project tools. To
access the Tools window click the Tools bar on the bottom of the Project Explorer. To
return to the Data window, click the Data bar on the top the Project Explorer.
TO CREATE A PROJECT:
1. Start Oasis montaj.
2. On the File menu, select Project and then select New. The New Project dialog is
displayed.
Note: Oasis montaj assumes that your data is in the directory containing this
project

Tutorial 1: Getting Ready to Work 9
3. Specify a name and directory for the project. For example, name the project
GeoDemo and specify the working directory as D:\Tutorial
4. Click the [Save] button. The system saves the project and indicates it is open by
adding menus to the menu bar, adding buttons to the Database Tools, Map
Layout, Map Tools and Standard short-cut tool bars and by displaying the Project
Explorer window. These are visual clues indicating that you are ready to start
working with the system.
5. To close a project, on the File menu, select Project|Close.
Changing Default Settings
The program will work correctly with all of the standard default settings; however these
may be changed to reflect your personal requirements or those of your computer. The
default settings are the selections made for many of the programs where there is no user
input and are designed to yield logical results.
You may overwrite some of these intelligent defaults in normal use but this should not
create any problems since the defaults are only intended to get you started with the system
and should change as your knowledge of the system increases.

10 Tutorial 1: Getting Ready to Work
TO CHANGE THE DEFAULT SETTINGS OF THE OASIS MONTAJ ENVIRONMENT
1. On the GX menu, select Global Settings|General. The Default Oasis montaj
settings dialog is displayed.
2. Select the desired choices from the available selections. You need not change any
selections at this time. Once you are more familiar with Geosoft, you may come
back to alter the settings.
The following list summarizes the default Oasis montaj Viewer settings:
Default grid colour table Select the default colour table to use for displaying grids
Print memory
(megabytes)
Select the amount of RAM you would like the Geosoft print
driver to use when printing. This only effects print
configurations that use the Geosoft drivers. Enter 0 to use the
default, which is 33% of the total physical RAM available on
the system.
The Geosoft print driver will slice each print job into bands of
this size. The more RAM you use for printing, the faster
printing will be. If you specify too much RAM, it is possible
to significantly diminish the performance of other tasks on the
computer. This amount should normally not exceed 50% of
the installed RAM on your system, although we will allow the
value to be up to 75% of the available RAM.
This setting is not used by the Windows driver. If you use the
Windows print driver, the printing process will use virtual
memory up to the size required by the print. This can be up to
600 MB for A0 (E) size plots. We recommend that you use
the Geosoft drivers when working with large plotters.

Tutorial 1: Getting Ready to Work 11
Image Cache Select the amount of virtual RAM you would like to reserve
for the image cache. As images are displayed in Oasis
Montaj, an efficient access version of the image will be stored
in the cache if there is room. The cache copy of the image
greatly improves the performance of rendering the image when
zoom/pan/redraw operations are performed. If there is
insufficient room in the cache, the image will always be
rendered from the DAT interface, which is slower.
We recommend that you should set the image cache size to
about 4 times the largest images that you routinely work with.
Note that the image cache will be created in the GEOTEMP
directory, and there must be sufficient room to hold the cache
plus other Geosoft temporary files. The image cache should
not be more than 50% of the available room in GEOTEMP.
Temporary file directory This directory is used by Oasis montaj to store temporary
files. Depending on the application, the requirements for
storage in this directory can be VERY large (from 10
megabytes to gigabytes). We recommend setting this
parameter to a very FAST drive. This will improve
performance of all large data operations (magmap, gridding,
etc).
Oasis montaj cannot start if this drive is invalid or if it is set
to a drive in which it cannot create files (CD ROM). Please
ensure that the directory is always valid.
Note that in previous versions of Oasis montaj the
GEOTEMP environment variable determined where this
directory was stored. This variable is no longer used and the
setting is controlled through the Windows registry.

12 Tutorial 1: Getting Ready to Work
Finding Help
Oasis montaj provides help information through two different interfaces. The Online
Help system, which can be access by clicking the Help () button on the individual
dialogs or by selecting the Help|Help Topics menu, can be used to locate quick
information as well as access Contents, Search and Favorites tools. For new users we
recommend that you take the online tour included in the About topics, which will
introduce you to Oasis montaj. The Manuals, Tutorials, and Technical Notes system,
accessed through Help|Manuals and Tutorials, contains full-length PDF documents that
you can download from the Geosoft website (www.geosoft.com/resources/tutorials/)and
print.

Tutorial 2: Working with Data
13
To a use Oasis montaj effectively, you will need to understand a bit about databases,
spreadsheets, profiles and maps. The “window” to the database in Oasis montaj is a
specialized earth science spreadsheet that appears automatically when you open a
database. This spreadsheet provides access to a wide range of data management and
profile viewing capabilities. Maps have special properties that you will learn about in later
tutorials.
The purpose of this tutorial is to provide you with an overview of how you can use this
data management system effectively.
Oasis montaj Databases
One of the fundamental technologies in Oasis montaj is its unique database architecture.
This architecture is designed to let you display many kinds of data formats (ASCII and
binary) in high-performance Oasis montaj databases.
Oasis montaj provides the ability to add compression to a database. You can choose to
compress for speed, size or use no compression at all. The type of compression you use
depends on which type better suites your needs. We recommend that you use speed, as it
provides the fastest access to your data with a good compression rate.
Opening a Database
Geosoft databases store and organize your survey data. Databases are displayed and
organized in Oasis montaj in the Spreadsheet Window.
TO OPEN A DATABASE
1. On the Database menu, select Open database. The Open Database dialog is
displayed.

14 Tutorial 2: Working with Data
2. Select the tutorial database (casaber.gdb) and click [Open]. The casaber.gdb is
displayed in your project.
Adding Compression to your Database
1. On the Database menu, select Save database as. The Save database as dialog is
displayed.
2. Specify a new database name as (casaber_size.gdb) and then from the
Compression Type dropdown list, select (Size). Click the [OK] button to
continue.
3. The new compressed database (casaber_size.gdb)is displayed in your project.
This manual suits for next models
1
Table of contents
Popular Software manuals by other brands

Novell
Novell SUPPORT ADVISOR - 04-2010 user guide

VMware
VMware VSHIELD ENDPOINT datasheet

Autodesk
Autodesk 00308-011408-9F30A - VLA AUTOSKETCH R8-MEDIA... user guide

IBM
IBM SPSS Data Collection installation guide

Novell
Novell EDIRECTORY 8.8 - GUIDE installation guide

Comcast
Comcast COMCAST DIGITAL VOICE user guide