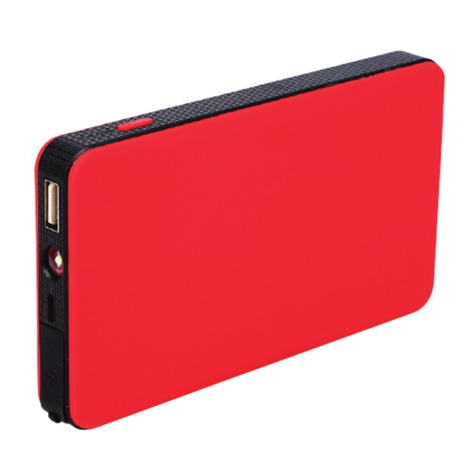
GET JUMPSTARTER MINI User manual

1
ENGUIDE
ITGUIDA
ES
GUÍA
FRGUIDE
DEHANDBUCH
PTGUIA
JUMPSTARTER
MINI
MULTIFUNCTIONAL MINI STARTER
V.1

2
ENGLISH
A. PRELIMINARY WARNINGS
Check the charge status of the device. If it is under 50% (2 LEDs out of 4),
JumpStarter needs to be recharged. To keep the JumpStarter energy capacity
constant, it should never be completely discharged for more than 30 days.
Beyond this term, the device may partially or totally lose its functionality.
If JumpStarter emits an acoustic signal during the start attempt, this means
that the device is in protection mode, not allowing further attempts.
Please, recharge the device before trying again.
Itisrecommendednottoperformfurtherrestartattemptsbeforerecharging,
otherwise JumpStarter may fall below the minimum capacity threshold. In this
case the device could not be charged again anymore.
Please, connect only the clamps included in the package.
Caution: Using ports or harnesses other than those included in the
JumpStarter package can damage – partially or totally – both the device
and what is connected to it.
B. SAFETY WARNINGS
Before using GET JumpStarter Mini, please read all instructions, safety
warnings and precautions carefully, for working and maintenance procedures,
for the list of components and for technical specifications. Failure to do so
may lead to incorrect operation or device malfunctions, resulting in damage to
the product or personal injury.
The following safety notes are extremely important to ensure the user’s
safety and to avoid damages to the device or to any product linked to it.
1. This device has been designed and tested only and exclusively for starting
12V up to 2000cc vehicles (not suitable for Diesel vehicles). Don’t use this
device to start other vehicles. It is also a Power Bank and a torch light. Do not
use it for any other purposes
2. Keep it away from children, persons with reduced physical, sensory or
mental capabilities or lack of experience and knowledge.
3. Improper use of the battery charger or tampering with the built-in electronic
circuit will invalidate your warranty.
4. The appliance must be repaired or serviced by trained personnel only.
EN

3
C. PRODUCT LAYOUT – Components
EN
Torch light
BACK
Clamps connection unit
5V-1A input port
Strike out unit’s
outlet port
USB 5V-2.1A
outlet port
LED indicator
Alarm beeper
Switch button
Charger cable

4
Indicator No light 1 LED 2 LED 3 LED 4 LED
Charge level 0% 25% 50% 75% 100%
MAIN FUNCTIONS & FEATURES
•Emergency electronic mini starter: it allows to restart any motorbike and scooter
(including watercrafts and small boats) when they have a low charged battery.
• LED Torch: 3 different high-intensity light mode (steady, SOS, strobo).
• Powerbank: light and compact device to recharge your mobile
devices wherever you are.
• Handy and useful: simple to be brought with you everyday in your
backpack, luggage or purse.
• Easy to use: no difficult procedures to remember, no settings to change.
• Maximum safety: best protection against short circuit, overcharge, over
discharge, overheating, reverse polarity.
D. OPERATION
HOW TO RECHARGE JUMPSTARTER:
1. Connect the USB charger cable to a charger (not included) or USB port.
2.Connect the micro USB to the device’s 5V1A input port.
CHARGE INDICATOR:
Press the button to check the JumpStarter’s charge level:
EN
The LEDs will light on one after the other during charging.
The number of LEDs lit up shows JumpStarter’s charge level (see table
above). Once the charge process is completed, all the LEDs will be on. All
LEDs will turn off when charging is interrupted.
A full charge process will take around 2 hours.

5
HOW TO START PETROL VEHICLES (12V) USING JUMPSTARTER:
EN
1. Completely insert the
connector with the clamps into
the outlet port with a rubber cap
marked with an open hood car.
2. The LED on the clamps
connection unit will start blinking
red and green, showing the device
is ready to be connected to the
battery.
3.Connect the red clamp to the
battery’s positive (+) terminal
and the black clamp to its
negative (-) terminal.
WARNING: do not to invert
the two clamps for any reason.
4. Turn on the vehicle using the
JumpStarter only if at least 3 LEDs
are lit on the charge indicator.

6
5. Proceed accordingly to what
the LED on the clamps connection
unit suggest:
-GREEN LED on: the connection
is correct and the circuit is
functioning. It is now possible to
start the vehicle.
-RED LED on with alerting sound
from the JumpStarter: The LED
indicates a connection error, while
the sound is a warning to correct
the position of the clamps as
explained in point 3.
Wait until the GREEN LIGHT
comes on to switch on the engine
using JumpStarter.
WARNING: If the engine does not start within 3 seconds stop
cranking and wait at least 30 seconds before attempting to start the
vehicle again. Do not try to crank the engine as explained more than
3 times in a row, as the device may get damaged. We recommend to
wait more than two minutes before cranking again, to prevent the
starter cables from overheating and disconnecting from the device as
an automatic safety measure.
6. After the vehicle starts, remove
starter cable from the battery
within 30 second and leave the
vehicle’s engine on.
EN
Green LED on
Red LED on and alerting sound

7
HOW TO RECHARGE MOBILE DEVICES:
HOW TO USE THE TORCH LIGHT:
1. Connect the charger cable to
the device’s USB 5V 2.1A port.
2. Select the appropriate
connector and connect it to your
mobile phone or tablet.
-Press the switch button for 3
seconds to turn the torch on.
-Press it again to start the SOS light.
-Press it again to start the strobe light.
-Press it again to turn the light off.
3 Sec
EN

8
EN
Contains FCC ID: LCS191211002AE
NOTICE: This device complies with Part 15 of the FCC Operation.
Its use is subject to the following two conditions :
(1) This device may not cause harmful interference, and
(2) This device must accept any received interference, including
interference that may cause undesired operation of the device.
NOTICE: Changes or modifications made to this equipment not
expressly approved by (manufacturer name) may void the FCC
authorisation to operate this equipment.
NOTICE: This equipment has been tested and found to comply
with the limits for a Class A digital device, pursuant to Part 15 of
the FCC Rules. These limits are designed to provide reasonable
protection against harmful interference when the equipment
is operated in a commercial environment. This equipment
generates, uses, and can radiate radio frequency energy and, if
not installed and used in accordance with the instruction manual,
may cause harmful interference to radio communications.
Operation of this equipment in a residential area is likely to cause
harmful interference; in this case the user will be required to
correct the interference at his own expense.
E. SYMBOLS AND CERTIFICATIONS
Athena s.p.a. declares herewith that the product
GK-JMPSTR-0002 complies with the essential requirements
of Directive 2014/53/EU. The complete text of the Directive
is available online: https://shop.athena.eu/it/node/75.

9EN
Athena S.p.A. warrants to the consumer that the product is free of defects
in material and workmanship for 24 (twenty-four) months from the date of
purchase, which must be certified by a document valid for fiscal purposes.
The warranty can only be exercised by the original consumer of the product
purchased fromanauthoriseddealerorthroughtheAthenaS.p.A.sales channel.
During the warranty period, the product – if the relevant defect has been
ascertained following an internal assessment – will be repaired or replaced
without any additional cost for workmanship and materials.
The warranty shall not apply in the following cases:
• Normal wear and tear of the product;
• Improper use of the product;
• Improper installation;
• Damages arising from repairs or alterations by unauthorised personnel;
• Damages arising from misuse, accidents and failure to observe the
precautions required;
• Inadequate maintenance.
Athena S.p.A. shall not be held liable for any damages, losses, expenses and
direct or indirect costs arising from the product or ascribable to the latter.
In case of repairs or replacement, the product will be covered by warranty
until the expiry of the original warranty. The product’s repair or replacement
may involve the use of equivalent parts in place of the original parts.
The removed parts or replaced products will become the property of Athena
S.p.A. This warranty issued by Athena S.p.A. does not in any way affect the
rights and remedies expressly envisaged and recognised to the consumer
pursuant to the national or regional laws in force concerning the sale of
consumer goods, nor does it limit the consumer’s rights towards the dealer
arising from the sales contract.
This warranty is exclusively valid in the countries in which the product was
marketed and sold by Athena S.p.A. or by an authorised dealer.
F. WARRANTY

10
ITALIANO
A. AVVERTENZE PRELIMINARI
Controlla lo stato di carica del dispositivo. Se è inferiore al 50% (2 LED accesi
su 4), è necessario ricaricare JumpStarter. Per mantenere costante la capacità
energetica, JumpStarter non deve mai essere mantenuto completamente
scarico per più di 30 giorni. Oltre questo periodo il dispositivo potrebbe perdere
parzialmente o totalmente la sua funzionalità.
Se JumpStarter emette un segnale acustico durante il tentativo di avvio,
ciò significa che il dispositivo è in modalità di protezione e non permetterà
ulteriori tentativi. Ricarica il dispositivo prima di riprovare.
Si raccomanda di non eseguire ulteriori tentativi di riavvio prima di ricaricare,
altrimenti JumpStarter potrebbe scendere al di sotto della soglia di capacità
minima. In questo caso, non sarà più possibile ricaricare il dispositivo.
Collega solo i morsetti inclusi nella confezione. Attenzione: l’uso di porte o
cablaggi diversi da quelli inclusi nella confezione di JumpStarter può danneggiare
- parzialmente o totalmente - sia il dispositivo sia ciò che è collegato ad esso.
B. AVVERTENZE DI SICUREZZA
Prima di utilizzare GET JumpStarter Mini, leggere attentamente tutte le
istruzioni, le avvertenze di sicurezza e le precauzioni per le procedure di
funzionamento e manutenzione, l’elenco dei componenti e le specifiche
tecniche. In caso contrario, si potrebbero verificare operazioni errate o
malfunzionamenti del dispositivo, con conseguenti danni al prodotto o lesioni
personali. Le seguenti note di sicurezza sono estremamente importanti per
garantire la sicurezza dell’utente ed evitare danni al dispositivo o a qualsiasi
prodotto ad esso collegato.
1. Questo dispositivo è stato progettato e testato solo ed esclusivamente per
l’avviamento di veicoli da 12V fino a 2000cc (non è adatto per veicoli Diesel).
Non utilizzare questo dispositivo per avviare altri veicoli. È anche un Power
Bank e una torcia. Non utilizzarlo per altri scopi.
2. Tenerlo lontano da bambini, persone con ridotte capacità fisiche, sensoriali
o mentali o mancanza di esperienza e conoscenza.
3. L’uso improprio del caricabatterie o la manomissione del circuito elettronico
incorporato invalideranno la garanzia.
4. L’apparecchio deve essere riparato o riparato solo da personale addestrato.
IT

11
C. LAYOUT DEL PRODOTTO – Componenti
IT
Torcia
RETRO
Unità di collegamento morsetti
Porta di ingresso 5V-1A
Porta di uscita per
l’unità di collegamento
morsetti
Porta di uscita
USB 5V-2.1A
Indicatore LED
Segnalatore acustico
di allarme
Interruttore
Cavo di ricarica

12
Indicatore Nessuna
luce 1 LED 2 LED 3 LED 4 LED
Livello di carica 0% 25% 50% 75% 100%
FUNZIONI E CARATTERISTICHE PRINCIPALI
• Mini starter elettronico di emergenza: consente di riavviare qualsiasi moto e
scooter (inclusi natanti e piccole imbarcazioni) con una batteria poco carica.
• Torcia a LED: 3 diverse modalità di illuminazione ad alta intensità (fissa, SOS, strobo).
• Powerbank: dispositivo leggero e compatto per ricaricare i tuoi
dispositivi mobili ovunque tu sia.
• Pratico e utile: semplice da portare con sé ogni giorno nello zaino,
nel bagaglio o nella borsa.
• Facile da usare: nessuna procedura difficile da ricordare, nessuna
impostazione da modificare.
• Massima sicurezza: massima protezione da corto circuito, sovraccarico,
sovra scarica, surriscaldamento, inversione di polarità.
D. FUNZIONAMENTO
COME RICARICARE JUMPSTARTER:
1. Collegare il cavo del caricabatterie USB a un caricabatterie (non incluso) o
a una porta USB.
2.Collegare la micro USB alla porta di ingresso 5V1A del dispositivo.
INDICATORE DI CARICA:
Premi il pulsante per verificare il livello di carica del JumpStarter:
IT
I LED si accenderanno uno dopo l’altro durante la ricarica.
Il numero di LED accesi mostra il livello di carica di JumpStarter (vedi
tabella sopra). Una volta completato il processo di carica, tutti i LED
saranno accesi. Tutti i LED si spengono quando la carica viene interrotta.
Una ricarica completa richiederà circa 2 ore.

13
COME AVVIARE I VEICOLI A BENZINA (12V) CON JUMPSTARTER:
IT
1. Inserire completamente il
connettore con i morsetti nella
porta di uscita con un cappuccio
di gomma contrassegnato da
un’automobile con cofano aperto.
2. Il LED sull’unità di connessione
dei morsetti inizierà a lampeggiare
in rosso e verde, indicando che il
dispositivo è pronto per essere
collegato alla batteria.
3. Collegare il morsetto rosso
al terminale positivo (+) della
batteria e il morsetto nero al
terminale negativo (-).
ATTENZIONE: non invertire i
due morsetti per nessun motivo.
4. Accendere il veicolo utilizzando
JumpStarter solo se sull’indicatore
di carica sono accesi almeno 3 LED.

14
5. Procedere secondo quanto
suggerito dal LED sull’unità di
connessione dei morsetti:
-LED VERDE acceso: la connessione
è corretta e il circuito funziona. E’
ora possibile avviare il veicolo.
-LED ROSSO acceso con suono
di allarme dal JumpStarter: il LED
indica un errore di connessione,
mentre il suono è un avvertimento
per correggere la posizione dei
morsetti come spiegato al punto 3.
Attendere fino a quando la LUCE
VERDE si accende per avviare il
motore utilizzando JumpStarter.
ATTENZIONE: se il motore non si avvia entro 3 secondi,
interrompere l’avviamento e attendere almeno 30 secondi prima di
provare a riavviare il veicolo. Non tentare di avviare il motore come
spiegato più di 3 volte di seguito, poiché il dispositivo potrebbe
danneggiarsi. Si consiglia di attendere più di due minuti prima di
riaccendere, per evitare che i cavi di avviamento si surriscaldino e si
disconnettano dal dispositivo come misura di sicurezza automatica.
6. Dopo l’avvio del veicolo, rimuovere
il cavo di avviamento dalla batteria
entro 30 secondi e lasciare acceso il
motore del veicolo.
IT
LED verde acceso
LED rosso acceso e suono di allarme

15
COME RICARICARE I DISPOSITIVI MOBILI:
COME USARE LA LUCE TORCIA:
1. Collegare il cavo del
caricabatterie alla porta USB 5V
2.1A del dispositivo.
2. Selezionare il connettore
appropriato e collegarlo al telefono
cellulare o al tablet.
-Premere l’interruttore per 3
secondi per accendere la torcia.
-Premere di nuovo per avviare la
luce SOS.
-Premere di nuovo per avviare la luce
stroboscopica.
-Premere di nuovo per spegnerela luce.
3 Sec
IT

16
Contains FCC ID: LCS191211002AE
NOTA: questo dispositivo è conforme alla parte 15 della normativa
FCC Il suo utilizzo è soggetto alle due condizioni seguenti:
(1) Il dispositivo non deve causare interferenze dannose,
e (2) Il dispositivo deve accettare qualsiasi interferenza
ricevuta, comprese quelle che possano causare disturbi al suo
funzionamento.
NOTA: eventuali modifiche o variazioni apportate a questo
apparecchio senza l’esplicita approvazione di (nome del
produttore) potranno invalidare l’autorizzazione FCC
all’utilizzo dell’apparecchio.
NOTA: questo apparecchio è stato testato e ne è stata
verificata la conformità ai limiti previsti per i dispositivi digitali
di Classe A secondo la parte 15 delle normative FCC. Questi
limiti sono studiati per fornire una protezione ragionevole
contro le interferenze dannose quando l’apparecchio viene
utilizzato in un ambiente commerciale. Questo apparecchio
genera, utilizza e può irradiare energia in radiofrequenza e, se
noninstallatoeutilizzatoinconformità almanualedi istruzioni,
può causare interferenze dannose alle comunicazioni radio. È
probabile che l’utilizzo di questo apparecchio in aree residenziali
causi interferenze dannose; in questo caso, l’utente sarà tenuto a
eliminare le interferenze a proprie spese.
IT
E. MARCHI E CERTIFICAZIONI
Con la presente, Athena s.p.a. dichiara che il prodotto
GK-JMPSTR-0002 è conforme ai requisiti essenziali della
Direttiva 2014/53/EU. Il testo integrale della Direttiva è
disponibile sul sito internet: https://shop.athena.eu/it/node/75.

17
Athena S.p.A. garantisce al consumatore che il prodotto è privo di difetti di
materiali o di produzione per 24 (ventiquattro) mesi dalla data di acquisto
che deve essere comprovata da un documento valido agli effetti fiscali.
La garanzia è valida solo per il consumatore originale del prodotto acquistato
da un rivenditore autorizzato o tramite il canale di vendite di Athena S.p.A.
Durante il periodo di validità della garanzia, il prodotto, qualora sia stato accertato
il difetto dopo una valutazione interna del caso in questione, verrà riparato o
sostituito senza nessuna spesa aggiuntiva per la mano d’opera e per i materiali.
La garanzia non è applicabile nei seguenti casi:
• Normale usura del prodotto;
• Uso improprio del prodotto;
• Installazione impropria;
• Danni risultanti da riparazioni o modifiche da parte di personale non
autorizzato;
• Danni derivanti da cattivo uso, incidenti, mancata osservanza delle
dovute precauzioni;
• Manutenzione inadeguata.
Athena S.p.A. non si ritiene responsabile per eventuali danni, perdite, spese,
costi, diretti od indiretti, derivanti dal prodotto od ad esso riconducibile.
In caso di avvenuta riparazione o sostituzione, il prodotto sarà coperto da
garanzia per il tempo rimanente del periodo di garanzia originale. La
riparazione o sostituzione del prodotto può comportare l’utilizzo di parti
sostitutive equivalenti in sostituzione alle originali.
Le parti rimosse o i prodotti sostituiti diventano proprietà di Athena S.p.A.
La presente garanzia rilasciata da Athena S.p.A. non pregiudica in alcun
modo i diritti e i rimedi espressamente previsti e riconosciuti in favore del
consumatore ai sensi delle leggi nazionali o regionali in vigore relative alla
vendita di beni di consumo, né limita i diritti del consumatore nei confronti
del rivenditore derivanti dal relativo contratto di vendita.
La presente garanzia ha validità unicamente nei Paesi in cui il prodotto è stato
commercializzatoevenduto daAthenaS.p.A. o daunsuorivenditore autorizzato.
IT
F. GARANZIA

18
ESPAÑOL
A. ADVERTENCIAS PRELIMINARES
Compruebe el estado de carga del dispositivo. Si está por debajo del 50% (2 de 4
LEDs), el JumpStarter ha de recargarse. Para mantener constante la capacidad
de energía del JumpStarter, nunca debe quedarse completamente descargado
más de 30 días. Si se supera este plazo, el dispositivo puede perder parcial o
totalmente su buen funcionamiento.
Si el JumpStarter emite una señal acústica durante el intento de arranque,
esto significa que el dispositivo está en modo de protección y no dejará
realizar otros intentos. Recargue el dispositivo antes de intentarlo de nuevo.
Se recomienda no realizar más intentos de arranque antes de recargar, ya
que de lo contrario el JumpStarter podría quedar por debajo del umbral de
capacidad mínima. En este caso, el dispositivo no podrá volver a cargarse.
Conecte solo las pinzas incluidas en el paquete. Atención: El uso de puertos o
arneses distintos a los que están incluidos en el paquete del JumpStarter puede
dañar-parcialototalmente-tantoel dispositivocomoloque está conectado con éste.
B. ADVERTENCIAS DE SEGURIDAD
Antes de usar GET JumpStarter Mini, lea atentamente todas las instrucciones,
advertencias de seguridad y precauciones, para los procedimientos de trabajo
y mantenimiento, para la lista de componentes y para las especificaciones
técnicas. De no hacerlo, puede provocar un funcionamiento incorrecto o un
mal funcionamiento del dispositivo, con el consiguiente daño al producto o
lesiones personales. Las notas de seguridad siguientes son muy importantes
para garantizar la seguridad del usuario y evitar daños al dispositivo o a
cualquier producto relacionado con el mismo.
1. Este dispositivo se ha diseñado y probado única y exclusivamente para
arrancar de vehículos de 12 V hasta 2000 cc (no es adecuado para vehículos
diésel). No utilice este dispositivo para arrancar otros vehículos. También es
una Power Bank y una luz de linterna. No lo utilice para ningún otro propósito.
2. Manténgalo alejado de los niños, de las personas con capacidades físicas,
sensoriales o mentales reducidas o con falta de experiencia y conocimientos.
3. El uso inadecuado del cargador de baterías o la alteración del circuito
electrónico incorporado invalidará su garantía.
4. El aparato debe ser reparado o mantenido exclusivamente por personal formado.
ES

19
C. LAYOUT DEL PRODUCTO – Componentes
ES
Luz de la antorcha
ATRAS
Unidad de conexión de las pinzas
Puerto de entrada
5V-1A
Puerto de salida para
la unidad de conexión
de los terminales
Puerto de salida
USB 5V-2.1
Indicador LED
Alarma sonora
Botón de cambio
Cable del cargador

20
Indicador No hay
luz 1 LED 2 LED 3 LED 4 LED
Nivel de carga 0% 25% 50% 75% 100%
FUNCIONES Y CARACTERÍSTICAS PRINCIPALES
• Miniarrancador electrónico de emergencia: se puede volver a arrancar cualquier
motocicleta yscooter (incluidas las motos acuáticas ylas pequeñasembarcaciones)
cuando tienen una batería con poca carga.
•LinternaLED:3diferentesmodos de luzdealtaintensidad(fija, SOS,estroboscópica).
•Powerbank: dispositivo ligero y compacto para recargar sus
dispositivos móviles dondequiera que esté.
• Práctico y útil: fácil de llevar todos los días en la mochila, equipaje o bolso.
• Fácil de usar: sin procedimientos difíciles de recordar y sin ajustes que cambiar.
• Máxima seguridad: la mejor protección contra cortocircuitos, sobrecargas,
sobre descargas, recalentamientos y polaridad inversa.
D. FUNCIONAMIENTO
CÓMO RECARGAR JUMPSTARTER:
1.Conecte el cable del cargador USB a un cargador (no incluido) o a un puerto USB.
2.Conecte el micro USB al puerto de entrada de 5V1A del dispositivo.
INDICADOR DE CARGA:
Presione el botón para comprobar el nivel de carga del JumpStarter:
ES
Los LEDs se encenderán uno tras otro durante la carga. El número de LEDs
encendidos muestra el nivel de carga del JumpStarter (ver tabla anterior).
Una vez que se termine el proceso de carga, se encenderán todos los LEDs.
Se apagarán todos los LEDs cuando se interrumpa la carga.
Un proceso de carga completo tardará alrededor de 2 horas.
This manual suits for next models
1
Table of contents
Languages:
Popular Remote Starter manuals by other brands

Schumacher
Schumacher DSR141 user manual

Linear
Linear ACCESS AK-21 Installation and programming instructions

Vector
Vector Power City DK080706 Owner's manual & warranty

Schumacher
Schumacher INSTANT POWER IP-75C owner's manual

EINHELL
EINHELL BT-PS 1000 Directions for use

Audiovox
Audiovox APS620 - Prestige Remote Start installation manual