17.
ADJUSTING THE HEIGHT
OF
THE
NEEDLE
BAR
(Fig.17)
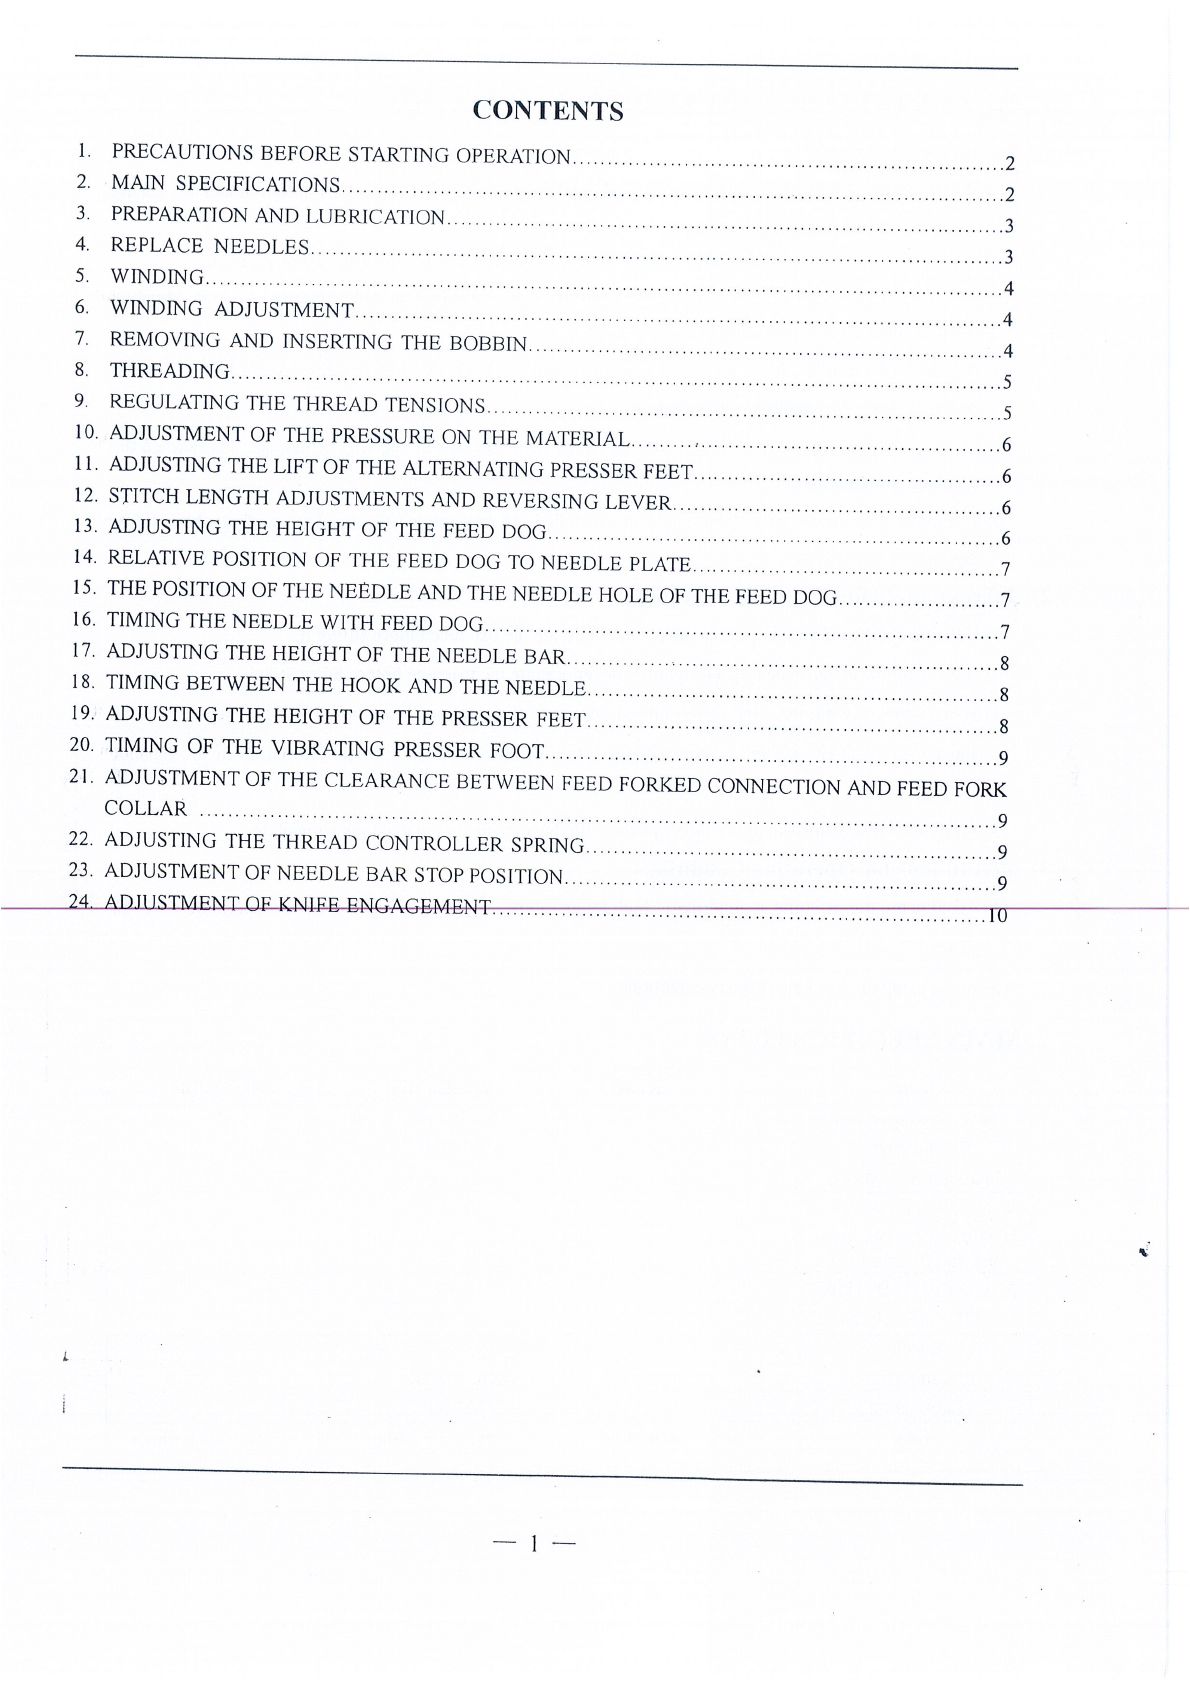
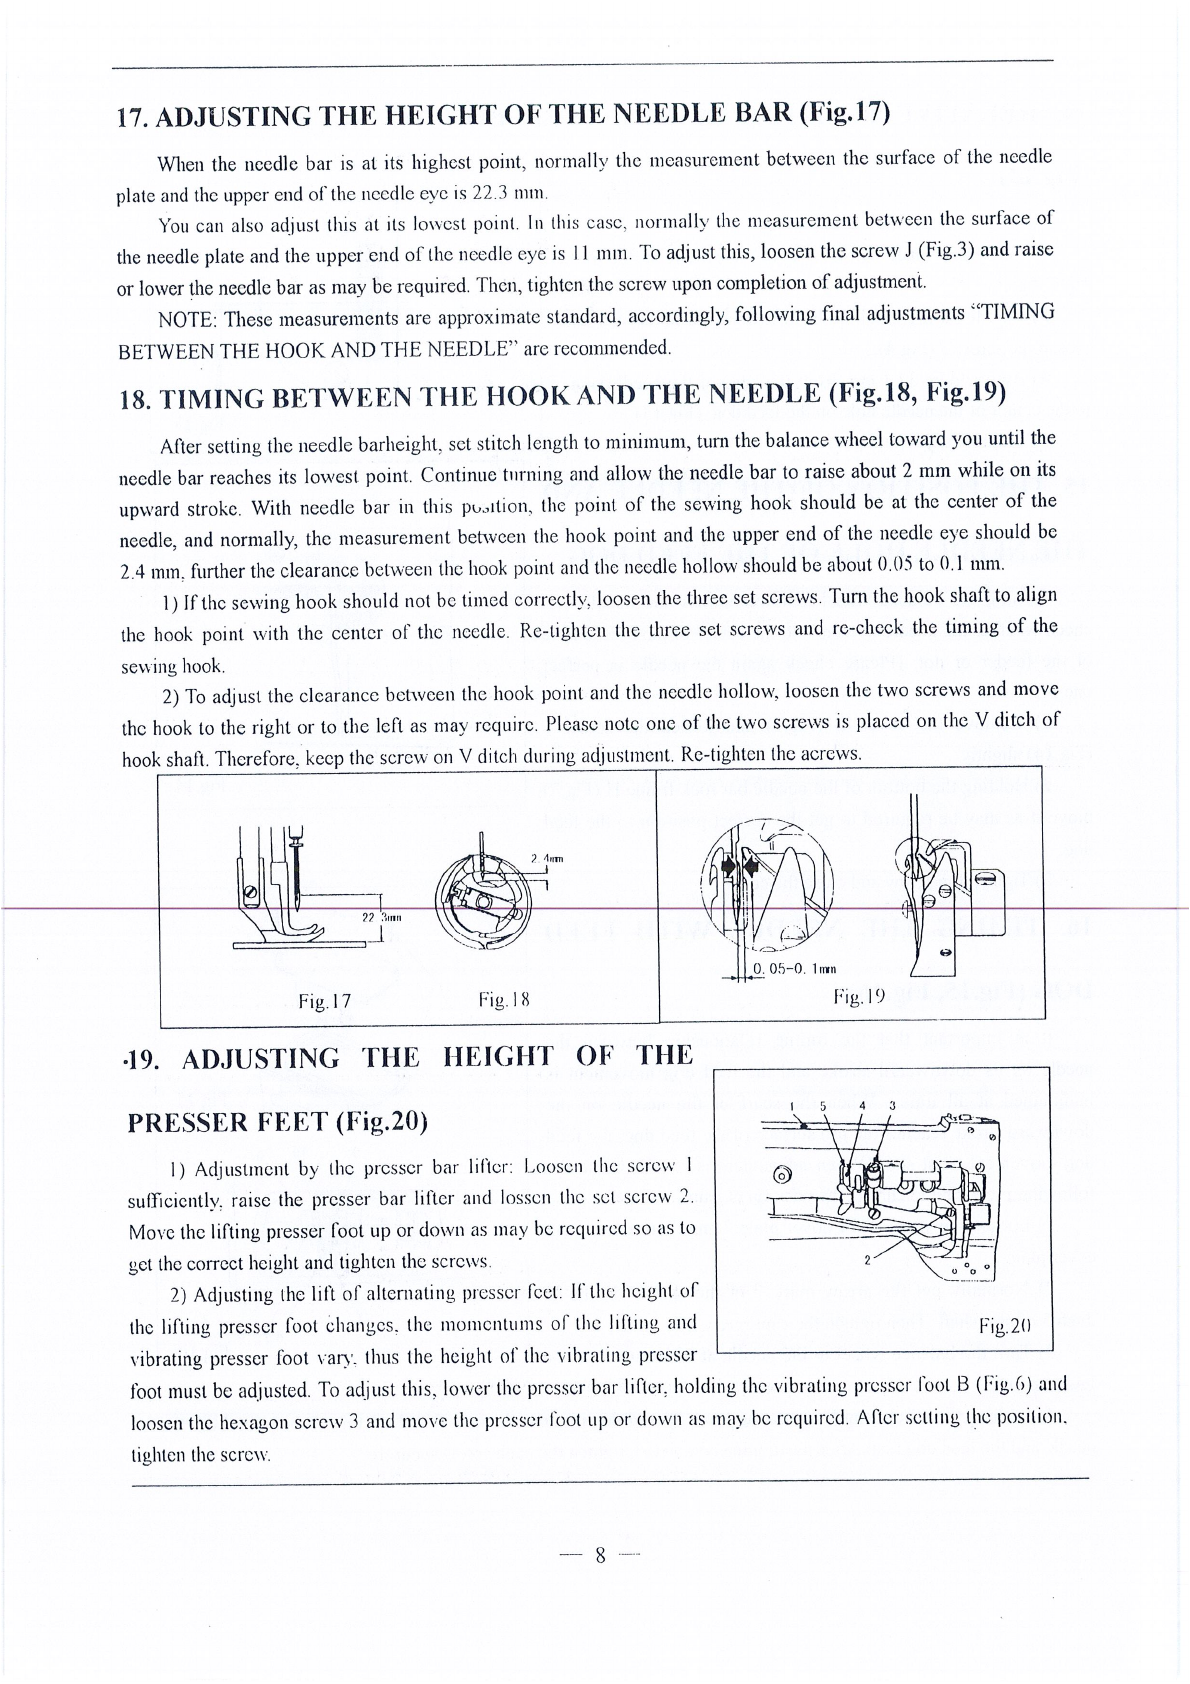
When
the needle bar
is
at its highest point, normally the measurement between the smface of the needle
plate
and
the
upper
end
of
th
e needle eye
is
22
.3
mm.
You
can also adjust
thi
s
at
it
s lowest point. I
11
thi
s case, normally
the
measureme
nt
betv,ecn the surface of
the
needle plate and the upper end
of
the needle eye
is
11
mm.
To
adjust this, loosen the screw
J
(Fig.3) and raise
or lower the needle bar
as
may be required. Then, tighten the screw upon completion
of
adjustment.
NOTE: These measurements are approximate standard, accordingly, following final adjustments "TIMING
BETWEEN THE HOOK AND THE NEEDLE" are
reco1m11ended.
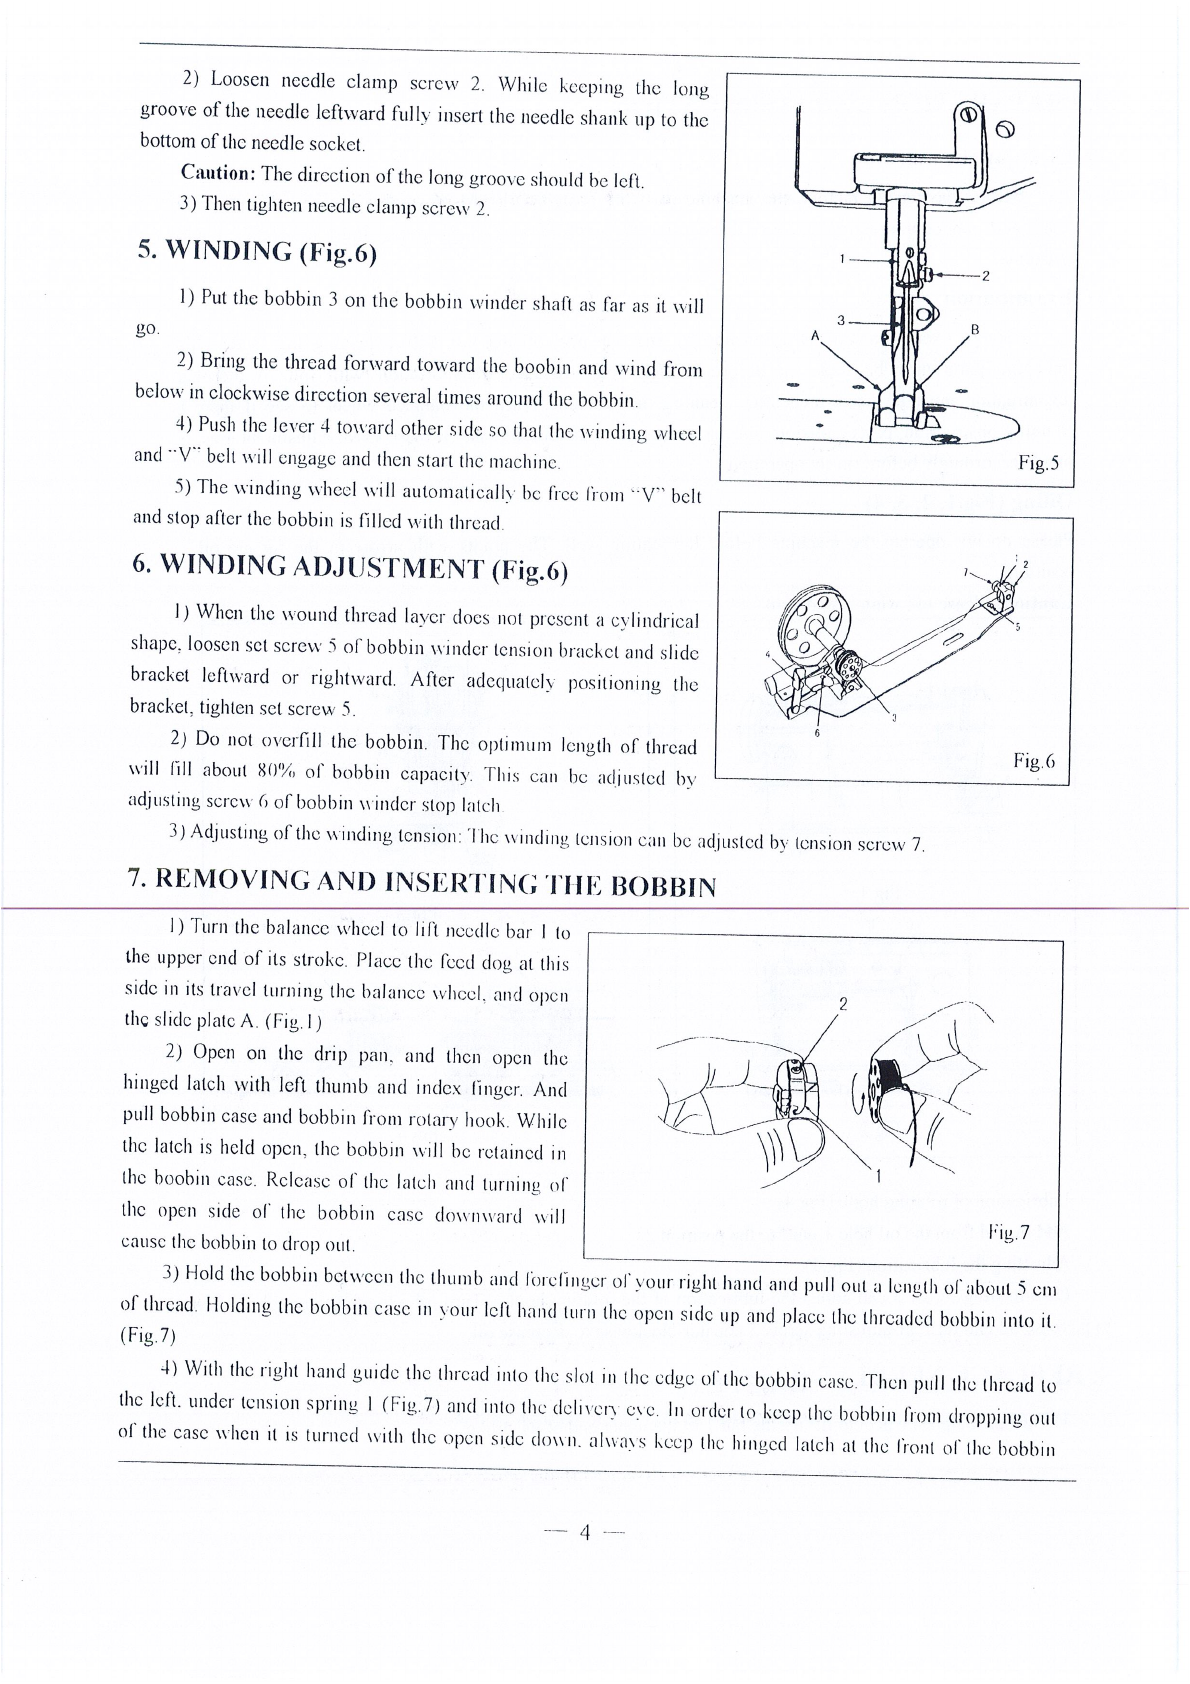
18.
TIMING BETWEEN THE HOOK
AND
THE
NEEDLE (Fig.18, Fig.19)
After setting the needle barheight, set stitch length lo minimum, turn the balance ,vheel toward you
until
the
needle bar reaches
its
lowest point. Continue tnrning and allow the needle bar
to
raise about 2 mm while on its
upward stroke. With needle bar
in
thi
s
p1.,
,
,1lion
,
the
point
of
the sewing hook should be
at
the center
of
the
needle,
and
normally, the measurement bet\veen
th
e hook point and the upper end
of
the needle eye should be
2.4
mm,
further the clearance betwe
en
the
hook
point
and
the needle hollow should be about
(l.05
to
OI
nun.
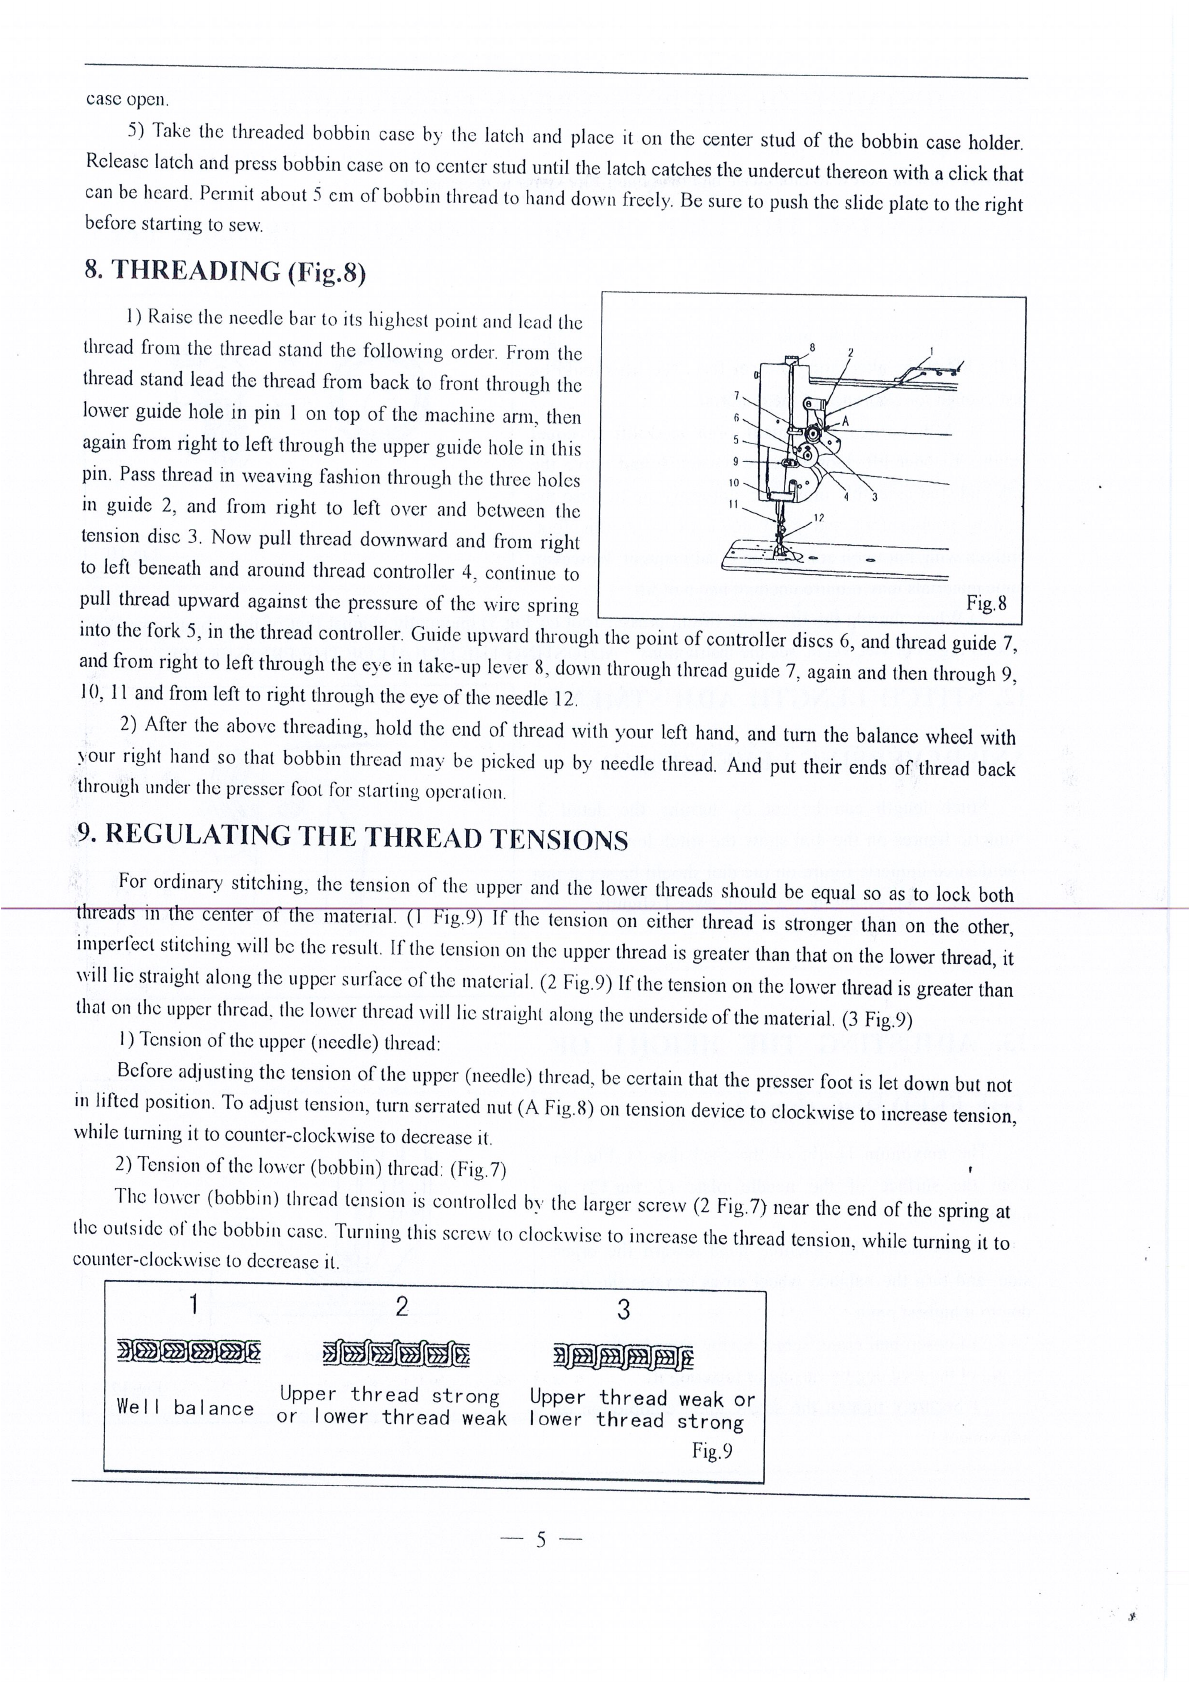
1)
If
the sewing hook should not be timed correctly, loosen the three set screws. Tum the hook shaft
to
align
the
hook
point with the center
of
the needle. Re-tighten the three set screws and re-check the timing
of
the
se\.ving
hook
.
2)
To
adjust the clearance between the hook point and the needle hollow, loosen the two screws
and
move
the
hook
to
the right or
to
the left
as
may
require. Please note one
of
the
two screws
is
placed on the V ditch
of
hook
shaft. Therefore, keep the screw
on
V ditch during adjustment. Re-tighten the acrews.
22
1rrm
===~=_l
Fig.17
Fig
18
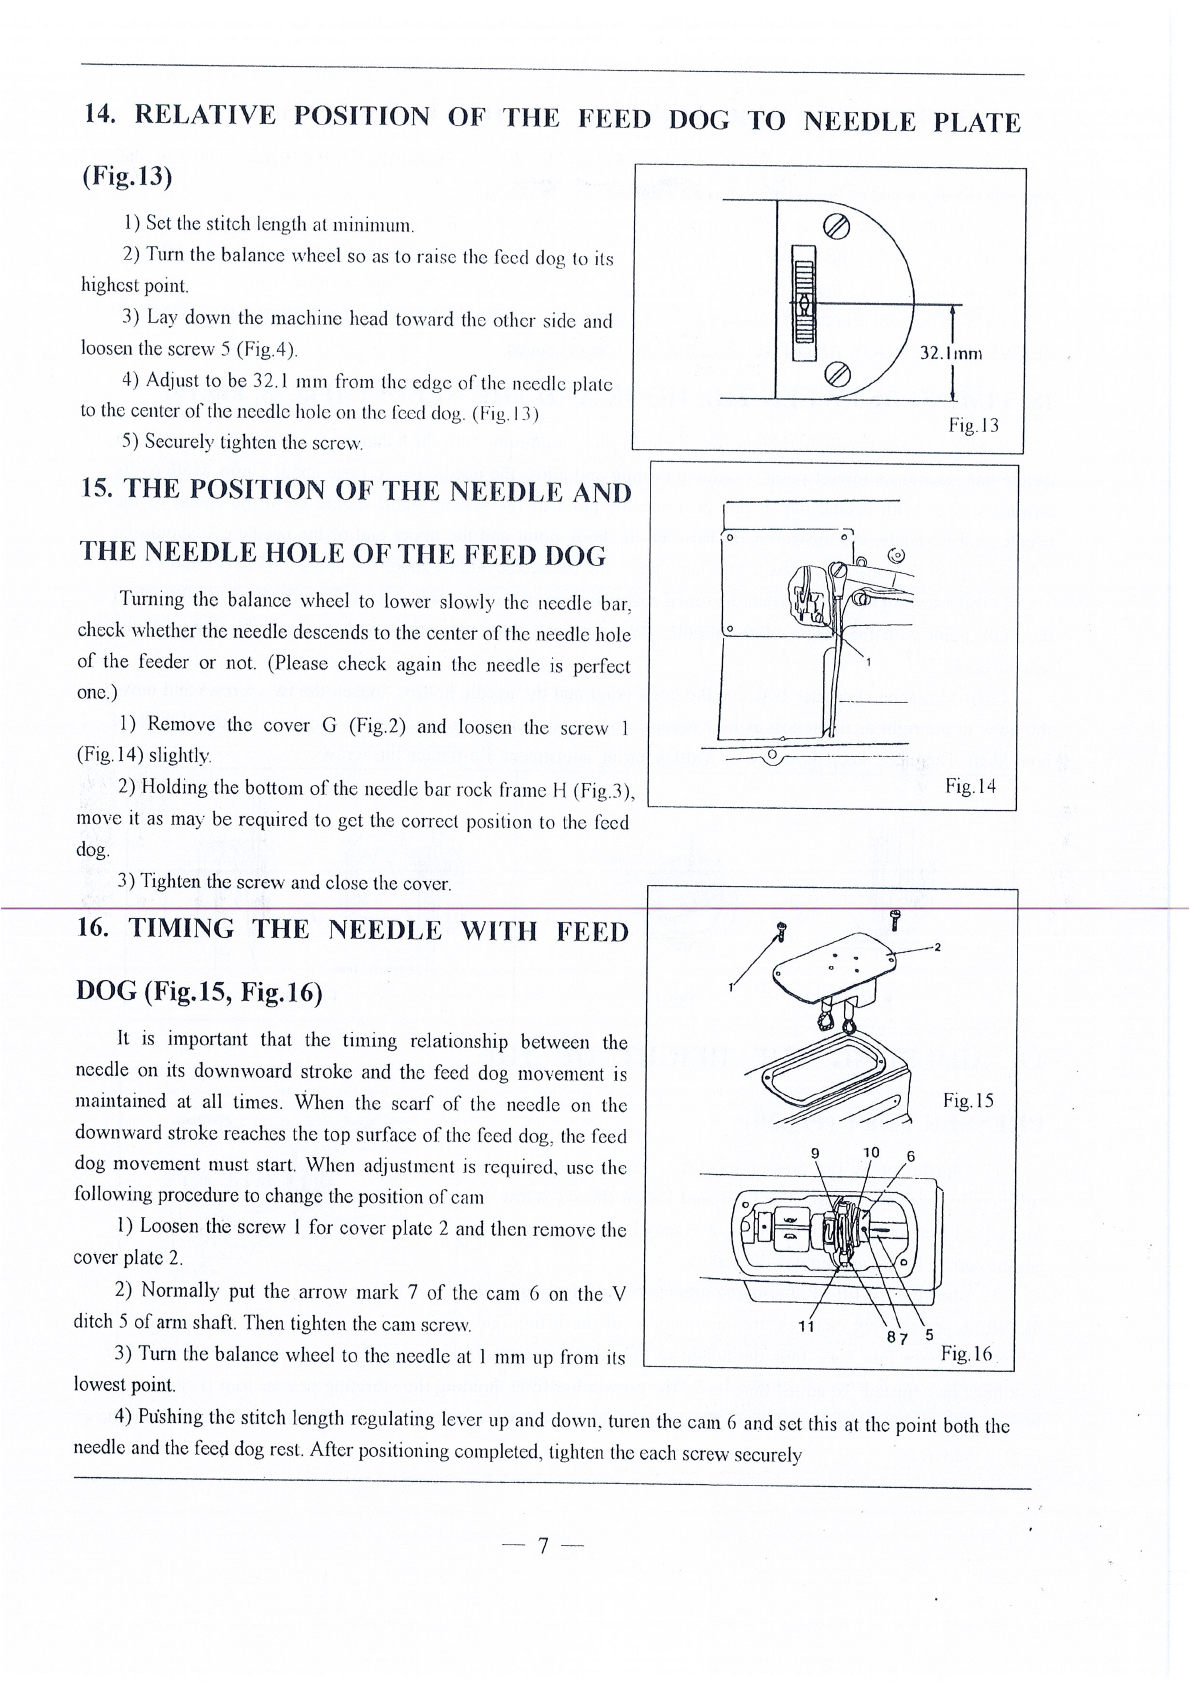
-19.
ADJUSTING THE HEIGHT
OF
THE
PRESSER
FEET
(Fig.20)
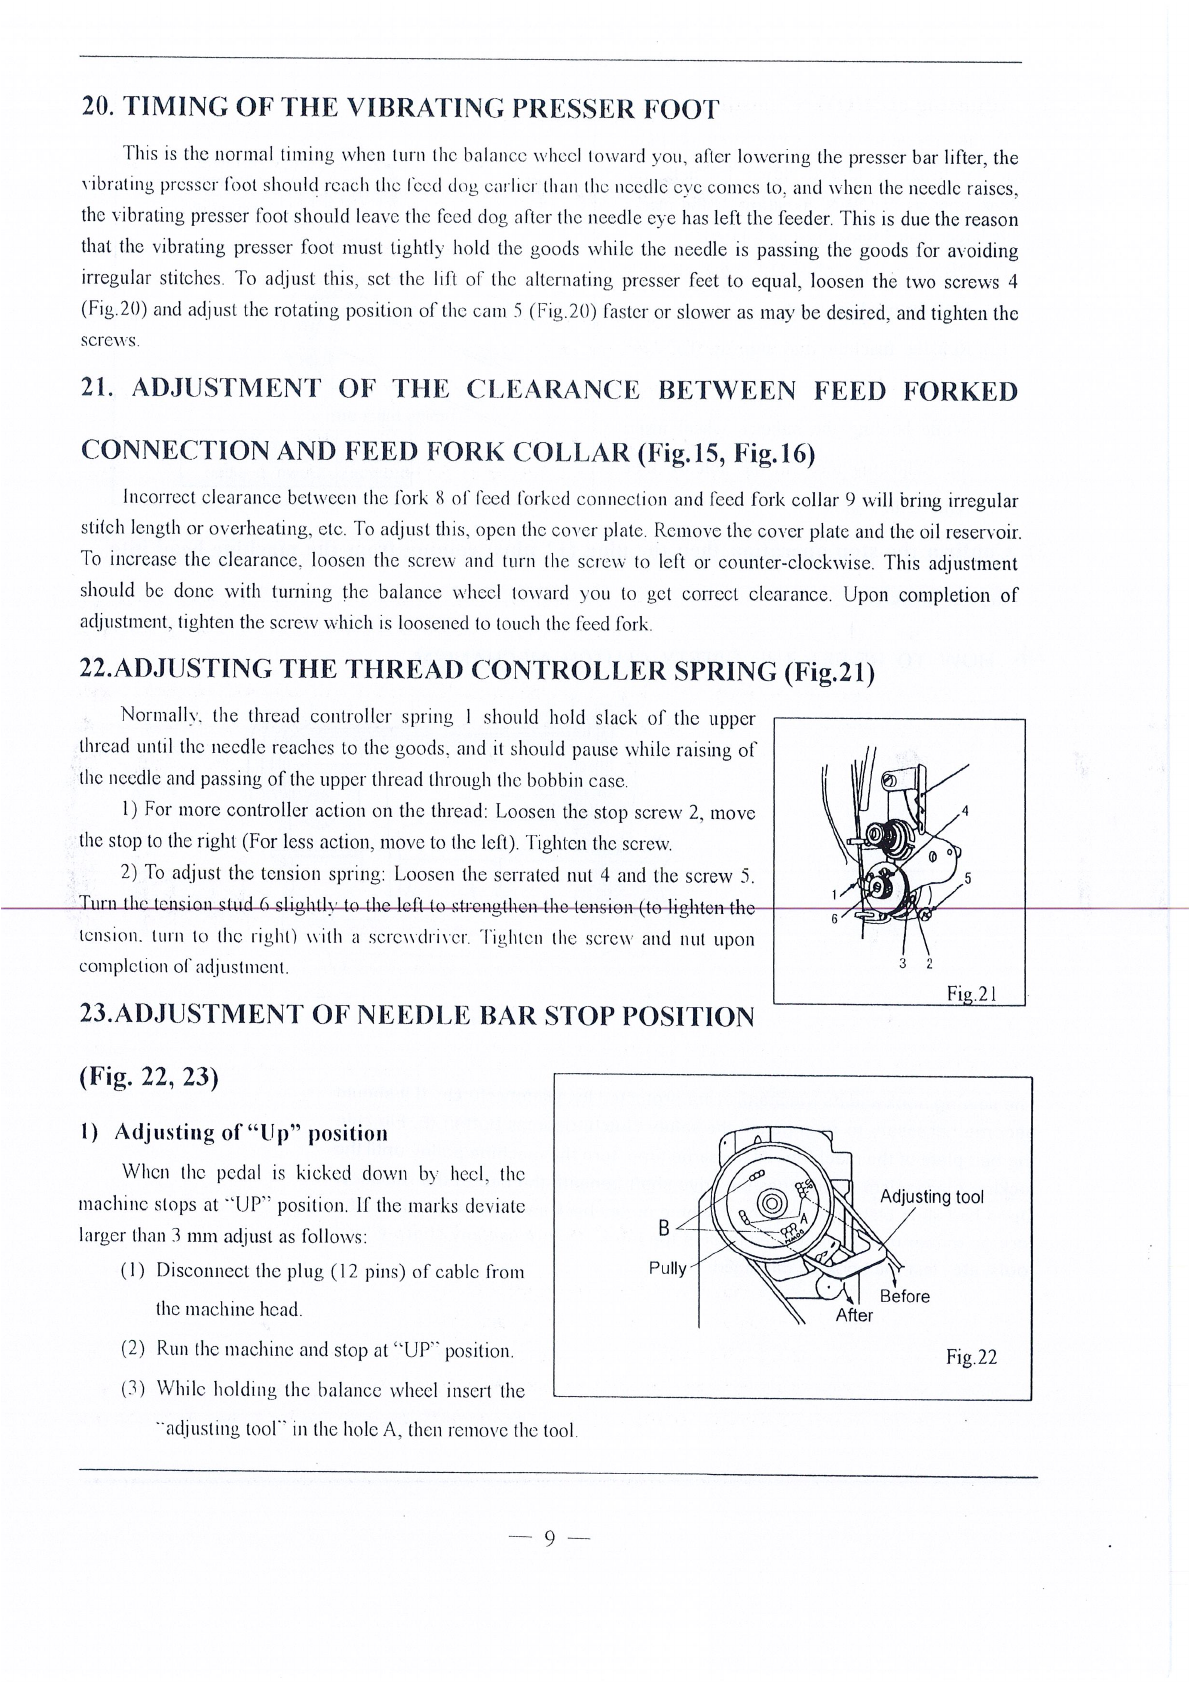
1)
Adjustmcnl
by
the presser
bc1r
lifter:
Loo
s
en
the screw I
sufficiently, raise the presser
bc1r
lifter and lossen the set screw 2.
Move
the lifting presser foot
up
or down
els
mc1y
be
required so
as
to
get
the
co1Tect
height and tighten the screws.
2) Adjusting
the
lift
of
allernating
pre
sser
fe
el If
th
e height
of
the
lifting presser foot changes, the momentums
of
the lifting
and
vibrating presser foot vary, thus the height of
th
e vibrating presser
Fig
.
19
5 4 3
Fig.20
foot
must be adjusted.
To
adjust this, lower the presser bar lifter, holding the vibrating presser
l'ool
B
(Fig.(>)
and
loosen the
hexc1gon
screw 3 and move the presser
foot
up
or down
as
nwy
be
required. After selling the position.
lighten
the
screw.
--
8 - -
From the library of Superior Sewing Machine & Supply LLC - www.supsew.com