�Remote Controller
>> 8
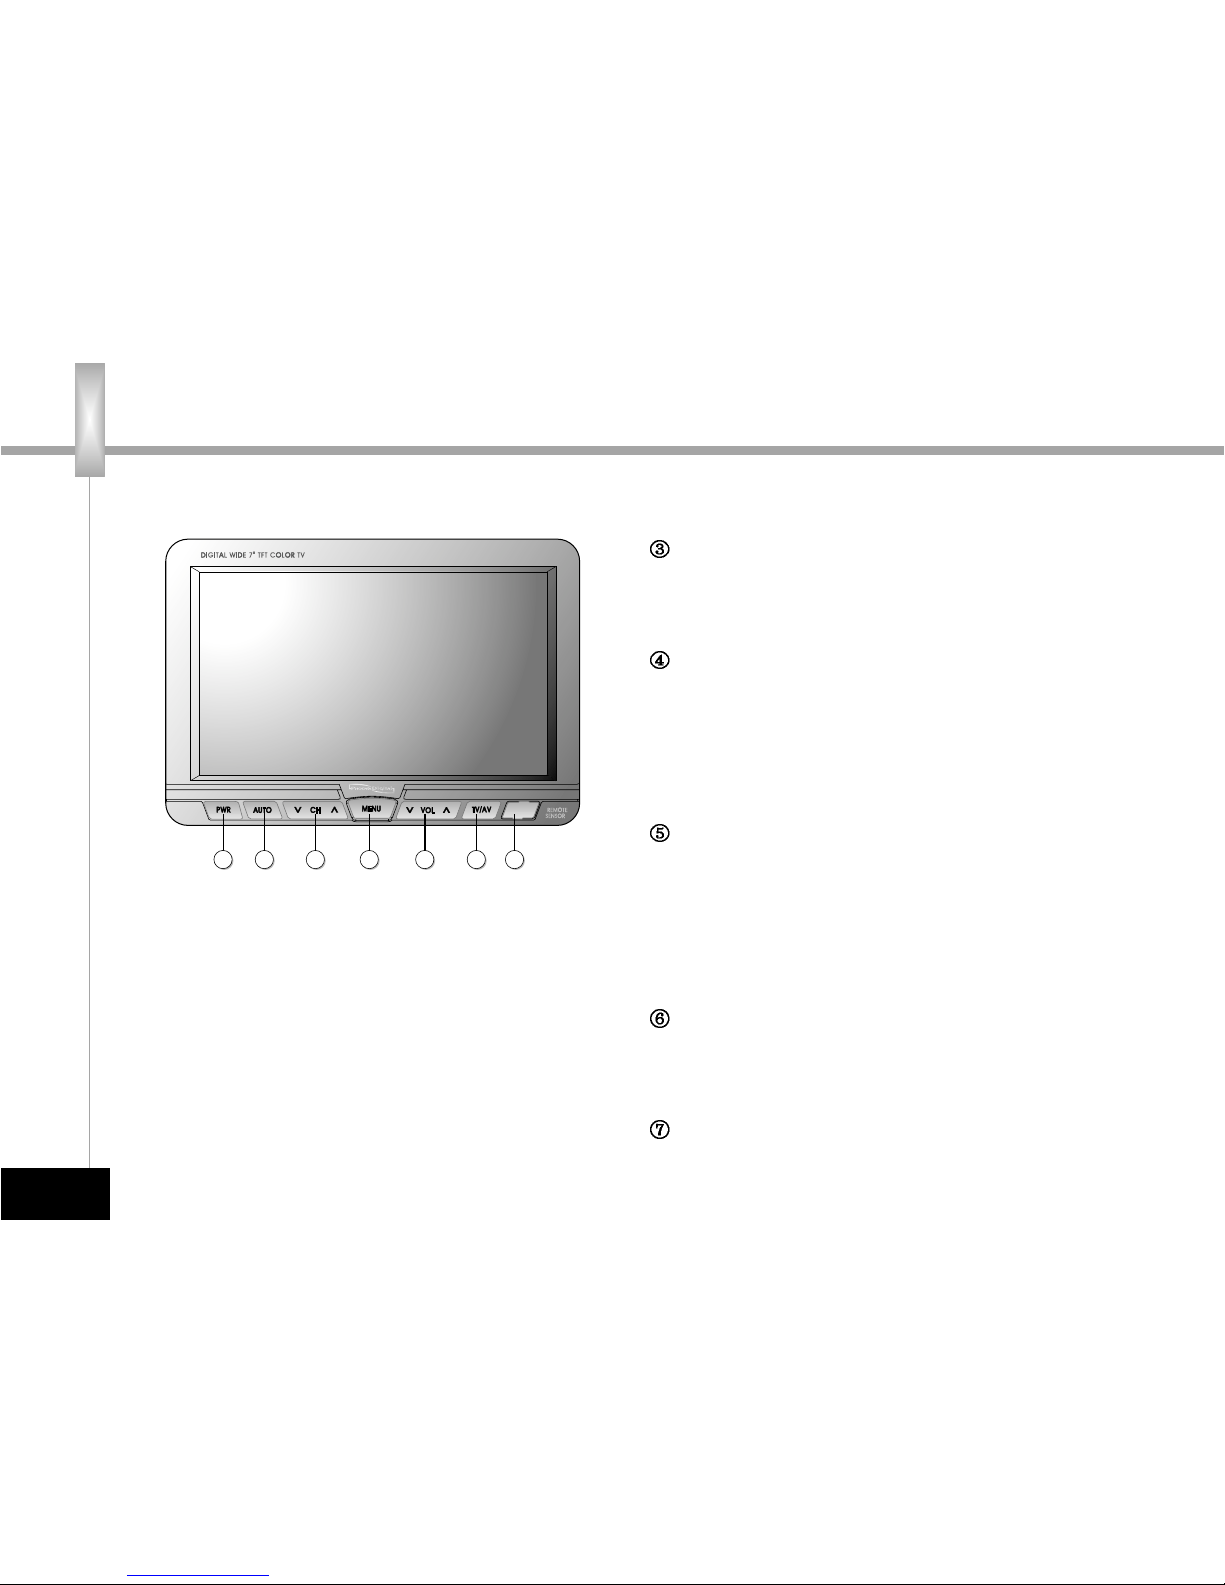
①①Power Button
Used to turn the TV on or off.
②②Channel Selection Button
Changes TV channels by
moving the button up and
down. Press AUTO Button to
automatically select memorized
channels.
FM Transmitter Button
By pressing this button, users
can listen to TV audio through a
car audio system. To do this,
set the frequency of the radio to
the frequency displayed on the
screen. The frequency ranges
between 88.0MHz~89.0MHz, in
200kHz increments.
Q. VIEW Button
Returns to the previous TV
channel.
MEMORY Button
When pressed, “ADD”is
displayed on the right top of the
screen and explanations on use
of ◀▶are displayed on the
bottom. By using the left and
right keys, the current channel
can be added or erased. Press
Up and Down keys to execute
the command displayed.
SOUND Button
Press to display current sound
level.
TV/AV Selection Button
By pressing this button, users
easily change the screen menu
from TV to AUX-VIDEO and S-
VIDEO.
AUTO Button
This button is used to
automatically memorize TV
channels. “AUTO”is displayed
on screen when the button is
briefly pressed. By pressing the
Channel up/down button, users
can select memorized
channels. “AUTO”disappears
when the button is pressed
again. Channels can be
selected manually with the
Channel up/down button.
VOLUME Control Button
This button controls TV volume.
If menus are displayed on
screen, the button reduces and
changes the value of the menu.
MUTE Button
Mutes the TV sound.