Attach front shelf hinges to brackets.
x4
Install brackets in leg holes.
x4
HARDWARE
10mm
HARDWARE
10mm
HEAT SHIELD ADJUSTER
IMPORTANT! Keep 2 spacers on each side of the grill lid to minimize heat transfer to the handle.
LID HANDLE
STAND GRILL UPRIGHT
7
Carefully lift grill up and stand
upright.
INSTALL BOTTOM SHELF
8
Slide shelf down to sit on shelf arm
bolts. Align with grooves under shelf.
SIDE SHELF
13
Line up the bullets with the pins on side
wall and clip shelf into support bar.
Use small
screws to
secure tool
hooks
REMOVE HANDLE
9
Unscrew handle from inside grill lid.
INSTALL HANDLE
10
Flip hand around to the front and
fasten to lid as shown here.
NOTE: Front shelf mount brackets attach in the same holes used for the front legs.
FRONT & SIDE SHELVING
MOUNT BRACKETS
11 FRONT SHELF
12
IMPORTANT! The grill is very heavy. Always use 2 people when lifting the grill.
BOTTOM SHELF
12mm
HARDWARE IMPORTANT! For proper heat shield positioning, use the marks on the
adjuster handle. The grill wall should align with the -.5 mark on the
handle, setting the heat shield 9.25 in. from the left inside grill wall.
HEAT SHIELD
16
Insert heat shield onto stainless steel
slider mount brackets.
HEAT SHIELD POSITIONING
18
Recommended position for even
heat distribution:
approx. 9.25 in. from left wall.
HEAT SHIELD ADJUSTER
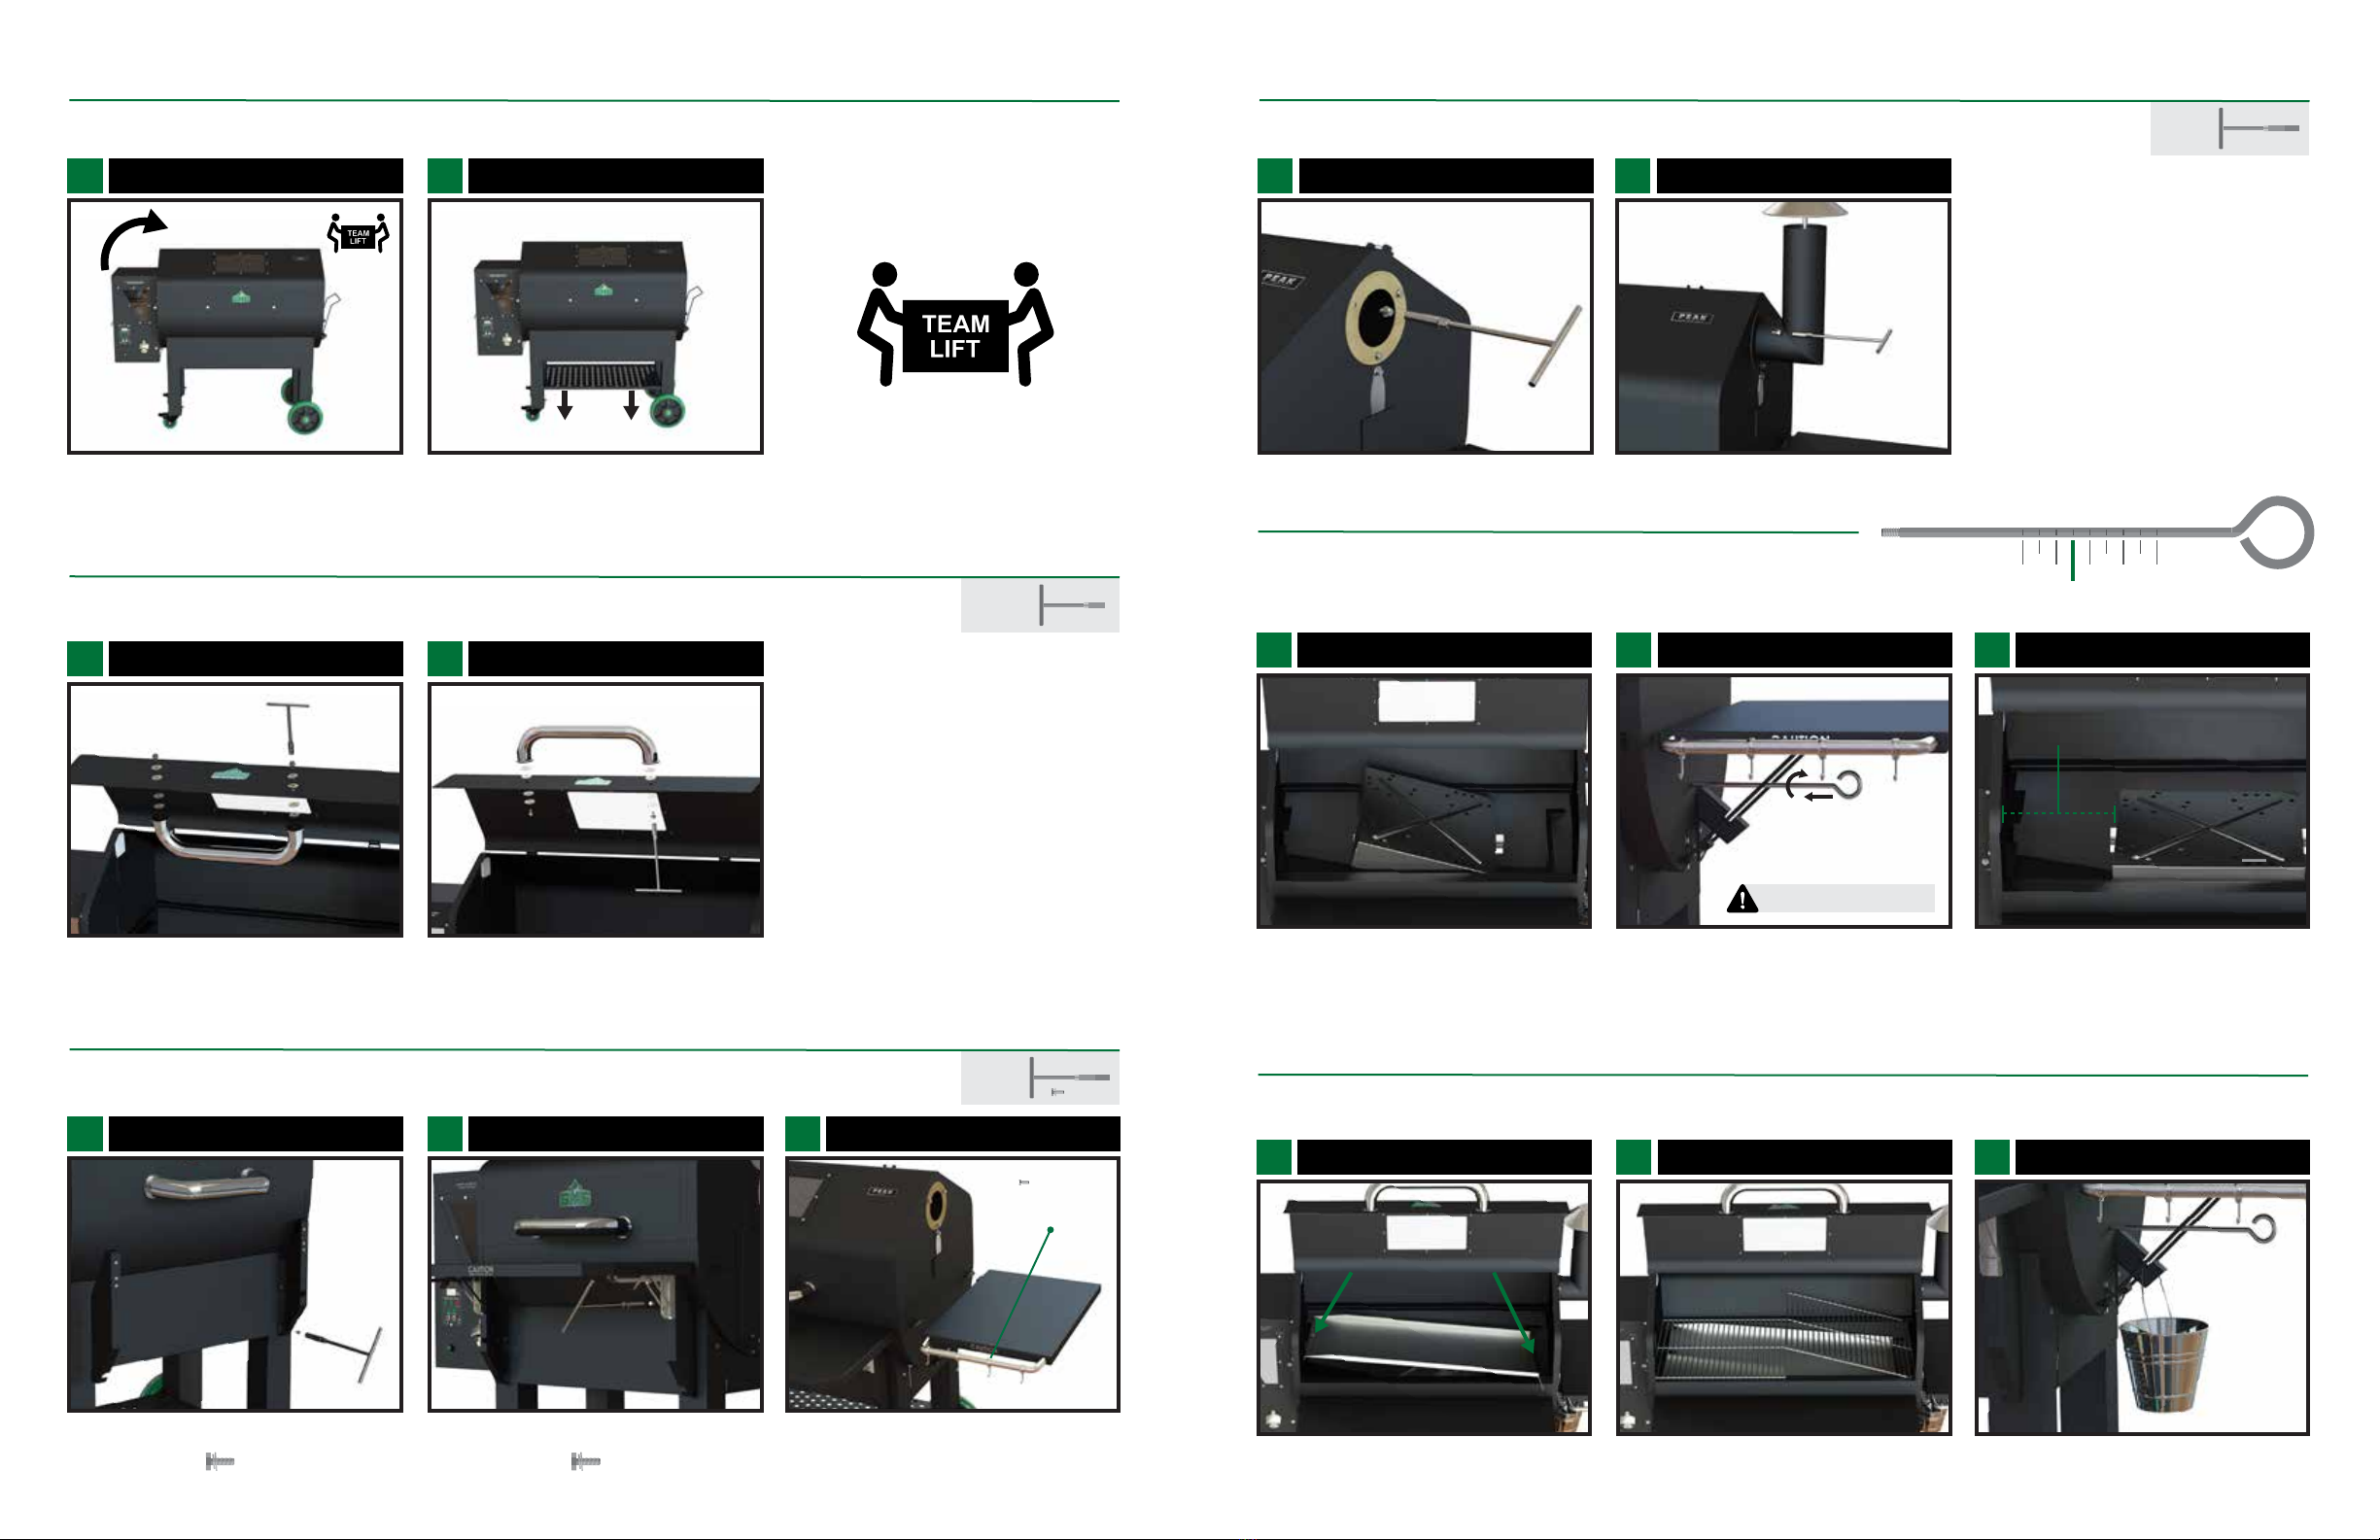
17
Insert adjuster handle into hole on
right side of grill wall and screw into
head shield.
IMPORTANT! Make sure to insert grease tray as shown below for proper temperature reading and grease drainage.
GREASE TRAY, GRATES, & GREASE BUCKET
GREASE TRAY
19
Follow grease tray cut-outs as shown. Insert grates as shown. Hang bucket on drip spout.
GREASE BUCKET
21
GRILL GRATES
20
REMOVE BOLTS
14 INSTALL CHIMNEY
15
IMPORTANT! Make sure the chimney cap ALWAYS stays open.
CHIMNEY
HEAT SHIELD
21012
SWEET SPOT
9.25 in.
Circle Half-moon
DO NOT OVERTIGHTEN.