3:5
Doc: 6403042_om_001-. (#001–)
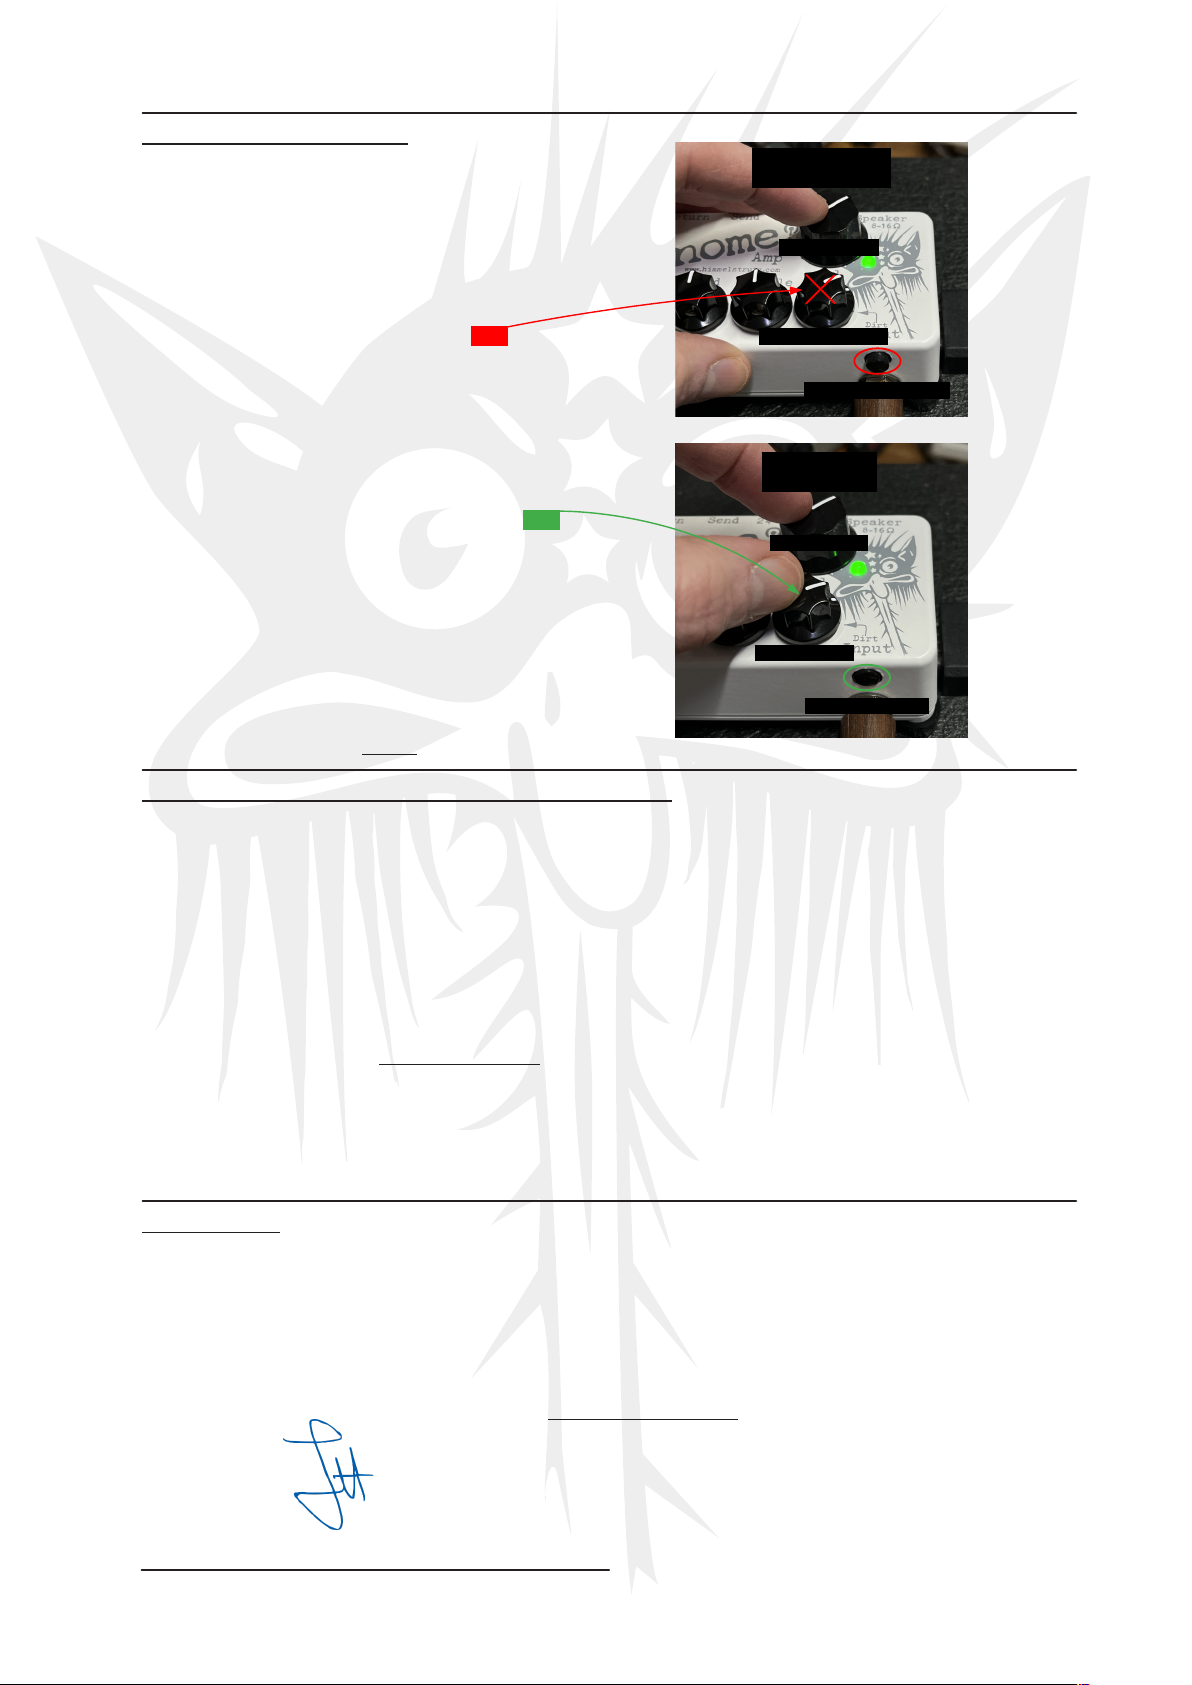
Vol control active
Dirt control NOT active
Dirt Switch OUT=Dirt OFF
The Clean
Vol control active
Dirt control active
The Dirt
Dirt Switch IN=Dirt ON
6. The Clean & The Dirt!
Himmelstrutz GNOME is equi ed with 2 main characters/
channels: The Clean & The Dirt.
A. The Clean: To use the Clean channel, set the front anel
Dirt switch in OFF mode (= ush button out) and use the
Vol control lus the Bass, id & Treble controls to adjust
the out ut character/level. In this state the Dirt control
has no function and the out ut character will be focused
on clean, shimmering sounds—which can get a bit
overdriven on higher Vol control settings (@ 65 to100%).
B. The Dirt: If you want even more, Himmelstrutz GNOME
offers real musical, touch sensitive overdrives/distortions.
Set the front anel Dirt switch in ON mode (= ush button
in). In this state you adjust the Dirt level with the Dirt
control to be adjusted from light, smooth overdrive into a
rough distortion—though GNOME never goes metal.
We recommend you to start with the Dirt control set at
noon/50% and from there use your ears and tongue to find
referred amounts of overdrive/distortion. Use the Vol
control to set the Output Power and also the Bass, id &
Treble for any further tone character adjustments. If you need
even more, or different kinds of overdrives, Himmelstrutz
GNOME also works great with edals!
7. Adjusting the tone/playing your instrument
A: Make sure the huge and horrifying Vol control is still set to minimum (0).
B: Check that your instrument is connected to Input.
C: Adjust the Dirt and the tone controls Bass, id & Treble to middle osition/noon/50%.
D: Set the front Dirt switch to IN (Dirty) or OUT (Clean) mode and lightly increase the Vol control. Then increase or
decrease the Dirt control simultaneously, or later, or before, whatever you like! Play some notes and try your way until you
find your sounds/levels/tone characters. If you need more or less overdrive, ush in/ ush out the front anel Dirt switch in
case you don’t know why or what you’re doing now … or whatever.
Note 1: Des ite the Himmelstrutz GNOME tiny format, just by turning 5 little controls and ushing a switch you can make this
box roar and scream like huge, classic older brothers which uses them stone-age vacuum valves. Isn’t it funny! Or is it not?
Note 2: If you need to change the tone character even more, in case you connected edals in front of Himmelstrutz GNOME—
or connected effects in the serial Send/Return effects loo —then adjust the Dirt and the Bass, id, Treble & Vol before
finally landing in destination wonderful!
8. Summary
At Himmelstrutz Elektro Art we wish you will get good use of and find a lot of ins iring sounds and feel in com any with
your scary little evil Himmelstrutz GNOME!
Take care of your hearing: if you lay loud, lease use ear rotection, which may be forgotten when you ex erience
irresistible sounds. But don’t forget this as loud sounds may be harmful to your ears—it’s not articularly cool hitting
yourself deaf by not thinking about assing that next corner…
For questions or comments, don’t hesitate to contact Himmelstrutz Elektro Art.
Sincerely,
Joakim Hedeby,
Himmelstrutz Elektro rt, Sweden