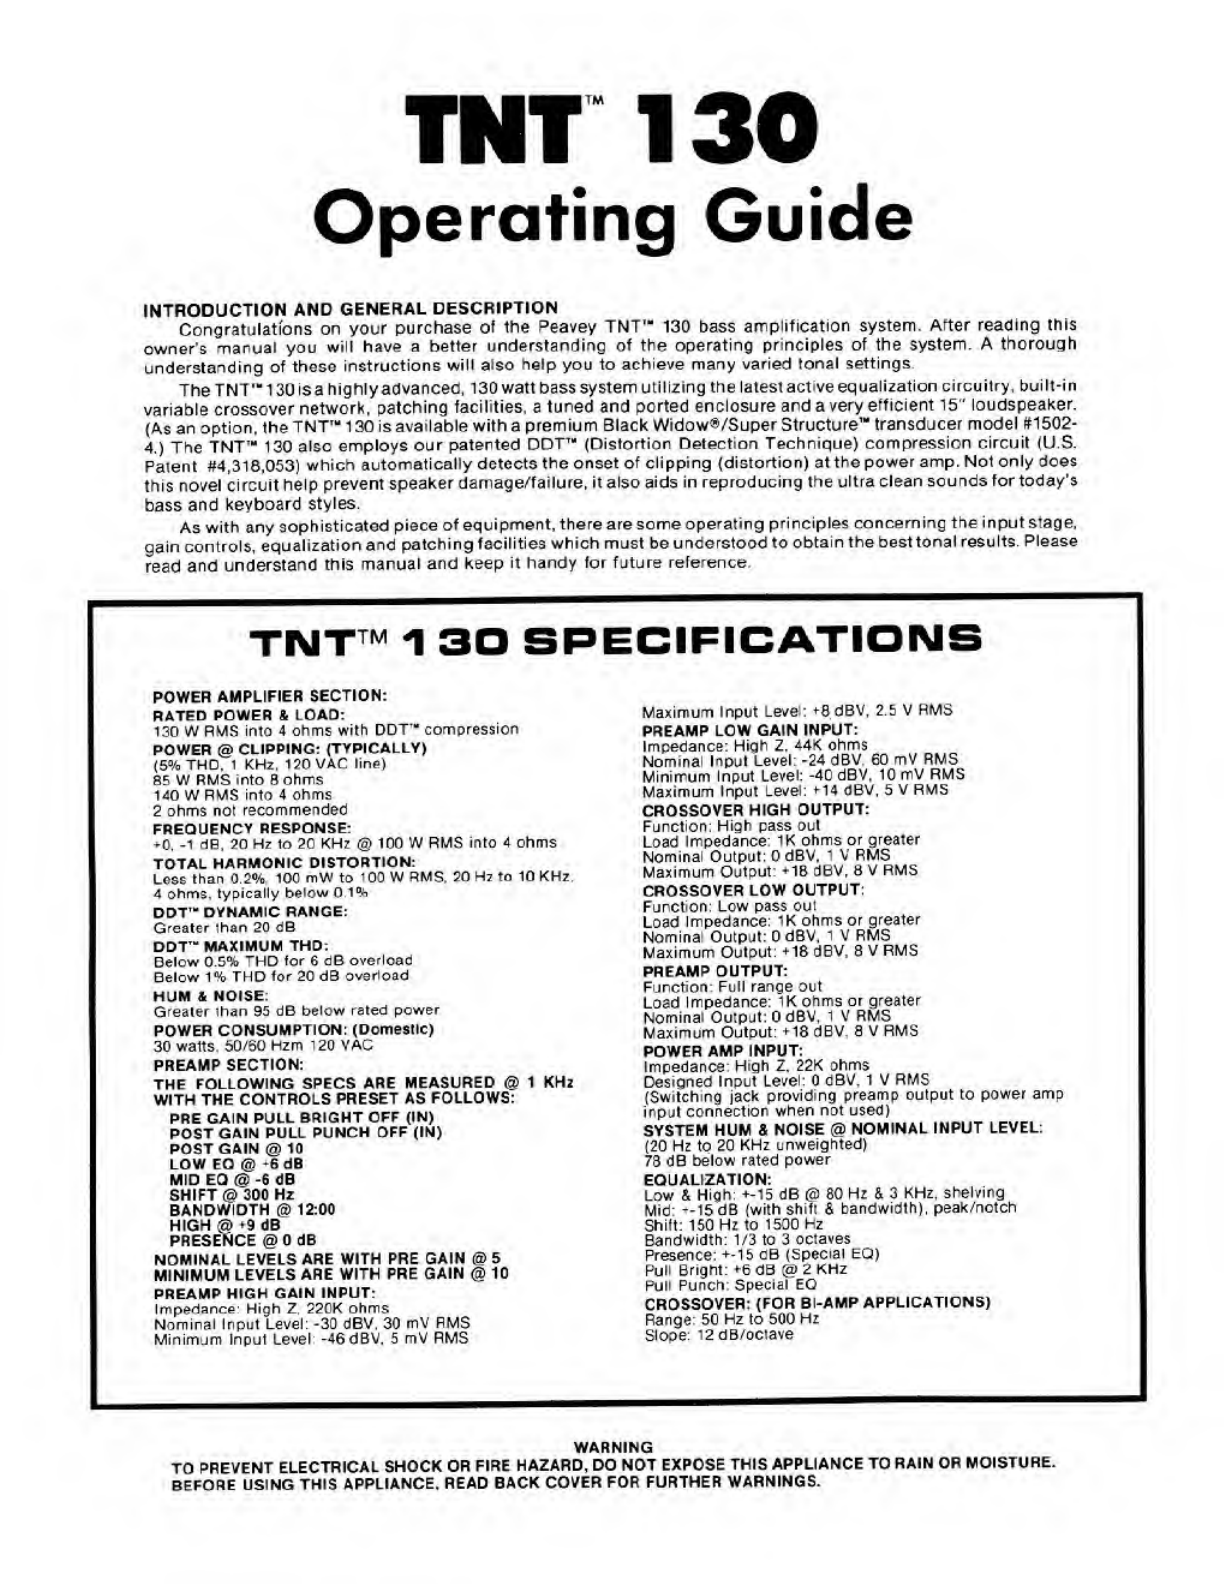
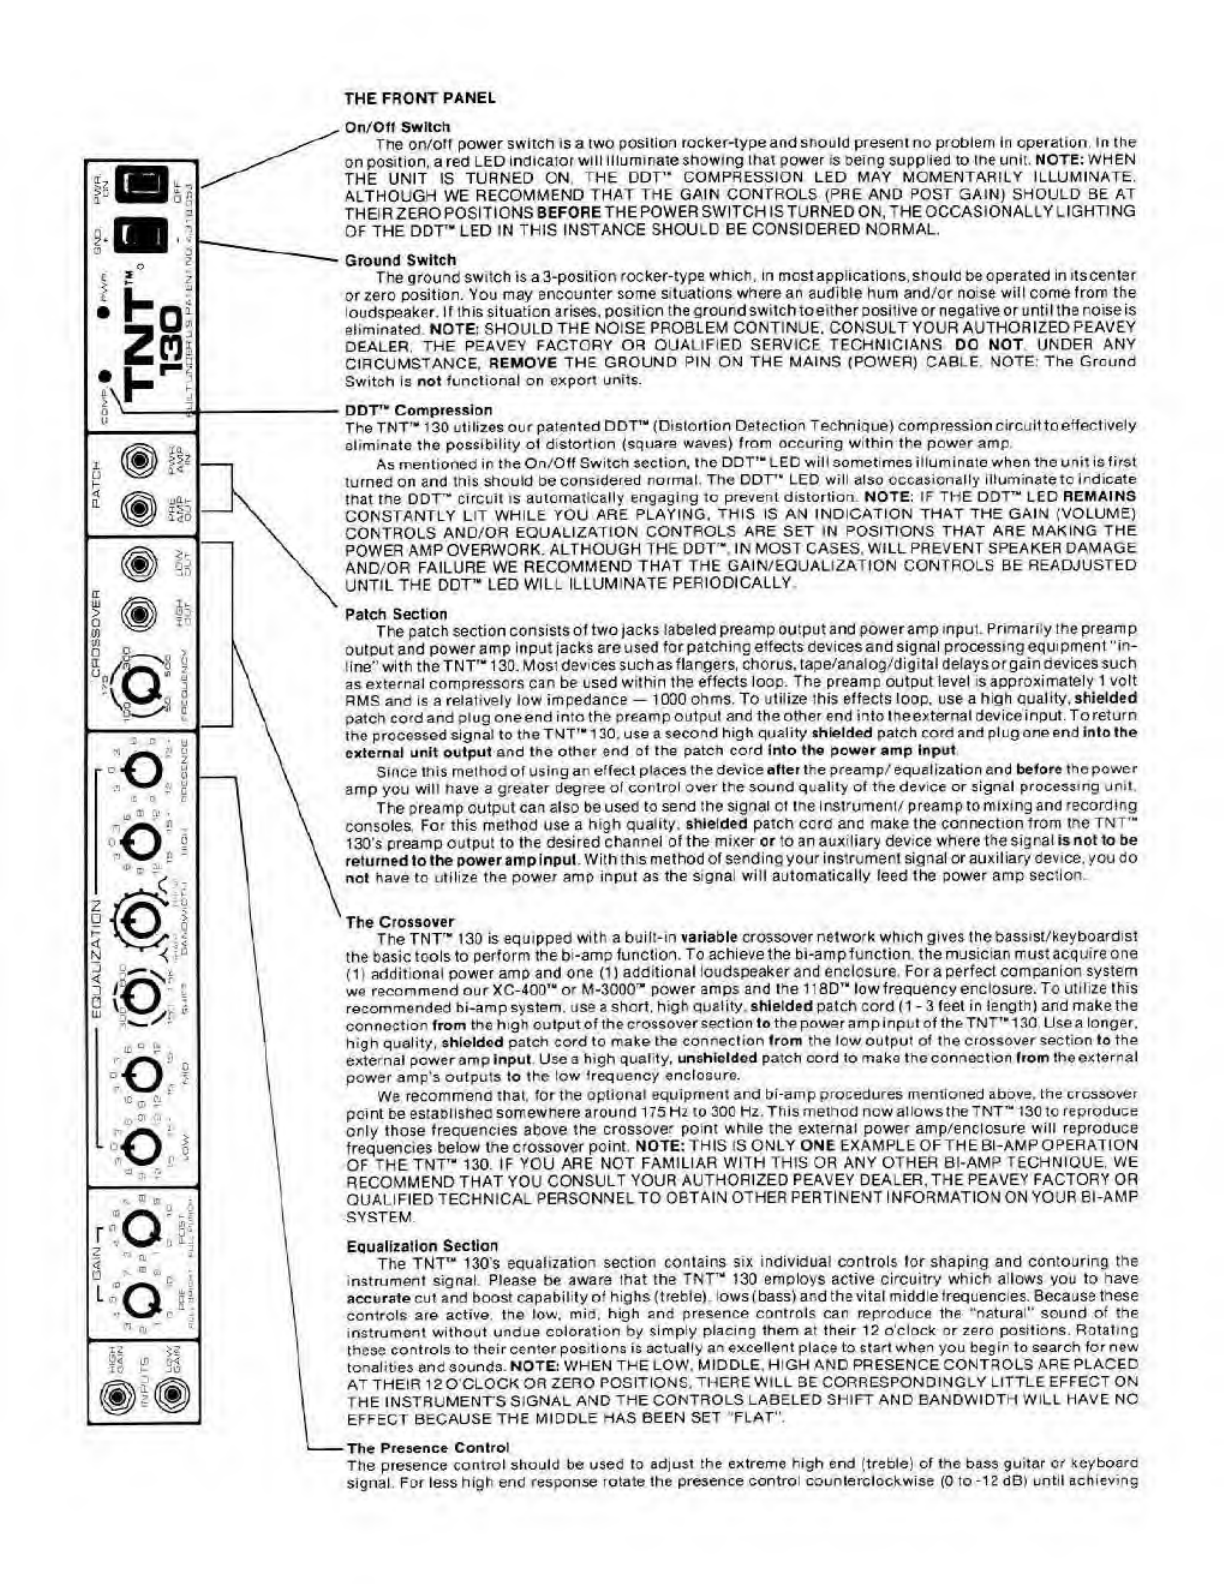
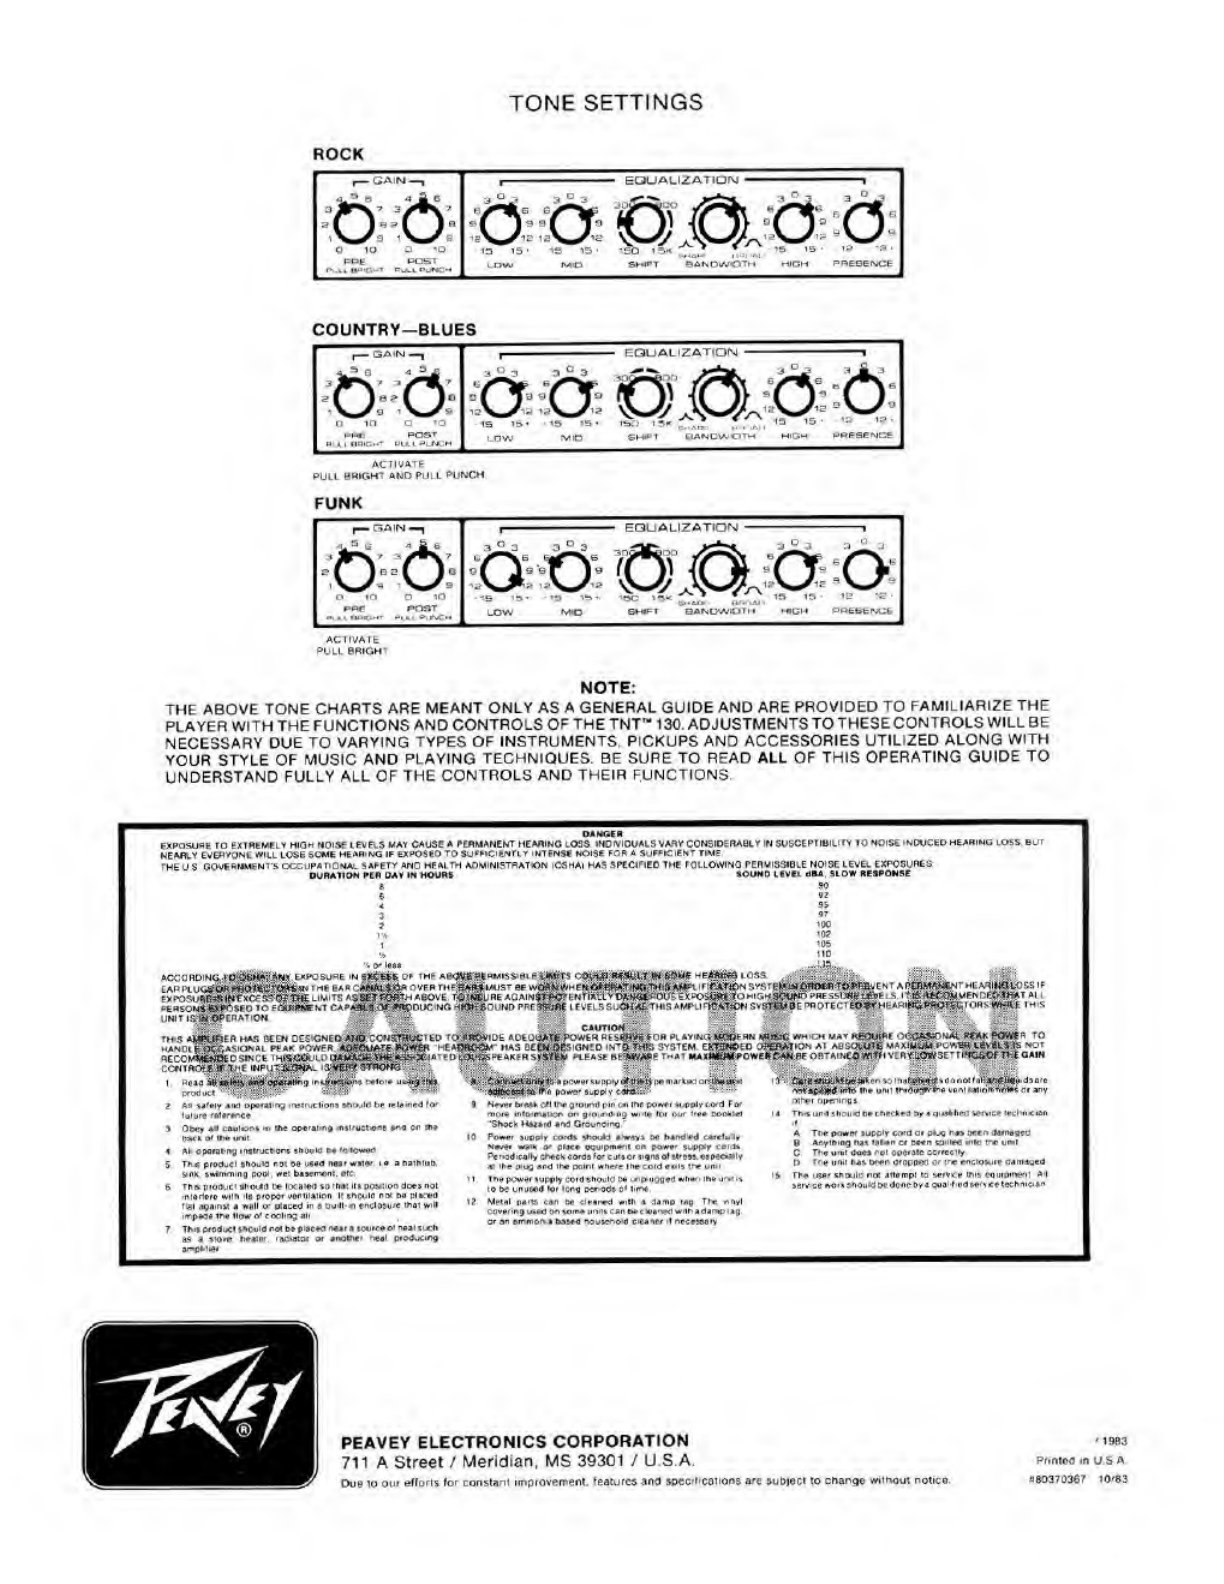
Peavey TNT 130 User manual
Other Peavey Musical Instrument Amplifier manuals

Peavey
Peavey Stereo Chorus 212 User manual

Peavey
Peavey The Century User manual

Peavey
Peavey Basic 60 User manual

Peavey
Peavey 3120 User manual

Peavey
Peavey SPECIAL Special 112 User manual

Peavey
Peavey Session 500 User manual

Peavey
Peavey Studio Pro 50 User manual

Peavey
Peavey Transtube Series 100 EFX User manual

Peavey
Peavey Mark III 300 CHS User manual

Peavey
Peavey Audition User manual

Peavey
Peavey Deuce II/Festival User manual

Peavey
Peavey Revolution 112 TransTube Series User manual

Peavey
Peavey Deltabass Deltabass User manual

Peavey
Peavey The Classic User manual

Peavey
Peavey Audition User manual

Peavey
Peavey Classic 20 User manual

Peavey
Peavey Triumph PAG 60 User manual

Peavey
Peavey KB 100 User manual

Peavey
Peavey Tour TKO 115 User manual

Peavey
Peavey Spectrum Bass II User manual