
Always check the Owner’s Manual for more operating and safety information.
1. Sit astride the motorcycle, in your normal
riding position, with both feet on the
ground.
2. Make sure the transmission is in neutral
( Nindicator is on) and the side stand is up.
3. Start the engine.
For the engine starting procedure, refer
to the Owner’s Manual.
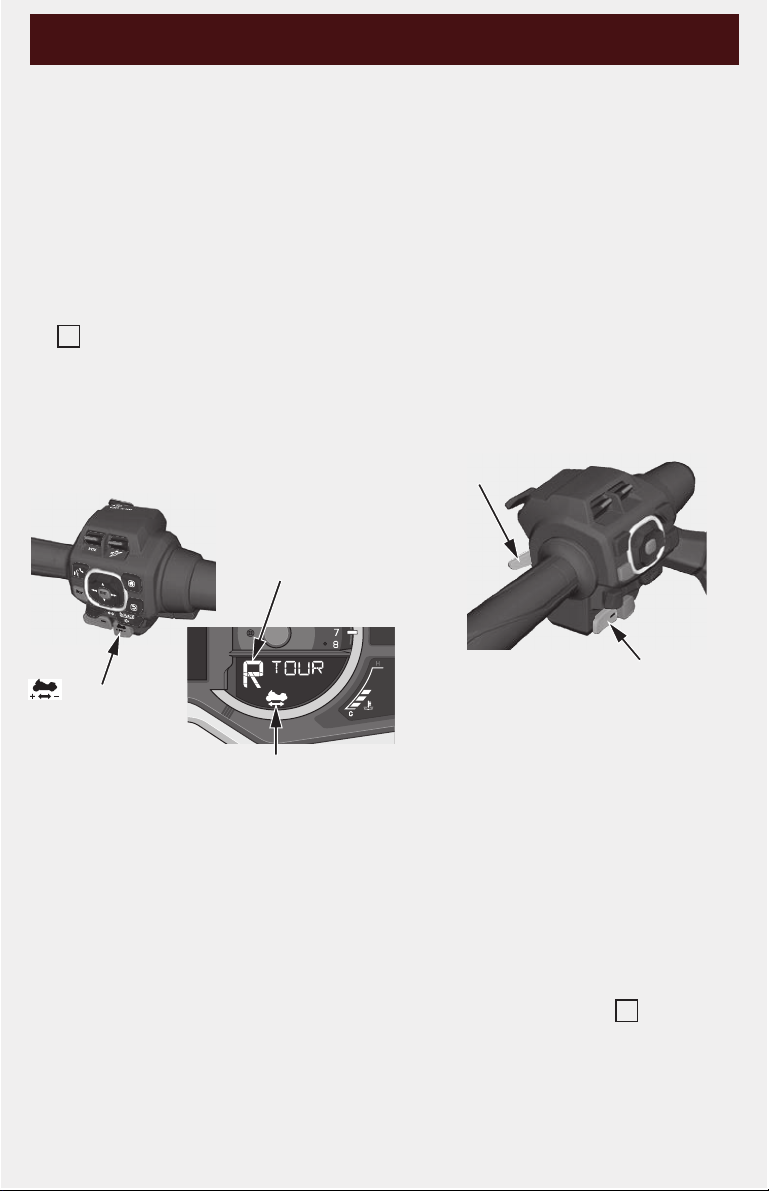
4. Press the Walking Speed mode switch
while applying the brake lever or pedal. The
Walking Speed mode indicator is displayed.
5. To move the motorcycle backward, press
and hold the shift down switch (-), and then
release the brakes.
To move the motorcycle forward, press
and hold the shift up switch (+), and then
release the brakes.
The motorcycle will move forward/
backward as long as you hold one of
the shift switches
Guide the motorcycle cautiously, using your
legs to maintain balance.
Use extreme care to maintain balance while
in Walking Speed mode on loose surfaces
(sand, dirt, gravel) or slick pavement.
Walking Speed Mode (GL1800BD/D/DA)
The Walking Speed mode assists the rider with getting the motorcycle into or out of tight areas
by maneuvering the motorcycle at slow speed.
Operate the motorcycle’s engine only in a well-ventilated area.
Make sure there are no obstacles or people in the area. Avoid steep or uneven surfaces.
Carrying a passenger while in Walking Speed mode is not recommended because it makes
balance and control more difficult to maintain.
When the shift up switch (+) (forward)
is pressed, “F” is displayed on the gear
position indicator.
When the shift down switch (-)
(backward) is pressed, “R” is displayed
on the gear position indicator.
It may take a few seconds before the
motorcycle starts to move.
When the engine is stopped in Walking
Speed mode, the clutch will disengage.
This will cause the motorcycle to
abruptly lose traction.
While in Walking Speed mode, do not
press the engine stop switch except in
an emergency. This will cause the
motorcycle to abruptly lose traction.
6. To stop the motorcycle, apply the brake
lever or pedal.
7. To end Walking Speed mode, apply the
brake lever or pedal. After the
motorcycle has stopped, press the
Walking Speed mode switch while
operating the brake lever or pedal, or
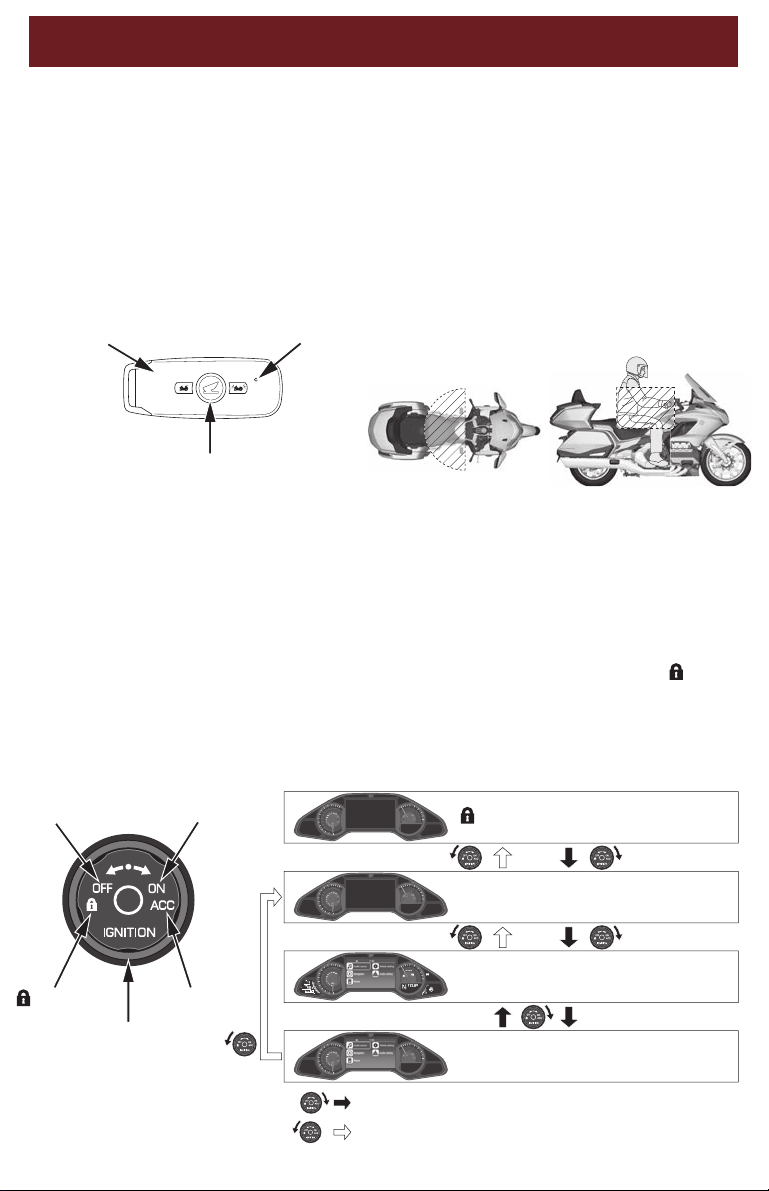
press the N side of the N-D switch.
Make sure the Walking Speed mode
indicator turns off and the indicator
comes on.
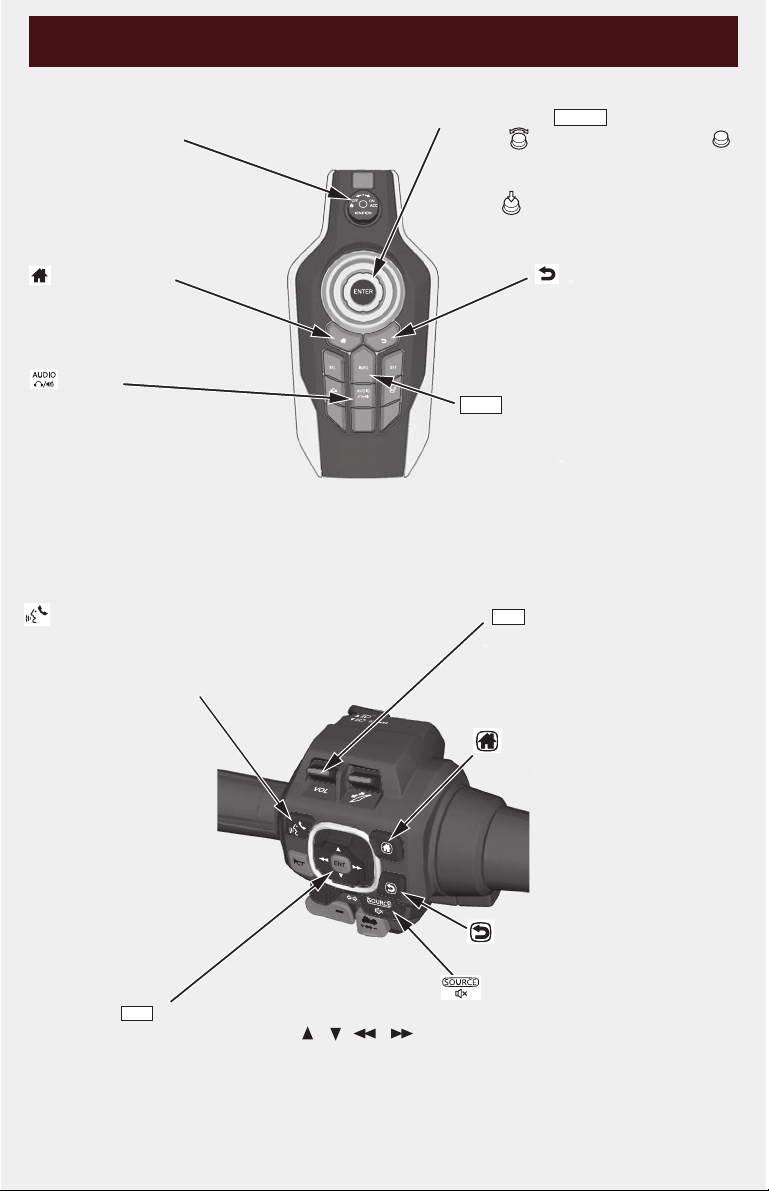
N
Walking Speed
mode switch
Walking Speed mode indicator
Gear position indicator
Shift up switch (+)
Shift down switch (-)


 Supplementary service manual")


