1. READ ALL INSTRUCTIONS CAREFULLY BEFORE USE. If you do not understand these instructions, need clarification or
further explanation, please visit us online at wwwwww..ttrriiccaamm..ccoommor call our toll free answer line for assistance at
11--880000--886677--66776633Monday through Friday 9:00 a.m. - 4:00 p.m., CST.
2. Do not exceed the overall maximum load capacity of 300 lbs (136 kg). The weight rating is based on an evenly
distriubted load.
3. Do not exceed folding tray maximum evenly distributed load capacity of 100 lbs (45.3 kg).
4. Do not allow children to use this cart without supervision. This cart is not a toy.
5. Do not use this cart to transport passengers.
6. Never fold without locking the wheels.
7. Always lock the wheels when storing.
8. If any parts become damaged, broken or misplaced, do not use the cart until replacement parts have been obtained.
9. It is recommended that the cart be inspected for damage before each use.
10. KEEP THESE INSTRUCTIONS FOR FURTHER REFERENCE.
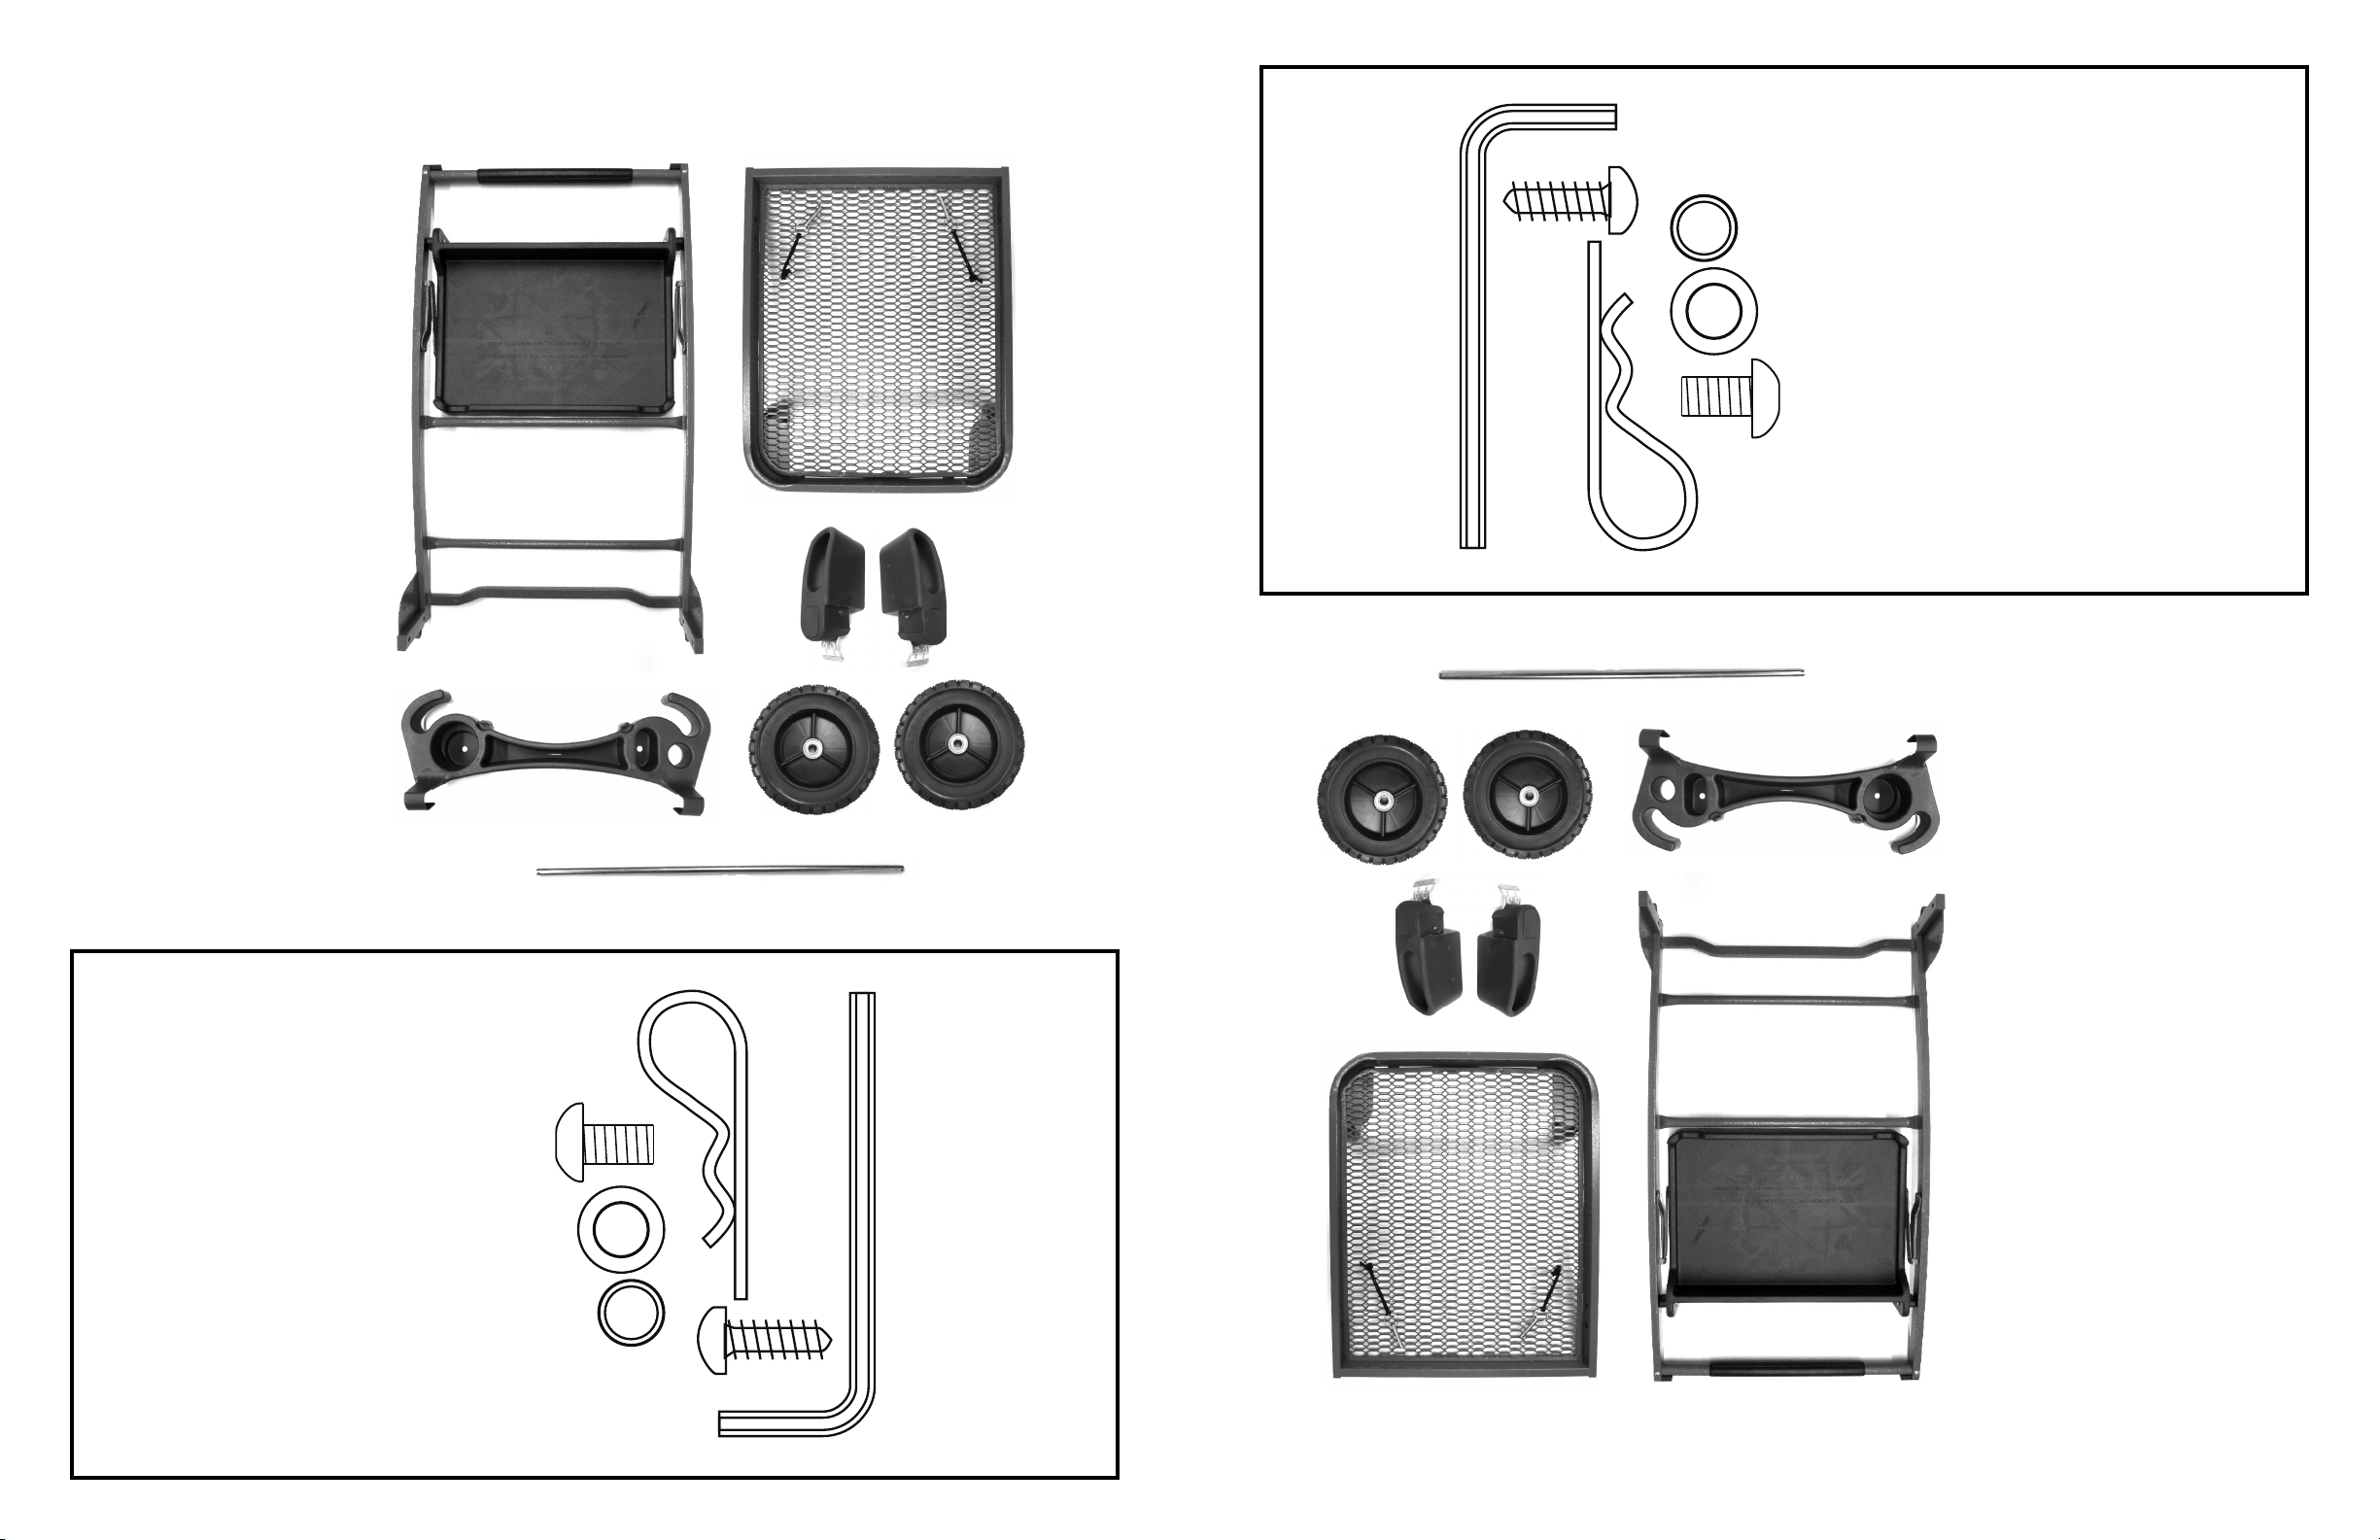
Your Orgo cart requires assembly. Account for all parts and hardware before beginning assembly. If any parts are missing,
damaged or if you have any questions or need additional instructions DO NOT RETURN THIS PRODUCT TO THE RETAILER,
visit us at www.tricam.com to complete the replacement parts submission form or call our
customer service department at 1-800-867-6763.
Tools required for assembly: Phillips screwdriver
Important Safety Instructions
Assembly Instructions
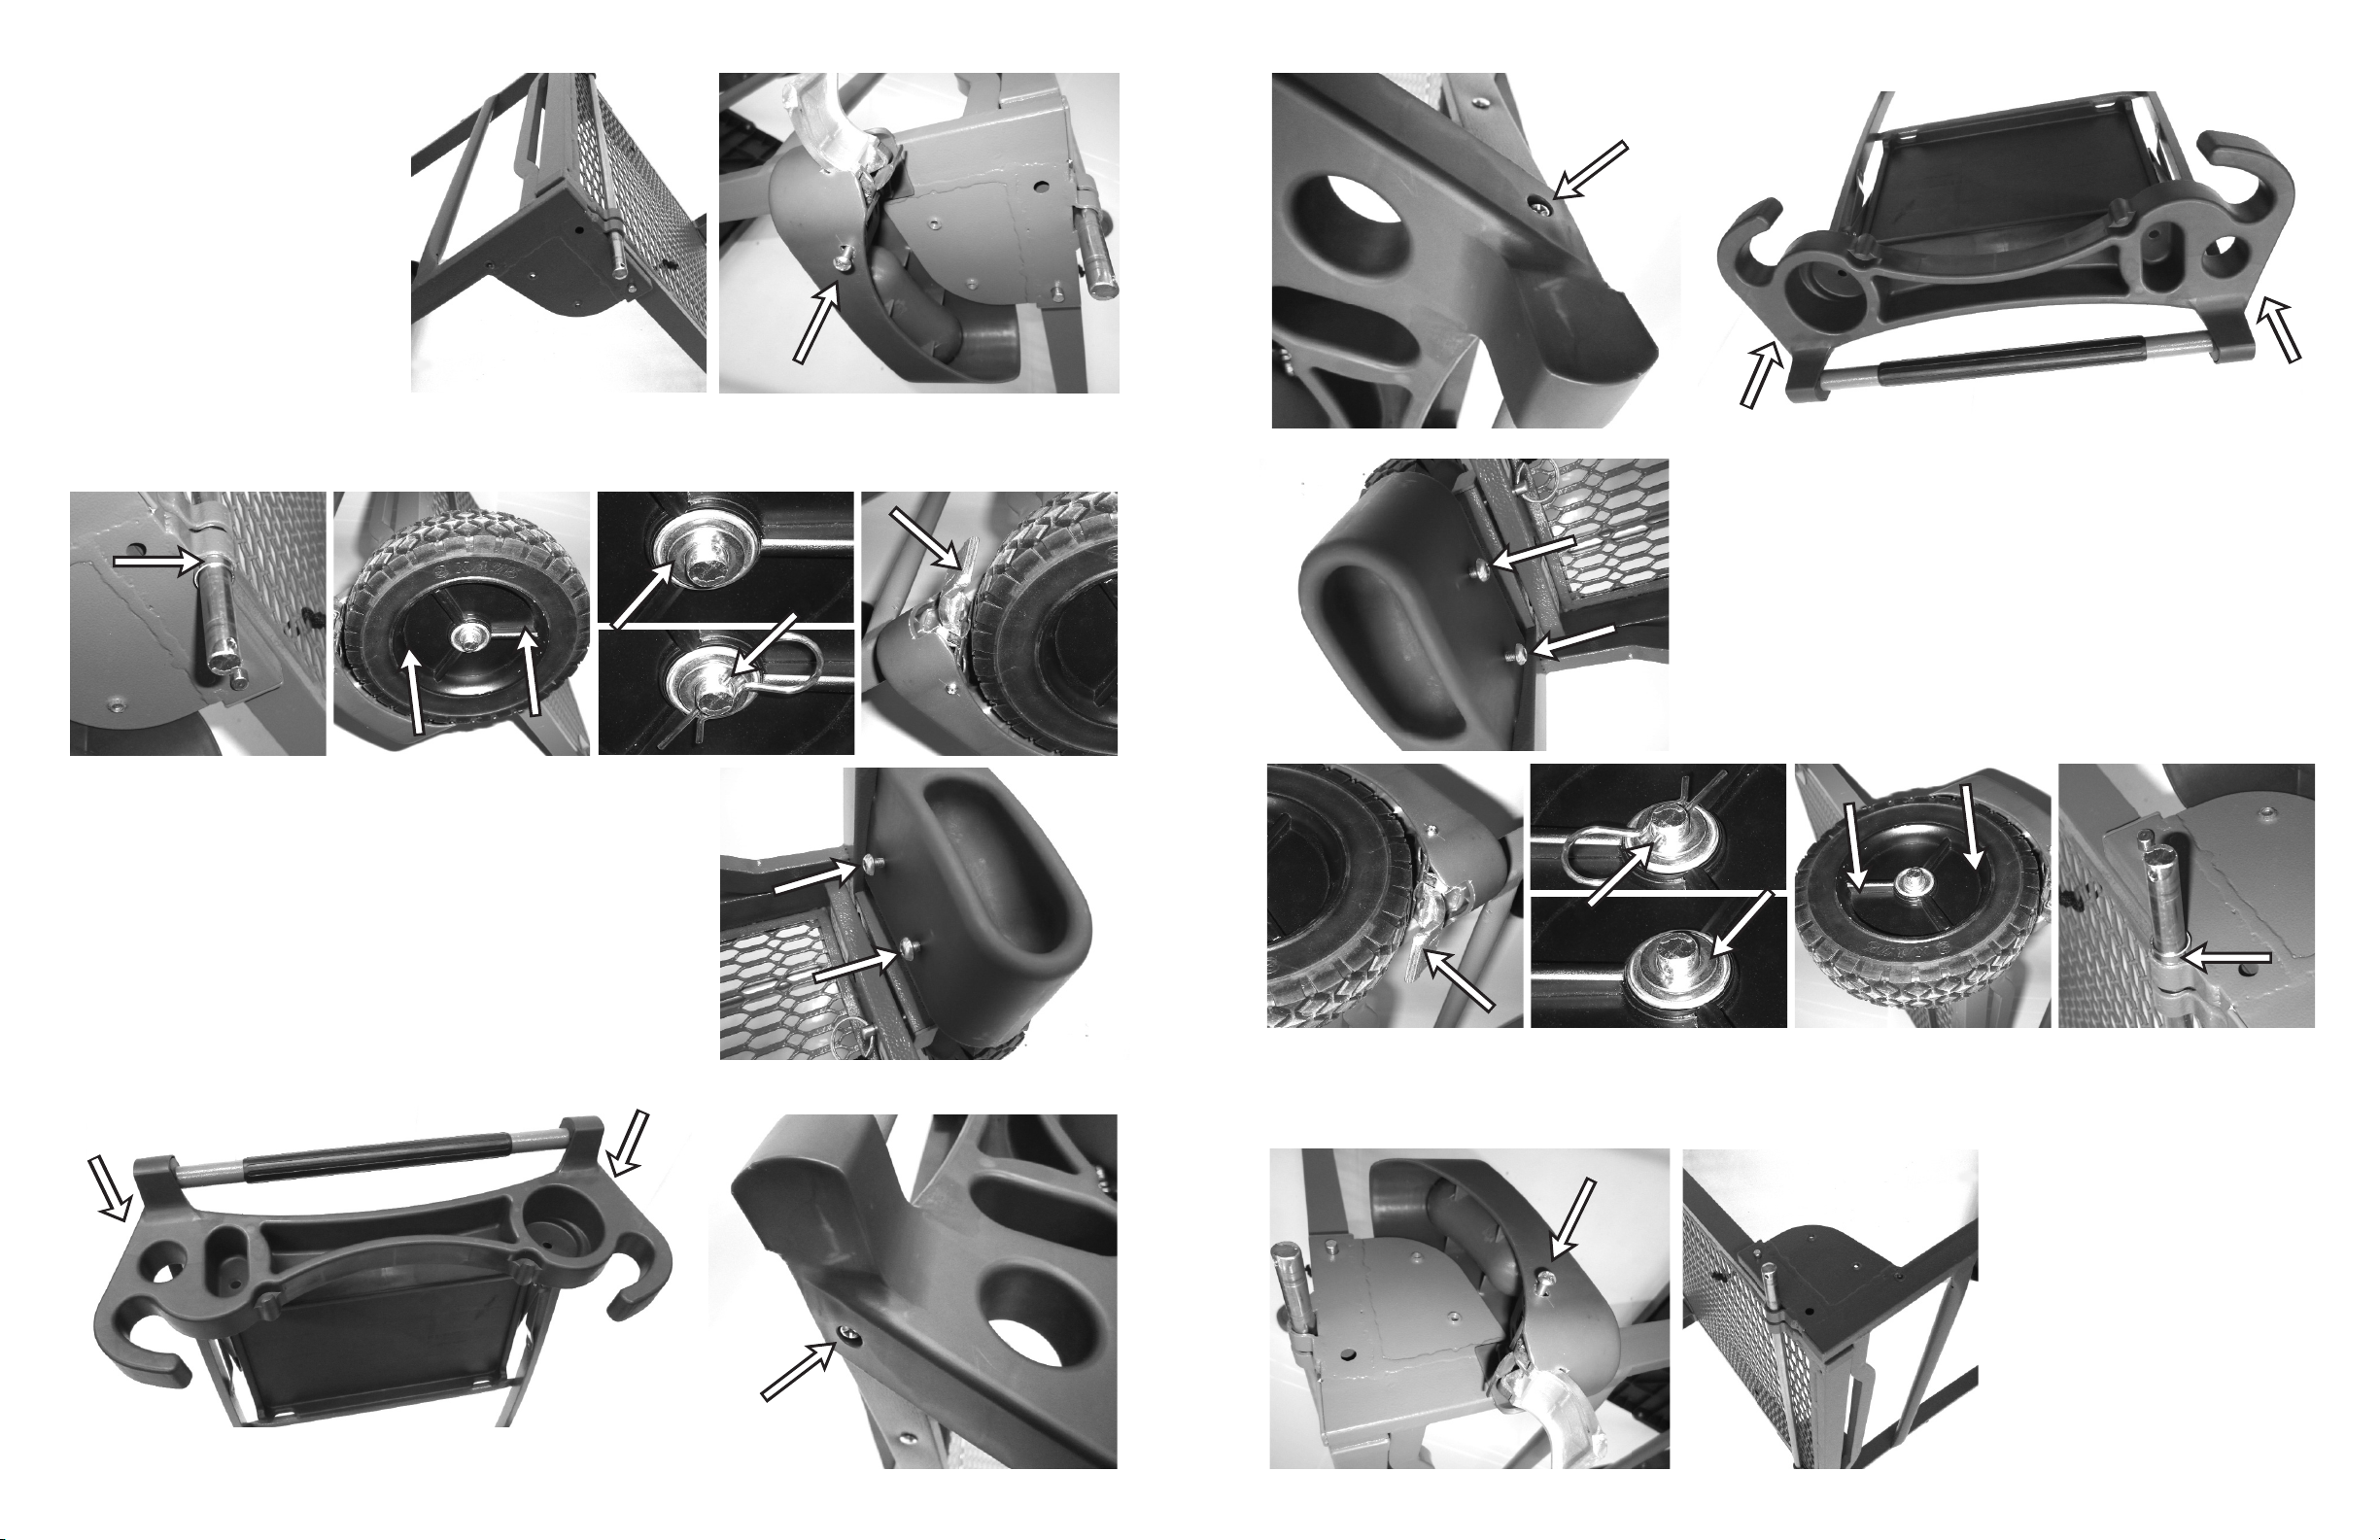
Step 1
Slide the axle through the frame and the base deck.
Step 2
Lock the base deck in place by sliding the locking pins
through the base deck and the frame. The base deck
should be in the upright locked position. Check to
make sure the locking pins are secure.
1. LEER CON CUIDADO TODAS LAS INSTRUCCIONES ANTES DE USAR. Si estas instrucciones no se entienden, o
necesitan ser aclaradas o explicadas aún más, por favor, llamar a nuestra línea de asistencia gratuita al
11--880000--886677--66776633de Lunes a Viernes de 9:00 a.m. a 4:00 p.m., Hora Estándar del Centro.
2. No sobrepasar el límite máximo de carga total de 300 lb (136 kg). La capacidad de peso nominal está basada en una
carga distribuida de manera uniforme.
3. No sobrepasar las 100 lb (45,3 kg) de carga total distribuida uniformemente, límite máximo de la bandeja.
4. No permitir a los niños usar este carrito sin supervisión. No es un juguete.
5. No usar para transportar pasajeros.
6. Siempre bloquear las ruedas antes de recogerlo.
7. Siempre bloquear las ruedas antes de guardar.
8. Si alguna de las piezas se daña, rompe o pierde; no usar el carrito hasta obtener la pieza de repuesto.
9. Recomendamos revisar el carrito después de cada uso para detectar cualquier daño.
10. GGUUAARRDDAARREESSTTAASSIINNSSTTRRUUCCCCIIOONNEESSPPAARRAAFFUUTTUURRAASSCCOONNSSUULLTTAASS..
El carrito Orgo necesita ensamblarse. Antes de empezar el ensamblaje, revisar si están todas las piezas y herrajes. Si
alguna falta o está dañada, o existe cualquier duda o se necesitan más instrucciones NO DEVOLVER ESTE PRODUCTO AL
MINORISTA: visitar nuestro sitio wwwwww..ttrriiccaamm..ccoommpara llenar el formulario de solicitud de piezas de repuesto o contactar a
nuestro departamento de servicio al cliente al 11--880000--886677--66776633..
Herramientas necesarias para el ensamblaje: Destornillador Phillips
Instrucciones de Seguridad Importantes
Instrucciones de Ensamblaje
Paso 1
Deslizar el eje a través del armazón y la
plataforma base.
Paso 2
Deslizar los pasadores de cierre a través de la
plataforma base y el armazón para fijar la primera en
su lugar. La plataforma debe quedar en la posición
vertical de cierre. Comprobar si los pasadores de
cierre están seguros.