4
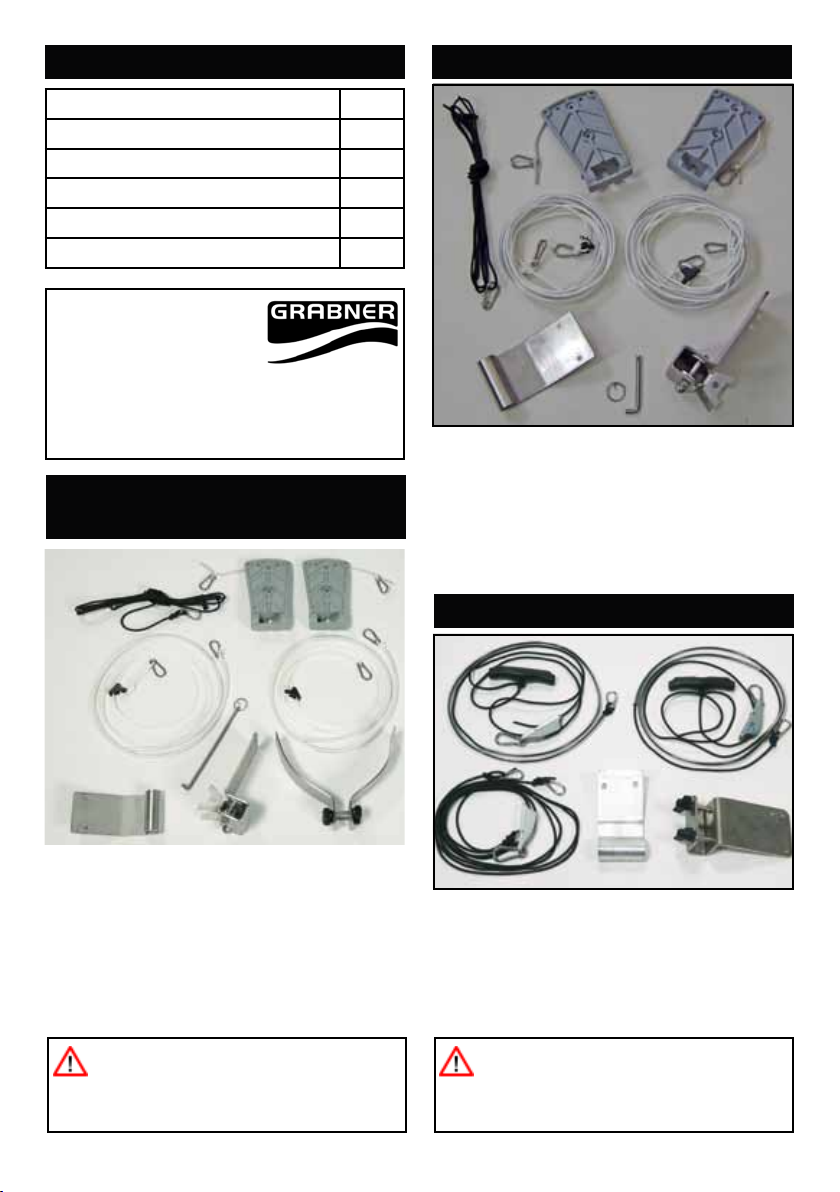
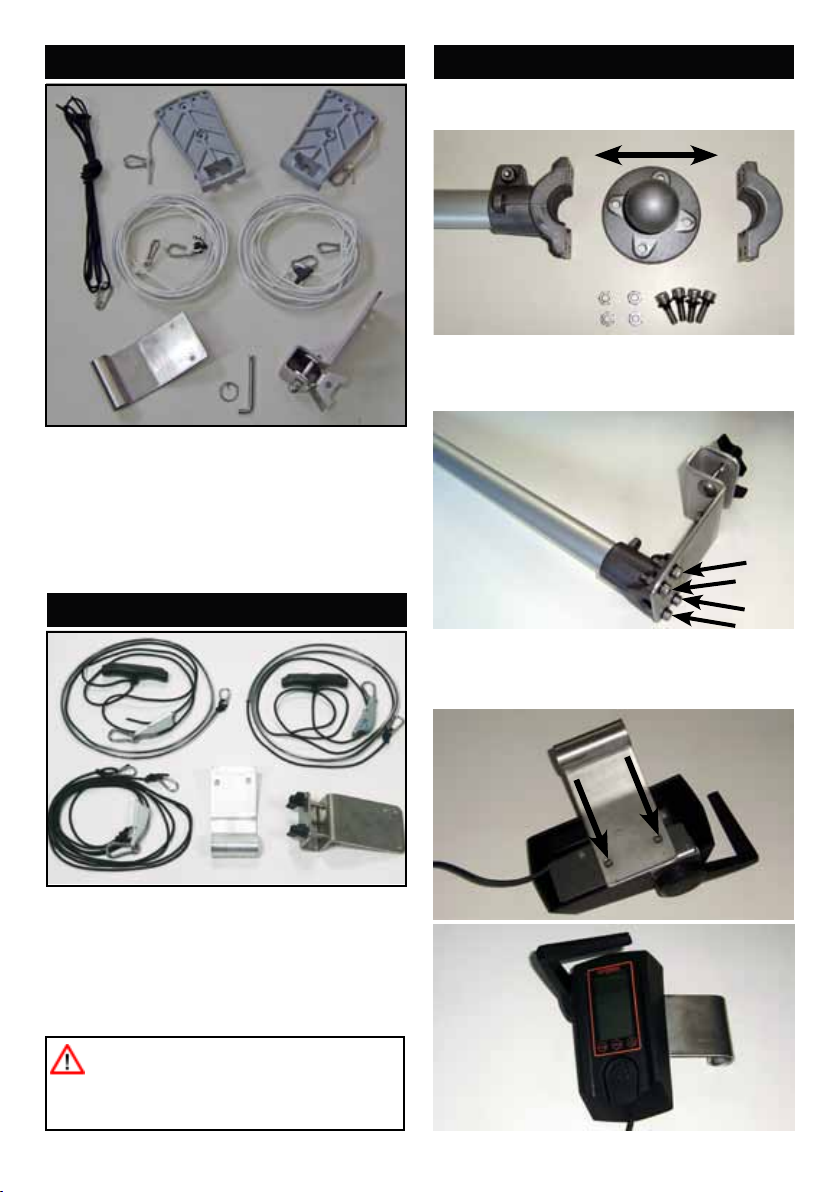
► Schieben Sie die Steuerpedale auf den
Stemmbügel vom Boot.
► Klemmen Sie den Stemmbügel mit Pe-
dale, in der gewünschten Position in Ihr
Boot.
► Hängen Sie die Steuerleinen, mit den
Karabinern, vorne an den Pedalen und
hinten am Anschluss für Lenkung ein.
► Führen Sie die Steuerleine dabei durch
die Öffnung am hinteren Verdeck (EX-
PLORER) bzw. entlang vom Rückenleh-
nenbeschlag (HOLIDAY).
► Stellen Sie sich die Länge der Steuerlei-
nen mit den Seilspannern so ein, dass die
Pedale senkrecht stehen.
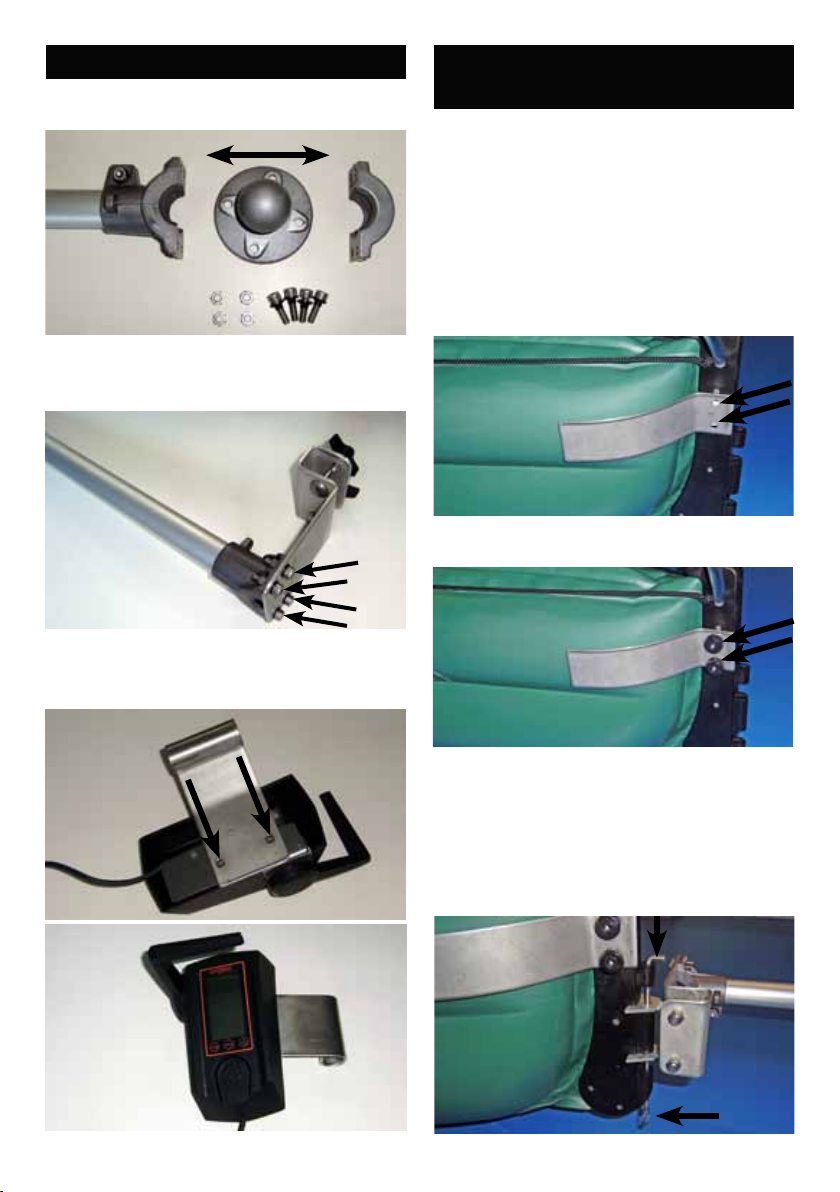
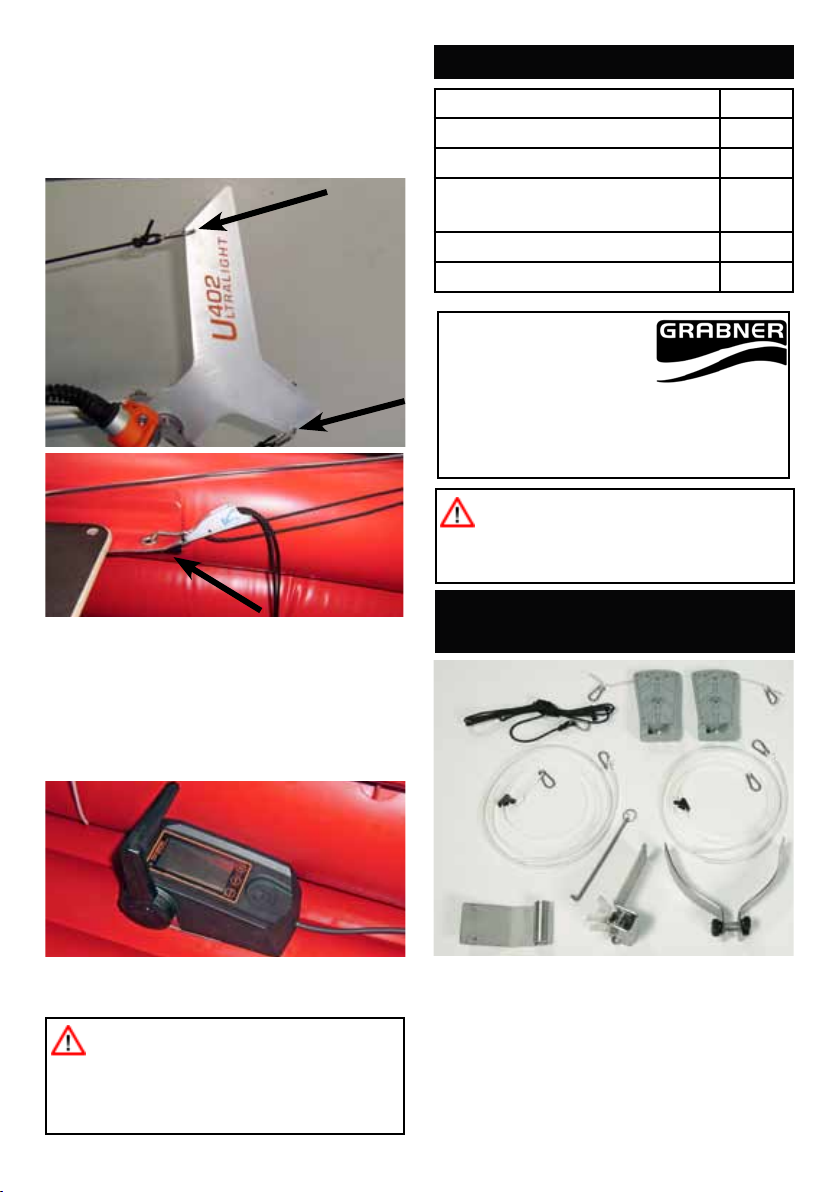
► Hängen Sie die Aufholleine an der obe-
ren Bohrung vom Schwenkarm ein.
► Führen Sie die Aufholleine durch die
Heckschutzleiste und xieren sie vorne
am Rückenlehnenbeschlag oder der Ver-
decköse.
► Legen Sie den Akku ins Boot.
► Klemmen Sie den Ferngashebel inge-
wünschter Position zwischen Boden und
Seitenschlauch.
► Verbinden sie die Kabel von Motor und
Ferngashebel mit dem Akku.
ACHTUNG
Lesen Sie bitte unbedingt die Bedienungs-
anleitung von Ihrem Motor und halten Sie
sich an die Anweisungen von Torqeedo.