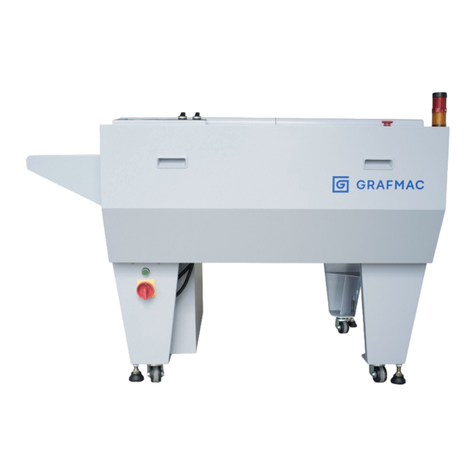
Grafmac W-PTP-32CDN Quick start guide

1/
O
Op
pe
er
ra
at
ti
io
on
na
al
l
M
Ma
an
nu
ua
al
l
T
Th
he
er
rm
ma
al
l
P
Pr
ro
oc
ce
es
ss
so
or
r
W
W-
-P
PT
TP
P-
-3
32
2C
CD
DN
N
/
/
W
W-
-P
PT
TP
P-
-4
45
5C
CD
DN
N
/
/
W
W-
-P
PT
TP
P-
-5
53
3C
CD
DN
N
PS Plate Processor
W
W-
-P
PT
TP
P-
-3
32
2S
SN
N
/
/
W
W-
-P
PT
TP
P-
-4
45
5S
SN
N
/
/
W
W-
-P
PT
TP
P-
-5
53
3S
SN
N
20080601A

2/
Table of Contents
1Parts Description
2LCD Control Panel Buttons
2.1 Auto/Manual Mode Button
2.2 Set Button
2.3 On/Off Switch, Enter
2.4 Cleaning the Rollers
2.5 Increment Value
2.6 Decrement Value
3Manual Mode
3.1 Roller Motor Switch
3.2 Chiller
3.3 Developer Fill Pump
3.4 Developer Circle Pump
3.5 Dryer Fan Heater
3.6 Developer Heater
3.7 Brush Motor Switch
3.8 Developer Replenishment Switch
3.9 Dry Fan Switch
3.10 Washing Valve Switch
3.11 Gum Switch
3.12 Reset Processed Plate Length
3.13 Reset Processed Plate Number
4Description of Parameter Settings
4.1 Developing Speed Setting
4.2 Developing Replenishment Rate
4.3 Anti-oxidation Replenishment Rate
4.4 Power On Replenishment
4.5 Developer Temperature Setting
4.6 Brush Speed Setting
4.7 Dryer Fan Temperature Setting

3/
4.8 Standby Operation Setting
4.9 Clean Notification Setting
4.10 Additive Setting
5Hidden Parameter Settings
5.1 General Explanations
5.2 Temperature Calibration
5.3 Chinese/English Mode Setting
5.4 Gum rollers cleaning setting
5.5 Temperature setting
5.6 Replenish Rate for Developer Pump
5.7 Calendar Setting
5.8 Pulse Calculator
6Plate Processor Status
7Operations
7.1 Starting Up
7.2 Standby Replenishment
7.3 Temperature Standby
7.4 Setting Operational Conditions
7.5 Auto Mode (Plate Developing)
7.6 Plate Eject
7.7 Emergency Stop

4/
Description of Symbols
Electricit
y
Caution
Warning:
Observe Safety Procedures
Danger:
Electrical Hazard

5/
1. Parts Description
NO. Items NO. Items
1 Plate feeding table 9 Electrical box
2 Plate feeding inlet 10 Emergency Stop Button
3 Re-wash inlet 11 Main power switch
4 Developing top cover (interlock) 12 Start button
5 Dryer top cover 13 LCD Control Panel
6 Filter for developer 14 Re-wash switch
7 Right side and left side cover 15 Plate eject switch
8 Leveling Feet 16

6/
2LCD Control Panel Buttons
2.1 Auto/Manual Mode Button
2.1.1 Switch from “Auto” to “Manual” modes. When the Plate
Processor is in the Auto Mode, press this button once to
switch to Manual Mode. When the Plate Processor is in
Manual Mode, press this button once to switch to Auto Mode.
2.2 Set Button
2.2.1 Use to set the Plate Processor parameters. The Set Mode
includes many sub-menus. Press [SET] repeatedly to change the
main setting categories.
2.2.2 Once the parameters are set, press [Auto/Manual] to return to the normal mode
of operation.
2.3 On/Off Switch, Enter
2.3.1 This button has different functions in the Manual Mode and Set
Mode.
2.3.2 In Manual Mode, this button functions as an On/Off switch to
turn the plate processor on or off manually. It indicates normal operating

7/
condition after the Plate Processor passes error diagnostics.
2.3.3 In the Set Mode, the button selects the currently displayed parameter or input
value.
2.4 Cleaning the Rollers
2.4.1 This button includes both 【gum rollers cleaning】&【skip】
functions.
2.4.2 Press this button to begin cleaning the rollers. (This function is
optional and
may vary according to the actual equipment in use.)
2.4.3 Push this button to skip executing standby replenishment
2.5 Increment Value
2.5.1 This button has different functions in the Auto Mode, Manual
Mode, and Set Mode.
2.5.2 In the Auto Mode, press the button to return to the previous
control setting.
2.5.3 In the Manual Mode, press the button to return to the previous manual control
setting.
2.5.4 In the Set Mode, press the button to increment the current parameter setting.
2.6 Decrement Value
2.6.1 This button has different functions in the Auto Mode, Manual
Mode, and Set Mode.
2.6.2 In the Auto Mode, press the button to go to the next control
setting.
2.6.3 In the Manual Mode, press the button to go to the next manual control setting.
2.6.4 In the Set Mode, press the button to decrease the current parameter setting.

8/
Operational Chart (Manual Mode)
AUTO/MANUAL
Roller Motor Switch
Chiller
Developer Fill Pump
Developer Circle Pump
Dryer Fan Heater
Developer Heater
Brush Motor Switch
Developer Replenishment
Dryer Fan Switch
Washing Valve Switch
Gum Switch
R
eset proceed plate length
e
set proceed plate number
ENTER
(
O
N)
ENTER
(
ON
)
ENTER
(
ON
)
ENTER
(
ON
)
ENTER
(
ON
)
ENTER
(
ON
)
ENTER
(
ON
)
ENTER
(
ON
)
ENTER
(
ON
)
ENTER
(
ON
)
ENTER
(
ON
)
ENTER
(
ON
)
ENTER
(
ON
)
ENTER
(
OFF
)
ENTER
(
OFF
)
ENTER
(
OFF
)
ENTER
(
OFF
)
ENTER
(
OFF
)
ENTER
(
OFF
)
ENTER
(
OFF
)
ENTER
(
OFF
)
ENTER
(
OFF
)
ENTER
(
OFF
)
ENTER
(
OFF
)
ENTER
(
OFF
)
ENTER
(
OFF
)
+
-
-
-
-
-
-
-
-
-
-
-
-
+
+
+
+
+
+
+
+
+
+
+
+
-

9/
3Manual Mode
3.1 Roller Motor Switch
●Function: Checks whether the roller motor function is normal. This function can detect
abnormality in roller motor operation and is useful in error diagnostics.
3.2 Chiller
●Function: Checks whether the chiller is normal. If the chiller becomes abnormal, this
function checks whether the chiller is working property, and is useful in error diagnostics
3.3 Developer Fill Pump
●Function: Checks whether the developer filling motor is normal. If the motor becomes
abnormal, this function checks whether the motor is working property, and is useful in
error diagnostics.
3.4 Developer Circle (Circulation) Pump
●Function: Checks whether the developer circulation pump is normal. If the pump becomes
abnormal, this function checks whether the pump is working property, and is useful in
error diagnostics.
3.5 Dryer Fan Heater
●Function: Checks whether the dryer fan heater is normal. If the heater becomes abnormal,
this function checks whether the heater is working property, and is useful in error
3.6 Developer Heater
●Function: Checks whether the solution heater is normal. If the developer heater becomes
abnormal, this function checks whether the heater is working property, and is useful in
error diagnostics.
3.7 Brush Motor Switch
●Function: Checks whether the brushing function is normal. If the brushing operation
becomes abnormal, this function checks whether the brushing motor is rotating, and is
useful in error diagnostics.

10/
3.8 Developer Replenishment Pump
●Functions:
▪Manually replenishes the developer solution into the developing tank.
▪Checks whether the developer replenishing function is normal.
In the presence of abnormal conditions, this function checks whether the replenishment
pump is working properly, and is useful in error diagnostics.
3.9 Dryer Fan Switch
●Function: Checks whether the dryer function is normal. If dryer operation fails, the
function checks whether the dryer fan is rotating, and is useful in error diagnostics.
3.10 Washing Valve Switch
●Function: Checks whether the washing operation is normal. If washing operation fails, this
function can determine whether the water valve is open, and is useful in error diagnostics.
3.11 Gum Switch
●Function: Checks whether the application of the gum solution is normal. When the
application of gum solution fails, this function checks whether the gum dispenser pump is
functioning properly, and is useful in error diagnostics.
3.12 Reset Processed Plate Length
●Function: Resets the total processed length to zero. Please note that the total processed
length is different from the number of plates processed.
3.13 Reset Processed Plate Number
●Function: Resets the total number of plates processed to zero. The running plate number is
convenient for determining the work quantity and can be used to determine whether the
filter needs to be replaced.
Tips:【Operation: Press [Enter] to turn the function On and Off.】
【Press [Auto/Manual] to exit the Manual Mode. The LCD displays “Auto Mode.”】

11/
SET
Pulse Calculator
SET
SET
SET
Power On Re
p
lenishment
SET
SET
SET
Brush S
p
eed Settin
g
SET
Dr
y
er Fan Tem
p
erature
SET
SET
O
p
eration Time Settin
g
SET
O
p
eration S
p
eed Settin
g
SET
Clean Notification Settin
g
SET
A
mount Settin
g
for Additive
SET
Develo
p
er Tem
p
erature Settin
g
SET
A
rea Settin
g
for Additive
Developing
Replenishment Rate
Anti-oxidation
Replenishment Rate
Standby Operation SettingAdditive Setting
+
–
+
–
+
–
+
–
+
–
+
–
+
–
+
–
+
–
+
–
+
–
+
–
+
–
+
–
+
–
ENTER
ENTER
ENTER
ENTER
ENTER
ENTER
ENTER
ENTER
ENTER
ENTER
ENTER
ENTER
ENTER
ENTER
ENTER
0 N O
1 YES
0
N
O
1 YES
0
N
O
1 YES
0
N
O
1 YES
0
N
O
1 YES
0
N
O
1 YES
0
N
O
1 YES
0
N
O
1 YES
0
N
O
1 YES
0
N
O
1 YES
0
N
O
1 YES
0
N
O
1 YES
0
N
O
1 YES
0
N
O
1 YES
0
N
O
1 YES
Cancel
Save
Cancel
Save
Cancel
Save
Cancel
Save
Cancel
Save
Cancel
Save
Cancel
Save
Cancel
Save
Cancel
Save
Cancel
Save
Cancel
Save
Cancel
Save
Cancel
Save
Cancel
Save
Cancel
Save
Standb
y
Time Settin
g
Area Setting for Replenishment
Amount Setting for Replenishment
Time Setting for Replenishment
Amount Setting for Replenishment
Develo
p
in
g
S
p
eed Settin
g
+
–
ENTER 0 N O
1 YES
Cancel
Save
SET Operational Chart (Parameter Settings)

12/
4Description of Parameter Settings
4.1 Developing Speed Setting
Set Plate Speed
5
●Different types of plates and developers require different developing speed. Set the
appropriate plate processing speed for proper plate developing.
●Range of Settings:1 ~ 19. Use [+] or [-] to increase or decrease the setting value. The
displayed value is the increment between the low and high speeds, and is not
indicative of the physical speed.
4.2 Pulse Calculator:
Use to calculate the pulse. All the running procedure of the processor is controlled by
the pulse. The pulse can be reference to the developing time setting. Technician can also use
the pulse calculator to measure exact replenish pump rate.
4.3 Developing Replenishment Rate
(The replenishment pump runs for Y ml every X m2.)
Developing Replenishment
Rate
≪Pulse calculator≫
Time:
Pulse:
Run:0 .0
設定沖版速度

13/
4.3.1 Area setting for replenishment (X m2)
▪Definition: Sets the area value X in m2 , When accumulated X m2reached, the
replenishment pump starts to deliver the developer from the replenishment
container to the developing tank. This will ensure that the consistency of the
developer is not affected by the number of developed plates thus reducing its
processing capacity.
▪Range of Settings: 0.1 ~ 9.9 m2. Use [+] or [-] to increase or decrease the
setting value, set unit of 0.1 m2. The value indicated is the actual area(square
measure) of the processed plate.
4.3.2 Amount Setting for Replenishment (Y ml)
▪Definition: Sets the value Y in ml. When accumulative square measure X m2
reached, the replenishment pump starts to replenish for Y ml.
▪Range of Settings: 1 to 250 ml. Use [+] or [-] to increase or decrease the
setting value, set unit of 1 ml. The value indicated is the actual amount of
replenishment.
4.4 Anti-oxidation Replenishment rate
Area setting for replenishment
m
2
Amount Setting for replenishment
ml
Anti-oxidation replenishment
rate

14/
4.4.1 Time Setting for Replenishment (X min)
▪Definition: Sets the replenish time X in minute. When accumulative time X
reached, the developer replenishment pump starts to deliver the developer
from the replenishment container to the developing tank. This ensures that the
developer concentration in the tank does not oxidize and diminish the
developing quality.
▪Range of Settings: 1 to 120 minutes. Use [+] or [-] to increase or decrease the
setting value, set unit of 1 min. The value indicated is the actual time in
minutes.
4.4.2 Amount Setting for Replenishment (Y ml)
▪Definition: Sets the amount Y in ml. When accumulative time X min reached,
the replenishment pump starts to replenish for Y ml.
▪Range of Settings: 1 to 250 ml. Use [+] or [-] to increase or decrease the
setting value, set unit of 1 ml. The value indicated is the actual amount of
replenishments.
Time Setting for replenishment
(min)
Amount Setting for replenishment
(ml)

15/
4.5 Power On Replenishment Setting
▪Definition: Set replenishment value X in ml. With One hour of plate processor been
turned off, X ml of developer was replenished.(The system timer calculate the
replenishment value automatically after the processor power on )
▪Range of Settings: 1 to 250 ml. Use [+] or [-] to increase or decrease the setting value,
set unit of 1 ml. The value indicated is the actual amount of replenishment.
4.6 Developer Temperature Setting
Set Developer Temperature
C
28.0
▪Range of Settings: 18 to 40oC. Use [+] or [-] to increase or decrease the setting value,
set unit of 0.1 oC. Press [Enter] to select and store the desired setting to memory. The
value indicated is the actual thermometer reading.
4.7 Brushing Speed Setting
Set Brushing Speed
rpm
12
▪Range of Settings: 1~22. Use [+] or [-] to increase or decrease the setting value, set
unit of 1. Press [Enter] to select and store the desired setting to memory. The displayed
value is the increment between low and high speed, and is not indicative of the
physical speed.
<Power On Replenishment>
(ml/h)
0

16/
4.8 Dryer Fan Temperature Setting
Set Dryer Fan Temperature
℃
50.0
▪Range of Settings: 20℃to 80℃. Use [+] or [-] to increase or decrease the setting
value, set unit of 0.2℃. Press [Enter] to select and store the desired setting to memory.
The value indicated is the actual thermometer reading.
4.9 Standby Operation Setting
(The roller motor turns at Z speed for Y seconds after every X minutes.)
4.9.1 Standby Time Setting (X min)
▪Definition: Sets a period in X minutes. When accumulative time X minutes
reached, the roller starts to turn to prevent the gum solution from hardening
on the rollers.
▪Range of Settings: 1 to 250 minutes. Use [+] or [-] to increase or decrease the
setting value, set unit of 1 min. The value indicated is the actual time in
minutes.
4.9.2 Operating Time Setting (Y sec)
Standby Operation Setting
Standby Time Setting
(sec)
Operating Time Setting
(sec)

17/
▪Definition: Sets a period Y in seconds. The roller motor turns for Y seconds
when the accumulative time X min reached.
▪Range of Settings: 0 to 99 seconds. Use [+] or [-] to increase or decrease the
setting value, set unit of 1 sec. The value indicated is the actual time in
seconds.
4.9.3 Operation Speed Setting (Z)
▪Definition: The roller motor turns at Z speed for Y seconds when the previous
setting of X minutes has elapsed.
▪Range of Settings: 1 to 19. Use [+] or [-] to increase or decrease the setting
value, set unit of 1. The displayed value is the increment between low and
high speed, and is not indicative of the physical speed.
4.10 Clean Notification Setting
▪Definition: Sets the length value X in meters. When the accumulative length
X meters reached, the LCD will indicate with cleaning requirement.
▪Range of Settings: 50 to 3000 meters. Use [+] or [-] to increase or decrease
the setting value, set unit of 50 meters. The value indicated is the actual
length of the processed plate.
▪After cleaning or to suspend cleaning, press [Auto/Manual] to enter the Auto
Mode. The Plate Processor will remain in operational status
▪After cleaning, reset the total processed length to zero.
Operating Speed Setting
(sec)
Clean Notification Setting
(m)

18/
4.11 Additive Setting
●this is a preserved setting function and no need to do any setting on it.
Tips:【Press [Enter] to select and store the desired setting to memory.】
【Prolonged Pressing [+] or [-] for one second to quickly increase or decrease current setting.】
【Choose the selected data than press[Enter] and choose [1 YES]to save the parameter.】

19/
+
–
+
–
+
–
+
–
SET
Chiller Setting
SET
Minimum Switch On Time
SET
Minimum Switch Off Time
SET
W
h
e
n
Cu
rr
e
n
t
T
e
m
pe
r
atu
r
e
i
s
χ
℃
L
owe
r
t
h
a
n
Sett
in
g
te
m
pe
r
atu
r
e
Sw
i
tc
h
O
ff
When Current Tem
p
erature is
χ
℃Hi
g
her than Settin
g
tem
p
erature Switch On
Operate Command Function Chart (Hidden Parameter Setting)
ENTER
ENTER
ENTER
ENTER
ENTER
ENTER
ENTER
ENTER
ENTER
ENTER
ENTER
ENTER
ENTER
ENTER
ENTER
SET
Clean Time Settin
g
+
–
SET
Drain Water Dela
y
Time Settin
g
+
–
Gum Cylinder
Clean Setting
Tem
p
erature Delta for Warnin
g
Temperature Setting
AUTO/MANUAL
SET
Tem
p
erature
SET
Chinese / En
g
lish
+
–
ENTER
ENTER
1
.
D
ev
e
l
ope
r B
at
h
2
.
Dr
ye
r F
a
n
+
+
–
–
+
–
+
+
–
–
ENTER
ENTER
1
.
C
h i n
e
s
e
2
.
E n
g
l i
s
h
Orange button on main board.
+
–
SET
SET
Month
Calendar
SET
Hour
SET
Year +
–
+
–
+
–
+
–
+
–
SET
Min.
SET
Da
y
Replenish Rate for Developer Pump +
–
SET
+
–
+
–
Heater Setting
SET
When Current Temperature is χ℃Higher than Setting temperature
S
w
i
tc
h
Off
SET
When Current Temperature is χ℃Lower than Setting temperature
S
w
i
tc
h
O
n

20/
----------------------------------------------------------------------------
5Hidden Parameter Settings:
5.1 General Explanations:
Some parameter setting items in the processor are no need to adjust and some are
important data that need to be protected to prevent wrong adjustment. The parameter
described below were set for hidden and can not be found unless pressing the orange
button on main board while selecting the setting menu.
5.2 Temperature Calibration:
The temperature sensor and the temperature sensor circuit can have error margins and
are therefore calibrated before the Plate Processor leaves the factory. If the
temperature reading on the LCD is different from actual value measured by the
thermometer, temperature calibration is required, to make sure it feedback accurate
and reliable value (temperature) to the main board.
Other manuals for W-PTP-32CDN
1
This manual suits for next models
5
Table of contents
Other Grafmac Computer Hardware manuals