manuals.online logo
Brands
  1. Home
  2. •
  3. Brands
  4. •
  5. Grundig
  6. •
  7. Car Receiver
  8. •
  9. Grundig RCD 400 User manual

Grundig RCD 400 User manual

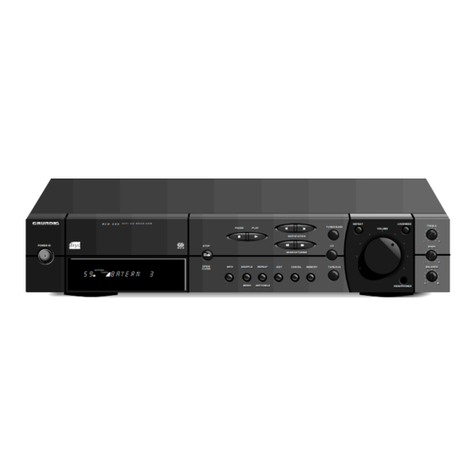
HIFI CD RECEIVER
RCD 400
Index
Deutsch
Installation ...............................4
Bedienungselemente ...................5
Display....................................6
Fernbedienung ..........................6
Verstärker ................................7
Radio..................................8-10
CD....................................11-12
Uhr und Timer..........................13
Wichtige informationen...............14
English
Installation .............................15
Operating elements ...................16
Display ..................................17
Remote Control ........................17
Amplifier part ..........................18
Radio ................................19-21
CD....................................22-23
Clock and Timer........................24
Important information.................25
Français
Installation .............................26
Éléments de commande ..............27
Écran.....................................28
Télécommande ........................28
Amplificateur...........................29
Radio ................................30-32
CD....................................33-34
Horloge et Minuterie ..................35
Informations importantes ............36
Italiano
Installazione............................37
Elementi di commando ...............38
Display ..................................39
Telecomando ...........................39
Amplificatore...........................40
Sintonizzatore ......................41-43
CD....................................44-45
L’orologio e il timer ...................46
Informazioni importanti...............47
Português
Instalação...............................48
Elementos de manejo.................49
Display ..................................50
Telecomando ...........................50
Amplificador............................51
Rádio ................................52-54
CD....................................55-56
Função horário e timer ...............57
Informações importantes.............58
Español
Instalación..............................59
Elementos de mando..................60
Display ..................................61
Telemando..............................61
Amplificador............................62
Sintonizador ........................63-65
CD....................................66-67
El reloj y el cronómetro...............68
Información importante...............69
Nederlands
Installatie ...............................70
Bedieningselementen.................71
Display ..................................72
Afstandsbediening.....................72
Versterker...............................73
Radio ................................74-76
CD....................................77-78
De klok en de timer ...................79
Belangrijke informatie................80
Dansk
Opstilling ...............................81
Betjeningselementer..................82
Display ..................................83
Fjernbetjeningen ......................83
Forstærker ..............................84
Tuner.................................85-87
CD....................................88-89
Uret og stopuret........................90
Vigtigt! ..................................91
Svenska
Installation .............................92
Kontroller ...............................93
Display ..................................94
Fjärrkontrollen .........................94
Förstärkaren............................95
Tunern ...............................96-98
CD ..................................99-100
Klockan och timern ..................101
Viktig information....................102
Suomi
Asennus ...............................103
Säätimet...............................104
Näyttö ..................................105
Kauko-ohjaimen......................105
Vahvistin...............................106
Radio .............................107-109
Käyttö.............................110-111
Kello ja ajastin .......................112
Tärkeitä tietoja .......................113
2
Index
∂DANSK
• Typemærkaten er placeret på bagsiden af apparatet.
• Bemærk: Netafbryderen er sekundært indkoblet og afbryder ikke strømmen
fra nettet. Den indbyggede netdel er derfor tilsluttet til lysnettet så længe
netstikket sidder i stikkontakten.
• Advarsel: Usynlig laserudstråling ved åbning når sikkerhetsafbrydere er ude
af funktion. Undgå udsættelse for stråling.
sSVENSKA
• Typnumret återfinns på apparatens bakside.
• Observera! Strömbrytaren är sekundärt kopplad och inte bryter strömmen
från nätet. Den inbyggda nätdelen är därför ansluten till elnätet så länge
stickproppen sitter i vägguttaget.
• Klass 1 laserapparat
Varning! Om apparaten används på annat sätt än i denna bruksanvisning
specificerats, kan användaren utsättas för osynlig laserstrålning, som
överskrider gränsen för laserklass 1.
ßSUOMI
• Tyyppikilpi on laitteen takaosassa.
• Huom. Toiminnanvalitsin on kytketty toisiopuolelle, eikä se kytke laitetta irti
sähköverkosta. Sisäänrakennettu verkko-osa on kytkettynä sähköverkkoon
aina silloin, kun pistoke on pistorasiassa.
• Luokan 1 laserlaite
Varoitus! Laitteen käyttäminen muulla kuin tässä käyttöohjeessa mainitulla
tavalla saattaa altistaa käyttäjän turvallisuusluokan 1 ylittävälle
näkymättömälle lasersäteilylle.
nNORGE
• Typeskilt finnes på apparatens bakside.
• Observer : Nettbryteren er sekundert innkoplet. Den innebygde netdelen er
derfor ikke frakoplet nettet så lenge apparatet er tilsluttet nettkontakten.
3
Deutsch......................................Seite 4 D
English......................................page 15 GB
Français...................................page 26 F
Italiano ..................................pagina 37
Português ............................página 48 P
I
Español..................................página 59 E
Dansk..........................................side 81
Nederlands.........................pagina 70
Svenska.....................................sida 92
Suomi........................................sivu 103
NL
DK
S
FIN
CLASS 1
LASER PRODUCT
Setting up
• If you want to set up your CD receiver on a shelf, in a cabinet or any other
type of enclosure, always ensure that sufficient ventilation is available. An
open space of at least 3 cm at the sides and the top, and 5 cm at the back of
your system is required.
• Place the power supply cable as far as possible from the sound signal lines
in order to avoid disturbing signal interference.
• When making connections, always note the identification markings on the
cables and sockets, as well as those on the back of the unit, in order to avoid
improper connections. Improper connections can considerably impair sound
quality.
Connecting the speakers
In order to take full advantage of your unit´s superior play-back quality and
overall performance, only quality speakers with corresponding load ratings
should be used. Speakers should thus have an impedance of 4 to 16Ω.
Maximum receiver output is achieved with 4Ωspeakers.
In addition, always make sure that speaker wires are properly and tightly twisted
to avoid protruding individual wires. These can cause shorts.
Important:
In addition, proper speaker connection is also important for sound quality.
• As seen from the listener, the right speaker must be connected to the right
terminal (right channel) and the left speaker to the left terminal (left channel).
• One of the wires of a loudspeaker cable is marked, e.g. with a colour or rib.
Connect the marked wire to the red terminal, the non-marked wire to the
black one.
• Make sure that all loudspeakers are connected in the same way.
Power supply connection
• Only connect the unit to a 230V~, 50/60 Hz a.c. power source.
• Always ensure that the voltage indicated on the unit's rating plate agrees with
you local power supply.
• If this is not the case, consult your dealer or customer service center. The
rating plate is found on the back of the unit.
Antenna connection
Only a good antenna system (broadband cable connection to your own antenna
system, or a common house antenna system) can guarantee optimum reception
quality, especially for FM stereo broadcasts.
FM 75 Ω
• The FM 75 Ωsocket is used for connection to the Community or Cable An-
tenna System or to a roof-mounted FM antenna with an impedance of 75 Ohm.
• If non of these are available, you may use the cast (wire) antenna supplied for
nearby station (reception could be poor). You should not, however, change
the length of the cast antenna.
AM LOOP ANTENNA
• For AM reception, connect the supplied wires to the AM LOOP ANTENNA
terminals and position the antenna for best reception.
• The elevated antenna bas well as earth ecan also be connected to these
sockets in place of the frame antenna.
Note: do not place the AM loop antenna on the unit, as this unit employs a
computing device which could cause interference.
Connecting other programme sources
Before connecting any programme sources, always switch any other connected
units off.
In addition, note the correct connection of the stereo channels:
R: right (red)
L: left (white).
TAPE Connect the LINE IN sockets of your cassette deck, tape recorder
or DAT recorder to the sockets TAPE OUT.
Connect the LINE OUT sockets of your cassette deck, tape
recorder or DAT recorder to the sockets TAPE IN.
©Important Information for Units sold in Great Britain
Units sold in GB are suitable for operation from a 230V AC, 50 Hz mains supply.
In case this appliance is supplied with a Safety Standard Approved mains lead fitted
with a non-rewireable 13 Amp mains plug which, if unsuitable for your socket,
should be cut off and an appropriat plug fitted by a qualified electrician.
The fuse and
fuse holder must be removed from the plug as accidental insertion of
the redundant
plug into a 13 Amp socket is likely to cause an electrical hazard.
Note: The severed plug must be destroyed to avoid a possible shock hazard should
it be inserted into a 13 Amp socket elsewhere.
If it is necessary to change the fuse in the non-rewireable plug, the correct type
and rating (5 Amp ASTA or BSI approved BS 1362) must be used and
the fuse
cover must be refitted. If the fuse cover is lost or damaged the lead and plug must
not be used until a replacement is obtained from your dealer.
If a non-rewireable plug or a rewireable 13 Amp (BS 1363) plug is used, it must
be fitted with a 5 Amp ASTA or BSI approved BS 1362 fuse. If any other type of
plug is used it must be protected by a 5 Amp fuse either in the plug or at the
distribution board.
Important: The wires in the mains lead are coloured in accordance with the
following code:BLUE - NEUTRAL, BROWN - LIVE
As the colours of the wires in the mains lead of your appliance may not
correspond with the coloured markings identifying the terminals in your plug,
proceed as follows: Connect the BLUE coloured wire to the plug terminal
marked with the letter 'N' or coloured black.
Connect the BROWN coloured wire to the plug terminal marked with a letter 'L'
or coloured red.
In no circumstances must any of the wires be connected to the terminal marked
with a letter 'E', earth symbol e, coloured green or green and yellow.
Replacement mains lead can be obtained from your dealer.
RIGHT
SPEAKER LEFT
SPEAKER
SPEAKERS
4-16
L
R
L
R
TAPE
OUT IN
FM 75 AM LOOP ANTENNA
FM
TAPE
OUT IN
SPEAKERS
4-16
L
R
SPEAKERS75 AM LOOP ANTENNA
©15
Installation
GB
Front of the CD RECEIVER
POWER This button is used for switching the receiver on and to
standby.
9STOP/ This button is used to end all functions and to open and
?
OPEN/CLOSE
close the CD compartment.
PAUSE ;This button is used to briefly interrupt CD playback
(PAUSE), without changing the unit settings.
PLAY BThis button is used to start or restart CD playback.
SEARCH / TUNING Q R
In CD mode: These buttons are used to start backward Qor
forward Rsearch.
In TUNER mode: You use these buttons to start the station search (AUTO
TUNING) or to advance the frequency step by step
(MANUAL TUNING).
SKIP / STATION O P
In CD mode: These buttons are used to skip to the previous or next
tracks.
In TUNER mode: These buttons are used to scroll through the station
memory in the direction indicated by the arrows.
SOURCE SELECTION
TUNER BAND This button is used to select the tuner and to switch to the
FM and MW bands.
CD This button is used to select the source CD.
TAPE/AUX This button is used to select the TAPE/AUX input.
DEFEAT This switch is used to bypass the BASS and TREBLE
controls
VOLUME This control is used for adjusting the volume.
LOUDNESS This switch is used during playback to adapt the volume
level to individual hearing sensitivity.
BALANCE This control is used to adjust the sound balance
between the left and right channels
BASS This is to adjust the bass tones.
TREBLE This is to adjust the high tones.
HEADPHONES This socket is for connecting standard stereo head-
phones with a 6.3 mm jack.
Volume is adjusted with the rotary VOLUME knob.
The receiver´s speaker outputs are automatically
switched off when the headphone jack is inserted, and
are automatically switched on again when it is removed.
MEMORY
In CD mode: This is used to call up the programming mode or to save
individual tracks.
In TUNER mode: This button stores a set station at the lowest respective
memory location.
CANCEL
In CD mode: This button is used to omit individual tracks from the
programme or to delete the complete programme.
In TUNER mode: This button is used to delete individual memory locations
or, if desired, the entire memory contents (by keeping the
button depressed for longer than 10 seconds).
EDIT
In TUNER mode: This button is used for selecting the station name input
mode.
In CD mode: This button is used to adjust the CD playing time to the
length of the cassette you are recording to.
In STANDBY mode: This button is used to call up the timer and clock
adjusting mode
REPEAT / ANT/CABLE
In CD mode: REPEAT This button is used to turn the repeat function
on and off.
In TUNER mode: ANT/CABLE This button is used to switch on the FM
antenna attenuator for reducing radio disturbance if your
tuner is connected to broadband cable and the reception
signal is too strong.
SHUFFLE / MONO
In CD mode: SHUFFLE This button is used to turn the shuffle function
on and off, which mixes up the track order.
In TUNER mode: MONO You use this button for selecting mono reception
if, for example, stereo reception exhibits too much
disturbing noise.
INFO
In CD mode:
This is used to change the information shown in the
display.
In TUNER mode: This button is used for switching the display between the
station name (RDS), or another name you assign,
RADIOTEXT and station frequency.
In any mode Pressing this button longer switches the timer on and off.
©16
Operating elements
GB
HIFI CD RECEIVER
RCD 400
R D S
POWER IO
POWER IO
POWER DEFEAT
PAUSE
PAUSE PLAY
PLAY
REPEAT
REPEAT
SHUFFLE
SHUFFLE
INFO
INFO
STOP
STOP
OPEN/
CLOSE
OPEN/
CLOSE
SKIP/STATION
SKIP/STATION
SEARCH/TUNING
SEARCH/TUNING
MEMORY
MEMORY
CANCEL
CANCEL
EDIT
EDIT TAPE/AUX
TAPE/AUX
CD
CD
TUNER BAND
TUNER BAND
DEFEAT
DEFEAT
VOLUME
VOLUME
LOUDNESS
LOUDNESS
HEADPHONES
HEADPHONES
TREBLE
TREBLE
BASS
BASS
BALANCE
BALANCE
R
R
L
L
+
+
+
+
-
-
-
-
ANT/CABLE
ANT/CABLE
MONO
MONO
HEADPHONES
LOUDNESS
STOP
OPEN/CLOSE PAUSE ;PLAY B
SKIP/STATION
O P
SEARCH/TUNING
Q R VOLUME
INFO SHUFFLE
MONO REPEAT
ANT/CABLE EDIT CANCEL MEMORY TREBLE BASS BALANCE
TUNER BAND CD TAPE/AUX
59 8A EPA 3
TUNED
ANTENNA
Display
1STATION NUMBER seven-segment display
This shows the number of the selected memory location (1 to 59 as either
one or two digits
2ɳ– This indicates that the tuner is receiving FM stereo broadcasts
3;B – This indicates that the CD is in playback or in pause mode.
4TUNED – This indicates that the unit is optimally tuned to a station
5Signal strength – The more dashes you can see, the stronger the
reception of the station you have tuned to.
614-segment display – for frequencies in MHz (FM) or kHz (MW),
(RDS) station name, radio text, names you have assigned or the selected
programme type.
7PROGRAM – This indicates that the CD is in programme mode.
8SHUFFLE – This indicates that the CD is playing tracks in random order.
9ANTENNA – comes on when the antenna attenuator is not switched on.
0REPEAT – This indicates that the CD is in repeat mode.
!CABLE – comes on during broadband cable reception if the antenna
attenuator is switched on with the ANTENNA/CABLE button.
@REMAIN – This lights up when the remaining time indication for the CD
player is selected.
#TOTAL – This lights up when the total time indication for the CD player is
selected.
Remote Control
Changing the batteries
If the range of your infrared remote
control seems to decrease, or if
certain individual functions can no
longer be carried out, you should
replace the batteries.
Two 1.5 Volt LR06 size AA are
required. To change the batteries,
open the compartment on the back of
the remote control. Ensure that the
batteries are inserted properly (note
the markings in the compartment).
And in the interest of the environment:
Remember that batteries must always
be disposed of properly.
GENERAL
y– This button is used to switch the unit to STAND BY.
SLEEP – this button is used to call up the sleep timer function.
Ǻ– This button is used to toggle the display modes of the active source.
ĭ– This button is used for muting the speakers.
VOLUME +/–– These buttons are used for controlling the volume of the
receiver.
TAPE – This button is used for selecting the TAPE input.
TUNER
TUNER – ThIs button is used for selecting the tuner (radio)
PTY – This buttons are used to select the programme type.
STATION 1 2 – These buttons are used for selecting stations
CD
CD – This button is used for selecting the CD player.
;– This button is used to switch the CD player to PAUSE.
9– This button is used to switch the CD player to STOP.
B– This button is used to start playback of the CD player
–DISC + – This button is only used for a CD changer.
O P – These buttons are used to select next or previous tracks on a CD.
RC 400
VOLUME
-+
TUNER STATION
TAPE
CD
SLEEP
PTY
DISC–+
PROGRAM ANTENNA ########MHz
12
0@
#9!
6
kHz
88
SHUFFLE REPEAT REMAIN TOTAL
CABLE
TUNED
54
7
8
3
©17
Display Remote Control
GB
Switching on and off
When you want to switch your receiver on, press the POWER button. The red
LED in the middle of the button indicates that the unit is on.
button depressed: POWER ON
button not depressed: STANDBY
The receiver will be activated and the last selected source will be selected.
When the receiver is switched to active mode (as described below), the LED in
the power knob lights up.
The receiver is muted for approximately 3 seconds when it is turned on in order
to suppress disturbing initial signal noise.
To switch the receiver to stand-by press the POWER button again.
Stand By
You can switch the system to STAND BY with the ybutton on the remote
control or with the POWER button.
The display shows the clock time.
When you want to switch your system on again, simply press one of the input
selection buttons on the unit or on the remote control or the POWER button.
Source Selection
To select a listening source, press either the corresponding button on the unit
or the corresponding button on the remote control.
Automatic Source Selection
When the receiver is switched on, the receiver automatically switches to the CD
input as soon as you press the CD player Bbutton.
Sound control
VOLUME The volume can be adjusted with the rotary VOLUME knob.
The volume can also be controlled via the remote control
with the VOLUME +/–buttons.
MUTING The volume can be completely muted by pressing the ĭ
button on the remote control.
This is useful, for example, if you want to take a telephone
call and do not want to be distracted by music, news, etc.,
from your system.
If the muting function is used when recording a tape, this
has no effect on the subsequent recording volume level as
only the speakers are muted.
The click you hear when you press the ĭbutton comes from
the relay which mutes the speakers.
The MUTING function can be deactivated by pressing the ĭ
button again or by pressing the VOLUME + button on the
remote control or any one of the input selection buttons.
BASS, TREBLE The BASS and TREBLE controllers can be used to
individually adjust the higher and lower frequencies from the
sound of your speakers. In this way, you can compensate for
surrounding acoustic irregularities which may be caused, for
example, by sound reflection behaviour on walls with
relatively large, empty surface areas, or ‘damping’ caused
by furniture or other objects.
LOUDNESS Pressing the LOUDNESS button slightly accentuates the
lower and higher frequencies which renders a more balanced
overall sound during quieter passages.
Its effectiveness depends in turn on the setting of the volume
knob. The sound is thus optimally adapted to human hearing
sensitivity, which is also dependent on the respective
volume.
If you have connected speakers which exhibit a great deal of
bass, LOUDNESS should always remain off to achieve a
more linear acoustic pattern. In this way, you compensate for
excessive emphasis of the lower frequencies.
DEFEAT The DEFEAT switch can be used to deactivate the bass and
treble control without changing the respective settings.
This function merely bypasses the signal path through the
bass and treble controls ensuring that the original sound is
reproduced with the highest fidelity.
BALANCE For effective stereo playback, it is important that the sound
emanates equally from both speakers.
Acoustic equalibrium can be distorted by furniture groups or
the listener´s position in a room, thus distorting the
impression of stereo sound.
The BALANCE controller can compensate for such
distortions.
©18
Amplifier part
GB
Switching on
• Select the radio input by pressing the TUNER BAND button.
– The first time you switch your unit on, it automatically switches to 'FM', and
the display indicates 87,50 MHz. STEREO ɳis also selected.
– Your unit is provided with the function 'LAST STATION MEMORY', which
means that the station that was playing when the set was switched off will be
selected again when the radio is switched back on.
Selecting the wave band
• Select the desired wave band (FM or MW) by pressing the TUNER BAND
button. Pressing this button switches to the next wave band in the following
order: FM - MW - FM.
– The display shows the selected band.
Adapting the antenna
If you receive broadcasts via broad band cable of a public or private cable
service, there may be high signal inputs at your antenna terminal, which may in
turn cause reception disturbances.
• If this is the case, press the ANT/CABLE button to switch on the input
attenuator ‘CABLE’ appears on the display. This reduces the antenna input
sensitivity, thus reducing disturbances. This setting is automatically stored.
FM reception MONO/STEREO
Normally, your unit is in stereo reception mode, which means that as soon as a
stereo signal of sufficient strength is detected, 'ɳ' appears in the display. If
stereo reception is disturbed, 'ɳ' disappears. In this way, disturbing
background noise is suppressed.
If noise-free stereo reception is not possible, you can switch your unit to MONO
reception.
• In this case, press MONO.
–'
ɳ' will disappear from the display.
The MUTING function is always switched off for MONO reception, allowing
the unit to receive even very weak broadcast signals.
RDS Radio Data System
Your tuner is an RDS tuner.
RDS (Radio Data System) stands for a new generation of radios that provides
the listener/user with more comfort and better reception in the short term, but
also opens up completely new information options for the future.
RDS-equipped receivers identify the tuned station (if it transmits 'RDS signals')
and indicate the name of the programme in the 8-place display (e.g. BAYERN 3,
SDR 3).
If you are tuned to an RDS station, the name of the station will be indicated after
a short time.
For more information, please see page 21.
Automatic station search
• To activate automatic station search (AUTO TUNING), press TUNING Q
or Runtil the frequency display begins 'to run'; then release the button.
– The search stops as soon as a station with sufficient reception quality is
found and tuned to precisely. The display shows TUNED.
– Every time you begin a search, the unit automatically switches to STEREO.
– A graph in the display indicates the field strength: the more illuminated
dashes you see, the stronger the reception.
–
The frequency of the received station is indicated in kHz (MW) or MHz (FM).
– If the search stops, the 'AUTO COMPARE' function first verifies whether the
station which has been found is already stored in the station memory. If this
is the case, the memory location of the station is displayed, as well as the
name of the station, if it already exists.
– Stations which are received with a weak field strength may be skipped.
These can be tuned to manually.
•
If desired, you can also interrupt the search by pressing TUNING QR.
Manual station search (manual tuning)
• Briefly press the TUNING
Q
or Rbutton to tune in the corresponding
direction in individual steps (FM: 25kHz; MW: 1 kHz).
• If you keep the button depressed, you can rapidly scan large frequency
ranges. When you release the button, AUTO TUNING is automatically
switched to. Muting is active during AUTO TUNING.
• If you briefly press one of the TUNING
Q
Rbuttons, manual tuning
is automatically switched to.
– Just as with automatic tuning , the TUNED flag and the number of
illuminated dashes indicate the reception quality.
– The 'AUTO COMPARE' function also verifies whether the found frequency is
already stored.
'LAST STATION MEMORY'
LAST STATION MEMORY means that the unit 'remembers' the last station that
was tuned to. This function ensures that the station which was selected before
the radio was switched off is automatically selected again when your radio is
switched back on.
ANTENNA FM 10530MHz
TUNED
ANTENNA FM 10530MHz
4
TUNED
©19
Radio
GB
Station memory
59 memory locations are available for storing stations.
•
Tune to the station you want to store with the station search function or manually.
• Press MEMORY.
– The station is stored at the next available memory location.
– The tuner software first checks the station memory for available memory
locations. If all the locations are occupied,’MEM FULL’ appears on the
display for approx. 1.5 seconds.
– Assigning a station frequency to two different memory locations is not
possible. The selected station is stored at the lowest available memory
location, meaning that you need not enter a number for memory locations.
– Every time the settings STEREO/MONO and ANTENNA/CABLE are changed,
they are automatically stored.
Storing stations
• If you want to store a station, press MEMORY.
– The first station which is stored is assigned to memory location 1, the
second station to memory location 2 and so on.
• If you want to move a stored station to another memory location, press
MEMORY.
– The station is always assigned to the first available memory location.
• Pressing the button again assigns a station to the next available memory
location.
• If you keep the button depressed, the memory locations are scanned one
after the other, deleting the previously assigned memory location.
Example:
You want to move your favourite station from memory location '6' to memory
location '1'.
• Select memory location '1'.
• Press CANCEL once.
– This deletes, or clears, memory location '1'.
You can also press MEMORY to move the station on location '1' to the next
available free memory location.
• Now select position '6', your favourite station, and then press MEMORY.
Your station is now stored on memory location '1'.
Calling up a stored station
• When you want to call up a stored station, press STATION OP. The
stations are called up in ascending or descending order.
Stations can also be selected via the system remote control:
• Select the radio input by pressing the TUNER button.
• Press the 1STATION 2buttons.
– The display shows the selected memory location number, and the unit
switches to this memory location.
– It is not possible to select a memory location which has not (yet) been
assigned to a station.
Example:
Memory location 6 is not assigned to a station.
If you are situated at memory location number 5 and press once STATION P
the unit will jump to memory location 7 (provided this location has been
assigned to a station).
Deleting a memory location
• If you want to delete a memory location to which a station is assigned, first
call up its number.
• Press STATION OPuntil you reach the station you want to delete.
You may also use the STATION 12buttons on the remote control.
• Press CANCEL.
– The memory location is deleted, and the memory location number does not
light up on the display anymore.
• Hold CANCEL down for 5 seconds if you want to delete all the memory
locations, for example after you move to another location.
– 'ERASE ?' appears briefly on the display.
• Keep the button depressed for an additional 5 seconds until the display
shows '87,5 MHz'.
– The station memory is deleted.
• If you now press one of the STATION OPbuttons, 'FREE' is shown on
the display.
• If you release the CANCEL button before these 5 seconds have elapsed, the
erase function is not carried out.
ANTENNA FM 10420MHz
8
©20
Radio
GB
RDS Radio Data System
Your unit is capable of receiving and evaluating RDS information which is broad-
casted along with the normal broadcast signal. The channel name is displayed and
automatically stored in the unit´s memory, overwriting names previously stored.
RADIOTEXT
Some RDS stations broadcast RADIOTEXT, which is additional information on the
station and programme being broadcast. RADIOTEXT information appears as
‘running’ text in the display. RADIOTEXT is transmitted character-by-character
by the radio station. As a result of that it may take some time until the entire text
has been completely received.
• RADIOTEXT is called up by pressing the INFO several times until the
running text of the RADIOTEXT signal can be seen.
– If a station does not broadcast RADIOTEXT, the unit switches automatically to
the frequency indication.
Switching displays
• Pressing INFO briefly switches the display (when available) between station
name (RDS or one you have entered), RADIOTEXT (with RDS stations), and
frequency.
– When the station name is displayed, only the memory location number is
displayed to the left of the name.
Assigning station names
Stations which do not transmit the RDS code can be assigned any name of your
choice.
• Press EDIT.
– With TUNING
Q
R, you can move the cursor in the desired
direction. You can enter up to eight characters.
– With STATION OP, you can move forward and backward through the
alphabet, the numbers 0-9 and to the space key.
• When you are ready to conclude an input and exit the input mode to store a
name, press EDIT or MEMORY.
Note:
If you attempt to assign a name to a station which transmits the RDS code,
RDS-DATA appears in the display, indicating that a name cannot be assigned.
Deleting a name
• If you press CANCEL when the input mode is selected, the previous name is
deleted and the cursor jumps to the first (left) position.
Programme type PTY (on the remote control)
RDS allows you to select FM stations according to programme type. There are
16 programme categories.
• By using the PTY button on the remote control, you can call up the actual
programme type. Other types can be selected with the STATION 1 2 buttons.
– The display briefly shows the programme type and then the name of the
stations that broadcast this programme type.
– If there are no stations broadcasting a given programme type, the display
briefly shows: 'NONE'.
What is meant by programme types?
NEWS = News service
Programmes that usually give brief reports on current events and statements
that are of public interest. Also: weather and traffic reports.
AFFAIRS = Politics and current events
Programmes that supplement or give more extensive information on the news,
e.g. reports and commentary, news magazine. These programmes also offer
detailed accounts on related issues, e.g. documentation and discussions. Also:
broadcasts of political and similar events.
INFO = Special informative reports
Programmes that offer helpful information, e.g. consumer magazine, health tips,
travel tips, special weather service. In addition, there are also programmes for
individual target groups, e.g. for farmers, children, foreign employees.
SPORT = Sports
All types of sports programmes.
EDUCATE = Learning and continuation of education
Educational programmes for those who wish to gain or further their knowledge
of different fields; e.g. schools' radio, educational radio broadcasts, foreign
language courses.
DRAMA = Radio plays, literature
All types of radio plays, e.g. radio thrillers and science fiction programmes;
readings from literary works.
CULTURE = Culture, church and society
Programmes that offer reports, commentaries or evaluations on topics from the
above-mentioned areas; e.g. discussions on theater, films and books, literary
radio series, reports on the school and educational system, church radio; also
prayers and church services.
SCIENCE
Programmes that deal with methods and findings from the world of science, as
well as with issues from the field of technology.
VARIETY
Programmes that mostly offer light entertainment, e.g. talk shows, quiz shows
and guessing games, cabaret shows, sketches, chat shows etc., often featuring
music.
POP M. = Pop music
Programmes with popular and modern hits from home and abroad.
ROCK M. = Rock music
Programmes with international music of the younger generation, often with a
heavy emphasis on rhythm.
EASY M. = Light music
Programmes with light music of all types, e.g. folk music, dance music,
musicals and operettes.
LIGHT-M. = Light classical music
Programmes with popular classical music; music, often abbreviated works of
excerpts of works, e.g. overtures, arias, etc.
CLASSICS = Serious classical music
Programmes with more serious works, e.g. symphonies, chamber music, full-
length operas.
MUSIC = Special music programmes
Music programmes that cannot be assigned to one of the above mentioned
programme types, e.g. folklore, jazz, experimental music.
7
7
ANTENNA FM 10530MHz
4
TUNED
ARD-RADI
4
©21
Radio
GB
General information
To remove a CD from its case, hold it on its
outside edge with the index finger and thumb.
Do not touch the surface of a CD with your fingers.
Always store a CD in its case when it is not being
used.
Place a CD in its case with the label facing up and
press down lightly.
Do not leave CD's for any length of time in direct sunlight or other places where
high temperatures may occur, such as in the vicinity of heating apparaturs. Do
not expose the CD's to humidity or rain.
Switching on
• Select the CD player by pressing the CD button.
– If you have not inserted a CD, ‘NO DISC’ appears briefly in the display, and
then ‘–:– –’.
– After the unit has been switched on, it is always in the STOP mode.
Inserting a CD
Open the CD compartment by pressing ?
Insert the CD so that the printed side of the
disc is facing up. Place CD singles (8 cm)
in the depression in the compartment.
Press ?again. The compartment closes.
The CD compartment can also be closed by
hand. After the compartment has closed, the
unit reads the contents of the CD. Information on the number of tracks, playing
length, etc. are recorded there. This information is shown in the display.
CD playback
• Press Bon the unit (or on the remote control) to start playback. The display
shows the number of the track being played as well as the elapsed playing
time (relative playing time).
The display can also show you additional information.
• Press INFO on the unit or Ǻon the remote control and the display shows you
the CD´s remaining playing time, ‘REMAIN’.
• If you press this button once more, the display shows the total playing time
and the total number of tracks.
• If you press Bagain, the running track will be restarted (REPLAY function).
• If you want to stop playback without changing the unit settings, press ;.
– The ;indicator on the display lights up.
• While playback is interrupted, you can press O P to skip to another track,
or press Qor Rto search for a certain passage.
• If you want to continue with playback, press ;or Bonce more.
• To stop playback, press 9(STOP).
Changing the display
• You can call up various information in the display by pressing the INFO
button on the unit or the Ǻbutton on the remote control.
– The displays changes according to the operating mode.
Skip function (TRACK NEXT/PREVIOUS)
• By pressing SKIP Pyou can skip to the beginning of the next track in the
track sequence (NEXT), and by pressing SKIP Oyou can skip to the
beginning of the preceding track (PREVIOUS).
• While in STOP mode you can choose a certain track.
– Playback begins immediately.
Fast search (SEARCH)
• By pressing SEARCH Qor R, you activate the fast search in the
corresponding direction.
– During the search procedure you can listen to the tracks.
– After approx. 5 seconds the unit ´s mute function is activated.
REPEAT function
The repeat function allows you to repeat the entire CD (or your programme).
• By pressing the REPEAT button, you activate the repeat function; by
pressing the button again you deactivate the repeat function.
– The display shows you the function you have chosen.
SHUFFLE function
• By pressing SHUFFLE you activate the shuffle function which mixes up the
order of the CD tracks. A random number generator selects the order of the
tracks to be played.
– All operating functions continue to function as during normal playback.
– The random number generator also controls the skip function.
– The display shows the function you have selected.
• The function is deactivated by pressing SHUFFLE or 9?; in this case the
remaining tracks are played in their normal order or playback is stopped.
– The shuffle function is also possible during playback of a programme.
142
5
REPEAT
SHUFFLE
027
4
REPEAT
4611
12
TOTAL
4432
1
REMAIN
016
1
4611
12
TOTAL
12 cm
8 cm
6.OYEMICANTO(HearMyVoice)
7.DON'TWANNALOSEYOU
8.GETONYOURFEET
9.YOURLOVEISBEDFORME
10.CUTSBOTHWAYS
11.OYEMICANTO(SpanishVersion)
12.SIVOYAPERDERTE
EPC4651452
BIEM/STEMRA
STEREO
Allrightsoftheproducerandoftheowneroftherecordedworkreserved.Unauthorisedcopying,
publicperformance,broadcasting,hiringorrentalofthisrecordingprohibited.MadeinAustria
1.AY,AY,I
2.HEREWEARE
3.SAY
4.THINKABOUTYOUNOW
5.NOTHIN'NEW
COMPACT
DIGITALAUDIO
1
2
©22
CD
GB
Programming
You can programme your own track sequence for each CD.
The order of the programmed tracks determines the order in which they are
played. Each track can be stored as often as you like. The time display shows
you the total playing time of the programme.
There are two methods of programming the desired track sequence. You can
enter a programme in the STOP mode or in the PLAY mode.
You can store a sequence of up to 30 tracks.
Programming in STOP mode
• Insert a CD and close the compartment.
– The CD player reads the contents of the CD. The display shows the total
playing time and the number of tracks.
• Press MEMORY to select the PROGRAM mode.
– At the left, the display shows PROGRAM and the total playing time of
programme.
• Select the first track you want to programme with Oand P.
– The track number flashes.
– The display shows the time which will be the total time of your programme
when you store the selected track. In this way you can easily search for tracks
which fill in your program to a desired total time (e.g. for recording purposes).
• By pressing MEMORY, the track is stored in your programme.
– The track number at the left stops flashing.
• Choose the next track you wish to include in your programme and press
MEMORY to save it.
–
The playing time display is updated.
• You can leave the programme mode by pressing the 9button.
Programming in PLAY mode
You can also enter a programme while a CD is playing.
• Press MEMORY.
– The number of the current track flashes and the display shows the time which
will be the total time of your programme when you store the selected track.
• If you wish to add this track to your programme, press MEMORY again.
– The track number stops blinking.
• If you wish to add a track to your programme other than the one currently
being played, press the Oor Pbutton.
• Save your selection by pressing MEMORY.
• You can leave the programme mode by pressing the 9button.
Programme playback
• To play the programme you have created, press B(PLAY).
– All functions of the playback mode continue to function.
Changing the programme
It is possible to change the programme you have created; you can add
additional tracks or delete tracks from your programme.
• If you wish to add an additional track, press MEMORY and select the
desired track by pressing OPon the keypad of your remote control. The
corresponding track number blinks.
• Use MEMORY to add the track to your programme.
• If you wish to delete a track you can do so by selecting the track and then
pressing CANCEL.
– The playing time display is continuously updated.
Deleting the programme
• To delete the entire programme, press CANCEL while in the STOP mode.
•
Opening the compartment (?) or shutting off the unit also deletes the programme.
EDIT function
This function notifies the CD player as to the playing time of a cassette tape.
• Press the EDIT button to call up the entries C 46, C 60, C 90, C100, C 110,
C 120 one after another.
• Select the corresponding playing time of the cassette.
– After a brief pause the unit will show you the total playing time and which
tracks will be recorded onto the A side of the cassette.
• Start the CD COPY function on the cassette deck.
– It starts to record on side A. When it is finished, the display shows the tracks
that will be recorded onto the B side.
• This function can also be used to record a programme that you have saved.
PROGRAM 420
1
TOTAL
PROGRAM 420
1
TOTAL
PROGRAM 000
TOTAL
©23
CD
GB
Setting the clock
Your unit has a 24 hour clock.
• Select STANDBY mode with the POWER button.
• Press the EDIT button two times. CLOCK appears on the display
– The time starts flashing in the display.
• To set the time, press the QSEARCH/TUNING Rbuttons. Each
short pressure of the buttons increases the displayed number by one.
Holding the button down increases the setting at high speed.
• Press the MEMORY button to store the setting.
• If you wish to leave the clock setting mode without changing the settings,
press the EDIT button again.
Note: In case of a power breakdown, the actual clock time is stored in the
memory. When power returns the clock start running again from the stored time
onwards.
The timer function
Before setting the timer, ensure that the correct clock time is set.
Switching the timer on and off.
The timer can be switched on or off in any mode of the set, even in standby
mode.
• You can activate and deactivate the timer with a long pressure on the INFO
button.
– If the timer is switched on, the display shows ‘TIMER ON’ during 1 second
and then returns to showing the original information. The LED in the POWER
button starts blinking.
– If the timer is switched off (another long pressure on the INFO button), the
display shows ‘TIMER OFF’ during 1 second and then returns to showing
the original information.
Setting the timer
• Select STANDBY mode with the POWER button.
• Press the EDIT button once. The display shows briefly TIMER.
– The start time starts flashing in the display.
e.g. ‘02:30 ON ‘
• To set the start time, press the QSEARCH/TUNING Rbuttons. Each
short pressure of the buttons increases the displayed number by one.
Holding the button down increases the setting at high speed.
• Press the SKIP/STATION Pbutton to prepare for setting the stop time.
• Adjust the stop time with the QSEARCH/TUNING Rbuttons.
• Press the MEMORY button to store the timer setting.
– As soon as the timer is activated, the LED in the POWER button will start
flashing.
– The set will start with the same function that was active before the set was
switched to standby (same source, same tuner station or same track number
of the CD).
– If the set was already switched on when the timer is activated, the actual
function continues and the set switches off at the set stop time.
– After the timer procedure the set will be switched to standby and the LED in
the POWER button will stop flashing.
The SLEEP function (on the remote control)
Your unit is provided with a sleep function which switches the unit off after a set
time has elapsed.
This allows you, for example, to fall asleep to music. You don't need to switch
the unit to standby as this happens automatically when the time you set has
elapsed.
The SLEEP button is on the remote control.
• Press the SLEEP button once.
–'SLEEP 60' appears on the display.
– After one second the set will be switched on and after 60 minutes the unit
will automatically switch to standby.
• If you press the SLEEP button again within one second you can select the
other sleep times: 60 –> 40 –> 30 –> 20 –> 10 –> 5 –> 0.
– During the sleep function the SLEEP indication will be shown on the display.
Note:
• While the sleep function is still active, you can reset the sleep time to 60
minutes by pressing the SLEEP button.
• Deactivate the SLEEP setting by switching the unit to standby (with the y
button on the remote control) or by pressing the SLEEP button until
'SLEEP 0' appears.
©24
The Clock and Timer
GB
Technical data
Amplifier part
Output power (DIN45500):
Music (4 Ω).......................................................................2 x 50 W
Nominal (4 Ω, 0.7% dist., 1 kHz) ......................................2 x 30 W
Input sensitivity / impedance:
Line IN....................................................................180 mV / 47 kΩ
Distortion: Nominal power -1dB, 8 Ω, 1 kHz................................≤0.01 %
Signal-to-noise ratio....................................................................≥94 dB
Tuner part
Sensitivity
Mono (S/N = 26 dB) ..............................................................1.1 µV
Stereo (S/N = 46 dB) ..............................................................35 µV
Frequency ranges:
FM..................................................................87.50 ... 108.00 MHz
MW ........................................................................528 ... 1605 kHz
CD part
Frequency response ± 0.1 dB............................................20 .. 20,000 Hz
Signal-to-noise ratio............................................................................96 dB
Distortion THD.......................................................................................80 dB
Dynamic range......................................................................................96 dB
General
Power supply:
Voltage.................................................................................230 V ~
Frequency..........................................................................50/60 Hz
Power consumption.............................................................. 150 W
Standby power consumption ..................................................< 6 W
Dimensions & weight
W x H x D........................................................435 x 75 (+12) x 300 mm
Weight..............................................................................approx. 5.3 kg
Extras: .........................................................................Instructions For Use
.........................................................................................Ident card
...............................................................Remote control transmitter
........................................2 x 1,5 VC micro batteries type LR06, AA
...............................................................................FM wire antenna
...............................................................AM loop antenna + screws
All rights reserved
This device is interference suppressed in accordance with applicable EC
regulations.
This device complies with safety regulation VDE 0860 and thus with
international safety regulation EN 60065.
Protection circuits
Your receiver is provided with series of electrical protection devices which
safeguard your speakers against damage. Overloads are thus almost instantly
checked. If your unit overheats, a thermal error is recognized. In this case, set is
switched off. In case this happens, you should pull the plug from the mains socket
and remove all objects that may cover the ventilation slots on the top cover of
the unit. Let the unit cool down for a few minutes before reinserting the plug.
Caring for the unit
Wipe the housing clean with a soft, dry and antistatic cloth.
Polishing and cleaning agents can damage the surface of the housing.
Trouble shooting
The following checklist will help you to correct most of the problems that can
occur with your unit.
Before you go through the following list, verify if the mains cable, antenna
cable(s) and speaker cables are securely connected.
If the following list does not help, please consult your HiFi dealer.
Problem Cause (and correction)
The receiver switches The transformer could be overheated.
off
Pull the plug from the mains socket and remove all objects
that may cover the ventilation slots on
the top cover of the
unit. Let the unit cool down for approx. 15 minutes
before before reinserting the plug.
No sound
Your unit is overheated., the volume level is automatically
reduced and the speakers are disconnected.
Pull the plug from the mains socket and remove all objects
that may cover the ventilation slots on
the top cover of the
unit. Let the unit cool down for a few minutes before
reinserting the plug.
The unit does not If the unit ‘hangs’ and you get no response whatsoever,
function this could be due to electrostatic discharge phenomena.
Pull the plug from the mains socket and re-insert.
No sound. Turn the VOLUME controller to the right.
If headphones are connected, disconnect them.
Ensure that speakers are properly connected.
Make sure that the MUTING function is not switched on (
ĭbutton on the remote control).
Due to bad stereo reception the muting function is active.
Press MONO to select mono reception or adjust the
frequency.
Strong hum or hiss. Adjust the aerial.
Station signal is too weak. (Connect to an outside aerial
for improved reception).
No sound from one
speaker or incorrect Check connection of faulty speaker.
balance between
left and right speaker.
Left and right channels
Check speaker connections /cable set up.
interchanged.
No bass, or apparent
incorrect placement Check speaker connections for correct cable polarity.
of instruments.
The remote control Replace the batteries.
does not work.
Too far away from the unit, or pointed at an excessive angle
The CD does not CD player is switched to PAUSE.
function Condensation has formed on the lens of the laser due
to a dramatic change in temperature;
this will disappear
automatically after some time.
CD compartment CD not correctly inserted.
does not close.
'NO DISC' appears No CD in the compartment. CD is scratched, dirty or
in display. warped or is inserted upside down. Insert another CD.
Playback does not CD player is in PROGRAM or SHUFFLE mode.
begin with the first title.Press the STOP button and then the PLAY
button.
©25
Important information
GB
GRUNDIG AUDIO INTERNACIONAL 04701 BRAGA 0PORTUGAL 0 1 2 3 4 5 6 7 8 9 /YS 895

Other manuals for RCD 400

1

Other Grundig Car Receiver manuals

Grundig GRKHD01 User manual

Grundig

Grundig GRKHD01 User manual

Grundig EC 4790 CD User manual

Grundig

Grundig EC 4790 CD User manual

Grundig WKC 2201 RDS User manual

Grundig

Grundig WKC 2201 RDS User manual

Grundig EC 4290 CD User manual

Grundig

Grundig EC 4290 CD User manual

Grundig AD 182 H User manual

Grundig

Grundig AD 182 H User manual

Grundig WKC 3301 RDS User manual

Grundig

Grundig WKC 3301 RDS User manual

Grundig SCD 5410 DAB User manual

Grundig

Grundig SCD 5410 DAB User manual

Grundig EC 4000 RDS User manual

Grundig

Grundig EC 4000 RDS User manual

Grundig WKC 2804 VD User manual

Grundig

Grundig WKC 2804 VD User manual

Grundig EC 4790 CD User manual

Grundig

Grundig EC 4790 CD User manual

Grundig Advance CC User manual

Grundig

Grundig Advance CC User manual

Grundig Allixx SCC 5460 RDS User manual

Grundig

Grundig Allixx SCC 5460 RDS User manual

Grundig SCD 3390 RDS Challenge 600 CD User manual

Grundig

Grundig SCD 3390 RDS Challenge 600 CD User manual

Grundig SCC 1501 User manual

Grundig

Grundig SCC 1501 User manual

Grundig WKC 5201 RDS User manual

Grundig

Grundig WKC 5201 RDS User manual

Grundig Advance CD User manual

Grundig

Grundig Advance CD User manual

Grundig WKC 5200 RDS User manual

Grundig

Grundig WKC 5200 RDS User manual

Grundig SOUND NEXT EC 4700 RDS User manual

Grundig

Grundig SOUND NEXT EC 4700 RDS User manual

Grundig 5600 RDS User manual

Grundig

Grundig 5600 RDS User manual

Grundig Aura v3 User manual

Grundig

Grundig Aura v3 User manual

Grundig RCD 400 User manual

Grundig

Grundig RCD 400 User manual

Grundig EC 4290 CD User manual

Grundig

Grundig EC 4290 CD User manual

Grundig RC 400 User manual

Grundig

Grundig RC 400 User manual

Grundig Smartradio User manual

Grundig

Grundig Smartradio User manual

Popular Car Receiver manuals by other brands

Kenwood KDC-X994 quick start guide

Kenwood

Kenwood KDC-X994 quick start guide

Eclipse AVN 6600 owner's manual

Eclipse

Eclipse AVN 6600 owner's manual

JVC KD-DV5301 instructions

JVC

JVC KD-DV5301 instructions

Boss Audio Systems 758DBI user manual

Boss Audio Systems

Boss Audio Systems 758DBI user manual

Custom Radio CSS-6000 owner's manual

Custom Radio

Custom Radio CSS-6000 owner's manual

Hyundai CMRX 4807 SU instruction manual

Hyundai

Hyundai CMRX 4807 SU instruction manual

Aiwa CT-X429 operating instructions

Aiwa

Aiwa CT-X429 operating instructions

Sony CDX-GT414U operating instructions

Sony

Sony CDX-GT414U operating instructions

Sony XA-V7W Service manual

Sony

Sony XA-V7W Service manual

Kenwood KDC-4590R/RV instruction manual

Kenwood

Kenwood KDC-4590R/RV instruction manual

Antique Automobile Radio 343201B Installation and operating instructions

Antique Automobile Radio

Antique Automobile Radio 343201B Installation and operating instructions

Pioneer Premier DEH-P650 Operation manual

Pioneer

Pioneer Premier DEH-P650 Operation manual

VDO CR 2201 datasheet

VDO

VDO CR 2201 datasheet

Clarion AXZ610 owner's manual

Clarion

Clarion AXZ610 owner's manual

JVC KS-FX945R instruction manual

JVC

JVC KS-FX945R instruction manual

DNA ACD3 user manual

DNA

DNA ACD3 user manual

Jensen CD315X Operation

Jensen

Jensen CD315X Operation

Valor Multimedia ITS-700W owner's manual

Valor Multimedia

Valor Multimedia ITS-700W owner's manual

manuals.online logo
manuals.online logoBrands
  • About & Mission
  • Contact us
  • Privacy Policy
  • Terms and Conditions

Copyright 2025 Manuals.Online. All Rights Reserved.