Inspection Certificate
Kontrollschein ●Bulletin de contrôle ●Certificato di controllo ●
Certificado de control
Please keep safely!
Bitte gut aufbewahren! ●A bien conserver, s.v.p.! ●Da conservare! ●
¡Para conservar!
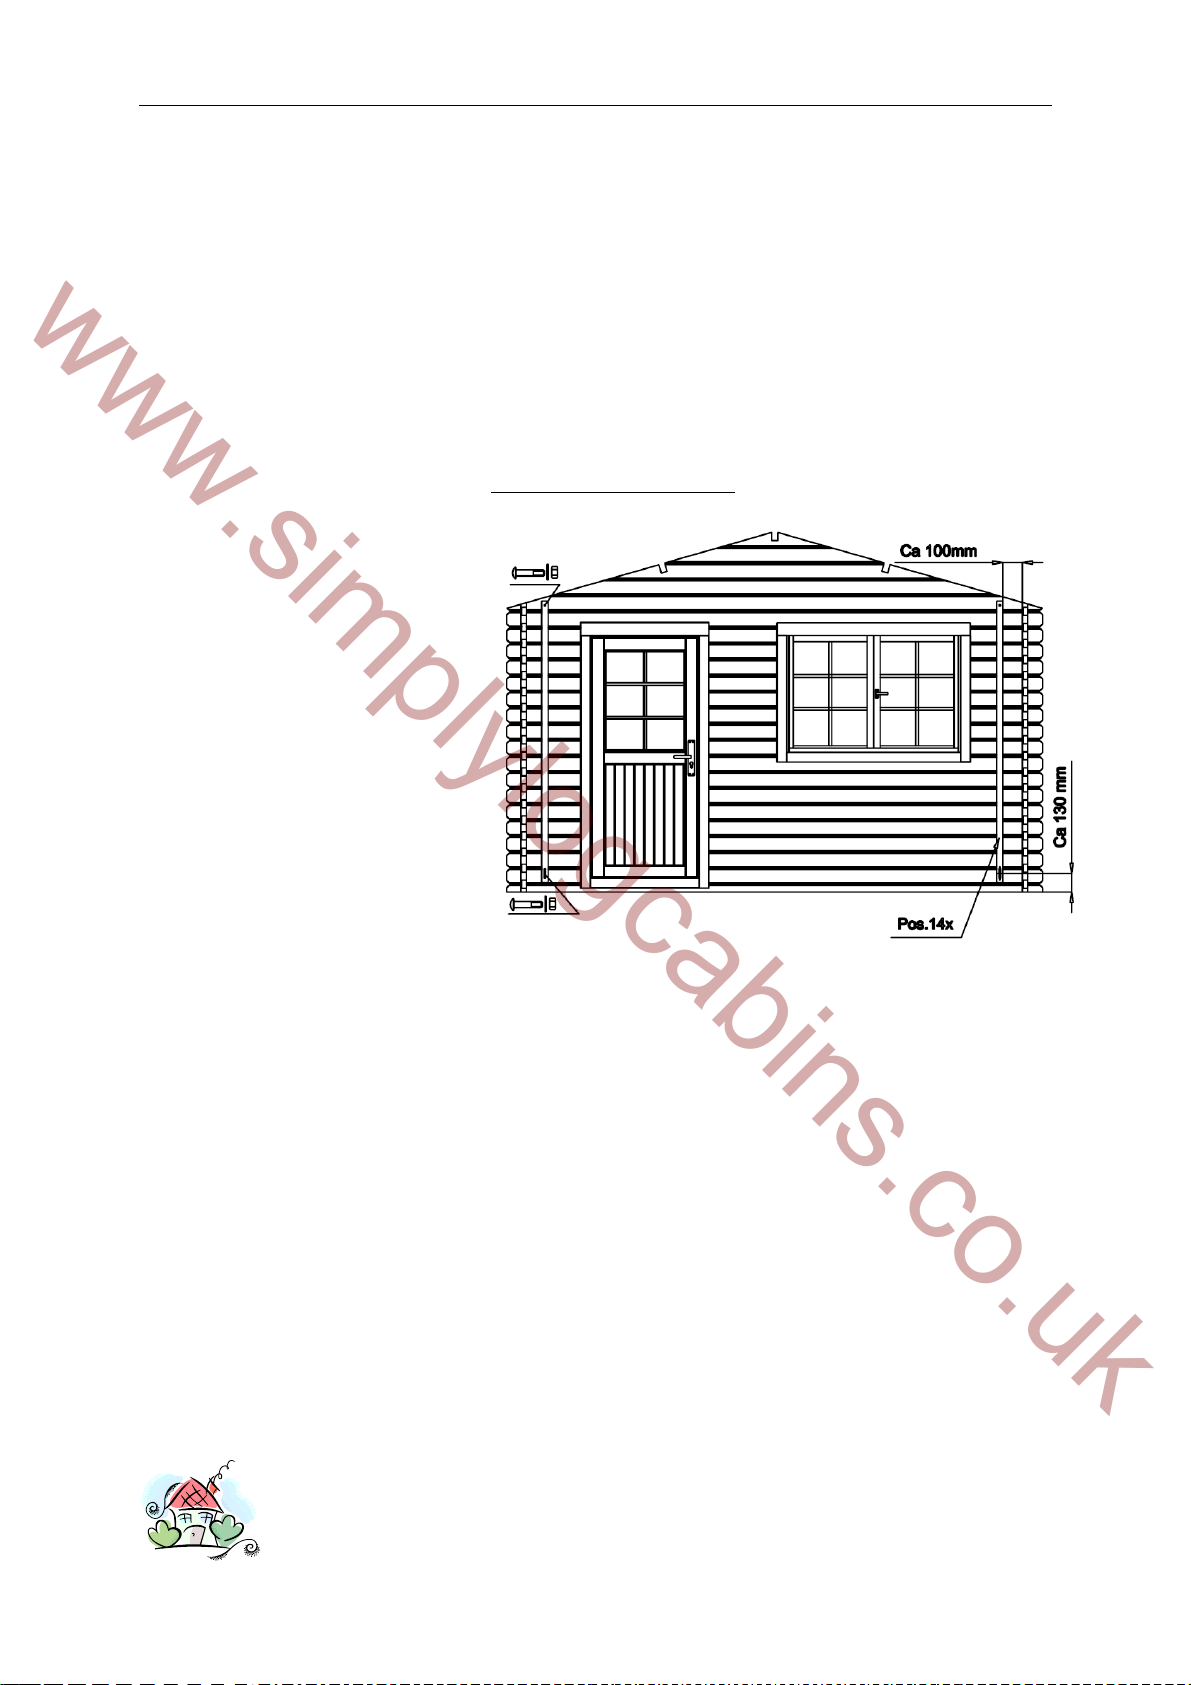
Log cabin FRB44-3535
Blockhaus ●Maisonnette en poutres ●Casa di travi ●Casita
English: The house you have purchased was manufactured in accordance with the high quality norms. The building unit has been carefully
inspected and packed. In order to avoid possible problems during the assembly carried out by yourself or the building company of your
choice, we recommend that you inspect the delivery for its completeness in accordance with the list of pieces before assembly. This
inspection must be carried out within 14 days after delivery to your place. Warranty claims are limited to the exchange of defective
materials. Defective building parts, which have already been used or painted, are excluded from being replaced. All further claims are
excluded! In cases of complaints, please pay attention to the following procedures: Please present this inspection certificate along with the
sales receipt to your place of purchase. Only in cases where these documents are presented will the complaint be dealt with quickly and
without complications.
Deutsch: Das von Ihnen gekaufte Haus wurde nach der hohen Qualitätsnorm gefertigt. Der Bausatz wurde sorgfältig geprüft und verpackt.
Um etwaige auftretende Probleme während des Aufbaus durch Sie oder Ihre Aufbaufirma zu vermeiden, kontrollieren Sie bitte die
Lieferung auf Vollständigkeit laut Stückliste vor dem Aufbau. Diese Kontrolle muss innerhalb 14 Tagen nach Anlieferung bei Ihnen erfolgen.
Ansprüche auf Gewährleistung beschränken sich auf den Austausch von fehlerhaftem Material. Fehlerhafte Bauteile, die bereits verbaut
oder gestrichen wurden, sind vom Umtausch ausgeschlossen. Alle weiteren Ansprüche sind ausgeschlossen! Sollte es zu einer
Beanstandung kommen, beachten Sie folgende Vorgehensweise: Legen Sie Ihrem Fachhändler diesen Kontrollschein zusammen mit dem
Einkaufsbeleg vor. Nur bei Vorlage dieser Unterlagen ist eine schnelle und problemlose Bearbeitung Ihrer Beanstandung möglich.
Français: La cabane que vous venez d’acheter a été fabriqué en respectant de hautes normes de qualité. L’ensemble de construction a
été testé et emballé avec soin. Afin d’éviter des problèmes éventuels pendant la construction par vous-même ou la société de construction
mandatée, nous vous prions de bien vouloir vérifier que toutes les pièces ont été fournies selon la liste des pièces avant que vous ne
commenciez la construction. Il vous incombe de faire ce contrôle dans les 14 jours après la fourniture. Les revendications en
dédommagement se limitent à l’échange de matériel défectueux. Des pièces de construction défectueuses, déjà construites ou peintes,
sont exclues de tout échange. Toutes les revendications ultérieures sont exclues ! Si une réclamation avait lieu, veuillez respecter le
déroulement suivant : Il vous faudra présenter, à votre commerçant spécialisé, ce bulletin de contrôle avec le récépissé de l’achat. Ce ne
sera que moyennant présentation de ces documents qu’un traitement rapide et sans problème de votre réclamation sera possible!
Italiano: La casetta che avete acquistato è stata prodotta secondo la norma di alta qualità. Il kit è stato controllato ed imballato con cura.
Per evitare eventuali inconvenienti durante il montaggio, si prega di verificare, prima del montaggio, la completezza della fornitura in base
alla distinta dei pezzi. Tale verifica deve essere effettuata entro 14 giorni dalla consegna. Eventuali diritti di garanzia si limitano alla
sostituzione di materiale difettoso. Gli elementi difettosi già montati o verniciati sono esclusi dal diritto alla sostituzione. Ogni altro diritto
resta escluso! In caso di reclamazione, procedere nel modo seguente: presentare questo certificato di controllo unitamente alla prova
d’acquisto al rivenditore. Solo in questo modo la Sua reclamazione potrà essere evasa rapidamente e senza problemi.
Español: La casa que ha adquirido ha sido fabricado de acuerdo con las normas de alta calidad. La construcción de la unidad ha sido
cuidadosamente inspeccionada y embalada. Con el fin de evitar posibles problemas durante la montaje llevada a cabo por usted o la
empresa de construcción de su elección, le recomendamos que inspeccione la entrega de acuerdo con la lista de las piezas antes del
montaje. Esta inspección deberá realizarse dentro de los 14 días después del parto a su lugar. Las reclamaciones de garantía se limita al
intercambio de materiales defectuosos. La construcción de partes defectuosas, que ya han sido utilizados o se pintan, no pueden ser
reemplazados. Todas las otras reclamaciones están excluidos! En los casos de quejas, por favor, preste atención a los siguientes
procedimientos: Por favor presente este certificado junto con el recibo de venta a su lugar de compra. Sólo en los casos en que estos
documentos se presentan a la denuncia se resuelva de forma rápida y sin complicaciones.
Factory inspection by ●Werkskontrolle durch ●Contrôle à partir
de l’usine par ●Collaudato da ●Controlado en la fábrica por :
…………………………………………………….......
Pack number ●Pack Nr. ●Packet n° ●Pacco N. ●Nopaquete:
……………………………………………………………
Date ●Datum ●Date ●Data ●Fecha :……………….....……
To be completed by buyer! (Please use block letters) ●Vom Käufer auszufüllen! (Bitte in Druckschrift) ●A remplir par l’acheteur! (en
lettres d’imprimerie, s’il vous plaît) ●Da compilare dall’acquirente! (in stampatello) ●Rellena el cliente (en mayusculas por favor) :
Place of purchase ●Bezugsquelle ●Source
d’achat ●Acquistato presso ●Lugar de compra :
……………………………………………
……………………………………………
……………………………………………
Sales receipt No. ●Kaufbeleg-Nr. ●Récépissé n°
●Prova d’acquisto N. ●Norecibo: .……...........
Delivery date ●Lieferdatum ●Date de livraison ●
Data di consegna ●Fecha de entrega: .………...
Buyer’s address ●Kundenanschrift ●Adresse du client ●Indirizzo del cliente ●
Dirección del cliente:
…………………………………………………………………………
…………………………………………………………………………
Telephone ●Telefon ●Téléphone ●Telefono: ...……………………..……...
Sales receipt date ●Kaufbeleg-Datum ●Date du récépissé ●Data prova
d’acquisto ●Fecha recibo :………….…...………………………………
Forwarder: □Pick-up □Others ●Durch: □Spedition □Selbstabholer ●
Par: □Transporteur □Propres moyens ●Tramite: □Spedizioniere □Mezzo proprio
●Entrega:Transporte organizado □transporte de cliente
Description of complaint ●Schilderung der Beanstandung ●Déscription de la réclamation ●Descrizione della reclamazione ●
descripción de queja: (Please keep the parts which are the object of the complaint until the complaint is settled! ●Bitte die
reklamierten Teile aufheben, bis die Reklamation erledigt ist! ●Veuillez garder les pièces contestées jusqu’à ce que la réclamation soit
traitée définitivement! ●Si prega di conservare i pezzi reclamati fino all’evasione della reclamazione!) ●Por favor mantiene todas detalles
reclamadas hasta que la queja se ha resuelto.
___________________________________________________________________________________
___________________________________________________________________________________
___________________________________________________________________________________
___________________________________________________________________________________
www.simplylogcabins.co.uk