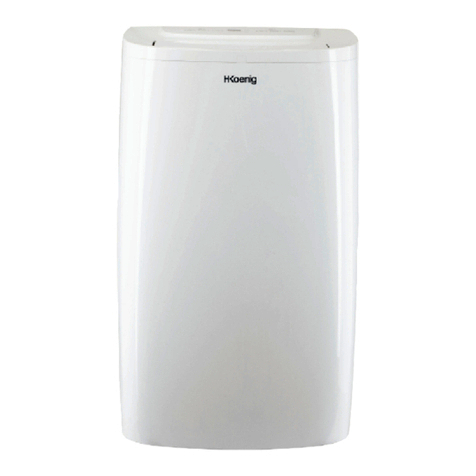
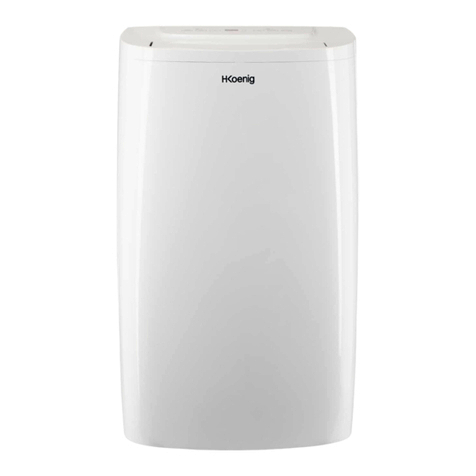
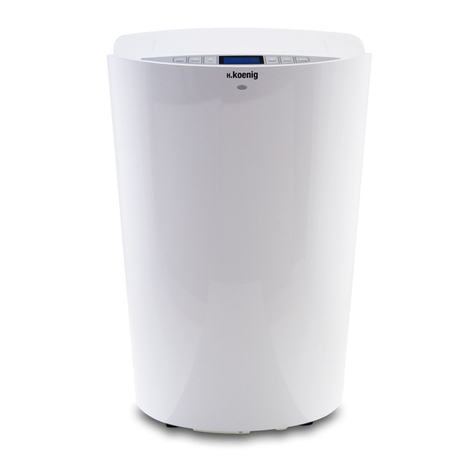
H.Koenig KOL7012 User manual

Instruction manual
Manuel d'utilisation
Bedienungsanleitung
Handboek
Manual de Utilización
Manuale d’uso
!
KOL7012(
Portable!Air!Conditioner!
Climatiseur!Portable!
Mobile!Kilmaanlage!
Draagbare!Air!Conditioner!
Aire!acondicionado!portátil!
Condizionatore!portatile!
!

ENGLISH!
Thank you very much for selecting this new model of Portable Air Conditioner, please read this
Use and Care Manual carefully before installing and using this appliance. Please keep this Use
and Care Manual properly for future reference.
Safety Instructions
Electrical Specifications
1. All wiring must comply with local and national electrical codes and be installed by a
qualified electrician. If you have any questions regarding to the following instructions, contact
a qualified electrician.
2. The unit must be installed in accordance with national wiring regulations. Check available
power supply and resolve any wiring problems before installation and operation of this unit.
3. For your safety and protection, this unit is grounded through the power cord plug when
plugging into a matching wall outlet. If you are not sure whether the wall outlet in your home
are properly grounded, please consult an electrician. If supply cord is damaged, it must be
replaced by the manufacturer, its service agent or similarly qualified person in order to avoid
any hazards.
4. This appliance is not intended for people(including children)with reduced physical,
sensory or mental capabilities, or lack of experience and knowledge, unless they have been
given supervision or instruction concerning use of the appliance by a person responsible for
their safety. Young children should be supervised to ensure that they do not play with the
appliance.
WARNING:
To reduce the risk of fire, electrical shock or injury when using your air conditioner, follow these
basic precautions:
l Do not use this unit in wet environment, like outdoor or bathroom etc., indoor use only.
l Do not remove ground prong.
l Do not use an adapter.
l Do not use an extension power cord.
l Never share the power outlet with other appliances.
l Never connect or disconnect the power plug with wet hands, to avoid electric shocks.
l Never turn off the unit by unplugging.
l Unplug air conditioner before servicing.
l Never dismantle, repair or modify the unit without authorization to avoid body injury or
property damage, be sure it repaired by manufacturer or professionals.
l Never put any objects into the unit.

l Never cover or obstruct air inlet or outlet to prevent overheating.
l Never hit or shake the unit to prevent damage.
l Never spray water or place the unit near water to prevent electric shocks.
l Never place the unit near gas appliances, fire or flammable liquids.
l Need two or more people to move and install air conditioner.
l Do not let children play near the unit.
l This appliance can be used by children aged from 8 years and above and persons with
reduced physical, sensory or mental capabilities or lack of experience and knowledge if they
have been given supervision or instruction concerning use of the appliance in a safe way and
understand the hazards involved. Children shall not play with the appliance. Cleaning and user
maintenance shall not be made by children without supervision.
Cautions
l Keep the unit at least 1 meter away from TV or radios to avoid electromagnetic interference.
l Do not expose the unit under direct sun light to avoid surface color fading.
l Do not tilt the unit for more than 35 degrees or upside-down while transporting.
l Place the unit on a flat surface and upright with less than 5 degrees inclination.
l Keep the drain hose in good condition without flexure then connect with unit.
l The unit operates more efficiently in certain room locations (Installation and Adjustment).
l Empty the condensed drainage pan before putting the unit in storage to prolong the unit
lifetime end of the season.
l Do not use chemical solvents (e.g. Benzene, alcohol-glazer) to clean the unit surface, do
not scratch or damage the unit.
l Make sure to cut off the power before disassembling or installing the filter.
Remark: Do not use this unit in cooling mode if the ambient temperature is higher than 35℃ or
heating mode if ambient temperature is lower than 7℃.

Features and Identification of Parts
1. Features
l New appearance with compact design, more luxury and upscale.
l Remote control & Panel control with LCD display and touch screen makes your operation
more accessible.
l The unit is with cooling, heating, fan, dehumidifying, and sleep functions.
l Air outlet is upwards, auto swing of horizontal louver and cover air outlet window when stop
working, to avoid dust into unit, vertical louvers can be manually adjusted.
l Humanized built-in remote control compartment, easy storage.
l Handles with cut-point design, make the whole unit more humanized.
l Power cord holder and universal socket can well protect the power cord.
l High position of exhaust air outlet, easy assembly and venting quickly.
l Intelligent, environmental-friendly and energy saving with self-evaporative cooling system.
l 24-hour Timer function, unique on/off reminding music.
l 3-minute delay re-starting protection to compressor and other multiple protection functions.

2. Identification of Parts
1. Front panel
2. Remote control receiving window
3. Control panel
4. Top panel
5. Horizontal louver
6. Right decoration board
7. Upper filter assembly of back panel
8. Remote control compartment
9. Left decoration board
10. Power cord
11. Winding-pillar
12. Lower filter assembly of back panel
13. Drain cover
14. Universal wheel
15. Filter assembly of side panel
16. Protective grid
17. Fastener
18. Handle
19. Round connector of exhaust hose
20. Exhaust hose
21. Adapter of exhaust hose
22. Window kits
Slant Panel of Adapter

Operations and Settings
1. Control Panel
This section explains proper mobile air conditioner operation.
2. Control Panel Operation
This unit is with Cooling, Heating, Dehumidifying, Fan and Energy Conversation & Sleep
modes operations.
1) Energize the Unit: Plug in and all icons in LCD display window will light up for 2 seconds
and reminding music will be on, then LCD display window will show ambient
temperature with range 5 - 35℃ (41-95℉),unit is standby for operation.
2) :Touch this key to turn on the unit, reminding music is sounded, and unit runs under
cooling mode automatically with set temperature 22℃(72℉),fan runs in medium
speed. Touch this key again, unit will be off and reminding music will sound.
A. When unit is on, LCD display window will show ambient temperature, fan starts running
and air outlet window will open automatically.
B. When unit is off, all parts stop working, air outlet window will close automatically.
3)
:
Touch this key to switch and select unit working mode you want, all modes turn
as below for your confirmation.
COOL DEHUMIDIFY HEAT FAN Energy Conversation
Operating
Modes
COOL
Temperature
Setting
Range
16℃--30℃
(60℉--86
℉)
DEHUMIDIFY
-----
-----
HEAT
Temperature
Setting
Range
16℃--30℃
(60℉--86
℉)
FAN
-----
-----
Energy
Conversation
Temperature
Setting
Range
16℃--30℃
(60℉--86
℉)
4) and
:
A. Touch or to increase or decrease the temperature 1℃or 1℉ by pressing once.
B. Touch or over 2 seconds to continuously increase or decrease the temperature
Fan Speed
Timer
Up
Display Window
Down
Mode
Power

number by 0.5 second interval, temperature setting range is 16~30℃/60~86℉。
C. Touch and together in same time to convert Celsius degrees and Fahrenheit
degrees. (℃←→℉ transition).
D. Touch or in TIMER status to adjust time setting.
5)
:
touch this key to change fan running speed to High speed 、Medium speed or
Low speed. 。
A. Under COOL and FAN modes, fan running speed can be adjusted by below
order,
B. Under HEAT mode, upper fan will run at low speed after the compressor works
2 minutes.
C. Under TRY mode, fan will be forced to run at low speed , temperature can’t be
adjusted.
D. Fan speed will be unchanged if unit operated between COOL and Fan modes, that
means if fan running at low speed under FAN mode, the fan speed will keep same when
unit changed to COOL mode; if fan running at high speed under COOL mode, it would
keep same when unit changed to FAN mode.
E. Fan will be forced running at low speed under Dehumidify and Sleep modes and fan
speed can’t be adjusted.
6)
:
Touch this key to set unit auto turn-on /turn-off time, to check or cancel time
setting.
A. This unit is designed with 24-hour timer, first two digits are for hours 00-24, and
last two digits are for minutes 00-60. You can increase or decrease half an hour each
time by touching or to finish hour and minute setting.
B. You can set unit AUTO OFF time when it is running. Or set unit AUTO ON time when
unit is standby. Once timer setting is OK, will be lighting till the time you set is
over and will be off.
C. You can touch again to re-set time when TIMER function is on. The TIMER is subject
to the final time setting. And TIMER would be ineffective and would be off if
any operation from control panel or remote control to turn on or turn off the unit.
+ : Start SLEEP Function by touching + in the same time under COOL

or HEAT mode, in LCD screen will be on; re-touch + to stop “Sleep”
function, will be off. Sleep function will be ineffective under FAN or DEHUMIDIFY
mode.!
7)! + :Turn on or turn off Auto-Swing by touching + Horizontal louvers will
swing automatically when unit starts working, touch + together to turn off auto-
swing, in LCD screen will be off. Re-touch + together to turn on auto-swing,
in LCD screen will be on again.
8) Other functions
A. Energy saving:Background light in LCD screen will light up for 10 seconds then
automatically off if you touch any key when unit is energized or background light is off.
B. Auto-clean :Unit will start and keep three minutes before off under COOL,
DEHUMIDIFY modes.
C. Energy Conversation: Low energy consumption under Energy Conversation mode.
3. Remote Control Operation
1) Power: Press this button to start the unit when it is energized or stop the unit when it
is in operation.
2) Mode: Press this button to select operation mode.
3) : Press this button to increase room temperature and timer setting.
4) : Press this button to decrease room temperature and timer setting.
5) Fan: Press this button to select fan speed in sequence: Low → Medium → High.
6) Auto-Swing: Press this button to turn on or turn off auto-swing function.
7) Sleep: Press this button to select or cancel sleep mode (only effective under cooling,
heating operation or energy conversation modes).
Up and down button
Fan speed button
!
Timer button
Sleep button
LCD display window
Power button
Mode button
Auto-swing button
Auto-clean button

8) Timer: press this button to set AUTO-ON and AUTO-OFF time. Time can be adjusted
between 0.5-24 hours. It jumps by 0.5 hour interval within 5 hours, and 1 hour interval
over 5 hours, set time will flash 5 times on screen then confirm the setting.
Before using your remote, install the AAA batteries into remote control.
1) Press and glide the battery cover on the back of the remote control, then you can
remove the cover.
2) Insert two new alkaline AAA batteries into the battery compartment, being sure to note
the proper polarity.
Reattach the battery cover, making sure the locking tab clicks into place.
Notes:
l Use alkaline batteries only. Do not use rechargeable batteries.
l When replace batteries, always replace both batteries with new batteries, do not mix
old and new batteries.
l If the air conditioner will not be used for an extended period of time, remove the
batteries from the remote control.
4. Remote Control Storage
1) Insert remote controller into built-in compartment in left side of unit, and push it gently
for closure.
2) Press the lower part of built-in compartment gently to open it and take out remote
controller.
Note: In order to avoid losing the remote control, please put the remote control inside of
the storage place when you not use it.
WARNING
If the liquid from the batteries gets onto your skin or clothes, wash it well with clean
water, do not use the remote control if the batteries have any leakage.
If you eat the liquid from the batteries, brush your teeth and see doctor. The chemicals in
batteries could cause burns or other health hazards.
Be sure to note proper
polarity of batteries

Installation & Adjustment
1. Installation
Notes:
l Keep this mobile air-conditioner in upright position at least 2 hours before first
installation.
l This air-conditioner may be moved indoor conveniently; keep the unit in upright
position while moving it. The air-conditioner shall be placed at flat surface.
l Do not install or operate this air-conditioner in bathroom or other wet environments.
1) Installation of exhaust hose assembly and its adapter.
A. Take out the exhaust hose and its connector and adapter, to remove the plastic bag.
B. Extend one end of exhaust hose, screw the end without slot of round connector onto
it with anticlockwise direction at least 3 laps.
C. Extend another end of exhaust hose, screw the adapter onto it with anticlockwise
direction at least 3 laps.
Note: Screw round connector and adapter into right position, at least 3 laps, to keep
good connection of exhaust hose assembly.
Remote Control Hold direction
Open and Close Direction
Remote Control
Remote Control Box

2) Installation of exhaust hose assembly to main unit.
Put front end of exhaust hose assembly onto jugged position of exhaust air outlet at
back panel, fasteners will lock the exhaust hose assembly.
Note:
l Keep the right direction of slant side of adapter, for ease installation of window
seal-plate.
l Keep exhaust hose connected in good position.
3) Installation of window seal-plate
A. Make the window half open, put the seal-plate into window, either in vertical or
horizontal position.
B. Extend seal plate parts and adjust it to the length of window, keep both ends to meet
window edge, fix it with screws then.
Note:
l Keep two ends of window seal-plate to meet the window edges well, to assure seal
effect.
l Turn the screw in good position.
Fastener
Slot
Exhaust Hose - Assembly

4) Installation of the unit
A. Move the unit with the exhaust hose assembly installed in front of window and keep
the unit at least 50cm away from the walls or other objects.
B. Install the rectangle end of exhaust hose assembly into the corresponding rectangle
hole in window seal-plate assembly, fix it with screw and close the window.
Note:
l Slide the adapter downwards and assure adapter installed in good position.
l Assure the slant panel direction to match seal-plate direction.
l Exhaust hose cannot be bent or with flexure higher than 45°, in order to keep good
ventilation of exhaust hose.
Important notes:
The exhaust hose is 280mm-1500mm long and this length is determined based on the
specification of the air-conditioner (s). Do not use prolonged the hose or replace it with
other different hoses as this may affect the functions of the air-conditioner. The
exhaust hose must be smooth or it may lead air-conditioner overheat and damage.
Drainage Instruction
1. Manual drainage:
1) Once the unit shuts down upon water-full, turn off the unit and then unplug.
2) Put the tray below the water outlet at the back of the unit.
3) Screw off the drain cover, unplug the water stopper for water flow into the tray.
4) Plug in stopper and screw the drain cover tightly onto water outlet after drainage.

Notes:
l Protect the drain cover and water stopper properly.
l Move the unit carefully to avoid the leakage it is necessary.
l Tilt the unit slightly backwards when draining.
l Block the drain hole as soon as possible before the tray is full if it cannot hold all water
in the unit to prevent the water leakage and wet the floor or carpet.
l Water stopper and drain cover must be tightly installed, to avoid new condensate to
wet the floor or carpet when the unit re-starts working.
2. Continuous drainage
1) Screw off the drain-cover & unplug the water stopper.
2) Connect drain-hole with φ12mm drain hose, as deep as possible to avoid leakage.
3) Pull the drain hose to bathroom or outdoor.
Notes:
l Drain hose must be installed when there’s no water in the tray.
l It is suggested that not to use continuous drainage when unit is in COOL mode, to
ensure enough water recycle in the unit to enhance the system cooling effects.
l It is suggested that to adopt continuous drainage when unit is in HEAT mode, to avoid
frequent drainage.
l Put the drain hose in an inaccessible place, not higher than drainage hole and keep
drain hose straight without any flexure.
l Keep the drain cover and its stopper properly when continuous drainage is adopted.
Multiple protection functions
1. Anti-frozen protection function
Under COOL mode, when the compressor continuously runs over 10 minutes, if tube
temperature is ≦2℃/36℉ for 20 seconds, the anti-frozen protection function will be
on, E4 will be shown on LCD display, compressor and water wheel motor will stop
working, but upper fan remains running; If tube temperature≧8℃/46℉, the unit will
stop anti-frozen protection and recover to the original working condition. Compressor
will re-start working with 3 minutes delay for protection.
2. Water-full safety alarm and shut –off protection function
When the water volume exceeds its alarm level in chassis, warning sounds
automatically and water-full icon is lighting in LCD display, you need to drain the
Drain Cover
Drain hose

condensate and re-start the unit. (For more information about how to drain, refer to the
“Drainage Instruction” please). If the unit is not shut down manually, the unit will
recover to the original operating status automatically once the water is fully drained.
Or connect the power to re-start the unit again.
3. Auto-Defrosting Protection
The system of this unit is with Auto Defrosting function, and will light up until Auto
Defrosting is finished.
4. Auto overheat protection
This unit is with auto overheat function under heating mode. Compressor and lower
fan will stop working if unit with higher temperature, and recovery if unit temperature
down to normal to prolong unit working life.
5. Delay protection function of compressor
This unit offers restart protection to compressor. Except that the compressor may start
immediately when the unit is energized first time, there is 3-minute delay re-start
protection after compressor is shut down.
Maintenance and Service
Note: Be sure to turn off the unit and pull out the plug before maintain or send to service
center.
1. Surface cleaning
1) Clean the unit surface with wet soft cloth and do not use chemical solvents such as
alcohol and gasoline to avoid any damage to unit.
2) Clean the dirty air outlet or louvers with wet soft cloth and detergent.
3) Any chemical solvent is prohibited to use for unit cleaning or put such things near the
unit for a long time.
4) Any thinner, alcohol-glazer or other similar solvents is prohibited for unit cleaning.
2. Filter cleaning
Clean the filter once every two weeks, or it would influence the unit function if filter
clogged with dust.
1) How to clean filter
1. Grip the filter handle and pull it out gently in correct direction.
2. Clean the dirty particles in filter by cleaner if it is necessary.
3. Immerse and wash the filter gently into warm water (about 40℃) mixed with neutral
cleaner, and then rinse and dry them thoroughly in the shade.
Notes:
l Pull out the filter gently.
l Removal of filter at back panel is at priority then for the filter at side panel, to avoid any
twist or damage to filter.
l Do not squash the mesh.
l Do not hit the mesh with sharp objects or brush.

3. Installation of the filter
Aim the end of the filter toward slot then push filter gently into slot.
Notes:
l Be sure to install the filter to side panel then for the filter to back panel.
l Install the filter with opposite direction of removal.
l Install the filter into place gently to avoid any damage to filter.
4. End of Season Storage
1) Screw off the drain cover and pull out the stopper to drain condensate water
completely. (Note: the tilt angle of the unit must be≦30).
2) Keep unit running in fan mode for half day to dry inside of unit completely to prevent
from going moldy.
3) Turn off the unit, pull out plug then wrap the power cord around the wire-winding pillar,
insert the plug into the universal fixing hole at the back panel of the unit, install the
water stopper and drain cover.
4) Remove the heat exhaust hose assembly, clean and keep it properly.
Notes:
l Hold the exhaust hose assembly with both hands when removal.
l Push the fasteners aside on exhaust air outlet using your thumbs, then pull out exhaust
Upper Filter
Upper Filter frame
Push direction
Lower filter frame
Lower filter
Side filter
Side filter frame

hose assembly.
5) Pack the air-conditioner properly with soft plastic bag and put it in dry place with
appropriate dust-proof measures, and keep the unit away from children.
6) Take out the batteries from the remote control and keep it properly.
Note:
Assure the unit is stored in a dry place. All accessories of the unit shall be protected
together properly.
Troubleshooting
Please check the unit and suggestions below before asking for professional service, but
never dismantle or repair the unit by yourself, it may cause harm to you and your property.
Trouble
Cause
Remedy
The unit fails
to start up
Power supply failure
Connect the unit to a live socket
and turn it on.
Water-full and its icon
lighting
Drain the water stored in the
unit.
Ambient temperature too
low or low high
It is recommended to use this
unit between 7-40℃
The room temperature is
lower than the set
temperature in cooling
mode or higher
temperature in heating
mode
Change the set temperature
Bad cooling
or heating
effects
There is direct sunlight
Close the window curtain
The doors and windows
are open, the room is
crowded or there are
other heat sources
Close the door and window,
remove other heat sources, and
add new air-conditioners
Dirty filter
Clean or replace the filter mesh
Air inlet or air outlet
clogged
Remove the obstruction
High noise
level
The unit is being placed
at uneven surface.
Put the unit at a flat and firm
place (may reduce noise)
The
compressor
does not work
Initiation of overheat
protection.
Wait until the temperature
decrease, the unit will re-start
automatically
The remote
control does
not work
Too long distance
Bring the remote control close to
the air-conditioner and ensure
airs at signal receptor on unit.
The remote control didn’t
aim at signal receptor on
unit.
The batteries have no
electricity
Replace the batteries
“CH01” code
displays
Room temperature
sensor failure
Check the room temperature
sensor and related circuits
“CH02” code
displays
Tube temperature sensor
failure
Check the tube temperature
sensor and related circuits
“E4” code
displays
Anti-freeze protection
Restore the functions
automatically once anti-freeze
protection is over.
Displays
Water tank in chassis is
full
Drain the condensate and re-
start the unit

Appendix
Power Supply
V~,Hz
220~240,50
Cooling Capacity
Btu/h
12,000
W
3,520
Heating Capacity
Btu/h
13,200
W
3,800
EER for Cooling
Btu/W.h
8.90
W/W
2.61
COP for Heating
Btu/W.h
10.56
W/W
3.09
Refrigerant/Charge
/g
R410A/560
Rated Input
Cooling
W
1,350
Rated
Current
Cooling
A
6.20
Rated Input
Heating
W
1,330
Rated
Current
Heating
A
6.20
Moisture Removal
L/h
1.4
Air Circulation
m³/h
430
Noise
High
dB(A)
55
Middle
dB(A)
53
Low
dB(A)
50
Body Size
W×H×D
mm
471×850×355
Package
Size
W×H×D
mm
540×888×398
Net Weight/Gross Weight
kg
34.0 /38.0
Application Area
㎡
16~22
Fuse Parameter
Type: FSD or 50F
Voltage: 250V
Current: 3.15A
Schematic diagram of the air-conditioner

For specific technical parameters of the model, refer to rating label on the product.
!
ENVIRONMENT(
(
CAUTION:!
Do! not! dispose! of! this! product! as! it! has! with! other! household! products.! There! is! a!
separation!of!this!waste!product! into!communities,! you!will! need!to!inform! your!local!
authorities! about! the! places! where! you! can! return! this! product.! In! fact,! electrical! and!
electronic! products! contain! hazardous! substances! that! have! harmful! effects! on! the!
environment!or! human! health!and! should! be!recycled.! The! symbol!here! indicates! that!
electrical! and! electronic! equipment! should! be! chosen! carefully,! a! wheeled! waste!
container!is!marked!with!a!cross.!
Adeva!SAS!/!H.Koenig!Europe!-!8!rue!Marc!Seguin!-!77290!Mitry!Mory!-!France!
www.hkoenig.com!-!sav@hkoenig.com!-!contact@hkoenig.com!-!Tél:!+33!1!64!67!00!01!
! !
Capillary
Heating
Cooling
Evaporator
Compressor
Condenser

FRANÇAIS
Merci d´avoir choisi notre climatiseur portable, lisez attentivement ce manuel avant de
l´utiliser et conservez-le afin de pouvoir vous y référer en cas de besoin.
Instructions de sécurité
Caractéristiques électriques
1. L´appareil doit être compatible avec votre installation électrique et installé par un
professionnel qualifié. En cas de doute quant aux instructions de ce manuel, contactez un
électricien qui sera capable de vous conseiller.
2. Respectez les règles de sécurité en vigueur lors de l´installation de l´appareil. Vérifiez
que l ´appareil est compatible avec votre installation électrique.
3. Pour votre sécurité, cet appareil est connecté à un fil de terre qu´il est conseillé de
connecter à une prise compatible. Si vous n´êtes pas sûr que la prise est connectée à la
terre, faites le vérifier par un électricien. Si le câble d´alimentation est endommagé,
n´utilisez surtout pas l´appareil et faites remplacer le câble par le fabricant ou un réparateur
agréé pour faire en sorte que la réparation se fasse en toute sécurité.
4. Cet appareil n'est pas destiné à être utilisé par des personnes présentant des capacités
réduites sur le plan physique, mental ou sensoriel ou bien manquant d'expérience ou de
connaissance, (y compris les enfants), sauf s'il leur a été demandé de surveiller ou si elles
ont eu des instructions concernant l'utilisation de l'appareil par une personne responsable
de leur sécurité. Les enfants doivent être surveillés pour s'assurer qu'ils ne jouent pas avec
l'appareil.
AVERTISSEMENTS:
Pour réduire le risque d´incendie, électrocution ou blessure pendant son utilisation, suivez
à tout moment les instructions ci-dessous :
l Ne jamais utiliser dans un environnement humide (en extérieur ou dans une salle de
bain, etc) L´appareil est uniquement prévu pour être utilisé en intérieur.
l N´enlevez pas la branche de mise à la terre.
l N´utilisez pas un adaptateur.
l N´utilisez pas de rallonge.
l La prise de courant doit être exclusivement à l´appareil.
l Ne jamais brancher ou débrancher le courant avec des mains mouillées ou humides
pour éviter les électrocutions.
l Ne jamais débrancher l´appareil en tirant sur la prise.
l Débranchez l´appareil avant de commencer l´entretien.
l Ne jamais démonter, réparer ou modifier l´appareil pour éviter de vous blesser ou
d´endommager l´appareil ; faites intervenir un professionnel.
l Ne jamais insérer un objet dans l´appareil.
l Ne jamais couvrir l´appareil ou obstruer les ventilations pour éviter la surchauffe.
l Ne jamais frapper ou secouer l´appareil pour éviter de l´endommager.
l Ne pas pulvériser l´appareil avec de l´eau ou tout autre liquide pour éviter tout risque
d´électrocution.

l Ne pas placer l´appareil près d´un appareil au gaz, une source de feu ou bien près de
substances inflammables.
l Déplacez l´appareil à deux pour éviter de vous blesser ou bien de l´endommager.
l Ne laissez pas les enfants jouer trop près de l´appareil.
l Si le cordon d'alimentation est endommagé, il doit être remplacé auprès d'un Service
après-vente afin d'éviter tout danger.
Précautions
l Utilisez l´air conditionné à un mètre minimum de la télévision pour éviter les
interférences.
l Ne laissez pas l´appareil exposé à la lumière directe du soleil pour éviter toute
décoloration.
l Ne pas pencher l´appareil à plus de 35 degrés ou à l´envers pour le déplacer.
l Placez l´appareil sur une surface plane propre et avec mois de 5 degrés d´inclinaison.
l Gardez le tuyau d´évacuation bien dégagé, ne pas le plier ou l´encombrer.
l L´appareil est plus efficace lorsque installé dans la position la plus adéquate, vois les
conseils fournis dans ce manuel.
l Videz le réservoir avant de ranger l´appareil pendant une période de temps prolongée
ou une fois la saison passée.
l Ne pas utilise de solvants (Benzène, alcool, etc.) pour nettoyer la surface de l´appareil.
l Les produits abrasifs pourraient rayer l´appareil.
l Débrancher l´appareil avant de manipuler le filtre.
Note: ne pas utiliser de la fonction d´air conditionné par températures supérieures à 35℃.
Caractéristiques et composants
1. Caractéristiques
l Nouvelle apparence avec un design compacte, plus luxueux et haut de gamme.
l Télécommande, panneau de control avec affichage LCD et écran tactile pour un control
facile.
l L´appareil est équipé d´un programme de refroidissement de l´air, d´un ventilateur, un
déshumidificateur et un mode veille.
l La sortie d´air a trois positions : verticale, oscillatoire et horizontale. Vous pouvez fermer
la sortie d´air pour éviter l´accumulation de poussière.
l Télécommande intégrée avec un compartiment pour la ranger.
l Poignées ergonomiques permettant une bonne prise en main.
l Le support permet de ranger le câble d´alimentation et le garder en parfait état.
l La position de l´évacuation rend le montage facile et la ventilation rapide.
l Intelligent, écologique et économique pour préserver l´environnement grâce à l’auto-
évaporation du système de refroidissement.
l Horloge de 24-hour avec alarme musicale.
l Start différé (3 minutes).
Table of contents
Languages:
Other H.Koenig Air Conditioner manuals
Popular Air Conditioner manuals by other brands

Mitsubishi Electric
Mitsubishi Electric MLZ-KA50VA installation manual

Toshiba
Toshiba RAV-GM2241AT8-E1 installation manual

Anslut
Anslut 417061 operating instructions

Bosch
Bosch Climate Line 2000 installation instructions

Daikin
Daikin RXS20K3V1B installation manual

Toshiba
Toshiba RAS-5M34U2AVG-E Service manual