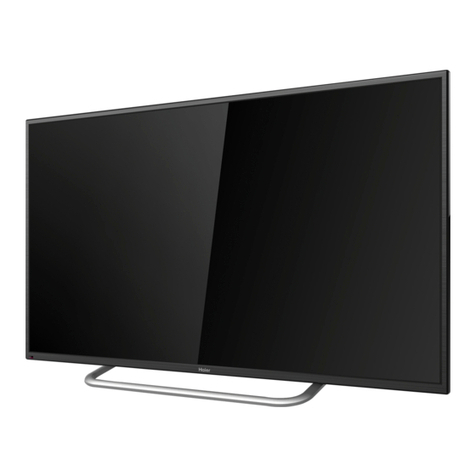
Haier LE75U9000SA User manual

LE75U9000SA

Contents
-1-
1ǃSafety and warnings..........................................................................................................2-3
2ǃIntroduction.....................................................................................................................4
3ǃWall Mount Installation................................................................................................... 5
4ǃInstallation.....................................................................................................................6-8
5ǃRemote Controller..........................................................................................................9
6ǃTV Operation..................................................................................................................10-31
7ǃTrouble shooting............................................................................................................32

-2-
SAFETY AND WARNINGS
IMPORTANT SAFETY INSTRUCTION
TO REDUCE THE RISK OF ELECTRIC SHOCK, DO
NOT REMOVE COVER (OR BACK).NO USER
SERVICEABLE PARTS INSIDE. REFER SERVICING
TO QUALIFIED SERVICE PERSONNEL.
CAUTION
The symbol indicates that dangerous
voltages constituting a risk of electric shock
are present within this unit.
The symbol indicates that there are
important operating and maintenance
instructions in the literaturaccompanying this
unit.
To reduce the risk of fire or electric shock, do
not expose this apparatus to rain or moisture.
WARNING:
1) Read these instructions.
2) Keep these instructions.
3) Heed all warnings.
4) Follow all instructions.
5) Do not use this apparatus near water.
6) Clean only with dry cloth.
7) Do not block any ventilation openings, install
in accordance with the instructions.
8) Do not install near any heat sources such as
radiations, heat registers, stoves, or other
apparatus (including amplifiers) that produce
heat.
9) Do not defeat the safety purpose of the
polarized plug. If the provided plug does not fit
into your outlet, consult an electrician for
replacement of the obsolete outlet.
10) the power cord from being walked
on or pinched particularly at plugs, convenience
receptacles, and the point where they exit from
the apparatus.
11) Only use attachments/accessories specified
by the manufacturer.
12) Unplug this apparatus during lighting
storms or when unused for long periods of time.
13) Refer all servicing to qualified service
personnel. Servicing is required when the
apparatus has been damaged in any way, such as
power-supply cord or plug is damaged, liquid
has been spilled or objects have fallen into the
apparatus, the apparatus has been exposed to
rain or moisture, does not operate normally, or
has been dropped.
14) Mains plug is used as the disconnect device,
the disconnect device shall remain readily
15) The ventilation should not be impeded by
covering the ventilation openings with items,
such as newspapers, table-cloth, curtains, etc.
16) No naked flame sources, such as lighted
candles, should be placed on the apparatus.
17) Attention should be drawn to the
environmental aspects of battery disposal.
18) The use of apparatus in moderate climate.
19) The apparatus shall not be exposed to
dripping or splashing and that no objects filled
with liquids, such as vases, shall be placed on
the apparatus.
Protect
operational.
20)Warning: To avoid any injury caused by lean
of the product, please always ensure the whole
product was placed within the table surface in
horizontal.
This symbol indicates that this product
incorporates double insulation between
hazardous mains voltage and user accessible
parts. When servicing use only
identical replacement parts.
This marking indicates that this product should
not be disposed with other household wastes
throughout the EU. To prevent possible harm to
the environment or human health from
uncontrolled waste disposal, recycle it
responsibly to promote the sustainable reuse of
material resources. To return your used device,
please use the return and collection systems or
contact the retailer where the product was
purchased. They can take this product for
environmental safe recycling.
The batteries shall not be exposed to
excessive heat such as sunshine, fire or the
like.
WARNING:
RISK OF ELECTRIC SHOCK
DO NOT OPEN!
CAUTION
Note:the use of apparatus in moderate climates.

INTRODUCTION
-4-
Main features
Used as Television, display terminal
High luminance, wide viewing angle
Can store programs
HDMI interface
5 Multi-Media player (USB);
99 ATV
Infrared Remote Controller............ 1
User’s Manual...............................1
Q SG ...............................
Accessories
Main parameter
Viewing Picture Size (Diagonal)
Resolution
Aspect Ratio
TV System
Receiving Channel
Power consumption
Signal Input/Output
Horizon
Video Signal System
Input Power Voltage
Audio Output Power
3840x2160
16 : 9
PAL-B/G
NTSC
PAL/
1-99 (ATV)
THD 7%
High-Definition Multimedia Interface(HDMI) x 3
Composite Video Input x 1
Audio Input x 1
YCb (Pb )Cr (P r) x 1
tal definition TV line Composite Video input > =350
Y Cb(Pb ) Cr(Pr) >=400
USB x 2
RF x 1
T
VGA x 1
PC Audio x 1
F CARD x 1
RJ45 x 1
Headphone Output x 1
COAXIALx 1
260W
AC 100-240V ~ 50/60Hz
2x10W
190cm
............. 1

WALL MOUNT INSTALLATION
-5-
Fix the wall mount scre ws into the re ar side of the LCD TV.
(M8 20mm/4pcs)
*The TV appear ance subject to mater ial object.
x
M8 20x
M8 20x
M8 20x
M8 20x
Place the TV with the display side down on a flat surface. Use a cloth
to protect the display.
Attach the stand base set to the bottom of the TV by firmly tightening the
supplied 6
M6x18mm
pcs screws.
Base Stand Assembly Instruction
-5-

-6-
INSTALLATION
REAR AV Connections
All the terminals are(from left to right):
RJ45,Headphone,VGA,PC Audio,HDMI1,HDMI2,HDMI3,RF.
Note: CVBSand YPbPr share one audio channel.
REAR AV Connections(SIDE)
All the terminals are (from left to right):
CVBS/Y,,YPBPR,L,R,COAXIAL,TF CARD,USB1,USB2
Fr ont panel KEYBOARD
1: Remote control sensor.
2: Indicator LED:
RED STANDBY.
3: Key board
30 30
1
2
3
1 SOURCE
Display the input source menu.
2MENU
Display main MENU.
3
Adjust sound level.
In MENU mode, press“V+”or“V-”to
adjust the item that you selected.
4
In TV mode press“CH+”or“CH-”to change
the channel up and down.
In MENU mode, press “CH+”or“CH-”to select
items.
5.
Press this button to turn the unit ON from
STANDBY mode.
Press it again to turn the set back to STANDBY.
12345

INSTALLATION
-7-
PRESET MODE (HDMI)
ANTENNA
Note:
Aerial connections: IEC(female).
Input impendance: 75 unbalanced.
480i/480P 60
1
502
3
4
Signal format
576i/576P
720P 50/60
1080i/1080P 50/60
52160i/2160P 30

INSTALLATION
-8-
This TV provides one group of AV ,one group of YPbPr for convenient connection to VCR, DVD
or other videoequipment.Please refer to the owner'smanual of the equipment to be connected
as well. You can use the input terminals on TV set rear as follows.
AV EQUIPMENT
It can be connected to the following appliances: VCR, multi disc player, DVD, camcorder, video game or stereo
system, etc...YPbPr can support these video fomats: 480i, 576i, 480p, 576p, 720p, 1080i, 1080p
Note:
1. share one audio channel.
2.Sometimes it will not support in different device because the device supplys nonstandard signal.
VIDEO, YPbPr
1WAN 2 34
WR
TO AUDIO
OUTPUTS
Y
Audio Receiver
G Green (Y)
B Blue (Pb/Cb)
W White(AUDIO-L)
R Red (AUDIO-R,Pr/Cr)
Y Yellow (VIDEO)
Audio/Video machine
with HDMI interfaces
GBRWR
GBR

-9-
REMOTE CONTROLLER

-10-
TV OPERATION
Set your TV when turn on the TV at first time.
Set the network(wire/wifi).
Select the wifi to connect.

-11-
TV OPERATION
Select the contry/ LCN/ Antenna Type/ Search Type to start auto tuning.
Have a good time watching the TV .

-12-
TV OPERATION
Main Menu
The Main Menu UI are as follow.
ressP/ to select the menu.//
ressP/ to select the APP List..//

TV OPERATION
-13-
System Setting
elect the Setting in the Main Menu to enter the System Setting.S
Network
Wireless Network
Select the WIFI ,and press the passwork to connect.

-14-
TV OPERATION
wired network
Insert the Ethernet cable ,and select Auto get IP
address to connect the Ethernet
Time
Press the Ż/ ŹWo select the Time to set.
Auto Attach Get the current time and date automatically
.
24 Hours Select the 12 hours or 24 hours.
Time Zone Select the local time zone.
Time Edit Edit the current time and date.
Date Format Set current date format.

TV OPERATION
-15-
TV OPERATION
General
Press the to select the General and set the general setting.Ż/ ŹLanguage Setting Select current display language.
Input Method Select the Input method.
System Upgrade Upgrade to the newest system version.
System Recovery Recovery system to original state.
About
Information about the TV.

TV OPERATION
-16-
TV OPERATION
Multimedia
Select the Video, and press OK button to enter.
Audio Track Change the audio track.
Select Subtitle Select On/OFF the subtitle.
Region Language Select the language.
Encoding Standard
Play Mode Select the play mode.
Aspect Ratio Select 16:9/4:3.
Select the encoding standard.

TV OPERATIONTV OPERATION
-17-
Music
Press the button to select the Music.Ż/ ŹPhoto
Press the button to select the Photo.Ż/ ŹFolder
Press the button to select the Folder.Ż/ Ź

TV OPERATIONTV OPERATION
-18-
Input Source
P澬澭澬澭b.
Press SOURCE button to enter input source
Source
TV TV
AV
YPBPR
HDMI1
HDMI2
HDMI3
VGA

TV OPERATIONTV OPERATION
-19-
TV Setting
Press the MENU button to enter the TV Setting
Picture
Press the to set the picture.Ż/ ŹContrast Adjust the white level of the picture.
Picture Mode
Highlight the item and Press OK to enter the sub-menu,
that shows the picture mode you can choose:
Standard/Dynamic/Soft /User/Vivid.
Brightness Adjust darkness of black sections in the picture.
Color Adjust the color intensity of the picture.
Sharpness Object edges are enhanced for picture detail.
1/10
Dynamic
Contrast
Brightness
Color
Sharpness
Table of contents
Other Haier LED TV manuals

Haier
Haier UL50H65 User manual

Haier
Haier LE40U5000TF User manual

Haier
Haier LE50B7000TF User manual

Haier
Haier LE43K6500TF User manual

Haier
Haier LT19Z6 User manual

Haier
Haier HLC24XSL2 User manual

Haier
Haier 55DA5550 User manual

Haier
Haier LE32F32200 User manual

Haier
Haier 48D3500 User manual

Haier
Haier 32D2000 User manual

Haier
Haier LE32C13200 User manual

Haier
Haier LE32B8000 User manual

Haier
Haier 24D3000 User manual

Haier
Haier LE22M600CF User manual

Haier
Haier LE40C13800 User manual

Haier
Haier LEC32B1380W User manual

Haier
Haier LEC24B2380 User manual

Haier
Haier LE75H9000U User manual

Haier
Haier LE19C1320 User manual

Haier
Haier LE43K6000SF User manual