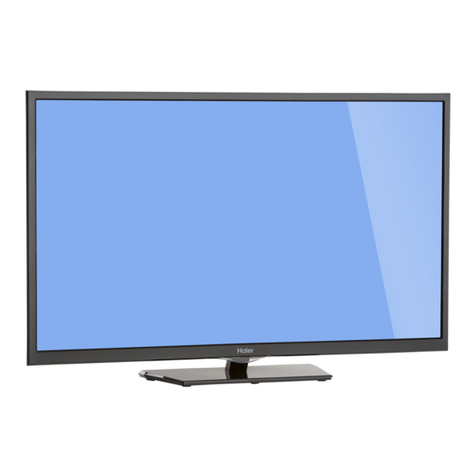
Haier LEC32B1380W User manual

LEC32B1380
LEC32B1380W
TFT-LED LCD TV

-1-
Contents
Safety and warnings.......................................................................................2-3
Introduction..................................................................................................4
Stand installation guide.................................................................................5
Installation................................................................................................... 6-9
Remote Control............................................................................................10
Operation..................................................................................................... 11-15
Trouble Shooting...........................................................................................16
DVD Operation............................................................................................. 17-20
DVD TroubleShooting...................................................................................21
Warranty.......................................................................................................2 2

-2-
SAFETY ANDWARNINGS
IMPORTANT SAFETY INSTRUCTION
TO REDUCE THE RISK OF ELECTRIC SHOCK, DO
NOT REMOVE COVER (OR BACK).NO USER
SERVICEABLE PARTS INSIDE. REFER SERVICING
TO QUALIFIED SERVICE PERSONNEL.
RISK OF ELECTRIC SHOCK
DO NOT OPEN!
CAUTION
CAUTION
The symbol indicates that dangerous
voltages constituting a risk of electric shock
are present within this unit.
The symbol indicates that there are
important operating and maintenance
instructions in the literaturaccompanying this
unit.
To reducethe risk offire or electricshock, do
not expose this to rain ormoisture.Television
WARNING:
1) Read theseinstructions.
2) Keep theseinstructions.
3) Heed allwarnings.
4) Follow allinstructions.
5) Do notuse this near water.
6) Clean onlywith dry cloth.
7) Do notblock any ventilationopenings, install in
accordance with theinstructions.
8) Do notinstall near anyheat sources suchas
radiations, heat registers,stoves, or other
(including amplifiers) thatproduce heat.
9) Do notdefeat the safetypurpose of thepolarized
plug. If theprovided plug doesnot fit intoyour outlet,
consult an electricianfor replacement ofthe obsolete
outlet.
10) Protected thepower cord frombeing walked on
or pinched particularlyat plugs, convenience
receptacles, and thepoint where theyexit from the
11) Onlyuse attachments/accessories specifiedby
the manufacturer.
12) Unplug this during lighting stormsor
when unused forlong periods oftime.
13) Refer allservicing to qualifiedservice personnel.
Servicing is requiredwhen the has been
damaged in anyway, suchas power-supply cord or
plug is damaged,liquid has beenspilled or objects
have fallen intothe , the has
been exposed torain or moisture,does not operate
normally, orhas been dropped.
14) Mains plugis used asthe disconnect device,the
disconnect device shallremain readily operable.
15) The ventilationshould not beimpeded by
covering the ventilationopenings with items,such as
newspapers, table-cloth, curtains,etc.
16) No nakedflame sources, suchas lighted candles,
should be placedon the .
17) Attentionshould be drawnto the environmental
aspects of batterydisposal.
18) The useof in moderate climate.
19) The shall not beexposed to dripping
or splashing andthat no objectsfilled with liquids,
such as vases,shall be placedon the .
Television
Television
Television
Television
Television Television
Television
Television
Television
Television
Television.
;
This symbol indicates thatthis product
incorporates double insulation between
hazardous mains voltage anduser accessible
parts. When servicing useonly
identical replacement parts.
This marking indicatesthat this product should
not be disposedwith other household wastes
throughout the EU.To prevent possible harm to
the environment orhuman health from
uncontrolled waste disposal,recycle it
responsibly to promotethe sustainable reuse of
material resources. To return yourused device,
please use thereturn and collection systems or
contact the retailerwhere the product was
purchased. They cantake this productfor
environmental safe recycling.
The batteries shallnot be exposed to
excessive heat suchas sunshine, fire or the
like.
WARNING:
The excessive soundpressure from earphones
and headphones cancause hearing loss.
WARNING:
Haier is committedto safely recycling
electronic products andproduct materials.
Please check fora local recycling location in
the United Statesat: 1800RECYCLING.COM
or call 1.800.RECYCLING.
-3-
High voltages are used in the operation of this television
receiver. Do not the cabinet.
Refer servicing to qualified service personnel.
open
SAFETY ANDWARNINGS
To prevent fire or electrical shock hazard, do not expose
the television receiver to rain or moisture.
Do not drop or push objects into the television cabinet
slots or openings. Never spill any kind of liquid on the
television receiver.
Do not block the ventilation holes on the back cover .
Adequate ventilation is essential to prevent failure of
electrical components.
of the TV
Do not trap the power supply cord under the television
receiver s .' stand
Never stand on, lean on, or suddenly push the television or
its stand. You should pay special attention to children.
Serious injury may result if it falls.
Do not place your television on an unstable cart, stand,
shelf or table. Serious injury to an individual and damage
to the television may result if it falls.
/or
When the televisionreceiver is not used for an
extended period of time, it isadvisable to disconnect
the ACpower cord fromthe ACoutlet.
Avoid exposing the television receiver to direct sunlight
and other sources of heat. Do not stand the television
receiver directly on other products which give off heat,
e.g. video cassette players and audio amplifiers. Do not
place naked flame sources, such as lighted candles on
the television.or near
Dim:515*320mm(
If the television is to be built into a compartment or similar
enclosure, the minimum distances must be maintained. Heat
build-up can reduce the life of your television, and can also
be dangerous.

-4-
INTRODUCTION
Main features Accessories
Infrared Remote Control.................... 1
User s Manual ................................. 1
Battery(AAA)................................... 2
Accessories
Main parameter
Power Cable..................................... 1
Integrated ATSC TV tuner for HDTV broadcast reception
High brightness provides a vivid and brilliant picture
Deeper blacks and brighter whites with high contrast
Wide Screen aspect ratio (16:9) for a complete home
theater experience
HDMI input for true digital connection
VGA port for connection to PC
Built-in stereo speaker system
Full-function Remote Control
x 2
Resolution:
TV System:
Video Signal System:
Receiving Channel:
Horizontal definition (TV line)
16:9
NTSC
Cable :1-135/ Air: 2-69 (ATV&DTV)
x 1
High-Definition Multimedia Interface (HDMI) Input
Audio Input x 2
Composite Video Input >=350
x 1
YCb(Pb)Cr(Pr) >=400
Video Input >=400
x 1
Input Power Voltage: AC 100V-240V 50/60Hz
ATSC Digital system and NTSC Analog system
Headphone Output
x 1
x 1
Coaxial Output
x 1
USB Input
Aspect Ratio:
Viewing Picture Size (diagonal)
Power consumption:
Audio Output Power (THD 7%):
YCb(Pb)Cr(Pr) Input
Composite Video Input
Analog RGB (VGA) Input
1920x1080
32 inches
90W
2x8W

-5-
Base StandAssembly Instruction
1. Attachthe base standneck to thebase stand bottomwith the included3 screws.
2. Place theTV with the display sidedown on a flat surface. Usea cloth or the material from
the TV packaging to protect the screen.
3. Place thebase stand neckin the sloton the bottom of the TV and push firmly upwards.
Attach with theincluded screw.

-6-
INSTALLATION
Front panel
1: Remote controlsensor.
2: Indicator LED: BLUE POWER ON.
RED STANDBY.
3:
Side panel keys
1. SOURCE: Display the input source menu.
2. MENU: Display main MENU.
3. CH+/CH-: In TV mode, press "CH+" or "CH-" to
change the channel up and down. In MENU mode, press
"CH+" or "CH-" to select items in standby mode, press
"CH+" or "CH-" to turn on the TV.
4. VOL+/VOL-: Adjust sound level. In MENU mode,
press "VOL+ " or "VOL- " to adjust the item that you
selected.
5. STANDBY: Press this button to turn the unit ON
from STANDBY mode. Press it again to turn the set
back to STANDBY.
Side panel
REAR Connections
All the terminals are (from left to right):
POWER SOCKET, VIDEO, AUDIO INPUT, YPbPr INPUT
Note: AV and YPbPr share one audio channel.
SIDE Connections
All the terminals are (from left to right):
HDMI1, HDMI2, USB, VGA, HEADPHONE, PC AUDIO, COAXIAL, RF.
Note: 1. When HDMI1 has an input signal coming from a DVI source then the audio input signal must be
connected to the PC audio input.
2. When HDMI2 has an input signal coming from a DVI source then the audio input signal must be
connected to the YPbPr/AV audio input.
30 30
1
3
2
YPb Pr
VIDEO
AC-INPUT
100-240V~50/60Hz
LR
COMPOSITE COMPONENT
HDMI1HDMI1 HDMI2HDMI2 USBUSB VGA
HEADPHONE
RF
PC AUDIO
COAXIAL
SOURCE
MENU
CH+
CH-
VOL+
VOL-
STANDBY
1
2
3
4
5

ANTENNA
INSTALLATION
Note:
Aerial connections: IEC(female).
Input impendance:75 unbalanced.
-7-
STEPS:
PC
Be sure boththe TV and computer areset to
Power off.
1.Connect VGA and audio cable.
2.Connect the powercord.
3.Power on theTV, switch to PC mode.
4.Power on thePC.
This sequence isvery important.
HDMI1HDMI1 HDMI2HDMI2 USBUSB VGA
HEADPHONE
RF
PC AUDIO
COAXIAL

PC
-8-
INSTALLATION
PRESET MODE
1
2
3
4
5
6
7
8
9
10
720*400
640*480
640*480
800*600
800*600
1024*768
1024*768
1024*768
1280*1024
1280*1024
70
60
75
60
75
60
70
75
60
75
31.47
31.47
37.50
37.88
46.88
48.36
56.48
60.02
63.98
80.00
RESOLUTION V.Freq.(Hz) H.Freq.(KHz)
YPb Pr
VIDEO
AC-INPUT
100-240V~50/60Hz
LR
COMPOSITE COMPONENT

INSTALLATION
-9-
AV EQUIPMENT
The television's inputscan be connected to the followingtypes of equipment:VCR, multi discplayer,
DVD, camcorder,video game orstereo system, etc.....
YPbPr can supportthese video formats:480i,576i,480p,576p,720p,1080i.
You can use the input terminals on TV set rear as follows.
HDMI
HDMI1HDMI1 HDMI2HDMI2 USBUSB VGA
HEADPHONE
RF
PC AUDIO
COAXIAL
Yellow (video)
White(audio L)
Red(audio R or Pr)
Y
W
R
W R
GBR
Blue(Pb)
Green(Y)
B
G
VIDEO EQUIPMENT with YPbPr
WR
GBR
WR
W R
TO AUDIO OUTPUTS
VIDEO EQUIPMENT
TO VIDEO
OUTPUTS
YPb Pr
VIDEO
AC-INPUT
100-240V~50/60Hz
LR
COMPOSITE COMPONENT

-10-
REMOTE CONTROL
VOL CH
TV
DISPLAY
S.M
P.M
RETURN DISPLAY AUDIO SUBTITLE
REPEAT GOTO MENU SETUP
CH LIST/ ASPECT
EPG/ FAV/
CC/ MTS/
1: POWER
To setthe TV standbyor on.
2: NUMBER KEY
For direct accessto program.
3:
Displays the mainon-screen menu.
4: CURSOR
To movewithin the menu.
5: EXIT
Used to exitmenu.
6: VOL+/VOL-
To adjustsound level.
7: P.M
To switchpicture mode.
8:
Press to displayand select theavailable video sources.
9: MUTE
To disableor enable thesound.
10: RECALL
To accessthe previously viewedprogram.
11: ENTER
Confirms selection.
12: TV DISPLAY
Displays/removes the programInformation
13: S.M
To switchsound mode.
14: CH+/CH-
To accessthe next orprevious Program.
15: ASPECT
To changepicture aspect .
16: CH LIST /
17: EPG
Display all theinformation of DTVprograms.
18: FAV
Usedto access yourfavourite channels in digital TV mode.
19: CC
Enable or disablethe CC function.
20: MTS
Switch the soundstereo.
Used to displaythe channel list/ Eject orInsert the disc.
9
14
13
10
12
11
15
18
26
24
25
20
1
2
4
5
6
7
19
23
21
22
16
17
30
38
29
28
27
For a descriptionof the DVD player function buttons
on the remote,please refer topage 20 ofthis manual.

OPERATION
-11-
The first item of the MENU is PICTURE MENU.
Press to select, press to adjust, press MENU
to exit.
1).
the
This menu provides several video adjustment options
for fine tuning the video display.
Picture Mode: Select the user picture mode (Standard,
Sports, Movie, Custom, Vivid).
2). Brightness: This will adjust the light output of the
complete picture, which will mainly affect the dark
areas of the picture.
3). Contrast: This will adjust the intensity of bright parts
in the picture but keep the dark parts unchanged.
4). Color: This will adjust the saturation level of the
colors to suit your personal preference.
5). Tint: Allows you to select color mix (tint) of the
picture.
6). Sharpness: This will adjust sharpness of fine details
in the picture.
1. PICTURE MENU
Note:
The Audio language is available for ATSC (DTV)
programs.
option only
3. SETUP MENU
The third item of the MENU is the SETUP MENU.
You can here.
Press to select, press to adjust, press MENU to exit.
set system settings
Note:
Restore Default: Resetall settings tothe factory
default value.
Channel names thathave been changedthrough the option
in the ChannelMenu are notreset when arestore default is
initiated.
Select
Adjust Menu Exit
Parental Controls
Timer
Closed Caption
Menu Settings
VGA Settings
Restore Default
>
>
>
>
>
>
3.1. Parental Controls:
Press to select , press ,and the
screen
Parental Controls
shown below willbe displayed.
Picture Mode Standard
Contrast 50
Brightness 50
Color 50
Tint 0
Sharpness
Advanced Video
50
Select
Adjust Menu Exit
< >
>
2. AUDIO menu
The second item of the MENU is the AUDIO MENU.
You can adjust sound here.
Press to select, press to adjust, press MENU
to exit.
1).
options
Sound Mode: Select the user sound mode (Standard, News,
Music, Theater, Sports, Custom).
2). Bass: Adjust to increase or decrease lower-pitched sounds.
3). Treble: Adjust to increase or decrease higher-pitched sounds.
4). Balance: Adjust to emphasize left or right speaker balance.
6). AVL: Auto Volume Level, this will the differences
in volume level
8). Audio Language: Select the audio language (English,
French, Spanish).
5). Surround: Turn on or off the simulated surround sound
feature.
reduce
between TV programming.
7). Digital Output: Select the digital sound signal that will
output from the coaxial audio output.
Color Temp. Normal
Select
Adjust Menu Exit
< >
Aspect Wide
Noise Reduction Middle
< >
< >
Press to select Advanced Video, press ,and
the screen shown below will be displayed.
1). Color Temp: This willadjust color temperature(Cool,
Normal, Warm) suit your preference.to
2). Aspect: Thiswill vary thesize of theimage on theTV
screen. There arefour modes whichcan be selected
(Wide, Zoom, Cinemaand Normal).
3). Noise Reduction:Adjust to reducethe appearance of
noise in thepicture (dots). Thereare five modesto
choose from (Strong,Auto, Off,Weakand Middle).
Advanced Video:
Note:
If you want to adjust contrast, brightness, color,
and sharpness, the picture mode must to
"Custom".
be set
Select
Adjust Menu Exit
Sound Mode Standard
Bass 50
Treble 50
Balance 0
Surround
AVL
Digital Output PCM
Off
Off
< >
< >
< >
< >
Audio Language English
< >

OPERATION
-12-
Change Password:
Press , andthe screen
shown below willbe
displayed.
2). New password:Input the newpassword
Select
Adjust Menu Exit
New password
Confirm password
----
----
Old password ----
1). Old password:Input the oldpassword
P.G switch:
When the is ON, theoptions
can be adjusted.
Parental Control shown
below
US: Press ,and the screenshown below will be displayed.
Select
Adjust Menu Exit
TV
MPAA N/A
>>
< >< >
Select
Adjust Menu Exit
Enter Password ----
Input the password,and you will
menu. The factorydefault password is 0000.
enter the Parental
Control
Select
Adjust Menu Exit
Change password
P.G switch Off
US
Canada
RRT setting
Reset RRT
< >
< >
< >
< >
< >
>
3). Confirm password:Input the newpassword again
1): TV:Press , andthe screen
shown below willbe
displayed.
Select
Adjust Menu Exit
ALL
FV
V
S
L
D
Press the ENTER key to lock/unlock .Parental Controls
Rating Content
FV
(Fantasy
violence)
V
(Violence)
S
(Sexual
situation)
L
(Adult
language)
D
(Sexually
suggestive
dialog)
Suggested
age
TV-Y (All
children)
TV-Y7(Direct to
order children)
TV-G(General
audience)
TV-PG(Parental
Guidance
suggested)
TV-14(Parents
strongly
cautioned)
TV-MA(Mature
audience only)
X
X
X
X
X
X
X
X
X
X
X
X
Content
2). MPAA: switch the movie-rating control level: N/A,
G, PG, PG-13, R, NC-17, X.
Rating Description
Age
G General audiences, All Ages admitted
PG
Parental Guidance suggested. Somematerial may not be
Suitable for children.
PG-13 Parents strongly cautioned. Somematerial .may be
Inappropriate for children under13.
R
NC-17
X
Restrict. Under 17 requires accompanyingparent or adult
guardian (age varies insome jurisdictions).
No one 17 andunder admitted.
X is an orderrating that is unifiedwith NC-17 but maybe
encoded in the dataof older movies.
Canada: Press , and the screen
shown below willbe
displayed.
1): Canada English:switch the English-ratingcontrol level:
EXEMPT, C,C8+, G, PG,14+,18+.
Select
Adjust Menu Exit
Canada English
Canada French
EXEMPT
< >< >
EXEMPT
< >< >

OPERATION
-13-
Rating Description
Age
E Exempt: Includes news,sports, documents and otherinformation
programming: talk shows, musicvideos, and variety programming.
C Children: Intended foryounger children under theage of 8 years.
Pays careful attention tothemes that could threatentheir sense of
securityand well-being.
C8+ Children over 8years old: Contains noportrayal of violence asthe
preferred, acceptable, or onlyway to resolve conflict;nor encourage
children to imitate dangerous actswhich they may see onthe screen .
G General: Considered acceptable forall age groups,Appropriate
viewing for the entire family, contains very little violence,physical,
verbal or emotional.
PG Parental Guidance: Intendedfor a general audience,but may not be
suitable for younger children (underthe age of 8) becauseit could
contain controversial themes orissues.
14+ Over 14 Years: Could contain themeswhere violence is oneof the
dominant elements of thestoryline, but it mustbe integral to the
development of plot orcharacter. Language usagecould be profane
and nudity, presentwithin the context of thetheme.
18+ Adults: Intendedfor viewers 18 years and olderand might contain
depictions of violence, which while related tothe development of
plot, character or themes, are intended foradult viewing. Could
contain graphic language and portrayals of nudity.
2).Canada French: switchthe French-rating control
level: E, G,8ANS+,13ANS+,16ANS+,18ANS+.
Rating Description
Age
E Exempt programming
G General: Allages and children, contains minimaldirect violence,
but may be integrated intothe plot in a humorousor unrealistic
manner .
8ans+ General but inadvisablefor young children: Maybe viewed by a
wide public audience, but couldcontain scenes disturbing to
children under 8 whocannot distinguish between imaginaryand
real situations. Recommended for viewingwith paren .tal guidance
13ans+ Over 13 years: Couldcontain scenes of frequent violentscenes
and intense violence.
16ans+ Over 16 years: Couldcontain frequent violent scenes andviolence.
18ans+ Over 18 years:Only for adult viewing.Could contain frequent
violent scenes and extreme violence.
Reset RRT: Press ,and the screen
shown below willbe
displayed.
RRT setting:in ATSC digital TVmode, it could be
adjusted
Select
Adjust Menu Exit
Are you sure?
NO YES
Press¡°ENTER¡±Key To Select
3.2 Timer
Press to select, press to adjust, press MENU
to exit.
You can adjust sleep timer and time related settings here.
Sleep Timer:Youcan set the sleep timer.
Note:
Time zone, DSTand Clock areavailable in ATSC ,
and the Clockcan't be adjust .
mode
ed
Select
Adjust Menu Exit
Sleep timer
Time zone
DST
Clock 1999/12/31 04:03PM
Pacific
Off
Off
< >< >
< >< >
< >< >
2): Option:You can edit the closed caption options.
Press , andthe screen shown below willbe displayed.
NOTE: Only availablein ATSC mode.
1): Advancedselection: only ATSCmode.available in
3.3 Closed Caption:switch the closedcaption mode.
Press to select Closed Caption, press , and the
screen shown below willbe displayed.
Select
Adjust Menu Exit
CC Mode
Basic Selection
Advanced Selection
Option
Off
CC1
Service 1
< >< >
< >< >
< >< >
>>
Select
Adjust Menu Exit
Mode
Font style
Custom
Default
Font size Default
Font Edge style Default
Font Edge color Default
FG color Default
BG color Default
FG opacity Default
BG opacity Default
< >< >
< >< >
< >< >
< >< >
< >< >
< >< >
< >< >
< >< >

OPERATION
-14-
1). Air/Cable: Select Air TV signal or Cable TV signal.
2). Auto Scan:
, and the screen
If it's the first time using the TV, you
should perform a full channel scan in order to capture
and store all available channels.
Press the to confirm shown below
will be displayed.
Select "YES" and
and the screen
press the ENTER to confirm,
shown below will be displayed,
which indicates that the auto search is progressing.
3). Favorite: Press to /delete favorite channels.add
4). Show/Hide: Press the ENTER button to display or
hide channels.
5). Channel NO. : Display the current channel number.
Press to change the channel.
6). Channel label: Press to edit the current channel
name.
7). DTV signal: Display DTV signal strength.
Signal strength indicator is for reference only, it
cannot be selected or adjusted.
Menu Language English
Select
Adjust Menu Exit
< >
3.5 VGASettings: O
nly available inVGA (PCinput)
mode.
1). H-Pos:Adjust the horizontalposition of thescreen.
2). V-Pos: Adjustthe vertical positionof the screen.
3). Clock: Finetune the screenwidth.
4). Phase: Finetune the phaseof the screen. Usually
don't adjust this item .
5). Auto:Auto adjustto fit thescreen.
you need to option
Press to selectVGA Settings,press , and the screen
shown below willbe displayed.
Select
Adjust Menu Exit
H-pos
V-pos
Clock
Phase
50
Auto
50
50
50
>
4. Channel MENU
Here you add/skipTV channels andcustomize displayed
channel info.
Press to select,press to adjust.
Select
Adjust Menu Exit
Air/cable
Auto Scan
Air
Favorite
Show/Hide
Channel NO.
Channel Lable.
DTV signal: Good
2-1
< >
< >
>
>
>
>
Select
Adjust Menu Exit
Are you sure?
NO YES
Press¡°ENTER¡±Key To Select
Select
Adjust Menu Exit
R F CH: 4
Found: 4
Analog: 1
Digital: 3
3.4 Menu Settings
You can adjust Menu Settings here.
Press to select, press to adjust, press MENU
to exit.

OPERATION
5. Multimedia MENU
With an externalstorage device attached to the USB input,
you can usethe Multimedia Menuto display JPEGpictures
and play MP3music.
The screen shownbelow will bedisplayed.
Before starting operation,verify USB storagedevice is of
FAT32 file systemformat. This televisiondoes not support
NTFS or otherformats. Please usea high-speed USB 2.0
device with amaximum capacity of50GB.
1. Select aPhoto
: pause
: stop
: fast backward
: previous
: next
: fast forward
: repeat all
: random play
Random
2. Select Music
The screen shown below will be displayed.
USB
C:
Photo Music
..
Everything I do.mp3
C:\laoge\
:17 001/018
Total size:3.7 GB
Unused size: 3.7 GB
Sealed With AKiss.mp3
.mp3
.mp3
.mp3
.mp3
.mp3
.mp3
.mp3
Everything I do.mp3
Title:
Artist:
Album:
Year:
Bit Rate: 128kbps
Play
05:49 06:33
Random
Use select the. Jpg files or folders,
to play, EXIT to stop playing or go to the
menu.
press ENTER
press previous
Use select the. MP3 files or folders, to
play, EXIT to go to menu.
press ENTER
press the previous
USB
C:
Photo Music
..
011.jpg
200812222178878787.jpg
20081.jpg
20087.jpg
20287.jpg
20787.jpg
20087.jpg
20787.jpg
20087.jpg
C:\photo\
:17 001/018
Total size:3.7GB 1024 x 768 372.72KB
Unused size: 3.7 GB 2006:07:14 15:37:42
011.jpg
: play
-15-

Picture Audio
Snow Noise antenna position, direction
or connection
Inspection Check
Interference Noise electronic equipment,car/
motorcycle,fluorescent light
Normal Picture Mute
Volume (check if mute is
activated or ifthe audio system
connections are notcorrect)
No picture Mute
Power cord isnot inserted
Power switch isnot opened
Contrast and brightness/volume
setup
Press standby keyon the remote
control for inspecting
No color Normal audio Color control
Picture
breaking up
Normal audio
or weak
Retune channel
No color Noise TVsystem
Normal audio
antenna position, direction
or connection
TROUBLE SHOOTING
Trouble phenomenonSymptom
Ghost
-16-
The LCD TV panel is built with very high precisiontechnology giving you fine picture details
in vibrant color. Occasionally, a few non-active pixels may appear on thescreen as a fixed
point of red, green, blue, black or white. Please note this does not affect theperformance of
the product.

CH LIST/
-17-
How to play a DVD disc
1. Change TV input source to "DVD" mode by pressing
button on remote or Source button
on the side of the TV.
2. Place DVD disc in player with the content side
(shiny side) facing the front of the unit.
3. DVD disc will automatically be loaded in to the player
and begin to play.
4. To eject the DVD disc, press Eject/Insert
button on remote or the button on the
side of the unit
DVD SIDE PANEL
Dolby Digital
32
Subtitle choices
KODAK picture CD
8
Audio choices
MP3 files on
CD-R/CD-RW
16:9
LB
TV Aspect
Ratio modes
DVD video
R
RESTRICTED
Parental Lock
This product incorporatescopyright
protection technology thatis protected
by method claimsof certain
U.S.patents and otherintellectual
property rights ownedby Macro vision
Corporation and otherrights owners.
Use of thiscopyright protection
technology must beauthorized by
Macro vision Corporation,and is
intended for homeand other limited
viewing uses only. Unless otherwise
authorized by Macrovision Corporation.
Reverse engineering ordisassembly is
prohibited.
The product complieswith the KODAK
Picture CD formatand will display
KODAK Picture CDs.The "KODAK
Picture CD Compatible"logo is a
trademark of EastmanKodak Company
and is usedwith permission.
Manufactured under license from Dolby
Laboratories."Dolby" and the double-D
symbol are trademarks of Dolby
Laboratories. Confidential Unpublished
Works. 1992-1997 Dolby Laboratories, Inc.
All rights reserved.
MPEG4 files on discs
9
Multi-angle
DVD OPERATION
OPEN/CLOSE
PLAY/PAUSE
Disc with its contentside (shiny side) facing
the front of theunit, insert vertically intothe
disc tray
Caution
This DVD Player has a Class 1 laser which may
be harmful to your eyes. Do not attempt to
disassemble the cabinet or make any adjustments.
Refer all servicing to a qualified professional.
Features
Disc formats supported by this player:
SOURCE
OPEN/CLOSE
PLAY/PAUSE

-18-
MENU OPERATION
Press the SETUPbutton on the remote control, the
SETUP MENU willbe displayed.After accessing the
setup menu, pressthe direction buttonsfor up and
down movement toselect an itemdesired, and press
RIGHT direction buttonto select theSUBMENU
item. Then pressthe ENTER/OK buttonto confirm.
Press LEFT directionbutton return tothe menu of
upper level. To exit thesetup, press theSETUP button
again. In theSETUP MENU, youmay choose any of
the following optionsas you like.
LANGUAGE SETUP
Select Language inthe setup menu,and display the
Language submenu:
OSD Language
Use this itemto select the language for the
setup menu andscreen display.
Subtitle
This option providesthe preset subtitlelanguage.
Select different MPEG4subtitle encoding option.
Audio
Select the built-indisc dubbing languageoptions.
DVD Menu
This option providesthe film's menulanguage
options.
VIDEO SETUP
Select Video in the setupmenu, and displaythe
Video submenu:
desired
MPEG4 Subtitle(optional)
Note: Not all playerssupport this item.
SYSTEM SETUP
Aspect Ratio
Select the aspectratio.
Notes:
TV System
Select the differentTV system.
For more informationof output format,
refer to theinstructions or yourTV set.
RATING SETUP
Select Rating in the setupmenu, and display
the Rating submenu:
The image displayratio is relatedto the recordeddisc
format. Some disccan not displayimages in the
aspect ratio youchoose. If youplay a discrecorded in
4:3 format ona wide screenTV, black bars will
appear on theleft and rightside of thescreen. You
must adjust thescreen setting dependingon the type
of the televisionyou have.
Note: The DVD playersetting should bematched to
your TV set.
Parental Control
Set the parentalcontrol feature of the player
Note:Password is neededbefore setting Parental
Control.
Set Password
Input four digits(password), then pressENTER
/Okto confirm.
Note: If you forgetyour password, pleaseuse the
universal password 6666 to unlock.
MISC SETUP
Select MISC in the setup menu, and display
the submenu:
Use Default Settings
Reset setup datato factory default value.
DVD OPERATION

-19-
MP3/WMA/JPEG PLAYBACK PICTURE CD PLAYBACK
The PICTURE CDdisc has sucha directory structure
structure as shownin the followingpicture.
Press Direction key to choose theroot
directory and thenpress ENTER/OK buttonto
enter into thesub directory.Press Direction
key to choose thedesired picture andthen
press ENTER/OK or PLAYto enjoy the
picture. If youwant to returnto the uppermenu,
press Direction key to choose the icon and
press ENTER/OK button.
Image rotation
In picture playstate, press Direction key to
rotate the picture.
The MP3/WMAdisc has sucha directory structureas
shown picture above.
Press Direction key to choose the root directory and
then press ENTER/OKbutton to enterinto the sub
directory. PressDirection key to choose the desired
track and thenpress ENTER/OK or PLAYto enjoy
the music ormovie. If youwant to returnto the upper
menu, press Direction key to choose theicon
and press ENTER/OK button.
Filter: Allowsselecting the categoriesof files
displayed in thebrowser list.
Repeat: Toswitch different repeatplaying mode
Mode: Select differentplaying mode asfollows:
Normal: Shuffle modeis cancelled.
Shuffle: Shuffle modeenabled. When playback
reaches the endof the currentchapter/track,playback
jumps to arandom chapter/track.As the endof each
chapter/track is reached,another random
chapter/track will beplayed until alltracks/chapters
have been playedor the Shufflemode is cancelledby
toggling to adifferent Mode Option.
Edit Mode: To enableprogrammed playback mode.
When you selectthe mode, pressLEFT Direction
key to directory andpress ENTER/OK to choose the
desired track andpress Add to programand press
Program view and press the Edit mode to cancel the
edit mode.At last pressLeft key to display program
track and pressENTER/OK to start program
playback.
Program view: Display program track.
Brower view: Display trackdirectory.
Add to program:Choice the trackpress Add to
program to add thetrack of theprogram play
directory.
Clear program: In thecomplete stop state(pressthe
STOP button twice), Firstpress Edit modeto enable
the edit mode.Press Left keyto program trackand
press ENTER/OK tocancel the desiredtrack. press
Clear program to delete the track of theprogram
play directory.
DVD OPERATION
This manual suits for next models
1
Table of contents
Other Haier LED TV manuals

Haier
Haier LE46F2280 User manual

Haier
Haier LE49K6500U User manual

Haier
Haier HLC24XSL2 User manual

Haier
Haier 40D3500M User manual

Haier
Haier LE55Q6500U User manual

Haier
Haier LE32K5000T User manual

Haier
Haier LE32B8000 User manual

Haier
Haier 40D3500M User manual

Haier
Haier LE39M600SF User manual

Haier
Haier LE32F32200 User manual

Haier
Haier LE39F32800 User manual

Haier
Haier LE32F2220a User manual

Haier
Haier LE75H9000U User manual

Haier
Haier 24E2000 User manual

Haier
Haier LY19Z6 User manual

Haier
Haier 42F3500 User manual

Haier
Haier HL22XLT2 User manual

Haier
Haier LE32K6000 User manual

Haier
Haier LE22F33800 User manual

Haier
Haier 32F2000 User manual