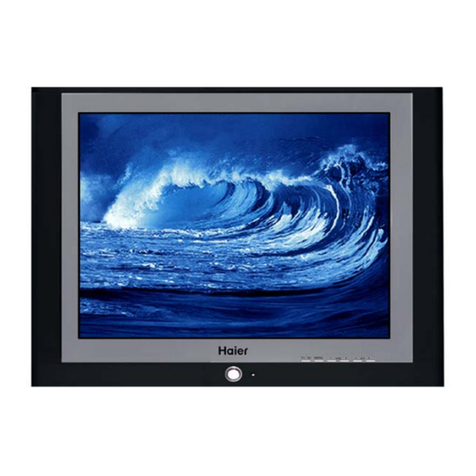
Haier 29FV5H User manual

1
14
27 29FV5H
R

1
English
Before Operation
Warning and cautions.................................................................................2
Installation.................................................................................................4
................................................................................4
The remote control..................................................................................4
MENU functions
Video set up............................................................................................5
Audio set up............................................................................................5
Timer set up............................................................................................6
Function
Channel
Calendar
...............................................................................11
Antenna Connection
Troubleshooting guide
set up.......................................................................................6
set up.......................................................................................7
................................................................................................8
V-CHIP set up.........................................................................................8
Others
Warranty ................................................................................................ 12
Specifications ...........................................................................................13
Table Of Contents
CAUTION: TOREDUCE THE RISK OF ELECTRIC SHOCK, DO NOTREMOVE COVER
(OR BACK). NO USER-SERVICEABLE PARTS INSIDE. REFER SERVICING TO QUALIFIED
SERVICE PERSONNEL.
THIS SYMBOL INDICATES THAT HIGH VOLTAGE IS PRESENT INSIDE. IT IS
DANGEROUS TO MARK ANY KIND OF CONTACT WITH ANY INSIDE PART
OF THIS PRODUCT.
THIS SYMBOL INDICATES THAT THERE ARE IMPORTANT OPERATING AND
MAINTENANCE INSTRUCTIONS IN THE LITERATURE ACCOMPANYING
THE APPLIANCE.
This important note is located on the rear of the cabinet.
Note to CATV system installer: This reminder is provided to call CATV system
installer s attention to section 820-40 of the NEC which provided guidelines
for proper grounding and, in particular, specifies that the cable ground shall
be connected to the grounding system of the building, as close to the point of
cable entry as practical.
Warning: To reduce the risk of fire or electric shock, do not expose this appliance to
rain or moisture.
Warning: To reduce the risk of fire or electric shock, do not expose this appliance to
rain or moisture.

English
2
English
IMPORTANT SAFETY INSTRUCTIONS
Read all of the instructions before using thisappliance. Whenusing this appliance, always
exercise
basic safety precautions, including thefollowing:
1) Save theseinstructions- The safetyand operation instructionsshould be retained for future
reference.
2) All warningson the appliance and in theoperating instructions should be followed.
3) Cleaning- UnplugTV from the wall outlet beforecleaning. Do not use liquidcleaners or
aerosol
cleaners.
Use only adamp cloth for cleaning.
Exceptions: Some productsare designed for uninterrupted service, eg. Cable TV converters.
Unplugging such accessoriesmay result in loss of authorizationcodes. In such cases, please
follow
instructions for unpluggingsuch devices as provided by theaccessories manufacturer.
4)Attachments-Do not useattachments not recommended by the TVmanufacturer as they
may cause
hazards.
5) Water and moisture-Do notplace this TV near water, for example, near abathtub, wash bowl,
kitchen sink, or laundry tub, in a wet basement, ornear a swimming pool.
6)Accessories - Donot place this TV on anunstable cart, stand, tripod, bracket or table. The TV
may
fall causing seriousinjury to someone, and serious damage to the appliance. Use onlywith a
cart,
stand, tripod, bracket, or table recommended by the manufacturer, or soldwith the TV. Any
mounting of theappliance should follow the manufacturer`s instructionsand should use a
mounting accessory recommended bythe manufacturer. An appliance and cart
combination should
be moved withcare. Quick stops, excessive force, and uneven surface may cause the
appliance and
cart combination tooverturn.
7) Ventilation- Slots and openings in thecabinet and the back or bottomare provided for
ventilation
and to preventoverheating. These openings must notbe locked in a built-in installation such
as a
bookcase or rack unless proper ventilationis provided orthe manufacturer`s instructions
have
been adhered to.
8)Power sources- This TV should be operatedonly from the type of powersources indicated on
the
electrical nameplate. If you arenot sure of the type ofthe power supply to your home, consult
your
appliance dealer orlocal power company. For TV intended tooperate from battery power or
other
source, refer to the operationinstructions.
9)Grounding or polarization- This TV is equipped witha polarized alternating current line plug(a
plug having oneblade wider than the other is).This plug will fit into thepower outlet only one
way.
This is safetyfeature. If you are unable to insert theplug fully into the outlet,try reversing the
plug. If
the plug shouldstill fail to fit, contactyour electrician to replace your outlet. Don`t defeat the
safety
purpose of thepolarized plug.

35
3
English
12)Lightning precaution -For added protection for this TV receiver during a lightning storm or when i
is left unattendedfor long period of time, unplug it fromthe wall outlet and disconnect the
antenna or cablesystem. This will prevent damageto the TVdue to lighting and power line surge
s
13)Object and liquidentry - Never push objects of anykind into this TV through openings as they
may touch dangerousvoltage point or short out partsthat could result in a fireor electric shock.
Avoid spilling liquid of anykind on the TV.
14)Servicing - Do not attempt to service the TV by yourself, as opening or removing covers may
expose you todangerous voltage or other hazards. Refer all servicing to qualified service
personnel.
15)Damage Requiring Service - Unplug this TV fromthe wall outletand refer servicing to qualified
service personnel under the following conditions:
a. When the power supply cord or plugis damaged or frayed.
b. If liquid has beenspilled, or objects have beenfallen into theTV.
c. If the TV hasbeen exposed to rain or water.
d. If the TV does not operate normallyby following the operation instructions. Adjust only those
controls that arecovered by the operation instructions, as improper adjustmentof other control
may result indamage and will often require extensivework by a qualified technician to restore th
e
TV to itsnormal operation.
e. If the TV hasbeen dropped or damaged in anyway.
f. When the TV exhibits a distinctchange in performance; this indicates a need for service.
16) Replacement parts - When replacement parts arerequired, be sure the service technician uses
replacement parts specifiedby the manufacturer that have thesame characteristics as the origi
n
part. Unauthorizedsubstitutions may result in fire, electric shock, injury to persons or other hazards
.
17) Safety check- Upon completion of any service of repairs to this TV, ask theservice technician t
o
perform routine safety checks to determine that the TVis in proper operation condition.
18) Heat -This TV product should be situatedaway from heat sources such as radiators, heat
registers, stoves,or other products(Including amplifiers) that produce heat.
19) Modifications -Any changes or modifications not expresslyapproved by the Federal
Communications.
20)Clean only witha dry cloth.
21)Do not blockany ventilation openings. Install in accordance with the manufacturer's instruction
s
22)Do not installnear any hear sources such asradiators, heat registers, stoves, or otherapparatus
(including amplifiers) thatproduce heat.
23)Do not defeatthe safety purposes of the polarizedor grounding type plug. A polarized plug has
two blades withone wider than the other. A grounding type plug has two blades anda third
grounding prong. The wide blade or the thirdprong is provided for your safety. When theprovided

plug does not fit into youroutlet, consultan electrician forreplacement of the obsolete outlet.
24)Protect the power cord from being walked on or pinched particularly at plugs, convenience
receptacles, and the point wherethey exit from the apparatus.
25)Only use theattachments/accessories specified by the manufacturer.
26)Refer all servicing to qualified service personnel. Servicing isrequired when theapparatus has
been damaged inany way, such aspower supply cord or plug isdamaged, liquid has been spill
e
or objects havefallen into the apparatus, the apparatus has beenexposed to rain or moisture, d
o
not operate normally, or hasbeen dropped.
Model number Serial number Date of purchase
Staple your receipt to your manual. You will need it to obtain warranty service.
For Future Reference Please
SAVE THESE INSTRUCTIONS
Haier

4
English
Front
Remote Control Functions
1. : Power on/off
2. MENU: Access/Exit Main M
3. CH+/-: Select next higher or lower channel
4. VOL+/-: Increase or decrease sound
5. CHANNEL NUMBER BUTTON: Direct channel
tuning (TV channel 02-69, CATV channel 01-125.)
6. RECALL: Return to previous channel
7. -/--: Digital Selector
8. TV/AV: TV/AV selection
9. CCD CCD selection
10. MUTE: Press key to Activate/deactivate Mute Function
11. P.STD: Picture Preference Select Button
12. DISPLAY: Display receiving channel
13.EXIT Exit TV Menu
1. : Power on/off
2. MENU: Access/Exit Main M
3. CH+/-: Select next higher or lower channel
4. VOL+/-: Increase or decrease sound
5. CHANNEL NUMBER BUTTON: Direct channel
tuning (TV channel 02-69, CATV channel 01-125.)
6. RECALL: Return to previous channel
7. -/--:
8. TV/AV: TV/AV selection
9. CCD CCD selection
10. MUTE: Press key to Activate/deactivate Mute Function
11. P.STD:
12. DISPLAY: Display receiving channel
13.EXIT
1.Menu: Access/Exit Main M (Menu)
2.TV/AV: TV/AV selection
3.V-: Decrease sound
4.V+: Increase sound
5.P-: Select next lower channel
6.P+: Select next higher channel
7.Power: Power on/off
8.
9.
Power Indicator
Sensor Windows
6
1
789
23
45
0
RECALL
TV/AV CCD
EXIT
MUTE
P.S T D DISPLAY
-/--
MENU CH+
VOL- VOL+
CH-
1
2
3
4
5
67
89
13
10
11 12
Rear
1. VIDEO: Video Input
2. AUDIO(L/R): Audio Input
Side
1. S-VIDEO Input
2. VIDEO/AUDIO Input
3. YUV-DVD component Input
4. VIDEO/AUDIO Output
5. Antenna Input
VIDEO
AUDIO-L
R
AUDIO-
1
2
AV1 IN
MENUTV/AV
MENU TV/AV
21
7
8
9
34 5 6
1234
5
Y
Cb
L
S-VIDEO
Cr
IN
VIDEO
IN OUT
R
AUDIO

5
5
English
Menu Functions
Video Set Up:
Pressing MENU button once will bring the VideoSet Up menu on the TV.
The following isshown on your TV screen:
Follow the procedure below toadjust the
picture quality ofyour choice:
1.Press the CH(+) and CH(-) button to go
up and downthe menu.
2.Press the VOL(+) and VOL(-) button to
increase and decreasethe level to your
preference for eachitem.
Adjustment of Picture Quality:
To adjust the picture quality from the factory presetread the following:
Picture: By increasing the level, it willadjust white areas of picture andby decreasing the level ,
it will adjustblack areas of picture.
Brightness: By increasingthe level, it will addmore light todark parts ofthe picture and by
decreasing the level, it willadd more dark to light partsof the picture.
Color: By increasingthe level, it will adjust the low and the high level of the picture.
Sharpness: By increasingthe level, it will showcleaner and clearerimages and bydecreasing
the level, it will make picture smoother.
Tint: Youcan adjust thetint of the picture by goinginto picture set up menu. By decreasing the
level, it will give red tint to skincolor and by increasing the color it will givegreen tint to
skin color.
Color Temp : By pressing the VOL(+/-) buttonsto select the three setting A)Neutral, B)Warm,
C)Cool.
Picture 70
Color 50
Sharpness 40
Tint 0
Color Temp. Neutral
Brightness 32
Video
Information to user:Thistelevision receiver is equipped with closecaption decoder and
parental blocking technologyas required by the FCC.
Audio Set Up:
By pressing MENUbutton ,and then pressing VOL(-/+) button it will bringyou to Audio
Set Up display. Youwill see thefollowing menu onyour TV screen:
Follow the procedure below toadjust the
sound quality: Audio
Bass 50
Treble 50
Balance 0
Surround off
Volume 50
1.Press the CH(+) and CH(-) button to go up
and down themenu.
2.Press the VOL(+) and VOL(-) button to
increase and decreasethe level to your
preference for eachitem.

6
English
Timer Set Up:
By pressing MENUbutton ,and then pressing VOL(-/+) buttonit will bring you to Timer
Set Up display. Youwill see thefollowing menu onyour TV screen:
Clock:
Time-On:
Ch. Select: This exclusive feature switches you toyour favorite channel at the
appropriate set time. Press VOL(+) and VOL(-)buttons to selectthe channel.
Time-Off :
Sleep Time: This feature allows you to turnoff television in pre-selected minutes (180,
170,160, ........,10 and0).
Remind time:
Ch. Switch: This feature lets you store yourfavorite channel. Once you storethe
channel number inthis function, when the settime is up, it will switch over
to the setchannel. This feature is usedwith the Exchangefeature. Press
VOL(+) or VOL(-)button to select the channel.
Press CH( +/-) buttons to scroll to Clock, then press VOL (-/+) buttons to set
the hour aftersetting the hour press CH( +/-)buttons to go to minute modeand
set by usingVOL(+/-) buttons.
Press CH( +/-) buttons to scroll to Clock, then press VOL (-/+) buttons to
set the hourafter setting the hour press CH(+/-) buttons to go to minutemode
and set byusing VOL(+/-) buttons.
Press CH( +/-) buttons to scroll to Clock, then press VOL (-/+) buttons to
set the hourafter setting the hour press CH(+/-) buttons to go to minutemode
and et byusing VOL(+/-) buttons.
Press CH( +/-) buttons to scroll to Clock, then press VOL (-/+) buttons
to set thehour after setting the hour pressCH( +/-) buttons to go tominute mode
and set byusing VOL(+/-) buttons.
Timer
AM
Time-On --:-- AM
Ch. Select 1
Time-Off --:-- AM
Sleep Time 0
Remind Time --:-- AM
Ch. Switch 1
Clock 10:18
Follow the procedure below to select one of
the above options:
1.Press the CH(+) and CH(-) button to goup
and down themenu.
2.Press VOL (+) button or VOL (-) buttonto
select your preference.
Function Set Up:
By pressing theMENU button, and then pressingVOL-/+ button will bring you to
Function Set Up menu. You will see thefollowing menu on your screen:
Setup
Language English
Background on
VNR on
AVL on
C. Caption off
Black Stretch on
1.Press the CH(+) and CH(-) button to go up
and down themenu.
2.Press the VOL(+) and VOL(-) button to
increase and decreasethe level to your
preference for eachitem.
Follow the procedure below toselect one of
the above options:

Language: UseVOL(+/-) to select the OSD ineither English, French or Spanish.
Background: Press the VOL (+/-) buttons to selectbetween Background ONor Background
OFF. When the Background ON function is chosen, a moving"NO SIGNAL" sign will
be displayed ifthere is no input signal to the set.
Black Stretch: Press VOL (+/-)buttons to turn the Black Stretchfeature on or off. When the
Black Stretch functionis on the screen automatically increases the contrast range.
VNR: Press VOL (+/-) buttonsto turn the VNR function onor off. VNR is a term forVideo
Noise Reduction, a built-in device on the set that reducesvideo noise interference
so the vieweris assured a clear picture.
AVL: AutomaticVolume Limit control reduces effectof large volume changes such aswhen the
ads come on. Press VOL(+) button or VOL(-) button toset it ON or OFF.
C.Caption: Press VOL (+/-) buttonsto select the Closed Caption options. Closed
Captioning helps thehearing impaired with the broadcast program, as wellas helping
children learn howto read. A built in decoder displays theaudio portion of a program
as text onthe screen when this option is selected.
OFF: WhenOFF is displayed on TV itmeans C.Caption is turned off.
CC1: When CC1displayson TV it means C.Caption is turned on.
CC2 to CC4:For other modes of video related broadcast information.
T1: For program guide and other information displayed by broadcasters.
(This blocks alarge portion of the picture on your screen).
T2 to T4:For other modes of information displayed by broadcasters.
(This blocks alarge portion of the picture on your screen).
Note: Select CC1 for full translation of theprimary language such asEnglish in your
area. Select CC2 for secondary language translation such as Spanish or anyother
language that maybe broadcast in your area.
Channel set up:
By pressing MENUbutton ,and then pressing VOL-/+ button it will bring you to
Channel Set Up. You will see thefollowing display on TV screen.
Channel
Antenna TV
Skip off
Current Ch. 2
Fine
Auto Program
Channel System Auto
Follow the procedure below to select above
options:
1.Press the CH(+) and CH(-) button to goup
and down themenu.
2.Press VOL (+) button or VOL (-) buttonto
select your preference.
Channel System: Press the VOL(-/+) buttons to select the correct channelsystem.
In general, you can set it as "AUTO" AUTO and NTSC will displayin turn
Antenna: Press VOL (+) button or VOL(-) buttonto select TV or CATV.
Channel Coverage byAntenna:
Antenna Type Channel Range
VHF 2-13
UHF 14-69
CATV 1-125
English
7

Skip :Press VOL(+) button or VOL(-) button toadd or delete the channel fromthe
stored memory.
Current Ch. : Press VOL(+) button togo up andVOL (-) button to go downto set the
channel position. The display will show the current playing channel.
Fine: If the picture and/orsound are poor, try using the FINE TUNE feature.
Do not usethis feature unless reception is poor. Press VOL (+/-) to start the Fine
Tune function.
Auto Program: Press VOL (+) button orVOL (-) buttonto auto program in channels.
This search automaticallyadds only the active channels inyour area to the TV's
memory. It deletes any channelson which there is no broadcastor a poor signal.
Note: The Auto Search function will scan thechannels on the selected antenna
input. Ifthe TV is connected to cable, please select Cable under Antenna.
Calendar:
Your TVhas been designedwith a calendar. By pressing MENU button ,andthen
pressing VOL-/+ button it will bring you to Calendar. You will see the following
display on TVscreen.
Calendar
OCT
OCT
OCT
Follow the procedure below to adjust the Calendar:
1. +/- buttonsPress the CH to select theyear
item, the month item or the date item.
2. Press the VOL-/+buttons to change
calendar setup (1901.1.1-2099.12.31).
3. Press EXIT button to exit the calendarmode.
V-CHIP SetUP:
Press the MENU Button on your remote controlto go to Password menu,then input
the password (0000). It will bring Parental Lock set updisplay on the screen. You
will see thefollowing menu on your screen:
Parental Lock
Parental Lock off
TV Rating
MPAA Rating
Lock Menu
Change Password
Passsword
Password ----
This function enablesyou to block certain TV channels in accordance tothe V-CHIP
requirement established bythe FCC.
English
8

To set the V-CHIP function:
Select the TVRating option. You will see theTV Rating menu on your TV screen:
1.Press CH(+/-) button to go up and down
the menu.
2. Press VOL(+/-) button to go into TV
Rating and Movie Rating menus.
3.Press MENU button to set the Parent
lock ON andParent lock OFF.
When TV ratingis selected, you will see
the following ratingtable on your TV screen.
When Movie ratingis selected, you will seethe following ratingtable on yourTV screen.
MPAARating
GU
PG U
RU
NC-17 U
XU
PG-13 U
PARENT LOCK OFF means the lock function is turned off . If the PARENT LOCK
is in "OFF"mode then V-CHIP function will not be active to accept the V-CHIP
signal.
PARENT LOCK ON means the lock functionis turned on. If the lock is inthe "ON"
mode then V-CHIP function is activated to accept the V-CHIP signal.
Password
The "Default Password" preset by the manufacturer is"0000" . If you want tochange
the preset passwordto your own password, just choose any four digits that canbe
easily remembered andset. Once you set passwordfor a particular channel, that
channel will beblocked. This channel can only be accessed withthe password.
LOCK Menu
AV LOCK:When it isset ON,you can not usethe AV.
PROGRAM LOCK:Whenit is set ON,the current channel is locked,you can not see
the program ofthis channel.
English
9
Note: You can press CH(+/-) buttons to go up and down the menu, then press VOL(+)
button to select "B" or "U' .
Note: You can press CH(+/-) buttons to go up and down the menu, then press VOL(+)
button to select "B" or "U" .
OCT
OCT
OCT
OCT
OCT
OCT
Rating FV
TV-Y
TV-Y7
TV-G
TV-PG
TV-14
TV-MA
DLSV
UUUU
UU U U
UUU
U
U
U
U
U
U
>
U
TV Rating

V-Chip Technology:
The "V-ChipTechnology" allow you to useU.S. and Canada Moviesand TV
PROGRAMS Guide ratingsto block certaintypes of TV programs and movies.
To understand clearly about TV programs rating codes, read thefollowing list:
U.S. TV Program Ratings
NR: Not Rated-this means that programs are not rated or rating does notapply.
TV-Y:For all children-this type of rated programs are designed fora very young audience,
including children fromages 2-6.
TV-Y7:Directedfor older children - this typeof rated programsmay include mild physical
violence, or may frighten childrenunder the ageof 7.
TV-G:General Audience-this type of rated programscontains little orno violence, no strong
language, and little or nosexual dialogue and situations.
TV-PG:ParentalGuidance Suggested-this type of rated programs may containlimited violence,
some suggestive sexualdialogue and situations, and rarelanguage.
TV-14:Parents strongly cautioned-this type of ratedprograms may containsexual content,
strong language andmore intense violence.
TV-MA:Mature audience only-this type of rated programs may containsexual violence,
explicit sexual contentand profane language.
FV: This type of ratedprograms contains Fantasy and cartoon violence.
Violence: This type of rated programs contains violence.
S: This type of rated programs contains sex.
L: This type of rated programs contains offensivelanguage.
D: This type of rated programs contains dialoguewith sexual content.
To understand clearly about movies rating codes, read the followinglist:
U.S. Movies Rating Chart
NR: This means movie is not rated yet. It ispending government rating approval.
G:General Audience-this type of movierating means all ages admitted to see the movie.
PG-13:Parents StronglyCautioned - this type of movierating means some material
may not beappropriate for childrenunder13.
R:Restricted- This type of movierating means children under 17 of age requires to
be with parentor guardian.
NC-17:This type ofmovie rating means no one 17 and under admitted.
X:This type of movie rating means adults only.
To understand clearly about Canadian programs rating codes, read thefollowing list:
Canadian English Rating Chart
E:Exempt - this type ofrated programs contain news, sports, documentaries, talk
shows, music videos, and a variety ofother programs.
C:This type of rated programs are intended for children under age8. There is no
offensive language, nudity or sexualcontent.
C8+:This type ofrated programs generallyconsidered acceptable for children 8
years and over. There isno profanity, nudity orsexual content.
G: This type of rated programs are generallysuitable for allaudiences.
PG: ParentalGuidance Suggested -inthis type of rated programs, some material
may not besuitable for children.
14+:In this typeof rated programs, some contentmay not be suitable for viewers
under the ageof 14.Parents are strongly cautionednot to have their children
view 14+ ratedprograms by pre-teens and early teens.
18:Adults Only-this type of ratedprograms are only for adult viewers only.
English
10

11
English

12
English
English
Warranty Information

13
753 X 500 X 573
2
English
45.5Kg
UHF: 14-69 CATV: 1-125
VHF: 2-13
Included :Accessories AA
HTAR29
9
5W+5W
110-220V,50/60Hz
Table of contents
Other Haier TV manuals

Haier
Haier HLH32ATBB User manual

Haier
Haier 21F8A User manual

Haier
Haier TN201AUV User manual

Haier
Haier HTAF21C User manual

Haier
Haier 29F9B-P User manual

Haier
Haier L24K3 User manual

Haier
Haier HLH26BBTV User manual

Haier
Haier LT15R1CBW User manual

Haier
Haier HTX21S31 User manual

Haier
Haier L42S9 User manual

Haier
Haier NS-LCD19W-09 User manual

Haier
Haier HLC22R1 - 22" LCD TV User manual

Haier
Haier L1927 User manual

Haier
Haier HTN19R12 User manual

Haier
Haier HL42XZK42a User manual

Haier
Haier 21T07 User manual

Haier
Haier 25F3A User manual

Haier
Haier ULT-15M User manual

Haier
Haier 21FA10-AM User manual

Haier
Haier HL42XP22 User manual