Hansa ZIG 645B User manual

ZIG 645B
OPERATING INSTRUCTIONS
EN
IO-DWS-1118
(05.2019/1)
Please carefully read these Operating Instructions
before using the appliance!

2
ECOLOGY IN PRACTICE
BASIC INFORMATION
SAFETY AND GERMENT CARE LABELS
INSTALL THE APPLIANCE
PRODUCT DESCRIPTION
PRODUCT FICHE
3
5
6
10
13
31
In accordance with European Directive 2012/19/EU and Polish legislation regarding used
electrical and electronic goods, this appliance is marked with the symbol of the crossed-out
waste container.
This marking indicates that the appliance must not be disposed of together with other
household waste after it has been used. The user is obliged to hand it over to waste col-
lection centre collecting used electrical and electronic goods. The collectors, including local
collection points, shops and local authority departments provide recycling schemes. Proper
handling of used electrical and electronic goods helps avoid environmental and health haz-
ards resulting from the presence of dangerous components and the inappropriate storage
and processing of such goods.
CONTENS

3
For many years, Hansa has consistently pursued pro-ecological policy.
Concern for the environment is as important for us as the use of modern technology. That’s why
we focus on energy-ecient appliances of the highest energy eciency class — A+, A++ and
A+++.
The development of technology has enabled our factories to become more environmentally
friendly – we use less and less water, electricity and less waste water and solid waste is gener-
ated in the production.
A lot of attention is paid to materials used in production. We strive to use only those that do not
contain harmful substances and make recycling and safe disposal possible after use.
ECOLOGY IN PRACTICE

4
Dear customer!
Thank you for choosing an Hansa product. For years we have deliv-
ered high-quality appliances, so that household chores become a real
pleasure. Before being packaged and leaving the manufacturer, the
appliance was thoroughly checked with regard to safety and func-
tionality. We also endeavour to make sure that modern technology in
Hansa products always goes hand in hand with a unique design.
Before using the appliance, please carefully read these Operating
Instructions Follow these instruction to avoid improper use and ensure
long and reliable operation of the appliance. Learn the principles of the
safe use to avoid accidents.
Store these operating instructions in a safe place to use them for ref-
erence whenever needed. These Operating Instructions contain all the
necessary information that will make the use of your Hansa appliance
simple and fun. We also encourage you to nd out more about other
Hansa appliances.
We hope using your new appliance is a pleasure.

Carefully read the operating instructions before plugging dishwasher to a power
outlet and using the appliance. Operating instruction include tips that will help you
avoid the risk of injury and damage to the appliance. Keep dishwasher documenta-
tion in a safe place for possible future use.
These operating instructions have been prepared for a range of appliances and
some features described herein may not apply to your appliance.
BASIC INFORMATION
The manufacturer hereby declares that this product
meets the requirements of the following European
directives:
Low Voltage Directive, 2014/35/EU,
Electromagnetic Compatibility (EMC) Directive
2014/30/EE,
Eco-design Directive2009/125/EU,
RoHS Directive2011/65/EU,
and has been marked with the symbol and issued
with a declaration of compliance made available to
market regulators.
MANUFACTURER’S DECLARATION
SAFETY AND GERMENT CARE LABELS
Do not abuse, sit on, or stand on the
door or dish basket of the
dishwasher.
Do not touch the heating
element during or immediately after
using.
Do not operate your dishwasher
unless all enclosure panels are
properly in place. Open the door
very carefully if the dishwasher
is operating. There is a risk of water
squirting out.
Do not place any heavy objects or
stand on the door when it is
open. The appliance could tip for-
ward.
When loading items to be washed:
Locate sharp items so that they are
not likely to damage the door
seal;
Load sharp knives with the handles
up to reduce the risk of cuttype
injuries;
Warning: Knives and other utensils
with sharp points must be loaded in
the basket with their points down or
placed in a horizontal position.
When using your dishwasher, you
should prevent plastic items
from contacting with heating ele-
ment.
6

Check that the detergent recep-
tacle is empty after completion of
the wash cycle.
Do not wash plastic items unless
they are marked dishwasher
safe or the equivalent. For plastic
items not so marked, check
the manufacturer’s recommen-
dations.
Use only detergent and rinse ad-
ditives designed for an
automatic dishwasher. Never use
soap, laundry detergent, or
hand washing detergent in your
dishwasher.
Other means for disconnection
from the supply must be
incorporated in the xed wiring
with at least 3mm contact
separation in all poles.
Keep children away from deter-
gent and rinse aid, keep children
away from the open door of the
dishwasher , there could still be
some detergent left inside.
To protect against the risk of elec-
trical shock, do not immerse the
unit, cord or plug in water or other
liquid.
SAFETY AND GERMENT CARE LABELS
7

This appliance can be used by
children aged from 8 years and
above and persons with reduced
physical, sensory or mental
capabilities or lack of experience
and knowledge if they have been
given supervision or instruction
concerning use of the appliance
in a safe way and understand the
hazards involved. Children shall
not play with the appliance. Cle-
aning and user maintenance shall
not be made by children without
supervision.
Dishwasher detergents are stron-
gly alkaline. They can be
extremely dangerous if swallo-
wed. Avoid contact with skin and
eyes, and keep children away
from the dishwasher when the
door is open.
The door should not be left in the
open position since this could
present a tripping hazard.
If the supply cord is damaged, it
must be replaced by the
manufacturer or its service agent
or a similarly qualied person
in order to avoid a hazard.
Please dispose of packing mate-
rials properly.
8
SAFETY AND GERMENT CARE LABELS

During installation, the power
supply must not be excessively or
dangerously bent or attened.
Do not tamper with controls.
The appliance is to be connected
to the water mains using new
hose sets, and the old hose-sets
should not be reused.
Make sure that the carpet
must not obstruct the openings
at the bottom base.
Use the dishwasher only for its
intended function.
The dishwasher is intended for
indoor use only.
The dishwasher is not designed
for commercial use. It is
intended for use in domestic ho-
useholds and in similar working
and residential environments.
Please do not overload your di-
shwasher. There is only space for
12 standard dishes. Do not use
dish that is not suitable for
dishwashers. This is important for
good results and for
reasonable energy consumption.
9
SAFETY AND GERMENT CARE LABELS
10
When choosing the place of installation, make sure you will be able to easily load and remove
dishes and utensils from the dishwasher.
Do not place the appliance in a room where the temperature can fall below 0°C.
Before installing unpack the appliance following the instructions on the packaging.
Place the appliance close to the water valve and drain.
When installing the dishwasher assume that the connection will not be changed.
When you move the appliance do not handle it by the door or control panel.
Leave some room on all sides to have convenient access to the dishwasher when cleaning.
Make sure that when you set the dishwasher you do not crush the water supply and drain
hos Also, make sure that the appliance is not places on the power cord.
Level the appliance using the adjustable legs. Proper level ensures trouble-free opening
and closing the dishwasher doors.
If the dishwasher door will not close properly, check that the appliance stands rmly on the oor,
if not, adjust using the adjustable legs.
Make sure that domestic water supply system is suitable for the dishwasher. It is recommended to
install a lter in the water supply line to avoid damage to the appliance due to impurities (such as
sand, clay, rust, etc.) that occasionally occur in water. This will also prevent accumulation of sedi-
ment after dishwashing.
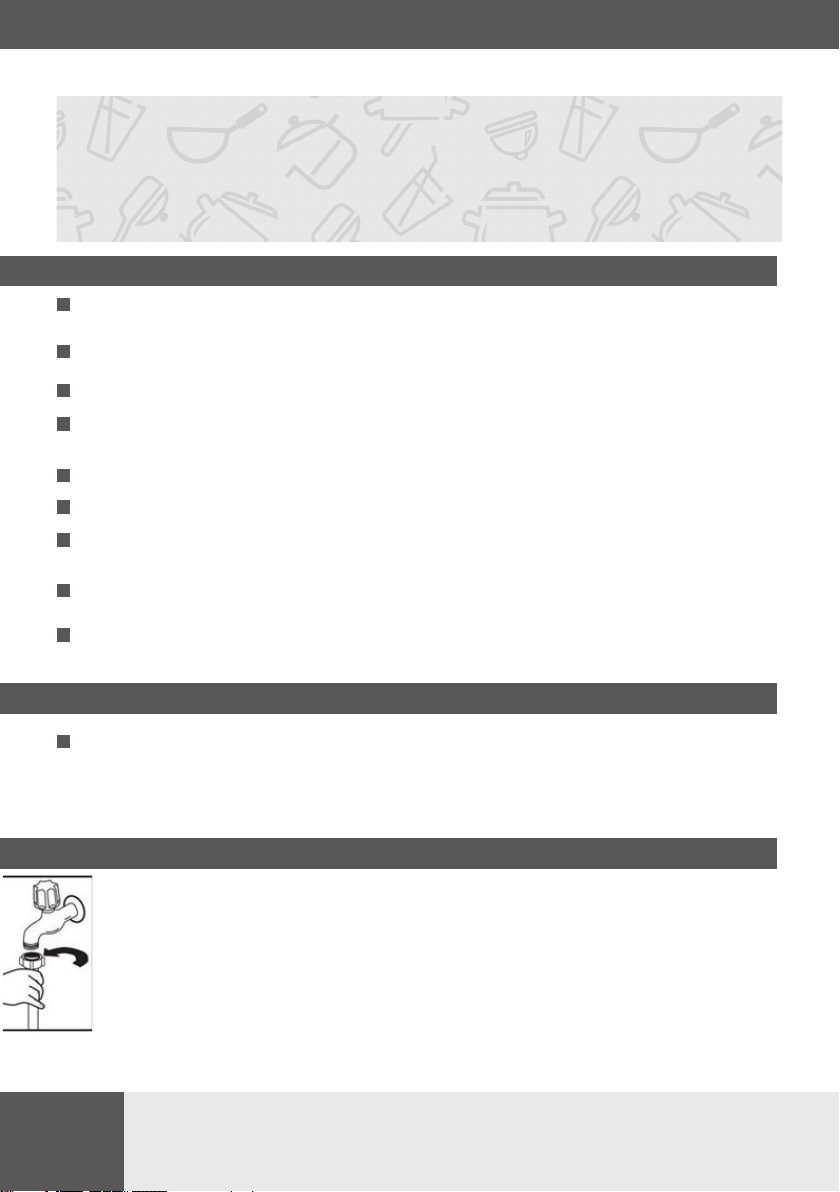
Do not use the water supply hose from the old dishwasher. Use the new water supply hose pro-
vided with the appliance. Before connecting, rinse the hose with water. Connect the water supply
hose directly to the water feed valve. The domestic water system pressure should be at least
0.04 MPa and up to 1 MPa. If the water pressure exceeds 1 MPa, install pressure reducing valve.
When the connection is ready, open the valve completely and check for leaks.
For safety reasons, close the water supply tap after every wash.
INSTALL THE APPLIANCE
PLACEMENT OF THE PRODUCT
WATER SUPPLY CONNECTION
WATER SUPPLY HOSE
11
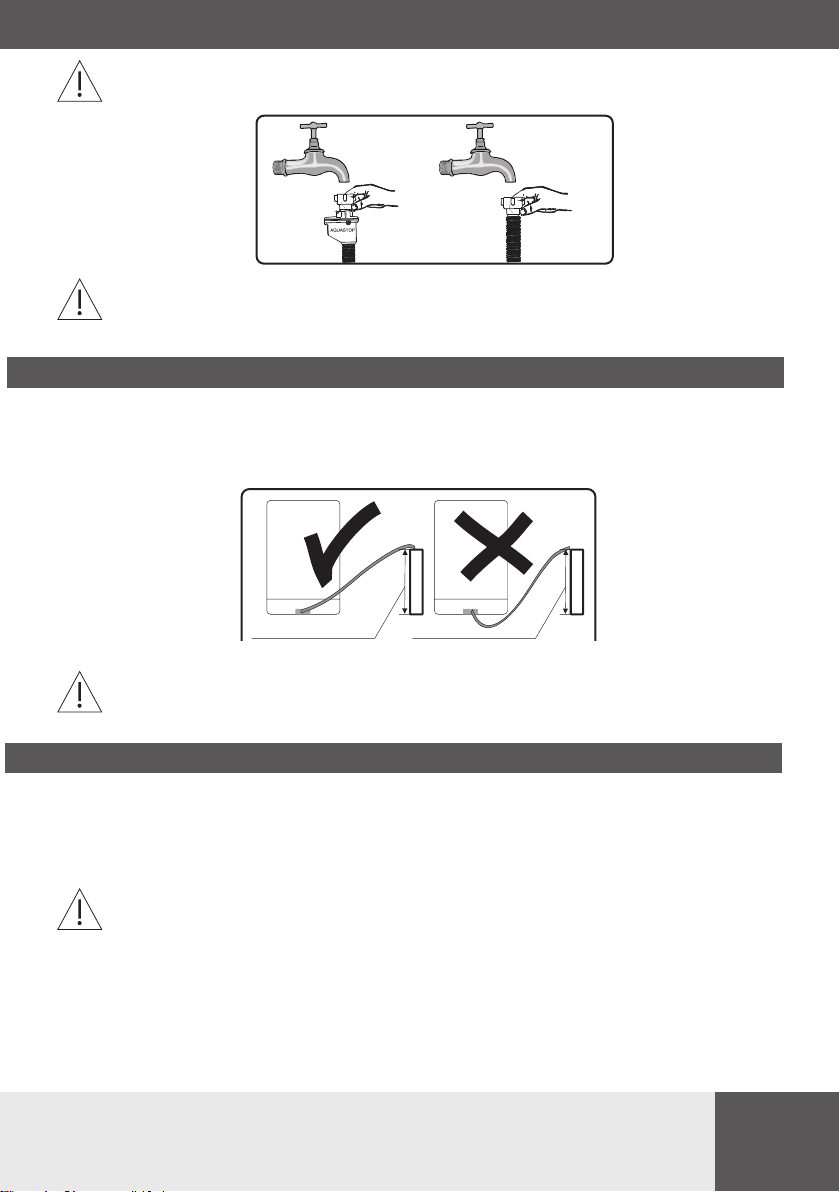
NOTE: Aquastop water supply is used in some dishwasher models. Dangerous voltage could
occur with Aquastop. Do not cut the Aquastop water supply. Do not allow it to bend or twist.
Important!
For safety reasons, close the water tap after every wash.
THE DRAIN HOSE
The drain hose can be connected directly to a water drain or kitchen sink stub pipe. You can also drain
the water directly into the sink using the special bracket (if available), placing the drain hose outlet on
the kitchen sink edge. The drain hose connection should be made at least 50 cm and up to 110 cm from
the oor.
min 50cm/max 110cm min 50cm/max 110cm
If the drain hose is longer than 4 m, dishes may not be washed properly. The manufacturer is
not be held responsible for such a situation.
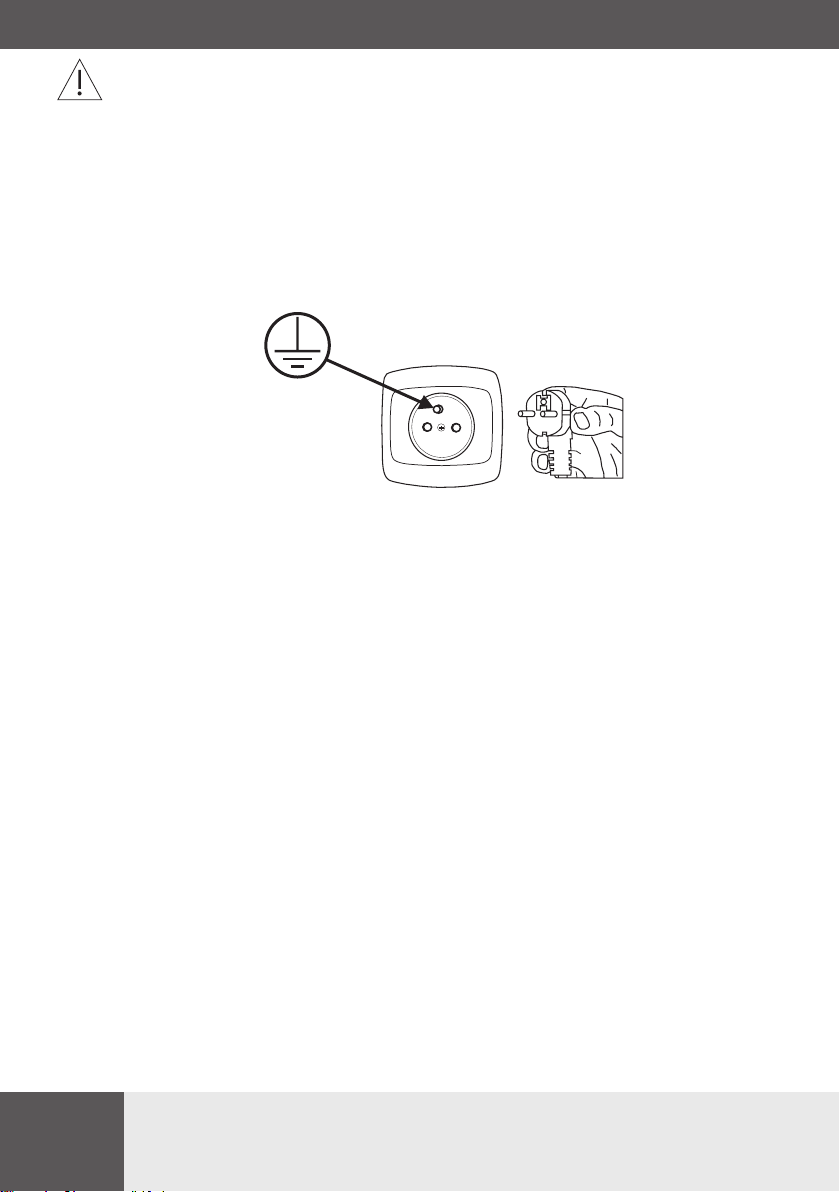
ELECTRICAL CONNECTION
Grounded plug must be connected to a grounded power outlet with a proper voltage. If there is no
grounding, refer this to a qualied electrician. If you operate the appliance without proper grounding,
the manufacturer does not assume any liability for the possible resulting damage.
Domestic electrical system must be protected with a 10-16A fuse.
The appliance must be supplied with 220-240 V AC. If the supply voltage is 110 V, use 3000W,
110/220 V set-up transformer to connect the appliance. Do not connect the appliance during
installation.
12
Always use the plug provided with the appliance. When you operate the appliance at lower
voltage the dishwashing eciency will deteriorate and may damage the appliance.
The power cord may only be replaced by authorized service or a qualied electrician. Failure to
comply with these rules may lead to an accident.
For safety reasons, you should always unplug the appliance after you have nished using it.
In order not to avoid electric shock, do not remove the plug from the wall outlet with wet
hands.
When you unplug the appliance from the wall outlet, always pull the plug. Never pull the power
cord.
13
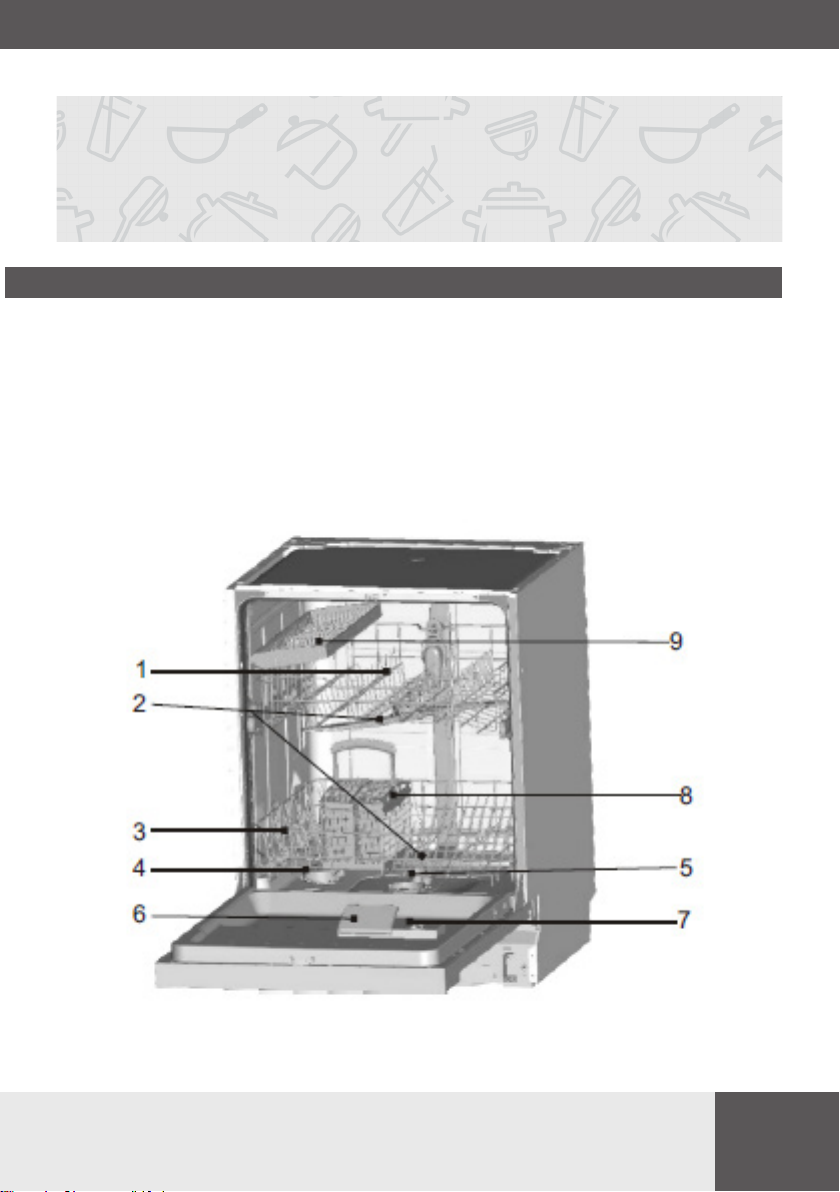
The features and components of the appliance (g. 1):
1 Upper Basket
2 Spray Arms
3 Lower Basket
4 Water Softener
5 Filters
6 Detergent Dispenser
7 Rinse Aid Dispenser
8 Cutlery basket
9 Fork shelf
DISHWASHER FEATURES
PRODUCT DESCRIPTION

14
CONTROL PANEL
1. Program indicator light: when you select a washing programme, the corresponding light will display.
2 Program select button/Child lock button: Press the button to select the program.
The „child lock“ will be available when you press the button 3 seconds ,and „LO“ ashes 6 times
on digital displays.
3 Salt and Rinse Aid Indicator Light: To come on when the softener or dispenser needs to be relled.
4 Digital display: To display the running time remain, malfunction codes and delay time.
5 Delay time: This option will allow you to delay the start time of any wash cycle for up to
24 hours (depending on model). Select the delay start time you want by pressing the DELAY
pad. Multiple pressing will increase the delay hours.
6 Power switch: To turn on/o the power supply.
7 After select the desire program, close the door, the dishwasher in function status.
Before using the appliance, verify that the data given on the rating plate
matches that of local power outlets.
Remove all packing materials from inside of the appliance.
Prepare special salt (water softener).
Add 2 kg special salt (intended for dishwashers) to the salt dispenser and ll it
with water to the brim.
Pour into the rinse aid dispenser.
1
Before rst use
1 2 3 4 5 6

15
PREPARE THE APPLIANCE FOR OPERATION
A dishwasher requires soft water (with low calcium content) to operate eciently.
Otherwise, white residue main remain on the dishes and inside the appliance. This
has a negative impact on the quality of dishwashing, rinsing and drying. When the
water ows through the softener, ions responsible for the water hardness are
removed, and the water becomes soft, for best dishwashing results. Depending on
the degree of water hardness, the ions responsible for water hardness accumulate
quickly inside the water softener. Therefore, the water softener must be regener-
ated to operate with the same eciency during the next wash. This is why special
salt is used in the dishwasher.
Setting
The amount of salt dispensed can be set from H0 to H7.
Salt is not required at the set value H0.
1. Find out about the hardness value of your tap water. Your water utility company
will help you with this.
2. Set value can be found in the water hardness table.
3. Close the door.
4. Switch on „Power” switch.
5. Hold down „ Delay” button and then press „Program” button for 5 seconds.The
buzzer rings one time and H ashes on the digital display.(factory setting is H4).
To change the setting:
1. Press “ Delay “ button.
Each time the button is pressed, the set value increasesby one level;when the value
of H7 has been reached, the display jumps back to H0(o).
2. Press “ Program “ button. The chosen setting has now been stored.
Contact your local water board for information on the hardness of your water supply.
2
The importance of water descaling
Water hardness Mmol/l Set value on
the machine
Clark Range
0-8 soft 0-1.1 H0
9-10 soft 1.2-1.4 H1
11-12 medium 1.5-1.8 H2
13-15 medium 1.9-2.1 H3
16-20 medium 2.2-2. 9 H4
21-26 hard 3.0-3. 7 H5
27-38 hard 3.8-5 .4 H6
39-62 hard 5.5-8 .9 H7
16
3
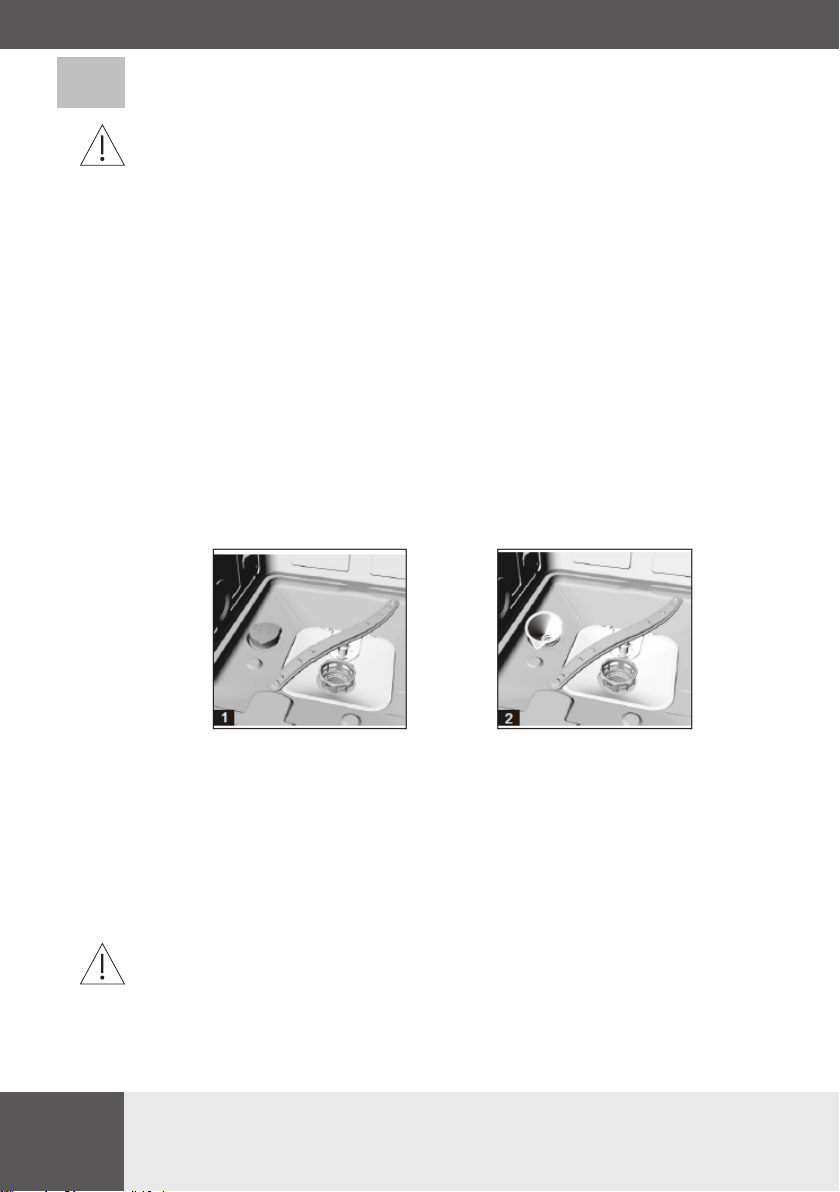
Loading the Salt into the Softener
Always use salt intended for use with dishwasher.
NOTE: If your model has no water softener, you may skip this section.
WATER SOFTENER
The hardness of the water varies from place to place. If hard water is used in the
dishwasher, deposits will form on the dishes and utensils.
The appliance is equipped with a special softener that uses salts specically
designed to eliminate lime and minerals from the water.
The salt container is located beneath the lower basket and should be lled as follows:
Attention
Only use salt specically designed for use in dishwashers! All other types of salt not
specically designed for use in a dishwasher, especially table salt, will damage the water
softener. In case of damages caused by the use of unsuitable salt the manufacturer does
not give any warranty nor is liable for any caused damages. Only ll with salt just before
starting one of the complete washing programmes. This will prevent any grains of salt or
salty water, which may have been split, remaining on the bottom of the machine for any
period of time, which may cause corrosion. After the rst wash cycle the control panel light
expires.
1. Remove the lower basket and then unscrew and remove the cap from the salt container.
2. If you are lling the container for the rst time, ll 2/3 of its volume with water (around
500ml).
3. Place the end of the funnel (supplied) into the hole and introduce about 1.2kg of salt. It is
normal for a small amount of water to come out of the salt container.
4. Carefully screw the cap back on.
5. Usually, the salt warning light will be o in 2-6 days after the salt container is lled with
salt.
NOTE: The salt container must be relled when the salt warning light in the control panel
comes on. Though the salt container is lled enough, the indicator light may not black out
before the salt fully dissolve. If there is no salt warning light in the control panel (for some
models), you can judge when to load the salt into the softener by the cycles that the dish-
washer had run (see the following schema).
2. If there are spills of the salt, a soak program could be run to wipe them out.

17
Function of Rinse Aid
Rinse aid is automatically added during the last rinse, ensuring thorough rinsing, spot
and streak free drying.
Attention!
Only use branded rinse aid for dishwasher. Never ll the rinse aid dispenser with
any other substances (e.g. dishwasher cleaning agent, liquid detergent). This would
damage the appliance.
When to Rell the Rinse Aid Dispenser
If there is no rinse-aid warning light on the control panel, you can judge the amount
of rinse-aid by the color of the optical level indicator „D” located next to the cap.
When the rinse-aid container is full, the whole indicator will be dark .As the rinse aid
diminishes, the size of the dark dot decreases. You should never let the rinse aid get
below 1 / 4 full.
As the rinse aid diminishes, the size of the black dot on the rinse aid level indicator
changes, as illustrated below.
Full
3 / 4 full
1 / 2 full
1 / 4 full - Should rell to eliminate spotting
Empty
4
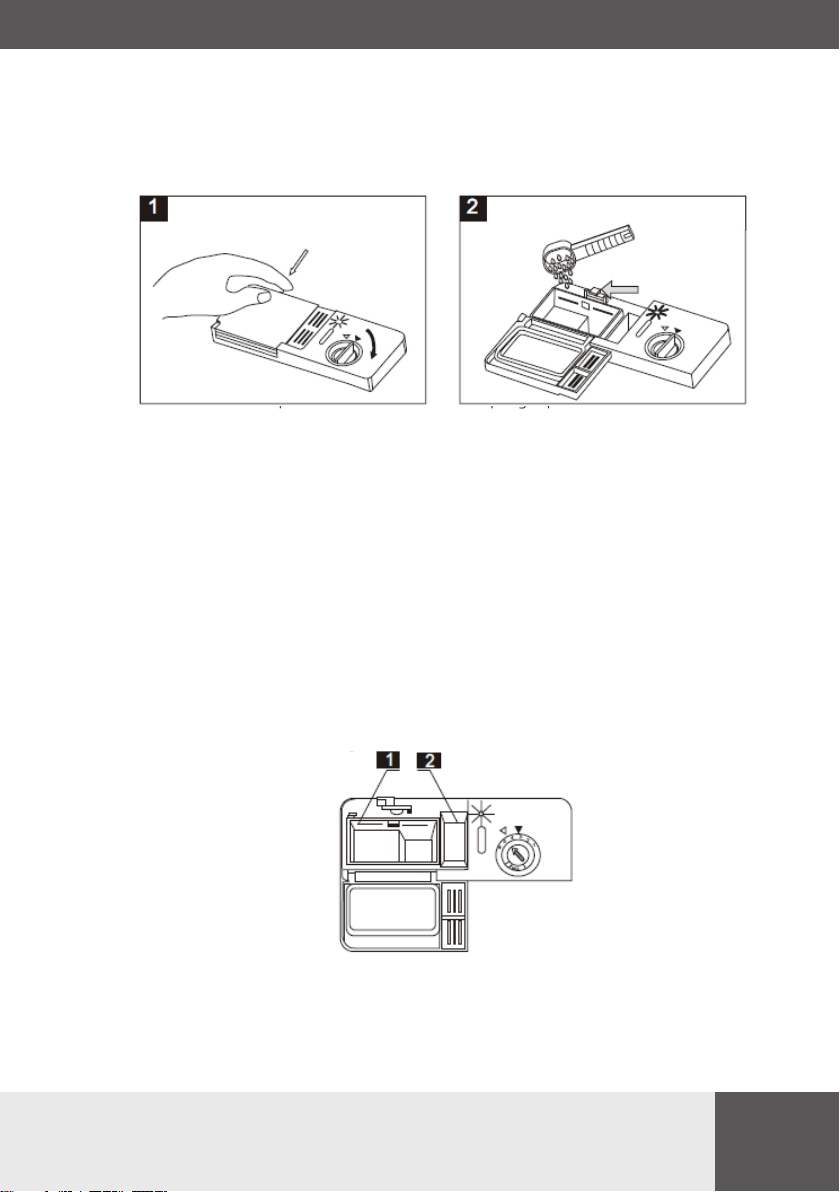
Fill the Rinse Aid Dispenser
RINSE AID DISPENSER
1. To open the dispenser, turn the cap to the „open” (left) arrow and lift it out.
2. Pour the rinse aid into the dispenser, be careful not to overll.
3. Replace the cap by inserting it aligned with „open” arrow and turning it to the „closed”
(right) arrow.
18
The rinse aid is released during the nal rinse to prevent water from forming droplets on
your dishes that can leave spots and streaks. It also improves drying by allowing water to
sheet o the dishes. Your dishwashers are designed to use liquid rinse aids. The rinse aid
dispenser is located inside the door next to the detergent dispenser. To ll the dispenser,
open the cap and pour the rinse aid into the dispenser until the level indicator turns com-
pletely black. The volume of the rinse aid container is about 140ml. Be careful not to overll
the dispenser, because this could cause over sudsing. Wipe away any spills with a damp
cloth. Don’t forget to replace the cap before you close dishwasher door.
Attention!
Clean up any rinse aid split during lling with an absorbent cloth to avoid excess foaming
during the next wash.
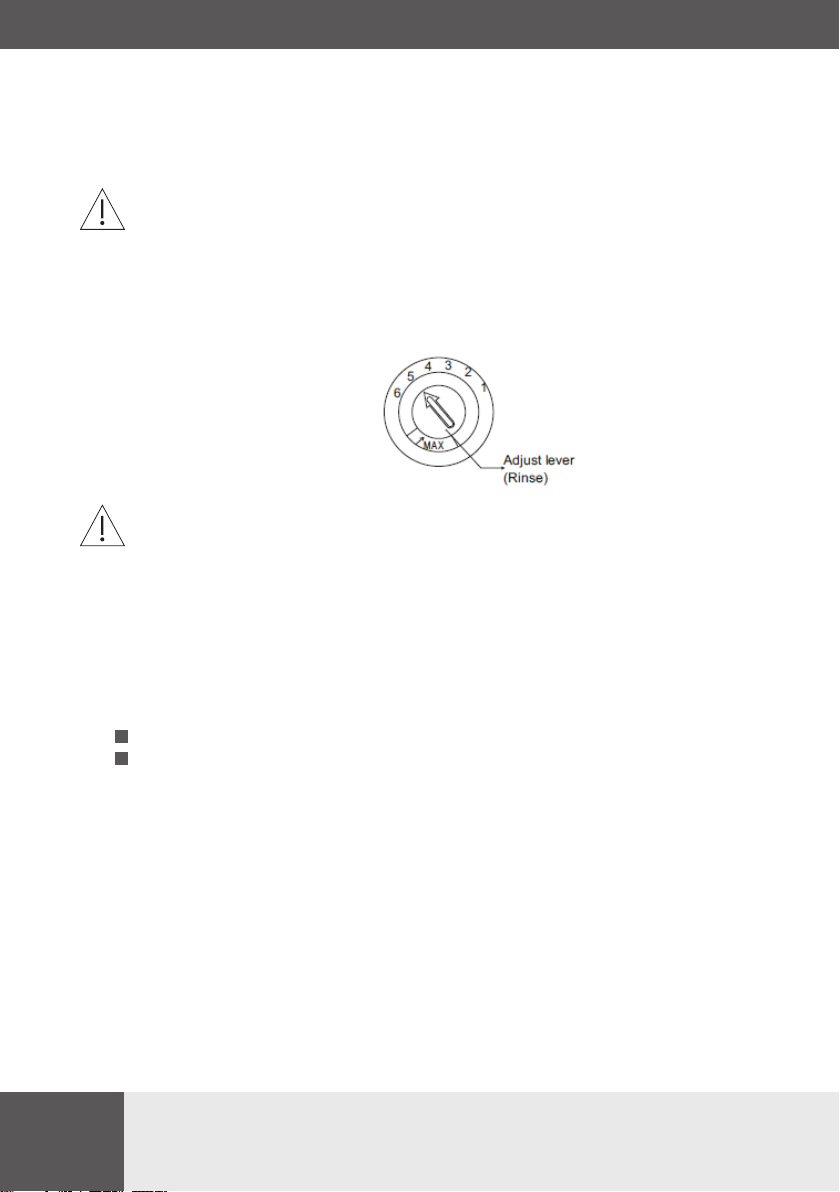
Adjusting Rinse Aid Dispenser
The rinse aid dispenser has four or six settings. Always start with the dispenser set on “4” If
spots and poor drying are problems, increase the amount of rinse aid dispensed by remov-
ing the dispenser lid and rotating the dial to “5 . If the dishes still are not drying properly or
are spotted, adjust the dial to the next higher number until your dishes are spot-free. The
dose is factory set in position 5.
NOTE: Increase the dose if there are drops of water or lime spots on the dishes after wash-
ing. Reduce it if there are sticky whitish streaks on the dishes or a bluish lm on glassware
or knife blades.
Function of Detergent
Detergents with its chemical ingredients are necessary to remove dirt, crush dirt and
transport it out of the dishwasher. Most of commercial quality detergents are suitable for
this purpose.
Concentrated Detergent
Based on their chemical composition, dishwasher can be split in two basic types:
conventional, alkaline detergents with caustic components low alkaline concentrated
detergents with natural enzymes
The use of “Eco” washing programme in conjunction with concentrated detergents reduces
pollution and is good for your dishes; these washing programmes are specially matched
to the dirt-dissolving properties of the enzymes of the concentrated detergent. For this
reason”Eco” washing programme in which concentrated detergents are used can achieve
the same results that can otherwise only be achieved using”intensive” programme.
Detergent Tablets
Detergent tablets of dierent brands dissolve at dierent speeds. For this reason some
detergent cannot dissolve and develop their full cleaning power during short programmes.
Therefore please use long programmes when using detergent tablets, to ensure the com-
plete removal of detergent residuals.
19
Detergent Dispenser
The dispenser must be relled before the start of each washing cycle following the instruc-
tions provided in the Wash Cycle Table. Your dishwashers use less detergent and rinse aid
than conventional dishwashers. Generally, only one tablespoon of detergent is needed fora
normal wash load. Also, more heavily soiled items need more detergent. Always add the
detergent just before starting dishwasher, otherwise it could get damp and will not dissolve
properly.
Amount of Detergent to Use
NOTE:
1. If the lid is closed: press release button. The lid springs open.
2. Always add the detergent just before starting each wash cycle. Only use branded deter-
gent aid for dishwasher.
WARNING!
Dishwasher detergent is corrosive! Take care to keep it out of reach of children.
Use only detergent specically made for use in dishwashers. Keep your detergent fresh and
dry. Don’t put powder detergent into the dispenser until you’re ready to wash dishes.
Fill in the detergent
Fill the detergent dispenser with detergent. The marking indicates the dosing levels , as
illustrated on the right:
1. The place of main wash cycle detergent placed, MIN means approximately 20g of deter-
gent.
2. The place of pre-wash cycle detergent placed, approximately 5g of detergent.
Please observe the manufacturer’s dosing and storage recommendations as stated on the
detergent packaging.
Close the lid and press until it locks in place.
If the dishes are heavily soiled, place an additional detergent dose in the pre-wash deter-
gent.
Chamber. This detergent will take eect during the pre-wash phase.
20
LOADING THE DISHWASHER BASKETS
For best performance of the dishwasher, follow these loading guidelines. Features and
appearance of baskets and silverware baskets may vary from your model.
Attention before or after Loading the Dishwasher Baskets
Scrape o any large amounts of leftover food. It is not necessary to rinse the dishes under
running water. Place objects in the dishwasher in the following way:
1.Items such as cups, glasses, pots/pans, etc. are stood upside down.
2.Curve items, or those with recesses, should be at a slant so that water can run o.
3.They are stacked securely and can not tip over.
4.They do not prevent the spray arms from rotating while washing takes place.
Very small items should not be washed in the dishwasher as they could easily fall out of the
baskets.
Removing the Dishes
To prevent water dripping from the upper basket into the lower basket, we recommend
that you empty the lower basket rst and then the upper basket.
1
NOTE:
You nd information about the amount of detergent for the single programme on the last
page. Please be aware that according to the level soiling and the specic hardness of water,
dierences are possible. Please observe the manufacturer’s recommendations on the
detergent packaging.
Detergents
There are 3 sorts of detergents
1.With phosphate and with chlorine
2.With phosphate and without chlorine
3.Without phosphate and without chloride
Normally new pulverized detergent is without phosphate. The water softener function
of phosphate is not given. In this case we recommend to ll salt in the salt container even
when the hardness of water is only 6 dH. If detergents without phosphate were used in
case of hard water often white spots appear at dishes and glasses. In this case please add
more detergent to reach better results. Detergents without chlorine do only bleach a little.
Strong and coloured spots will not removed completely. In this case please choose
a programme with higher temperature.
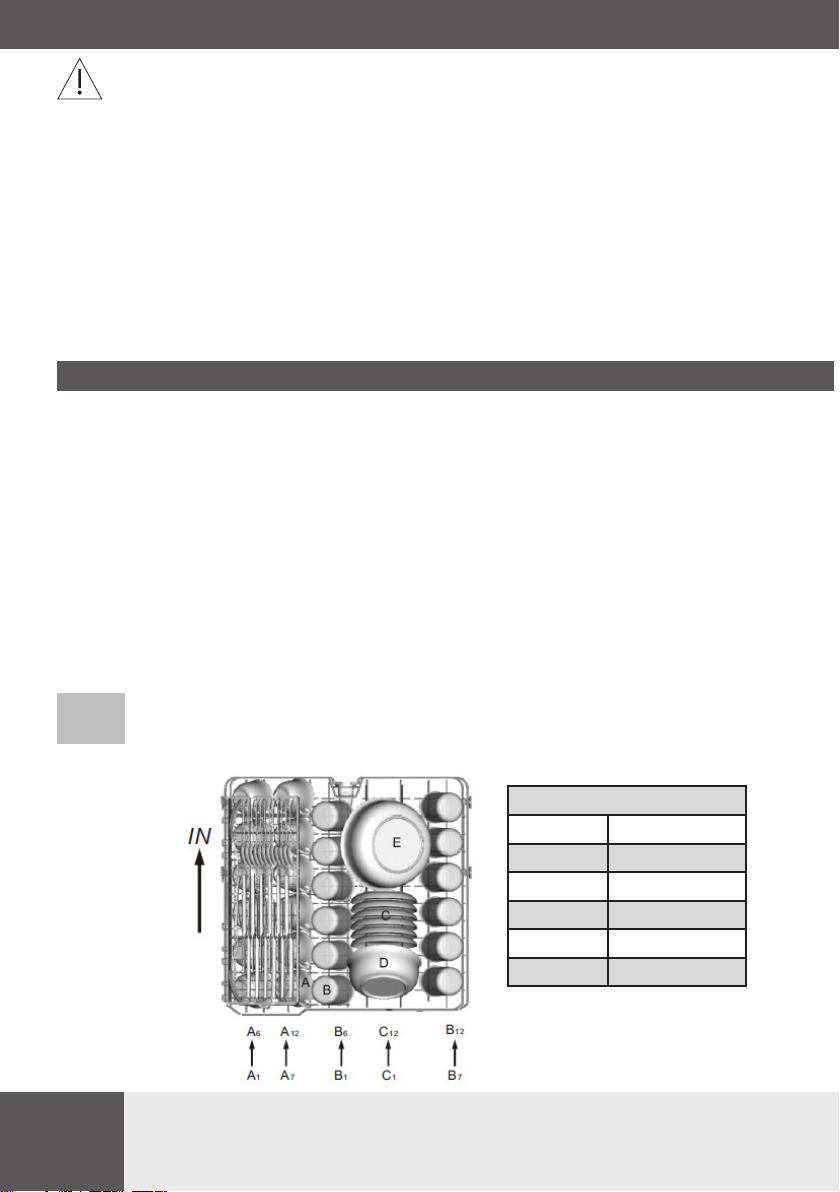
Loading the Upper Basket
The upper basket is designed to hold more delicate and lighter dishware such as glasses, coee
and tea cup and saucers, as well as plates, small bowls and shallow pans (as long as they are not
too dirty). Position the dishes and cookware so that they do not get moved by the spray of water.
Upper basket
Type Item
ACup
B Glass
C Saucer
D Serving bowl
E Serving bowl
Table of contents
Other Hansa Dishwasher manuals

Hansa
Hansa ZIM 676 EH User manual

Hansa
Hansa ZIM627H User manual

Hansa
Hansa ZIM635PH User manual

Hansa
Hansa ZIM 615H User manual

Hansa
Hansa ZIM466TH User manual

Hansa
Hansa ZWM 628IEH User manual

Hansa
Hansa ZWM 428IEH User manual

Hansa
Hansa ZWM 627 WEB User manual

Hansa
Hansa ZIM647TH User manual

Hansa
Hansa ZWM426EH User manual

Hansa
Hansa ZIM486ELH User manual

Hansa
Hansa ZIM 608 EH User manual

Hansa
Hansa ZIM647TH User manual

Hansa
Hansa ZWM 415WB User manual

Hansa
Hansa ZIM 476 H User manual

Hansa
Hansa ZIM635PH User manual

Hansa
Hansa ZIM676H User manual

Hansa
Hansa ZIM 634 B User manual

Hansa
Hansa ZIM466TH User manual

Hansa
Hansa ZIM486ELH User manual


