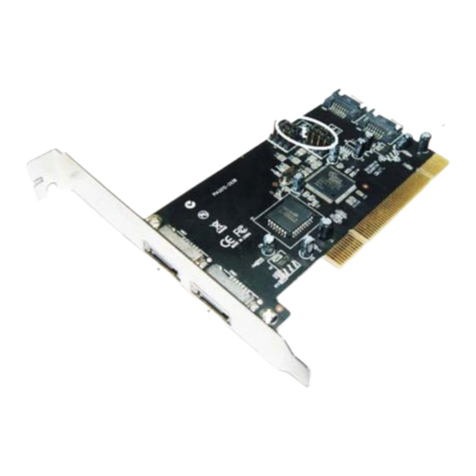
HardSID Quattro PCI User manual

HardSID Quattro PCI user’s guide
HardSID Quattro PCI user’s guide ................................................................................1
www.hardsid.comHardSID Quattro PCI user’s guide...................................................1
HardSID Quattro PCI user’s guide ................................................................................2
Installing the SID chips..............................................................................................2
Supported versions.................................................................................................2
The right direction..................................................................................................2
Setting the voltage..................................................................................................3
Installing the filter capacitors.................................................................................3
Digi boost for 8580 SIDs ...........................................................................................3
Audio connectors .......................................................................................................4
The internal connector: ..........................................................................................4
The external stereo jacks:.......................................................................................4
Configuring the mixed output mode ......................................................................5
Installing the card.......................................................................................................5
Choosing between the outputs ...................................................................................6
Internal mixed CD-audio output (Mixed Line Out)...............................................6
External sound outputs...........................................................................................6
IRQs and DMAs ........................................................................................................6
Turn off the amplifier and/or any connected equipment before you turn on the
computer! ...............................................................................................................7
Installing the software................................................................................................7
Re-detecting the SID chips on your card:..................................................................8
Installing and using the HardSID MIDI.....................................................................9
Windows XP and Windows 2000 ..........................................................................9
Windows 98 and ME .............................................................................................9
Getting started with HardSID MIDI ......................................................................9
www.hardsid.com

HardSID Quattro PCI user’s guide
Installing the SID chips
Always install perfect / tested SID chips! Using damaged SIDs may damage your card.
Installing SID chips into the card is easy. You can simply plug the SIDs into the SID sockets.
Do it carefully, don’t force the SID because it may cause broken pins!
If you buy your card with SID chip(s) from us, we’ll send it to you configured well.
If you buy it without SIDs, we’ll configure it for four 6581 chips by default.
See the following topics for custom setups:
Supported versions
The HardSID Quattro PCI supports both (6581 and 8580) versions of the SID chip. You can
use up to four SID chips at the same time in any combination (for example: two 6581 and two
8580 chips). There is no problem if you don’t have four chips, the card works even with one
SID chip (also works with two of three SID chips).
The right direction
Please check the SID directions on the picture. Always install your SID chip(s) in the right
direction or else you may damage the SIDs and your card.

Setting the voltage
You have to set the voltage of every SID chip you install depending on its version (8580 or
6581) by setting its voltage jumpers. Position “Left” is for the 8580, position “Right” is for the
6581.
You can see the voltage jumper layout on this picture:
Installing the filter capacitors
The 6581 and 8580 versions of the SID chip are working with different filter capacitors.
The 6581 needs two 470pF capacitors. (four pairs / 8 pieces are included in your package)
The 8580 needs two 22nF capacitors. (four pairs / 8 pieces are included in your package)
Since you can install various SID versions into every SID socket on the HardSID Quattro PCI
card, you’ll have to install the valid capacitors for every SID chip.
You can find the filter capacitor socket at the upper-right corner of the SID sockets.
Every SID needs two filter capacitors. There are three socket pins for both capacitors on the
card. Pins 1-2-3 for the first and pins 4-5-6 for the second filter.
Pins 1-2 and pins 4-5 are the same, since there are different capacitor layouts on the market.
There are two-pin-wide and three-pin-wide ones. You have to install them aligned to the right.
That means that if you install wide capacitors, you can install them into pins 1-3 and 4-6 as
shown on the picture, but if you have two-pin-wide ones you can simply install them into pins
2-3 and 5-6.
Digi boost for 8580 SIDs
The 8580 SIDs are improved to perform their volume changes silently. Some C64
game/demo tunes are using the volume register to play digitized sounds on the 6581. These
sounds are very silent on a 8580, because of the improved volume changing method.

You can enable a loud volume changing patch for every SID socket on the HardSID Quattro
PCI card by the first four (1-4) DIP switches on the upper left corner of the card.
It is not recommended for MIDI users, because loud ticks will appear when you set the
channel volume. Turn this on only if you know you really need it.
Don’t use the digi boost together with the external inputs jacks! It may damage your card.
The factory default is digi boosts OFF for the HardSID Quattro PCI. (DIP switches 1..4 OFF)
Audio connectors
There are six connectors on the card. Five external stereo jack plugs and one internal CD-
audio connector.
The internal connector:
•One stereo mixed* CD-audio connector with mono/or fix-panned stereo sound of all of the
four SIDs (if you wish to connect your HardSID Quattro PCI to your other soundcard
internally)
The external stereo jacks:
•Two stereo "dry" outputs for professional usage (the separate sound of each SID on four
channels)
•One stereo mixed* output with mono/or fix-panned stereo sound of all of the four SIDs
(mono is recommended for the external mixed output)
•Two stereo inputs for external sound filtering (use it only with standard line-level outputs
or you may damage your HardSID Quattro PCI!)
* The mixed outputs are very useable when you don't want to connect your HardSID Quattro
PCI to professional external equipment (mixers, effect processors, etc...), you just want to
hear the sound of all of the SIDs on one output.

Configuring the mixed output mode
The mixed outputs can be configured to full mono or a fix-panned stereo (each SID is panned
left or right in about 80%) mode.
The mono mode is recommended for the external mixed output. (use another output for mixed
stereo or fully separated stereo sound)
The configuration must be done with the last two (5-6) DIP switches at the upper left on the
card. The meaning of the two switches (5-6) is the following:
DIP switch number Applies to SID #.. When switch is ON When switch is OFF
5 SIDs #1 and #3 Sounds on Left+Right Sounds on Right only
6 SIDs #2 and #4 Sounds on Left+Right Sounds on Left only
(you can see that the full mono mode is when DIP switches 5&6 are both set to ON)
The factory default is full mono for the HardSID Quattro PCI. (DIP switches 5&6 ON)
The “Right only” and “Left only” text in the table means that the sound of the two applied SIDs
is panned in about 80% to the left/right channel. This gives you better stereo feeling,
especially when listening with headphones. (Note: the external mixed jack is not a headphone
output, it’s a line-level output for amplifiers, mixers, etc…)
Using the mixed outputs gives you virtually more noise, since you’ll hear the noise of all of
your SID chips even if there is only one SID actually playing. (especially in full mono mode
which is the factory default)
If you need fully separated low-noise professional outputs for studio usage (mixing,
recording, effecting with external professional equipment), use the external “dry”
outputs!
Installing the card
•Turn off your computer!
•Find an empty PCI-slot on your motherboard then install the card into it perfectly.
•Don’t force the card, but place it as deep as you can into the slot.
•If you’re ready, fix its position by screwing the card’s back panel onto the computer’s
case.

Choosing between the outputs
Internal mixed CD-audio output (Mixed Line Out)
Ideal for connecting the HardSID card to another soundcard. It can be connected to a
soundcard using a standard CD-audio cable. (you can connect it for example to a CD-in or
AUX connector)
A CD-audio cable has four pins. The pinout of a valid cable looks like this:
Left – Ground – Ground – Right.
This is a very comfortable and simple solution, but note:
•You’ll hear the noise of all of your SID chips even if there is only one SID actually playing.
(especially in full mono mode)
•Your existing soundcard’s noise will be added to the HardSID’s sound, since the HardSID
is connected to your soundcard.
External sound outputs
External mixed output (black jack)
This is almost the same as the internal mixed output except it is a jack connector on the back
panel.
Every note/rule applies to this connector too which applies to the internal mixed output, but
mono mode is recommended for the external mixed output. (use another output for mixed
stereo or fully separated stereo sound)
External “dry” outputs (green jacks)
This is the best way of connection if you’re using the HardSID Quattro PCI in a studio for
professional recording/mixing/effecting.
The “dry” outputs are two stereo jack connectors which can be connected to a studio mixer,
amplifier or anything else in your studio setup what has line-level input(s).
•Fully separated sound of four SID chips on two stereo jacks (four separated channels)
•No additional noise on the four separated channels (there is only the noise of one SID
chip which is very low especially using the SID version 8580)
IRQs and DMAs
The HardSID Quattro PCI doesn’t need any IRQs or DMAs. So, there won’t be conflicts
because of that.

Turn off the amplifier and/or any connected equipment before you turn on the
computer!
Installing the software
Download the compressed driver package(s) for your operating system(s) from
www.hardsid.com “Download” menu.
Find the final place of the executables on your hard disk and unpack the contents there
(For example: C:\HARDSID)! NOTE: Don’t move or remove this folder after the
installation. All of your executables and data files will run/open from there!
Since the HardSID Quattro PCI is a plug and play soundcard your operating system will
recognize it and will ask you for the drivers.
If you didn’t unpack your drivers yet when the operating system asked you for the
drivers, simply delete the unknown or not perfectly installed HardSID Quattro PCI
from the Device Tree, unpack the driver package, and then restart your computer!

When the operating system recognizes your card and asks you for the drivers:
¾Go to the step where you can select any driver from a list.
¾Select “Sound, video and game controllers”.
¾Click on the “Have disk” button.
¾Enter the full path (browse) of the unpacked driver/application folder (for example:
C:\HARDSID) and press Enter.
¾Choose the “HardSID PCI SoundCard” and press Enter.
¾Some dialogs will appear asking you if you really want to install this driver. Always
click “Yes” or “Ok” to go on with the installation.
¾You’ll have to restart your computer at this step. (except on Windows XP)
¾This dialog will appear on your screen:
¾If everything went Ok, all checkboxes on this dialog will be checked after a while and
the dialog will close. It may ask you if you want to overwrite your existing MIDI
Channel configuration. Clicking “Yes” is recommended if you don’t have an existing
very special custom HardSID MIDI Channel setup.
¾Windows 98 and ME will restart to make the installation finished. Windows XP and
Windows 2000 won’t restart.
¾The installation is ready now.
NOTE: Don’t move or remove the installation folder. All of your
executables and data files will run / open from there!
(C:\HARDSID for example)
Re-detecting the SID chips on your card:
Run the HardSID Configuration Wizard and click “Next” until you get to the “Device setup”
page:

Click “Auto-detect” then click “Start” to re-detect the SID chips on the HardSID Quattro PCI,
then click “Next” and “Finish”.
Installing and using the HardSID MIDI
Windows XP and Windows 2000
The Windows XP and Windows 2000 version of the HardSID Drivers has built-in MIDI driver.
No additional installation is required.
Windows 98 and ME
Read the “HSMIDIINS9XME.TXT” in your HardSID folder (for example: C:\HARDSID) or see
the instructions below:
¾Go to the Control Panel
¾Run the "Add new hardware" wizard
¾Go to the page where you can select any hardware from a list
¾Select "Sound, video and game controllers"
¾Click on the "Have disk" button
¾Enter the path of the MIDI driver (the MIDIDRV folder), and press ENTER
¾(For example: C:\HARDSID\MIDIDRV)
¾You'll see the "HardSID MIDI Synth" in a popup window. Press ENTER
¾Click Finish
¾Choose YES on the computer restart confirmation dialog!
Getting started with HardSID MIDI
Please read the HardSID MIDI Documentation (HSMIDI.pdf or HSHELP.hlp) in your HardSID
folder. (for example: C:\HARDSID)
Copyright © 1999-2003 Hard Software, Hungary
< www.hardsid.com >
Table of contents
Popular PCI Card manuals by other brands

Conrad Electronic
Conrad Electronic 97 36 98 operating instructions
Acces I/O products
Acces I/O products PCIe-ICM-4SM user manual

PMC
PMC Adaptec AHA-3944-AUWD Simple Step-by-Step Tips
Delta Data Systems
Delta Data Systems PMAC PCI Hardware reference manual
StarTech.com
StarTech.com PEXUSB311AC2 quick start guide
Kontron
Kontron PCI-AOB8/12 user guide
