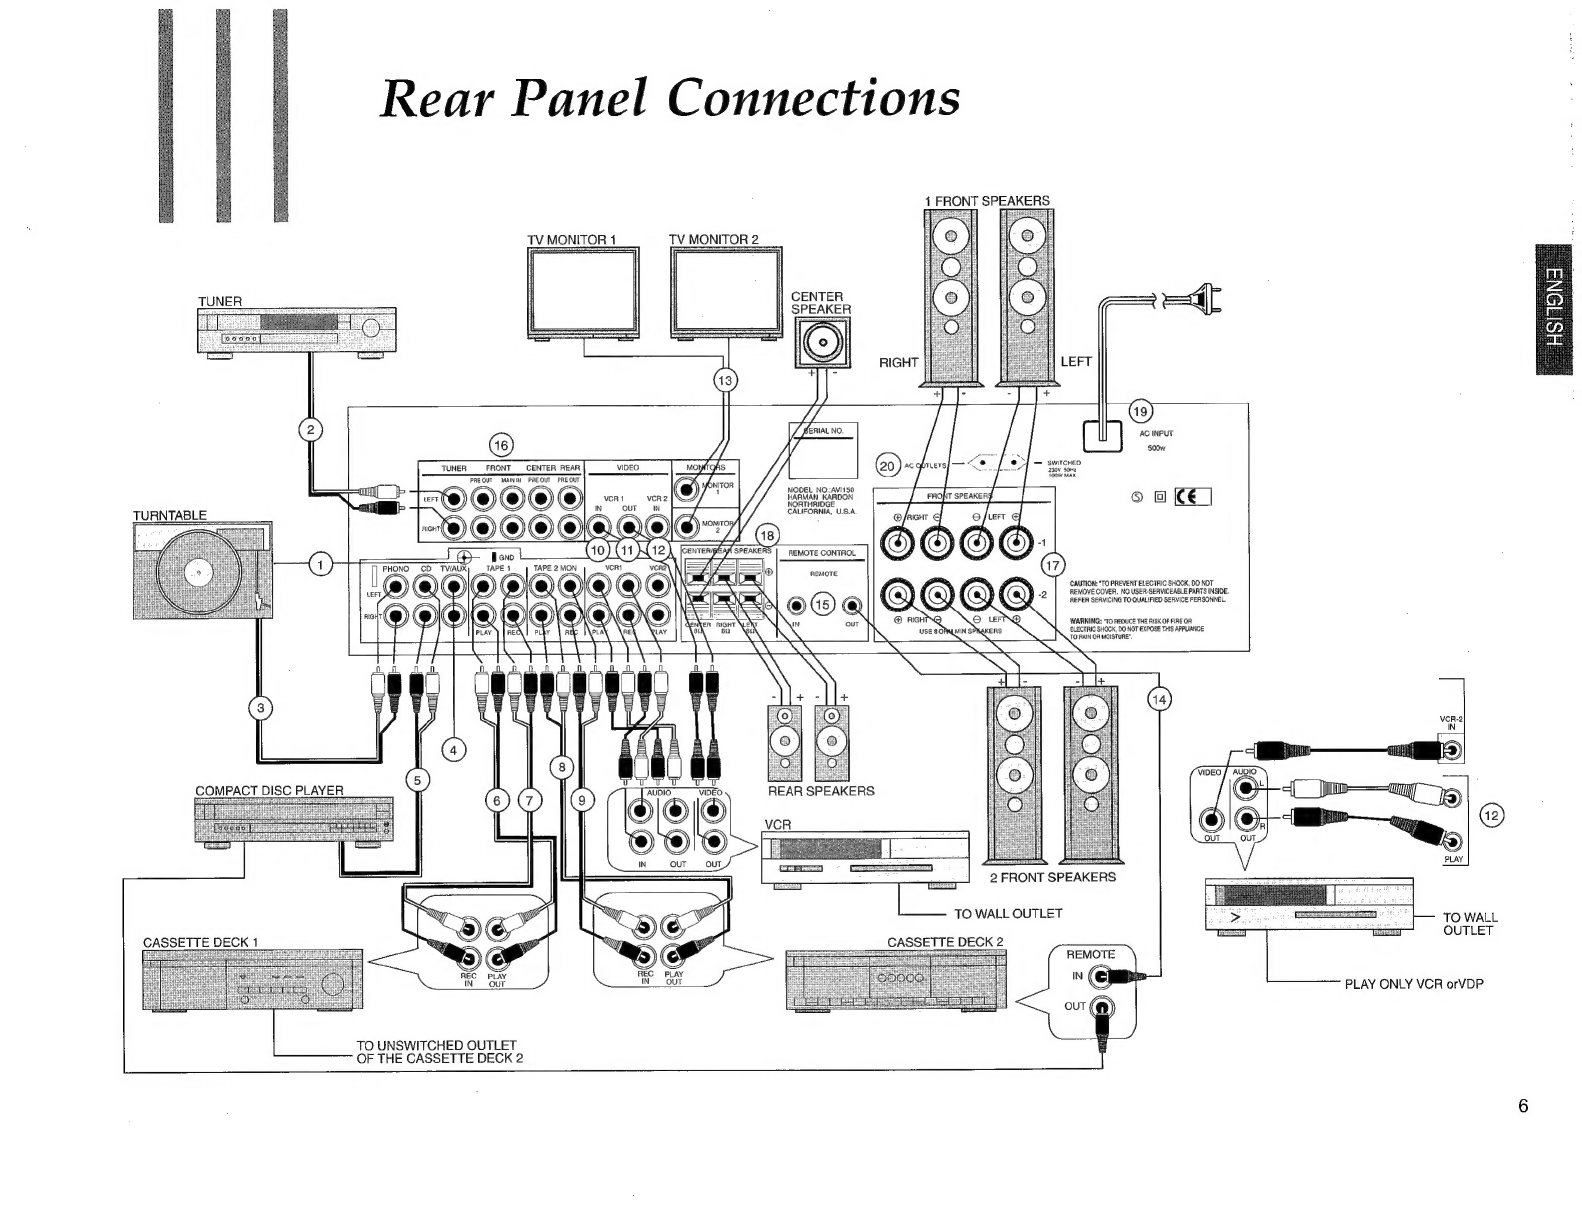
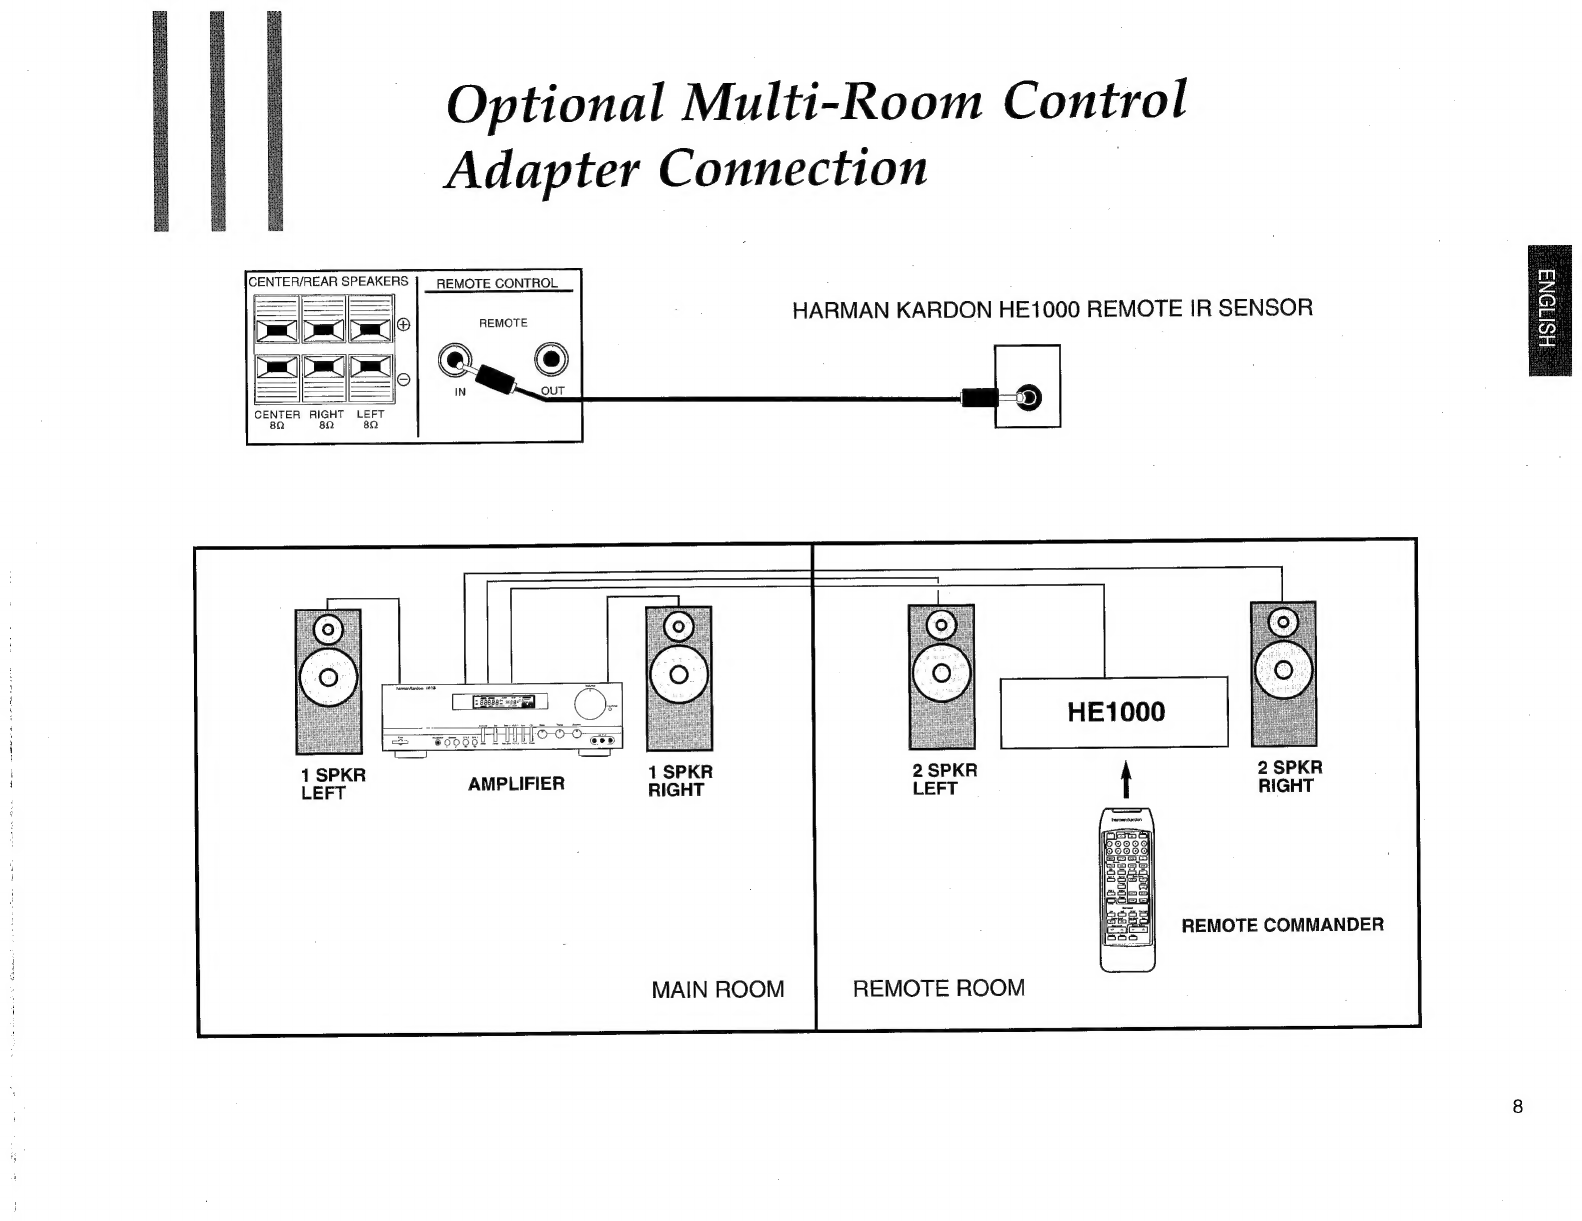
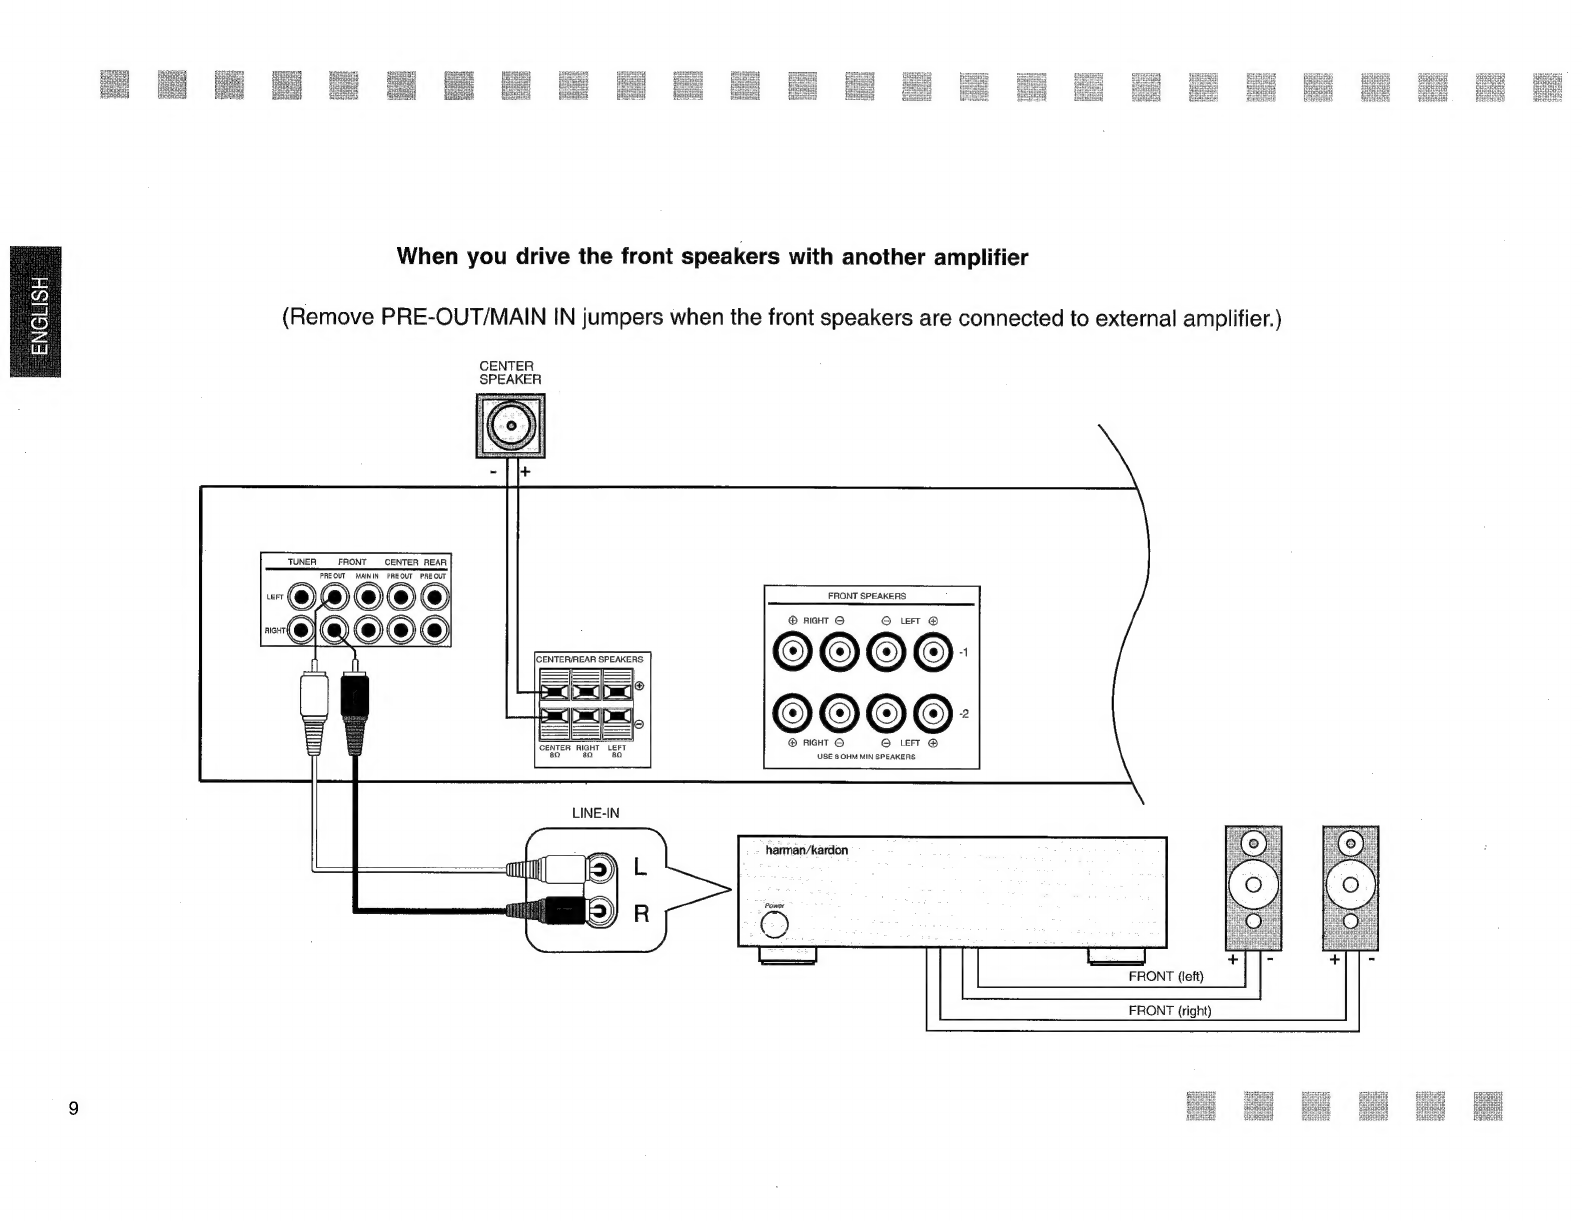
Harman Kardon AVI 150 User manual
Other Harman Kardon Amplifier manuals

Harman Kardon
Harman Kardon SIGNATURE 2.1 User manual

Harman Kardon
Harman Kardon PM650 User manual

Harman Kardon
Harman Kardon AB 1 User manual

Harman Kardon
Harman Kardon HK750 User manual

Harman Kardon
Harman Kardon CITATION B User manual

Harman Kardon
Harman Kardon PA5800 SIGNATURE 2.1 User manual

Harman Kardon
Harman Kardon Sonata FA-10 User manual

Harman Kardon
Harman Kardon HK6200 User manual

Harman Kardon
Harman Kardon HK770 User manual

Harman Kardon
Harman Kardon CITATION X-I User manual

Harman Kardon
Harman Kardon CA212 User manual

Harman Kardon
Harman Kardon HK6600 User manual

Harman Kardon
Harman Kardon HK825 User manual

Harman Kardon
Harman Kardon THE TRIO A-224 User manual

Harman Kardon
Harman Kardon The Chorale A260 User manual

Harman Kardon
Harman Kardon PM665 User manual

Harman Kardon
Harman Kardon CITATION 12 User manual

Harman Kardon
Harman Kardon HK503 User manual

Harman Kardon
Harman Kardon CITATION 7.1 Administrator Guide

Harman Kardon
Harman Kardon The Chorale A-260 User manual