Harry 314 Guide

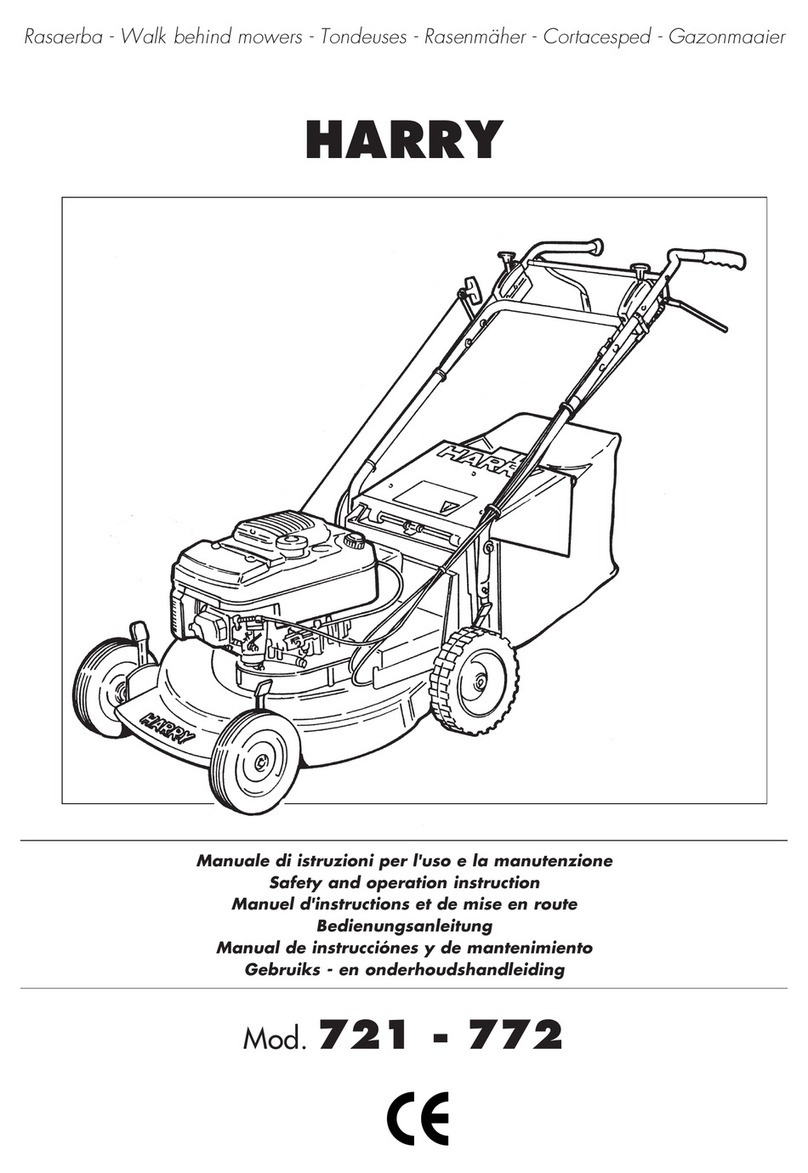
HARRY
Rasaerba - Walk behind mowers - Tondeuses - Rasenmäher - Cortacesped - Gazonmaaier -
Græsslåmaskiner - Cortador de grama - Ruohonleikkuri - Clookoptikhv mhcanhv
HARRY
I
UK
F
D
ES
DK
P
FIN
NL
Gebruiks - en onderhoudshandleiding
Bruger og vedligeholdelsesmanual
Manual de Instruções para o uso e a manutenção
Käyttö- a huolto-opas
Odhgive
ςς
ςς
ς
crhvsh
ςς
ςς
ς
Manuale di istruzioni per l'uso e la manutenzione
Safety and operation instruction
Manuel d'instructions et de mise en route
Bedienungsanleitung
Manual de instrucciónes y de mantenimiento
GR


HARRY
3
ITALIANO ................................................... pag. 8
ENGLAND .................................................. pag. 13
FRANCE ..................................................... pag. 18
DEUTSCHLAND ........................................... pag. 23
ESPAÑA ..................................................... pag. 28
THANK YOU for buying a HARRY roduct!
Your HARRY mower has been carefully designed, engineered and manufactured to give good and satisfactory erformance. Review this Manual to
familiarize yourself with the unit, its features, its o eration.
Pay articular attention to the Euro ean secutiry rules. The symbols you find here in this manual indicate articular dangerous oints and hel you
to revent accidents.
Nous vous félicitons d'avoir choisi une tondeuse HARRY.
Les tondeuses HARRY ont été conçues et réalisées our offrir des erformances de travail exce tionelles.
Nous vous recommandons de lire attentivement ce manuel d'instructions our rendre connaissance des caractéristiques d'utilisation de votre tondeuse.
Lisez attentivement les conseils de sécutité conformes aux normes Euro éenes avant d'utiliser la tondeuse.
Les symbols mentionés dans ce manuel indiquent un articulier danger et vous aident de révenir des accidents.
Wir danken Ihren für den Kauf eines HARRY Rasenmähers.
Der HARRY Rasenmäher ist für sicheren und zuverlassigen Betrieb konstruiert, wenn er gemäß der Betriebsanleitung bedient wird.
Lesen Sie zum Verständnis dieses Handbuch durch bevor Sie den Rasenmäher in Betrieb nehmen
Lesen Sie sich diese Bedienungsanleitung der Euro äischen Sicherheitsvorschiften sorgfältig durch.
Achten Sie auf die Symbole in dieser Anleitung. Die Symbole weisen auf die gefährlichsten Punkte hin und sind zu befolgen, um Unfälle zu vermeiden.
Gracias or com rar un roducto HARRY.
Su cortacés ed HARRY ha sido cuidadosamente diseñado, motorizado y montado ara ro orcionar un rendimiento ó timo. Revise este manual
ara familiarizarse con este a arato
Ponga es ecial atencion en las normas de seguridad euro eas. Los simbolos que a arecen en este manual le indican los untos es ecialmente
eligrosos y le ayudan a evitar accidentes.
U heeft een HARRY gazonmaaier gekozen; wij feliciteren u daarmee. Wij weten dat u een veeleisende gebruiker bent, die geïnteresseerd is in de
betrouwbaarheid en de stevigheid, in het vermogen en de duur van het materiaal waarmee u werkt.
De handleiding met de Euro ese veiligheidsvoorschriften aandachtig doorlezen. Neem vooral de symbolen van deze handleiding goed in acht. Zij
duiden o gevaar en hel en ongelukken te voorkomen.
UK
F
D
ES
NL
DK
P
NEDERLAND ............................................... pag. 33
DANMARK ................................................. pag. 38
PORTUGAL ................................................. pag. 43
FINLAND .................................................... pag. 48
GREECE ...................................................... pag. 53
FIN
Obrigado or ter com rado um cortador de grama HARRY!
Os cortadores de grama foram rojetados e construídos ara oferecer ótimos desem enhos. Leia com atenção este manual ara oder com reender
as características e o uso correto do Seu cortador de grama.
Particular atenção deve ser dada às informações a res eito do uso correto segundo os requisitos essenciais de segurança exigidos elas Diretrizes Euro éias
em vigor. Prestar atenção aos símbolos que serão encontrados lendo o manual, indicam ontos de articular erigo e ajudam a revenir acidentes.
Tak fordi De har købt en af vore HARRY græsslåmaskiner.
Græsslåmaskinerne af mærket HARRY er blevet udviklet og udformet til at levere o timal ydelse. Læs denne manual meget nøje for at blive fortrolig
med græsslåmaskinens egenskaber og med hvordan den skal bruges korrekt.
Det er særlig vigtigt at De læser informationerne som vedrører korrekt brug i overensstemmelse med de sikkerhedskrav, som er gældende i EU.
Vær o mærksom å symbolerne De støder å, når De læser manualen. Disse indikerer s ecielt farlige unkter og hjæl er med at forhindre alle former for ulykker.
KIITOS, että olette hankkineet HARRY ruohonleikkurin!
HARRY ruohonleikkurit on suunniteltu ja valmistettu siten, että niiden suorituskyky on aras mahdollinen. Lukekaa huolellisesti tämä ohjekirjanen,
jotta o itte tuntemaan ruohonleikkurinne ominaisuudet ja oikeat käyttötavat.
Erityistä huomiota tulee kiinnittää oikeata käyttöä koskeviin tietoihin, jotka ovat voimassa olevien EU:n direktiivien turvavaatimusten mukaisia.
Kiinnittäkää huomiota merkkeihin, joita näette o asta lukiessanne, koska ne osoittavat erityisen vaaralliset kohdat ja auttavat välttämään onnettomuudet.
GRAZIE er aver acquistato un rasaerba HARRY!
I rasaerba HARRY sono stati rogettati e costruiti in modo da offrire ottime restazioni. Leggete attentamente questo manuale er oter ca ire le
caratteristiche ed il corretto uso del Vostro rasaerba.
Particolare attenzione va restata alle informazioni circa l'uso corretto in conformità ai requisiti essenziali di sicurezza richiesti dalle vigenti Direttive Euro ee.
Fate attenzione ai simboli che incontrerete leggendo il manuale, stanno ad indicare unti articolarmente ericolosi ed aiutano a revenire qualsiasi incidente.
I
GR
Sa
ς
eucaristouvme pou epilevxate evna proiovn tou ergostasivou HARRY.
H clookoptikhv mhcanhv HARRY evcei scediasteiv me frontivda kai kataskeuasteiv evtsi wvste na exasfalivzei thn kaluvterh dunathv apovdosh.
Parakalouvme diabavste prosektikav ti
ς
parouvse
ς
odhgive
ς
crhvsh
ς
. VOpou sunantavte ta parakavtw suvmbola epishmaivnoun idiaivterou
ς
kinduvnou
ς
kai sa
ς
bohqouvn na apofuvgete ta atuchvmata.

HARRY
4
12
2
HARRY
3
7
54
12
2
1
8
6
915
13
10 11
14
16
17
Mod. 314-411-481-R49
C48-C49-C50-C53-C54-R53 Mod. 313-322-424-471
S48-S49-S52-S53
P48-P49-P54
Fig.01
Mod. C48-C49-C50-S48
S49 C53-C54-S52-S53
P48-P54
Fig.02 Fig.03
Mod. 313
Fig.05
Fig.04

HARRY
5
17
5
Fig.06
3
7
4
5
7
4
4
3
mod. 471-C50-C54-P54
Fig.07 Fig.08
Fig.09 Fig.10
Mod. 313

HARRY
6
70 mm
max
mod. 313-322-424
471-S48-S49-S52-S53
P48-P49-P54 mod. C48-C49-C50-314
411-481-C53-C54-R53
Fig.11
20 mm
min.
Limited’usura
Wear limit
Limited’usure
Verschleissgrenze
Limite de desgaste
Slytagegrens
Slidgrænse
Limitedesgastada
Äyttöraja
vOrio fqorav
ς
Lamanuova
New blade
Nouvelle lame
Neues messer
Hoia nueva
Nieuwe plaat
Nyt skæreblad
Lâminanova
Usi terä
Nevo macaivri
Pericoloso
Dangerous
Dangereux
Gefährlich
Peligroso
Gevaarlyk
Farligt
Perigosov
Vaarallinen
Epikivnduno
B
B
A
A
C
C
HARRY
1
Fig.12 Fig.13
Fig.14
Max 25 mm
R49-R53
Fig.16
III
II
I
Fig.15

HARRY
7
Fig.19 Fig.20 Fig.21
Fig.22
H48-H49-H53-P49
MULCHING
NORMALNORMAL
Fig.17 Fig.18
Fig.24
Fig.23

HARRY
8
ITALIANO
1) DESCRIZIONE DELLE PARTI (Fig. 01)
1Manubrio superiore
2Manubrio inferiore
3Comando gas
4Maniglia freno
5Maniglia semovenza
6Maniglia fissaggio manico
7Maniglia avviamento
8eflettore
Leggere attentamente questo manuale rima della mes-
sa in funzione
ATTENZIONE!
Mantenere alla distanza di sicurezza le ersone estra-
nee.
Per ogni intervento di manutenzione, ricordatevi di
s egnere il motore e di staccare il connettore della
candela
Utilizzate occhiali di sicurezza
Non fumare durante il rifornimento di carburante
INDICE:
1) escrizione delle parti:
2) Norme di sicurezza
3) Montaggio del rasaerba
4) Messa in funzione
5) Regolazione dell'altezza di taglio
6) Manutenzione
7) Controlli e regolazioni
8) Immagazzinamento invernale
9) Mulching
10) Sistema davviamento Touch-N-Mow
9Ruota posteriore
10 Ruota anteriore
11 Carter
12 Motore
13 Lama
14 Cestello raccoglierba
15Trasmissione
16 Leva regolazione altezza taglio
17Leva velocità avanzamento
ATTENZIONE!
a- Si raccomanda di leggere attentamente e di comprendere appieno il
contenuto di questo manuale prima dell'utilizzo del rasaerba.
b- L'uso del rasaerba è proibito alle persone con meno di 16 anni.
c- L'operatore è responsabile verso terzi nella zona di lavoro.Assicurarsi
che non ci siano bambini o animali domestici nella zona di lavoro.
d- Prima di iniziare il lavoro è indispensabile ispezionare l'area che
deve essere lavorata e rimuovere tutti i sassi, le eventuali lattine od
ogni altro oggetto estraneo che si trova in quella zona.Controllate
inoltre dove sono sistemati eventuali irrigatori o ogni altro ostacolo
nascosto che potrebbe creare situazioni di pericolo durante il taglio
e- Utilizzate delle robuste scarpe chiuse durante il taglio; non usare
sandali e non tagliate a piedi nudi. Usate scarpe abbiano una buo-
na aderenza anche quando il terreno è bagnato; usate inoltre guan-
ti da lavoro per avere una presa più sicura.
f- Assicurarsi prima di iniziare la falciatura che la lama sia ben fissata
e le protezioni di sicurezza siano montate.Non utilizzare il rasaerba
senza che il raccoglierba o il deflettore siano montati.Qualora ven-
gano riscontrati dei difetti, provvedete alla sostituzione o alla ripa-
razione.
g- Non aggiungete carburante quando vi trovate in un locale chiuso, quando
il motore è ancora in moto o quando il motore è ancora caldo. Non
fumate durante le operazioni di rifornimento del carburante.
h- Non fate funzionare il rasaerba in ambienti chiusi.I gas di scarico
emessi dal motore in funzione sono velenosi se respirati, possono
essere asfissianti e quindi mortali.
i- Non regolate l'altezza di taglio quando il motore è in funzione.
l- ATTENZIONE! Quando il motore è acceso, non metter le mani o i
piedi sotto il rasaerba o nel condotto di scarico, la lama è in movi-
mento quando il motore è in funzione.
m- Tagliate il prato solo quando le condizioni di luce sono buone.
n- Non correte. Non fatevi influenzare dalla premura di finire il lavoro;
tenete un'andatura adatta al tipo di lavoro che dovete svolgere.
o- Non usate il rasaerba quando non è in buone condizioni. Provvede-
te alla riparazione prima dell'uso.
p- Non permettete l'uso del vostro rasaerba ad alcuna persona se pri-
ma non gli avete fornito delle precise istruzioni e non gli avete fatto
leggere questo manuale
q- Non spingete mai il rasaerba all'indietro (verso l'operatore)
r- Quando dovete tagliare su terreni in pendenza procedete di traver-
so mai dall'alto verso il basso o viceversa. Prestate particolare atten-
zione quando cambiate direzione . Non tagliate su terreni molto
scoscesi.
s- Spegnete sempre il motore quando non tagliate o quando dovete
attraversare un marciapiede, un viale o una strada.
t- Nel caso urtiate un ostacolo, arrestate il motore, staccate il cavo
candela e controllate se si sia verificato qualche danno.Riparate
l'eventuale danno prima di usare nuovamente il rasaerba; qualora il
danno fosse grave rivolgetevi al più vicino rivenditore HARRY.
2) NORME DI SICUREZZA

HARRY
9
ITALIANO
Utilizzate occhiali di sicurezza
Non fumare durante il rifornimento
di carburante
Mantenere alla distanza di sicurez-
za le ersone estranee.
4) MESSA IN FUNZIONE
Controlli rima dell'avviamento
Prima di ogni accensione controllate i seguenti punti e se necessario prov-
vedete alla manutenzione richiesta.
lControllate che il cestello e il deflettore siano ben fissati e pronti all'uso.
lControllate il livello dell'olio nel motore, se necessario provvedete al-
l'aggiunta facendo attenzione a non superare il livello indicato(vedere
il libretto istruzioni del motore stesso).
lControllate l'altezza di taglio impostata e regolatela come desiderato
(vedere il capitolo seguente "Regolazione altezza di taglio")
Avviamento del motore (Fig. 07 - Fig. 08 - Fig. 09)
Effettuate le operazioni di messa a punto, si proceda all'avviamento del
motore nel seguente modo:
a- Azionare la maniglia freno (4) per permettere l'avviamento del motore.
b- Per motori con sistema PRIMER:
premere 3-4 volte la pompetta di arricchimento posta sul carburatore.
Posizionare la leva acceleratore (3) nella posizione MAX.
Per motori con sistema CHOKE:
posizionare la leva acceleratore (3) nella posizione START.
c- Avviare il motore: impugnare la maniglia dell'avviamento (7) e tirare
la fune senza sforzo sino ad avvertire la resistenza provocata dalla
compressione, rilasciare la maniglia stessa e dare quindi uno strappo
energico.
Mantenere premuta la maniglia (4) durante il funzionamento, al rilascio
della stessa, il motore si ferma. Per ulteriori chiarimenti si raccomanda la
consultazione del libretto di istruzioni del motore stesso.
Per innestare la trazione,
, spingete la maniglia (5)
verso il manubrio; per arrestare l'avanzamento è sufficiente lasciare la
maniglia. Il rasaerba può essere spinto avanti e indietro quando la tra-
zione non è inserita.
Per il modello 471-C50-C54-P54 è possibile variare la velocità di
avanzamento agendo sulla leva (Fig.10 -pos.17) .
Montaggio del cestello in tela (Fig. 05)
1) Fate scivolare il telaio nel sacco di tela, tenete l'impugnatura al-
l'esterno della stoffa.L'impugnatura e la maniglia del cestello in tela
devono essere entrambe nella parte alta del cestello. Il foglio di pla-
stica sarà in basso.
2) Fissate i 4 lati del sacco in tela al telaio rettangolare, facendo scivo-
lare la guaina di plastica del sacco sopra il telaio metallico. Lasciate
libera la parte alta sinistra e destra del sacco.
Montaggio del manubrio - mod. 313 (Fig. 06)
1) Inserire le stegole inferiori del manubrio nelle apposite sedi ricavate
sui due mozzi laterali ed avvitare le due manopole laterali.
3) MONTAGGIO DEL RASAERBA
Attrezzi
Per montare un rasaerba HARRY occorrono:
- un cacciavite
- due piccole chiavi regolabili
Montaggio del deflettore (Fig. 02 - Fig. 03 - Fig. 04)
1) Mettere la molla nei due fori del deflettore, inserire il tirante (1), posi-
zionare il deflettore assemblato sul carter e fissarlo con le 2 viti (2).
3) Posizionate la rete sui due ganci del cestello. Sulla rete sono indicati
il lato rasaerba e il lato cestello.
4) Posizionate le piastre metalliche sui ganci saldati al telaio del cestello
e stringete i dadi. Assicuratevi che la rete non cada quando la stes-
sa è alzata in posizione di apertura totale durante l'operazione di
svuotamento dell'erba.Fate scivolare la guaina in plastica dalla parte
alta destra e sinistra del sacco sopra il telaio.
5) Montate il tegolo nella parte inferiore destra della rete con 4 viti e
dadi. Avvitate con il cacciavite e con la chiave.
6) Per montare il cestello sul rasaerba mettetevi sul lato destro del
rasaerba, alzate il deflettore con la mano destra e con la sinistra
agganciate il cestello al tirante.
ATTENZIONE! La lama entra in funzione quando si met-
te in funzione il motore.
Arresto del motore
Il motore e la lama si arrestano rilasciando la maniglia freno.
ATTENZIONE! Lintervento er variare la velocità di avan-
zamento, deve essere eseguita solo a motore funzio-
nante.
ATTENZIONE! La lama girerà ancora er max 3 secondi.
Non utilizzare il rasaerba senza che il cestello raccoglierba
o il deflettore siano montati
Per regolare laltezza di taglio su macchine con comando centralizzato,
è necessario impugnare la leva, sollevare il cannotto scorrevole e portar-
la in una delle 7 posizioni predisposte.
Vedere la figura per le altezze di taglio disponibili.
Fermate sem re il motore e attendete che la lama sia com-
letamente arrestata.
5) REGOLAZIONE DELL'ALTEZZA DI TAGLIO
Procedure er il taglio
Adattate la velocità alle condizioni dell'erba. Regolate la velocità del motore
al massimo quando l'erba è alta e fitta oppure al minimo quando è bassa.
Regolazione altezza di taglio (Fig. 11)

HARRY
10
ITALIANO
Consigli er il taglio
I risultati migliori si ottengono quando non più di un terzo dell'altezza
dell'erba è tagliata.
Quando l'erba è alta, usate la posizione di taglio più alta per il primo
taglio.
Se volete tagliare l'erba più bassa, ripassate con una posizione di taglio
più bassa. Se tagliate ad un livello troppo basso l'erba, dovrà impegnare
più energie per lo sviluppo di nuove foglie invece di irrobustirsi, e sarà più
soggetta alla possibilità di bruciare in caso di siccità.
Se lasciate che l'erba cresca troppo, la parte inferiore si indebolirà e in-
giallirà. L'erba lasciata a terra forma uno strato che impedisce la crescita
dell'erba; la raccolta dell'erba tagliata è sempre raccomandata.
Tutti i rasaerba HARRY, sono studiati per un immediato cambio di funzioni:
taglio e raccolta contemporaneamente o solo taglio (raccomandato quan-
do l'erba è molto alta).
Svuotamento del cestello (Fig. 12)
Il sistema brevettato di svuotamento del cestello permette di effettuare
questa operazione in due diversi modi:
ASollevate il deflettore e staccate il cestello dalla macchina utilizzando
la maniglia posta al centro del cestello.Sollevate quindi la parte po-
steriore dello stesso per permettere la fuoriuscita dell'erba.
BPrendete la parte posteriore del cestello e ruotatelo verso l'alto: l'erba
cadrà sul terreno (sistema brevettato).
Per prolungare la vita del cestello bisogna svuotarlo ogni volta che si
finisce il taglio e prima dell'immagazzinamento invernale. Controllate
frequentemente il cestello; se difettoso procedete alla sostituzione con
parti di ricambio originali.
ATTENZIONE!
Per ogni intervento di manutenzione, ricordatevi di
s egnere il motore e di staccare il connettore della
candela di accensione.
1Controllate a intervalli frequenti le lame e le viti che fissano il motore.
2Controllate che tutti i dadi e le viti siano strette in modo da avere il
rasaerba sempre in condizioni ottimali di lavoro.
3Controllate frequentemente lo stato del cestello di raccolta
dell'erba.Sostituite il cestello con un cestello nuovo qualora si riscon-
trino dei difetti. Usate solo parti di ricambio originali.
4Non immagazzinate il rasaerba in un luogo chiuso con il serbatoio
pieno di benzina. Lasciate raffreddare il motore dopo l'uso in un luo-
go aperto.
6) MANUTENZIONE
5Per ridurre il pericolo di incendio, fate in modo che il motore sia pulito
dall'erba, dalle foglie o da eventuale grasso di olio
6Ricordate che la benzina è infiammabile. Tenete la benzina in una
tanica metallica lontano dal calore o da fiamme libere.
7Fate revisionare dal rivenditore HARRY il vostro rasaerba al termine
di ogni stagione. Questo vi permetterà di avere il vostro rasaerba in
perfetta efficienza all'inizio della stagione successiva.
8Accertatevi che nelle riparazioni vengano usate parti di ricambio origi-
nali HARRY, questo Vi permetterà di mantenere la qualità del vostro
rasaerba allo stesso livello di quando l'avete acquistato.
ATTENZIONE!
Per ogni intervento di manutenzione, ricordatevi di
s egnere il motore e di staccare il connettore della
candela di accensione.
7) CONTROLLI E REGOLAZIONI
ATTENZIONE!: l'usura eccessiva della lama uò ortare
alla formazione di rofonde cre e ed al distacco di alcuni
ezzi della stessa che ossono creare serio ericolo all'o e-
ratore stesso ed ai resenti nella zona di lavoro.
Controllo - Smontaggio e affilatura della lama (Fig. 13 -
Fig. 14)
- Fermate il motore. Staccate il cavo della candela per evitare avviamenti im-
provvisi e non voluti del motore.
- Piegate il rasaerba sul lato sinistro oppure sul lato opposto alla cande-
la per evitare problemi di ingolfamento.
-Controllo: esaminate con cura il grado di affilatura e di usura della
lama, specialmente in corrispondenza delle pieghe.
- Poiché la sabbia o altro materiale possono essere causa di usura, si
consiglia di controllare frequentemente la lama. Se si notano delle ano-
malie, si deve provvedere alla sostituzione della lama.
-Smontaggio: impugnate energicamente un terminale della lama,
per evitare tagli si consiglia di indossare un guanto; svitate il bullone,
togliete la rondella e quindi la lama.
-Affilatura: affilate la lama se i taglienti sono deteriorati ma la lama
è in buone condizioni. Utilizzate una mola per l'affilatura; controllate
che, dopo questa operazione la lama sia ancora bilanciata. Se non
fosse bilanciata, si avranno delle vibrazioni eccessive. Prestate parti-
colare attenzione per evitare di tagliarvi!
- Montate la lama centrandola sul supporto e stringete il bullone.
LUBRIFICAZIONE
Motore: cambiate l'olio dopo le prime due ore di lavoro. Successiva-
mente ogni 25 ore come indicato nel manuale di manutenzione del mo-
tore. Prima di ogni utilizzo del rasaerba, controllate il livello dell'olio.
Per la lubrificazione delle arti in movimento: occasionalmente, mettere
alcune gocce di grasso sui componenti in movimento (quali cuscinetti,leve
di regolazione dell'altezza delle ruote ecc.).
REGOLAZIONE CAVO SEMOVENZA (Fig. 15)
Il cavo innesto semovenza deve essere registrato solo se, con motore in
funzione, azionando la maniglia semovenza le ruote non rispondono
prontamente e danno la sensazione che la frizione slitti.
La regolazione si realizza sbloccando i 2 dadi (pos.1), ruotando due giri
il dado superiore in senso antiorario e bloccandolo con il controdado, se
loperazione non risultasse efficace la si può ripetere.
ATTENZIONE!
Un eccessivo carico sul cavo uò rovocare la rottura della
trasmissione.
opo la registrazione verificare sempre che, a motore spento, tirando la
macchina allindietro senza azionare la maniglia semovenza, le ruote
posteriori ruotino liberamente.

HARRY
11
ITALIANO
1) Per poter tagliare lerba nella modalità Mulching, bisogna verificare
che laltezza dellerba non sia superiore a 10 cm., viceversa, è ne-
cessario togliere la chiusura Mulching e montare il sacco raccoglierba.
2) Qualora si stia procedendo nella modalità Mulching è necessario
accertarsi che lerba sia asciutta e la lama ben affilata per evitare
che lerba tagliata non si accumuli sotto la chiocciola della scocca.
3) Funzionamento:
a- Posizionare la chiusura Mulching nel vano di espulsione deller-
ba
9) MULCHING
Accertarsi che il motore sia s ento ed il ca uccio della can-
dela staccato.
b- Portare la leva di regolazione dellaltezza di taglio, in una delle
3 posizionicorrispondenti alla targhetta Mulching (vedi fig. 17).
Per modelli H48-H49-P49 posizionare laltezza di taglio non in-
feriore a 50mm.
c- Avviare il motore e procedere al normale taglio dellerba.
4) opo il funzionamento nella modalità Mulching è buona norma pro-
cedere ad una accurata pulizia per rimuovere i residui del taglio del-
lerba.
Per questa operazione, togliere la chiusura Mulching, come indicato
in fig. 16 .
Svitare il pomello e spingere la chiusura verso linterno, come indi-
cato in fig. 18 .
DESCRIZIONE DEL PRODOTTO
Il sistema davviamento Touch-n-mow, brevettato da Briggs & Stratton, è
un nuovo prodotto che permette di avviare il rasaerba tirando semplice-
mente la barra di sicurezza, senza lausilio di batterie, cavi elettrici, in-
terruttori e corde da tirare.
FUNZIONAMENTO
Caricare il sistema davviamento Touch-N-Mow - Per motivi
di sicurezza il sistema viene fornito disattivato dalla fabbrica produttrice.
Anche in seguito ogni qual volta il sistema di avviamento venisse disattivato
appositamente per motivi di sicurezza, il Touch-N-Mow avrà poi bisogno
di essere caricato per essere pronto alluso.
Per caricare il sistema davviamento, si deve avviare il motore usando
lavviamento manuale (fune davviamento) seguendo i passi di seguito
riportati:
1. Controllare il livello della benzina e dellolio motore
2. Collegare il cavo candela
3. Premere il primer del motore tre volte (fig.20).
4. Inserire la chiave di sicurezza (fig. 19). Ruotarla in senso orario
sulla posizione RUN (fig.21).
5. Liberare la barra di sicurezza ruotando la maniglia del dispositivo
Touch-N-Mow (fig. 22).
6. Accendere il motore con lavviamento a mano tirando la corda (fig
23). Se il motore non parte al secondo tentativo, verificare di aver
eseguito correttamente i passaggi precedenti.
7. Lasciare che il motore raggiunga la velocità operativa.
8. Rilasciare la barra in modo appropriato.
NOTA: al rimo avvio della rasaerba, o comunque do o un eriodo di
rimessaggio lubrificare il unto di snodo indicato (fig. 24) e lasciare
acceso il motore er cinque minuti rima di usare la macchina.
Quando la barra viene rilasciata la molla di ritorno spinge il Touch-N-
Mow a contatto con il volano.
Lenergia darresto (inerzia) che proviene dal volano permette il
caricamento autonomo del Touch-N-Mow stesso.
Il meccanismo autocaricante del dente di arresto mantiene la molla nella
posizione di carica.
10) SISTEMA DAVVIAMENTO TOUCH-N-MOW
Arrestare il motore
Rilasciare la barra di sicurezza in modo appropriato.
NOTA: Nel momento in cui si ferma il motore, sentirete il rumore del
sistema di avviamento che si ricarica. Questo rumore causato dallalta
velocità del dente darresto è normale.
Il Touch-N-Mow è un sistema brevettato che funziona sia da sistema di
avviamento quando si tira la barra di sicurezza, che da freno motore
quando si lascia appropriatamente la barra di sicurezza.
Girando la chiave di sicurezza di 1/4 di giro in senso antiorario (posi-
zione LOCK&REMOVE ), il Touch-N-Mow si blocca. Togliere SEMPRE la
chiave di sicurezza e metterla in un posto sicuro. Il motore non partirà
senza chiave di sicurezza o con la chiave nella posizione LOCK&REMOVE.
NOTA: Se il motore rimane senza benzina o se il motore si ferma a
causa di erba tro o alta o er altre ragioni meccaniche, lavviamento
Touch-N-Mow non si ricaricherà automaticamente e sarà necessario ri-
etere i unti elencati nel aragrafo: Caricare il sistema davviamento
Touch-N-Mow.
Avviare il motore utilizzando il sistema Touch-N-Mow
1. Controllare lolio motore.
2. Collegare il cavo candela.
3. Premere il primer per tre volte.
4. Inserire la chiave di sicurezza. Girare in senso orario sulla posizio-
ne RUN.
5. Rimuovere la sicurezza della barra.
6. Tirare la barra per avviare il motore.
NOTE: Se il motore non parte significa che il Touch-N-Mow si è scarica-
to. In tal caso provvedere al caricamento.
Staccate il cavo della candela, girate il rasaerba e pulite la parte inferio-
re del carter.Eliminate ogni accumulo d'erba con un cacciavite quindi
lavate con getto d'acqua. Pulite le superfici del rasaerba e lasciate asciu-
gare. Controllate che il cestello per la raccolta dell'erba sia vuoto; lavate
lo stesso lasciandolo però asciugare. Immagazzinate il rasaerba in un
luogo asciutto e protetto dalle intemperie.
Procedure er l'immagazzinamento invernale
Seguite le seguenti istruzioni per la preparazione del vostro rasaerba per
l'immagazzinamento a fine stagione.
Per quanto riguarda il motore, seguite le istruzioni fornite dal costruttore
del motore.
8) IMMAGAZZINAMENTO INVERNALE

HARRY
12
ITALIANO
SUGGERIMENTI PER LA RICERCA GUASTI
Se il motore non riesce a artire:
1. Controllare il livello della benzina.
2. Assicurarsi che la candela sia collegata correttamente
3. Ricaricare il sistema davviamento seguendo i punti elencati nel pa-
ragrafo caricare il sistema davviamento Touch-N-Mow.
4. Verificare di aver tirato la barra di avviamento dopo aver sbloccato
la leva di sicurezza.
5. Assicurarsi che la chiave di sicurezza sia nella posizione RUN.
6. Verificare che il cavo di avviamento funzioni correttamente per atti-
vare e ricaricare il Touch-N-Mow.
7. Assicurarsi che linterruttore STOP sia correttamente fissato sul Touch-
N-Mow.
AVVERTENZE E PRECAUZIONI
Come per ogni prodotto nuovo ci sono importanti considerazioni da fare
sulla sicurezza del Touch-N-Mow. In particolare é necessario tener conto
che questo sistema basa il proprio funzionamento su una molla mantenu-
ta in carica dal volano. Un intervento inconsapevole o maldestro nei pressi
della molla può causarne limprovviso rilascio con conseguenze che pos-
sono essere estremamente pericolose per sé stessi e le persone vicine.
Quindi se le istruzioni che seguono non vengono ris ettate
cè il rischio di traumatiche am utazioni o lacerazioni!
- Scollegare SEMPRE la candela, scaricare e bloccare il Touch-N-Mow
rimuovendo la chiave di sicurezza PRIMA di effettuare QUALSIASI
assistenza al motore o al rasaerba.
- Assicurarsi che il Touch-N-Mow sia scarico e bloccato PRIMA di
trasportarlo o maneggiarlo.
- NON mettere le mani o i piedi sotto il rasaerba quando il sistema
davviamento è in carica
-MAI resu orre che il sistema sia scarico anche se la
chiave è nella osizione LOCK&REMOVE o se è stata
rimossa dal motore.
- NON mettere le mani sul volano mentre il sistema si scarica.
- NON trasportare o sollevare il motore dal convogliatore vicino al
volano.
- Maneggiare SEMPRE il sistema di avviamento Touch-N-Mow, se
smontato dal motore, dallinvolucro in ferro della molla.
- NON sollevare lo starter mettendo le vostre dita ove vi sono le parti
in movimento del sistema stesso.
-NON tentare di manutenzionare o ri arare lavviatore
Touch-N-Mow.
- Bloccare e rimuovere SEMPRE la chiave di sicurezza e riporla in un
posto sicuro fino al prossimo utilizzo. La chiave di sicurezza è stata
disegnata e pensata apposta per essere rimossa dal motore quando
non è in uso. Rimuovendo la chiave si prevengono avviamenti
incontrollati o inaspettati in presenza di bambini o adulti non infor-
mati. La chiave di sicurezza deve essere nella posizione di blocco
del sistema (posizione LOCK&REMOVE) prima che possa essere ri-
mossa.
- Verificare SEMPRE che il cavo di STOP sia attaccato e fissato corret-
tamente allinterruttore di STOP. Il mancato funzionamento dellin-
terruttore di STOP (contatto a massa) può danneggiare lavviatore
Touch-N-Mow.
Chiudere e rimuovere SEMPRE la chiave di sicurezza e riporla in un
posto sicuro fino al prossimo uso.
La chiave di sicurezza è stata disegnata e pensata per essere rimos-
sa dal motore quando non è in funzione.
Togliere la chiave per prevenire avviamenti accidentali del rasaerba in
presenza di bambini o adulti incauti.
La chiave di sicurezza deve essere nella posizione LOCK&REMOVE pri-
ma che possa essere rimossa.
SCARICARE E BLOCCARE SEMPRE IL TOUCH-N-MOW PRIMA I:
- rimuovere erba o altri detriti dal rasaerba
- cambiare il filtro dellaria, dellolio o la candela
- rimuovere la lama er la manutenzione
- effettuare qualsiasi altra manutenzione al motore o al rasaerba
- tras ortare il rasaerba
SUGGERIMENTI PER LASSISTENZA
Il Touch-N-Mow è fissato al motore con viti Torx T 30.
Il Touch-N-Mow fa girare il motore per 2 secondi a 1000 RPM. Un avvia-
mento a corda a 600 RPM, e un avviamento elettrico a 450 RPM.
Se il motore non parte, caricare il Touch-N-Mow manualmente (fune di
avviamento).
Se il serbatoio è stato rimosso dal motore ASSICURARSI che la chiave di
sicurezza del sistema Touch-N-Mow sia nella posizione LOCK & REMOVE
prima di installare nuovamente il serbatoio.
Non usare la chiave di sicurezza prima di installare il serbatoio in quanto
possono verificarsi operazioni non sicure.
Se avete qualche dubbio sulle condizioni di carica del Touch-N-Mow,
scaricate il sistema davviamento.
SCARICARE IL SISTEMA DI AVVIAMENTO
Prima di pulire il rasaerba, effettuare manutenzione o trasportare il
rasaerba SI EVE scaricare il sistema davviamento Touch-N-Mow.
Per scaricare il sistema:
1. Scollegare il cavo candela.
2. Azionare il sistema di avviamento e fare una falsa partenza.
3. Girare la chiave di sicurezza di 1/4 in senso antiorario nella posi-
zione LOCK&REMOVE.
4. Togliere la chiave di sicurezza.
NOTA: Se la chiave di sicurezza non si orta nella osizione di
bloccaggio, tirare leggermente la corda autoavvolgente er rilasciare la
tensione nel sistema davviamento.
GARANZIA
Il meccanismo di avviamento Touch-N-Mow è un unico sistema e NON è
composto da parti ricambiabili singolarmente. Qualsiasi segno di mano-
missione invaliderà la garanzia del costruttore.
* Se il Touch-N-Mow non si disattiva
1. Tentare di caricare lavviatore. Aspettare il click del dente darre-
sto e provare a scaricarlo ancora tirando la barra di sicurezza.
2. Se loperazione al punto 1 NON ha scaricato lavviatore, tirare la
barra di sicurezza, picchiate leggermente con un martelletto di gomma
lesterno del convogliatore a molla e sul braccio dinnesto del siste-
ma, provando a farlo innestare.
3. Se le operazioni ai punti 1 e 2 non riescono a scaricare lavviatore,
bloccare e togliere la chiave di sicurezza dal sistema , e rimuoverlo
attentamente dal motore. Contrassegnare il sistema rimosso come
completamente carico e inviarlo alla casa produttrice Briggs &
Stratton.
* Se il pignone davviamento è bloccato nel volano
1. Cercare di caricare lavviatore usando la fune autoavvolgente. Aspet-
tare il click del dente di arresto e provare ancora a scaricarlo.
* Se lavviatore non si blocca con la chiave di sicurezza
1. Se lavviatore è scarico tirare leggermente la fune davviamento cer-
cando di far fare una rotazione al volano e provare a portare la
chiave di sicurezza nella posizione di blocco, (LOCK POSITION).
2. Se lavviatore è carico, scaricarlo e cercare di bloccarlo con la chia-
ve di sicurezza. Se lavviatore non si blocca, ripetere loperazione al
punto 1.
* Se il sistema davviamento continua a ricaricarsi dopo la
partenza del motore
1. Controllare le connessioni dellinterruttore darresto e la massa. Un
sovraccaricamento della molla ANNEGGERA il sistema Touch-N-
Mow.
Problemi di avviamento o di fermata del motore possono essere collegati
alla barra davviamento, al dispositivo di regolazione del cavo o al
leveraggio.
E MOLTO IMPORTANTE che questo dispositivo di regolazione per-
metta di attivare correttamente sia il sistema davviamento Touch-N-
Mow che il blocco motore.

ENGLAND
HARRY
13
Before using the machine, read the instruction manual.
ATTENTION!
Kee ersons, who do not know the safety rules away
from the mower.
Sto the engine and disconnect the s ark lug wire
before re aring
Wear safety glasses to rotect your eyes
Never smoke while filling the gasoline tank
CONTENTS:
1) escription of the parts
2) General safety precautions
3) Assembly
4) Operation
5) Mowing procedure
6) Maintenance
7) Inspection and maintenance
8) Storage procedure
9) Mulching
10) Touch-N-Mow starting system
1) DESCRIPTION OF THE PARTS (Fig.01)
1Upper handle
2Lower handle
3Throttle
4Cable
5Handle driving
6Handle rod
7Handle
8eflector
9 Back wheel
10 Front wheel
11 eck
12 Engine
13 Blade
14 Grasscatcher
15Gearbox
16 Adjusting levers for cutting height
17Variable speed
2) GENERAL SAFETY PRECAUTIONS
ATTENTION!
a) Read the operating and service instruction manual carefully before
using the mowers
b) Person under 16 years of age must not use the lawn mower.
c) The operator is responsable for the safety of other people in the working
area.Keep children and domestic animals at a safe distance when the
lawn mower is in use.
d) Thoroughly inspect the area where the mower has to be used, remove
all sticks, stones, wires cans and other foreign objects from the area to
be mowed.Also note the location of holes, stumps, and other possible
hazards.
e) Wear only solid shoes when mowing. o not operate mower when
barefoot, or wearing open sandals.Wear sensible clothing-long-pants,
boots or heavy shoes that will grip even in wet weather, and gloves
(like golfers) for a sure grip. Also, don't wear anything that's so loose
that it might get caught on something.
f) Check the blade bolts for proper tightness. Never use the lawn mower
without either grasscatcher or deflector.
g) o not fill the gasoline tank indoors, when engine is running or while
the engine is still hot.Never smoke during the filling of the gasoline
tank.
h) o not start the engine indoors. Exhaust gases coming fom the engine
can be poison when repired, and can therefore be suffocating and
mortal.
i) Never attempt to make a wheel height adjustment while the engine is
running.Adjust the cutting height while the mower is on a level, firm
surface.
l) CAUTION O NOT put hands or feet under mower or in the discharge
chute, nor make any adjustment.
m) Mow only in daylight or good artificial light.
n) O NOT run with the mower. o not allow hurry or panic to influence your
better judgement. Take time to do job in the safest manner.Always be sure
of your footing; keep a firm hold on the handle and walk; never run.
o) O NOT use damaged mower. Always have damage repaired before
mowing.
p) o not allow anyone to operate your lawn mower without proper
instructions and have them to read these safety instructions
q) Never pull mower towards you, always follow mower to cut grass
r) Mow across the face of slopes; never up and down. Exercise extreme
caution when changing direction on slopes. o not mow excessively
steep slopes
s) Always stop engine or blade when not cutting grass or when crossing
gravel drive, sidewalk, or roadway.
t) After striking a foreign object, stop the engine, remove the wire from the
spark plug, thoroughly inspect the mower for any damage, and repair
the damage before restarting the engine and operating the mower.

ENGLAND
HARRY
14
3) ASSEMBLY
Tools:
To assemble the HARRY mower you will need:
- One straight head screwdriver;
- Two small adjustable wrenches.
Deflector- late assembly (Fig. 02 - Fig. 03 - Fig. 04)
1) Position the spring into the two holes of the deflector plate, insert the
rod (1), position the assembled baffle plate on the casing, securing it
with the 2 screws (2).
Assembly of handlebar mod. 313 (Fig. 06)
1) Insert the lower plough tails of the handlebar into the relative
slots on the two lateral hubs and tighten the two knobs.
3) Place grille over the two hooks of the catcher. Be sure grille flanges
face mower. Mower side and catcher side are indicated on grille.
4) Place metal plates on frame brackets, just aft of each hook. Secure to
bracket with flat head bolts, nuts and washer. The other end of clip
should now cover the top of the grille, just aft the hook... thus preventing
the grille from falling off when the grille is raised to full open position
at time of emptying grass cuttings.Slip bag top left and right plastic
ends over the metal frame.
5) Attach spoon to lower right from side of grille with 4 straight head
screws and nuts. Tighten with screwdriver and small adjustable wrench.
6) To attach grasscatcher to mower stand on right side of mower lift
deflector with right hand, and with left hand hook catcher onto two
open areas of handle rod.
Assembly of fabric grasscatcher (Fig. 05)
1) Slip the wire frame into the fabric bag, keep the metal handle outside
of the fabric. The metal handle and fabric bag cloth handle will both
be at top side of the catcher. The plastic sheet will be on the bottom .
2) Secure the 4 sides of fabric bag to rectangular frame opening by
slipping plastic ends of bag over the metal frame. Leave top left and
right of bag off.
Wear safety glasses to rotect
your eyes
Never smoke while filling the gasoline
tank Kee ersons, who do not know the
safety rules away from the mower.
4) OPERATION
Keep the handle (4) pressed during machine operation. When the handle
is released, the engine stops. For further information and explanations,
read carefully the user instruction manual of the engine. Squeeze adjusting
lever towards wheel and move it to the position desired.
assure pin on adjusting lever (5) engages notch in
housing. Refer to figure for the approximate cutting height afforded by
each of the different positions.
For model 471-C50-C54-P54 it is possible to alter the advance speed
by means of the lever (17) (Fig. 10).
Pre-start ins ections
before each start-up, check the following and, if necessary, perform the
service specified.
lCHECK deflector, grasscatcher to make sure they are in proper position
and tightened.
lCHECK oil level in engine and, if necessary, add oil up to, but not
over, full mark.
lCHECK cutting heights and adjust (see paragraph "cutting height
adjustment").
Engine startu (Fig. 07 - Fig. 08 - Fig. 09)
Once the machine has been set up properly, start the engine as follows:
a- Operate the brake handle (4) to enable engine startup.
b- Engine with PRIMER system: Press the fuel-enrichment pump located
on carburettor 3 or 4 times.If the model is equipped with an accelerator
position the accelerator lever (3) on MAX.
Engine with CHOKE system: If the model is equipped with an
accelerator, when the engine is cold, position the accelerator lever (3)
on START.
c- Start engine: Grip the starting handle (7) and pull the starter rope
gently until you feel the resistance caused by compression. Then give
the starter rope a sharp tug.
ATTENTION! The blade starts turning as soon as the engine
is started.
ATTENTION! The blade will continue turning for max. 3
more seconds after the engine has been sto ed.
Engine sto :
The engine and the blade stop when the handle is released.
ATTENTION! Undertake the o eration only with the engine
running
5) MOWING PROCEDURE
Mowing rocedure:
Vary speed to suit grass conditions. Set the engine speed to the maximum
for tall and thick grass or lower for short and thin grass. On self propelled
models squeeze control bar towards handle to engage the transmission;
to stop forward motion release the control bar. The mower can be hand
pushed with the control released.
Cutting height adjustment (Fig. 11)
To adjust the cutting height on machines with centralized control it is
necessary to grip the lever, lift the sliding sleeve and position to one of the
7 set positions.
Always sto the engine and wait until the mower blade goes
to a com lete halt. Never use the lawn mower without either grasscatcher or
deflector.

ENGLAND
HARRY
15
LUBRICATION SERVICES
Engine: Change oil after the first two hours of operation and subsequently
after every 25 hours as specified in engine manual. Check the oil level
each time you use your mower.
For lubrication of moving arts: occasionally pour a few drops of grease
onto the moving parts (such as bearings, wheel height adjustment levers
etc).
Em tying grasscatcher (Fig. 12)
When the bag becomes full, stop engine and wait for all parts to stop.
The patented HARRY grass collection system gives you two ways to empty
grasscatcher:
ALift deflector and simply unhook the bag. Grasping handle at middle
and rear of bag, gradually tip bag forward to empty clippings and
shake bag until all clippings have fallen out;
BGrasp handle at rear and just tip bag; clippings will fall out on the
ground (patented);
To extend the life of the basket it is necessary to empty it each time the cut
is terminated and before the winter storage. Check the basket frequently;
if it is defective proceed to replace it with original spare parts.
Mowing ti s:
Best results are achieved when no more than 1/3 of the height of the
grass is cut off. The cutting deck should be level under all conditions; if
long grass must be cut, use highest cutting height for first mowing. If you
want the grass shorter, then recut to the lower height. If cut too short, the
grass will expend more energy for development of new leaves and less
for root strengthening and will be more subjected to burning. On the
other hand, if allowed to grow too long, the lower part will be shaded
and will discolor.
ispersed clippings mat to form thatch which prevents proper growth; to
prevent grass disease from thatch, bagging is always recommended. All
HARRY mowers are designed to allow immediate change of function:
cutting and bagging at the same time or cutting only (this is recommended
only when grass is high).
6) MAINTENANCE
1Check the blade and the engine mounting bolts at frequent intervals
for proper tightness.
2Keep all nuts, bolts and screws tight to be sure the equipment is in safe
working conditions.
3When the grasscatcher is used on your mower, check the catcher often
for damage.Use only recommended catcher.Replace with new bag if
loose seams or tears are evident.
4Never store the equipment with gasoline in the tank inside a building
where fumes may reach an open flame or spark.Allow the engine to
cool before storing in any enclosure.
ATTENTION!
Sto the engine and disconnect the s ark lug wire
before re aring.
5To reduce fire hazard, keep the engine free of grass, leaves, or excessive
grease.
6Remember that gasoline is flammable. Store your reserve supply
carefully in a metal container and away from heat and fire.
7Have your mower inspected and serviced each year by an authorized
HARRY dealer. etermine if any additional devices are available which
might upgrade the safety of your mower.
8Factory specified HARRY replacement parts must be used to assure
adequate protection against injury.
7) INSPECTING
Ins ecting-removing shar ening-blade (Fig. 13 - Fig. 14)
- Stop engine. CAUTION: before checking or doing any work on the
blade,disconnect the spark plug wire and secure it away from the plug
to prevent unintentional starting.
- Tip mower on its left side or opposite side from spark plug, so plug will
not be fouled (which causes starting problems).
-INSPECTING BLADE: Carefully examine blade for sharpness and
wear, especially where flat and curved parts meet . Since sand and
abrasive material can wear away the metal that connects the flat surface
to the upturned lift, check blade before using the mower. If a slot or
wear is noticed replace blade. Replace blade if badly chipped, bent
or out of balance.
ATTENTION!
Sto the engine and disconnect the s ark lug wire
before re aring.
-DISMANTLING: Firmly grip an edge of the blade, to avoid the risk
of cuts it advisable to wear gloves; unscrew the bolt, remove the washer
and then the blade.
-SHARPENING BLADE: Sharpen blade when the cutting edges
become dull if the blade is in otherwise good condition. For best results,
remove the blade and sharpen it on grinding wheel.Check blade after
sharpening to determine that it is still balanced. It will cause excessive
vibration if unbalanced.Be careful to avoid cutting yourself on sharp
blade!
- Assemble the blade centering it on the support and tighten the bolt.
ATTENTION! If blade is allowed to wear, a slot may form
near the sail. Eventually a iece of blade may break off
resulting in serious injury to yourself or a bystander.
TRANSPORTER CABLE REGULATION (Fig. 15)
The transporter engagement cable must only be regulated in the event
that, with engine running, on handle operation the wheels fail to provide
a prompt response and it seems that the clutch is slipping.
Regulation is undertaken by loosening the 2 nuts (1), turning the upper
nuts twice in anti-clockwise direction, and then re-tightening it with the
counter-nut, should the operation not be effective it can be repeated.
After regulation always check that, with engine off, and pulling back the
machine without operating the transporter handle, that the rear wheels
rotate freely.
ATTENTION!
Excessive ressure on the cable may result in the breakage
of the transmission.

ENGLAND
HARRY
16
8) ISTORAGE PROCEDURE
Storage rocedure:
Take the following steps to prepare your mower for storage at the end of
the mowing season. Refer to the engine manual for directions for preserving
the engine. With the spark plug wire disconnected from plug, turn the
mower on its side and thoroughly clean underside of deck. Scrape away
accumulation of grass with putty knife and/or wire brush first, then wash
down with water from a hose.
CAUTION: Avoid spraying water into exhaust or air intake while washing
deck - tape openings closed to prevent this. Clean external surfaces of
mower and allow to dry, then lubricate all exposed metal surfaces with a
light coating of oil to prevent corrosion. The grass catcher may be washed
in detergent; allow to dry thoroughly after washing. Store mower during
off season in a storage shed or dry area protected from weather.
1) For grass cutting in Mulching mode, it is necessary to check that the
grass height does not exceed 10 cm, viceversa it is necessary to
remove the Mulching closure element and mount the grass collection
sack.
2) When working in the Mulching mode, make sure that the grass is
dry and that the blade is well sharpened in order to ensure that the
cut grass does not accumulate underneath the volute of the casing.
3) Function:
a- Position the Mulching closure element in the grass expulsion
compartment.
9) MULCHING
b- Position the cutting height regulation lever to one of the three
positions on the Mulching plate (see fig. 17)
For H48-H49-P49 models the cutting height shall be set not lower
than 50 mm.
c- Start up the motor and proceed with normal grass cutting.
4) After operation in the Mulching mode it is advisable to undertake
thorough cleaning to remove any cut grass residue. For this operation
remove the Mulching closure element, as indicated in fig. 16
Loosen the knob and push the closing towards inside as shown in
figure 18 .
Make sure that the motor is off and that the s ark- lug cover
is detached.
10) TOUCH-N-MOW STARTING SYSTEM
PRODUCT DESCRIPTION
The Touch-n-Mow starting system, patented by Briggs & Stratton, is a
new mechanical starting system for the lawn mower which operates by
simply pulling the motor bar, without requiring batteries, electric cables,
switches or strings to pull.
OPERATION
Loading the Touch-n-Mow starting system. For safety reasons,
the system is off when supplied by the manufacturer. Also afterwards,
whenever the starting system is turned off on purpose for safety reasons,
the Touch-n-Mow will require to be loaded in order to be ready for use.
To load the starting system, the motor must be started by means of the
manual starting (starting string), following the steps below:
1. Check gasoline and motor oil levels.
2. Connect spark plug cable.
3. Press motor primer three times (Fig.20).
4. Insert safety key (Fig.19). Rotate it clockwise to RUN position
(Fig.21).
5. Release motor bar by rotating Touch-n-Mow safety lever (Fig.22).
6. Manually start the motor by pulling the string (Fig.23). If the motor
does not start at the second attempt, make sure the previous steps
have been properly executed.
7. Let the motor reach the operating speed.
8. Properly release the bar.
NOTE: at the first start u of the lawn mower or after any eriod of non
use, lubricate the articulation oint shown (Fig. 24) and leave the motor
on for five minutes before using the machine.
When the bar is released the return spring pushes the Touch-n-Mow device
until this touches the flywheel.
The stopping energy (inertia) generated by the flywheel allows the Touch-
n-Mow starting system self-loading.
The self-loading mechanism of the pawl keeps the spring in the loading
position.
Sto ing the motor
Properly release the motor bar.
NOTE: when the motor sto s, you will hear the starting system re-loading
noise. This noise caused by the high s eed of the awl is normal.
The Touch-n-Mow device is a patented system working both as starting
system when the motor bar is pulled, and as motor brake when the motor
bar is properly released.
By turning the safety key by _ anticlockwise (LOCK&REMOVE position),
the Touch-n-Mow device locks. ALWAYS remove the safety key and put it
in a safe place. The motor will not start without safety key or with the key
in LOCK&REMOVE position.
NOTE: If the motor remains without gasoline or if it sto s due to excessively
high grass or because of other mechanical reasons, the Touch-n-Mow
starting system will not automatically reload and it will be necessary to
re eat the ste s listed in the section Loading the Touch-n-Mow starting
system.
Starting the motor by means of the Touch-n-Mow system
1. Check motor oil.
2. Connect spark plug cable.
3. Press primer three times.
4. Insert safety key. Rotate clockwise to RUN position.
5. Activate motor bar safety lever.
6. Pull motor bar to start engine.
NOTE: if the motor does not start it means that the Touch-n-Mow device
is unloaded. Proceed to load it .

ENGLAND
HARRY
17
- ALWAYS disconnect the spark plug, unload and lock the Touch-n-
Mow device by removing the safety key BEFORE carrying out any
assistance intervention on the motor or the lawn mower.
- Make sure the Touch-n-Mow device is unloaded and locked BEFORE
transporting or handling it.
- O NOT put your hands or feet below the lawn mower when the
starting system is loaded.
-NEVER suppose that the system is unloaded even if the key is in the
LOCK&REMOVE position or it has been removed from the motor.
- O NOT put your hands on the flywheel while the system is being
reloaded or released .
- O NOT transport or lift the motor from the conveyor near the
flywheel.
- ALWAYS handle the Touch-n-Mow starting system, if disassembled
from the motor, from the spring iron case.
- O NOT lift the starter putting your fingers where there are the
moving parts of the system.
- O NOT try to carry out maintenance or repair interventions on the
Touch-n-Mow starter.
- ALWAYS lock and remove the safety key and put it in a safe place
until the following use. The safety key has been designed and
manufactured to be removed from the motor when not in use. By
removing the key there is no risk of uncontrolled or unexpected
startings in the presence of children or unaware adults.
The safety key must always be in the system lock position
(LOCK&REMOVE position) prior to its removal.
- ALWAYS make sure that the STOP cable is correctly attached and
fixed to the STOP switch.The non operation of the STOP switch (ground
contact) may damage the Touch-n-Mow starter.
ALWAYS close and remove the safety key and put it in a safe place
until the following use.
The safety key must be in the LOCK&REMOVE position prior to its
removal.
ALWAYS UNLOA AN LOCK THE TOUCH-N-MOW BEFORE:
-Removing grass or other waste material from the lawn mower.
-Changing air filter, oil filter or s ark lug.
-Removing blade for maintenance.
-Carrying out any other maintenance o eration to the motor or the
machine.
-Trans orting the lawn mower.
TROUBLESHOOTING TIPS
If the motor does not start:
1. Check gasoline level.
2. Make sure spark plug is correctly connected.
3. Reload the starting system by following the points of section loading
the Touch-n-Mow starting system.
4. Make sure the starting motor bar has been pulled after releasing the
safety lever.
5. Make sure the safety key is in RUN position.
6. Check the proper operation of the starting cable to turn on and reload
the Touch-n-Mow.
7. Make sure the STOP switch is properly fixed to the Touch-n-Mow device.
WARNINGS & PRECAUTIONS
As for any new product, some important comments must be made on the
Touch-n-Mow safety. In particular it is necessary to consider that the
operation of this system is based on a spring kept under load by the
flywheel.
Any unaware or inexperienced intervention near the spring may cause its
sudden release with consequences which may be extremely dangerous
for the operator and any nearby person.
SAFETY WARNING: it is im erative that all the safety
instructions below are strictly com lied with, otherwise
traumatic am utations and injuries may take lace!
UNLOADING THE STARTING SYSTEM
Before cleaning the lawn mower, carrying out maintenance or transporting
the machine, IT IS NECESSARY to unload the Touch-n-Mow starting system.
To unload the system:
1. isconnect spark plug cable.
2. Act on the starting system and make a false starting.
3. Rotate safety key by _ anticlockwise to LOCK&REMOVE position.
4. Remove safety key.
NOTE: if the safety key does not reach the locking osition, slightly ull
the self-winding string to release the tension in the starting system.
GUARANTEE
The Touch-n-Mow starting mechanism is a single-block system and OES
NOT include individually changeable parts. Any tampering will nullify
the manufacturers guarantee.
ASSISTANCE TIPS
The Touch-n-Mow device is fixed to the motor by means of Torx T 30
screws.
The Touch-n-Mow starting system makes the motor run for 2 seconds at
1000 RPM compared with a string starting at 600 RPM and an electric
starting at 450 RPM.
If the motor does not start, manually load the Touch-n-Mow device (starting
string). If the tank has been removed from the motor, MAKE SURE that
the safety key of the Touch-N-Mow system is in lock position
(LOCK&REMOVE) before installing the tank again.
o not use the safety key before installing the tank as unsafe operations
may take place.
In case of doubt on the loading conditions of the Touch-n-Mow device,
unload the starting system.
* If the Touch-n-Mow starting system does not turn off
1. Try to load the starter. Wait for the click of the pawl and try to
unload it again by pulling the safety bar.
2. If the operation in item 1 has NOT unloaded the starter, pull the
engine bar, slightly hit with a small rubber hammer on the outside of
the spring conveyor and the coupling arm of the system, trying to
engage it.
3. If the operations in items 1 and 2 cannot unload the starter, stop and
remove the safety key from the system and carefully remove it from
the motor. Mark the removed system as fully loaded and send it to
the manufacturer Briggs & Stratton.
* If the starting pinion is locked in the flywheel
1. Try to load the starter by means of the self-winding string. Wait for
the click of the pawl and try to unload it again.
* If the starter does not lock with the safety key
1. If the starter is unloaded, slightly pull the starting string trying to
make the flywheel rotate and try to move the safety key to LOCK
POSITION.
2. If the starter is loaded, unload it and try to lock it with the safety key.
If the starter does not lock, repeat operation described in item 1.
* If the starting system continues to reload after the motor
starting:
1. Check the connections of the stop switch and the ground. Any overload
of the spring WILL AMAGE the Touch-n-Mow system.
Motor starting or stopping problems may be related to the engine bar,
the cable adjusting device, or the leverage.
IT IS VERY IMPORTANT that this adjusting device enables to correctly
operate both the Touch-n-Mow starting system and the motor lock.
.

FRANCE
HARRY
18
i) Effectuez le réglage de la hauteur de coupe sur une surface plane et
avec la moteur à l'arrêt.
l) ATTENTION!: Il ne faut jamais toucher les parties travaillantes sous le
capot de la tondeuse ou l'intérieur du tunnel d'éjection lorsque le moteur
tourne, car la lame de coupe est en rotation lorsque le moteur est en
marche.
m) Ne tondez l'herbe que de jour ou avec un éclairage suffisant.
n) Ne courez pas. Prenez votre temps et tenez solidement votre tondeuse.
Gardez toujours une démarche stable.
o) Ne vous servez de la tondeuse que lorsqu'elle est en bon état. Faites-
la réparer si nécessaire. Souvenez-vous qu'une tondeuse qui vibre
trop, doit être examinée au plus vite par votre Revendeur car les
vibrations sont signe d'un dommage.
p) Ne permettez pas l'usage de votre tondeuse à gazon à personne , si
vous n'avez lui pas donné préalablement des instructions précises et
il n'à pas lu ce manuel.
q) Ne tirez jamais la tondeuse en arrière.
r) Quand vous devez tondre en pente, il faut travailler en sens oblique,
jamais de haut en bas, ou inversement. Soyez particulièrement vigilant
en changeant de direction sur les talus. Ne tondez pas sur des pentes
trop raides.
s) Arrétez toujours le moteur quand vous devez traverser une surface
autre que du gazon (trottoir, rue, allée).
t) En cas de choc avec obstacle, il faut arrêter le moteur, détacher le
câble de la bougie et contrôler s'il y a des dommages. Il faut réparer
les dégâts éventuels avant réutilisation. Si le dommage est important,
veuillez vous adresser au Revendeur HARRY le plus proche.
Avant d'utiliser la machine, lire attentivement la notice
d'instructions
ATTENTION!
Ne laissez jamais une ersonne n'ayant as de
connaissance des instructions de sécurité, utiliser votre
tondeuse.
Eteigner le moteur et détacher le câble de la bougie
avant de rocéder au nettoyage.
Utilisez des lunettes de sécurité our rotéger vos yeux.
Ne fumez as endant que vous ajoutez du carburant.
SOMMAIRE:
1) escription des pièces:
2) Norme de sécurité
3) Montage
4) Fonctionnement
5) Réglage du coupe
6) Maintenance
7) Contrôles et reglages
8) Remisage hivernal
9) Mulching
10)System de demarrage Touch-N-Mow
10 Roue
11 Chassis
12 Moteur
13 Lame
14 Bac en toile
15Transmission
16 Manette de réglage de hauteur de coupe
17Variateur de vitesse
1) DESCRIPTION DES PIÈCES (Fig. 01)
1Mancheron supérieur
2Mancheron inférieur
3Accélérateur
4Poignée du frein
5Poignée autotracté
6Poignée
7Câble
8eflecteur
9Roue
2) NORME DE SECURITE
ATTENTION!
a) Lisez attentivement ce manuel avant d'utiliser votre tondeuse et assurez
vous de bien connaître les précaution de sécurité.
b) Ne laissez jamais un enfant de moins de 16 ans utiliser votre tondeuse.
c) L'opérateur est responsable vis-à-vis des tiers dans la zone de travail.
Eloigner les enfants et les animaux domestiques lorsque la machine
est en marche.
d) Inspectez scrupuleusement la surface à tondre. Enlevez tous corps
étrangés: batons, pierres, etc.Repérez les obstacles tels que arrosoirs,
trous et autres éléments susceptibles d'endommager la tondeuse au
travail.
e) Utilisez des chaussures robustes ayant une bonne adhérence même
par temps humide. Ne mettez pas de sandales et surtout ne tondez
jamais pieds nus.L'emploi de gants de travail permet une prise plus
sûre.
f) Assurez-vous que la lame soit bien fixée. N'utilisez jamais la tondeuse
sans le bac ou le deflecteur. Assurez-vous que toutes les précautions
de sécurité sont respectées.En cas de défaillance, réparez ou remplacez
immédiatement la piece incriminée.
g) Ne jamais ajouter d'essence dans le réservoir lorsque la tondeuse est
en marche ou lorsque le moteur est encore chaud.Ne fumez pas pendant
que vous ajouter du carburant.
h) Ne jamais allumer la tondeuse dans des entroits mal ventilés. Le gaz
d'échappement du moteur peut être suffoquant et mortal.

FRANCE
HARRY
19
3) MONTAGE
Outils:
Pour monter la tondeuse HARRY, il vous faut:
- tournevis;
- clés (plate ou à pipe de 8).
Montage de la chicane (Fig. 02 - Fig. 03 - Fig. 04)
Mettre le ressort dans les deux trous du déflecteur, insérer le tirant (1),
mettre en place le déflecteur assemblé sur le carter et le fixer avec les 2
vis (2)
Montage du sac de ramassage (Fig. 05)
1) Glisser le châssis métallique dans la toile du sac en laissant la poignée
à l'extérieur. La poignée et la toile seront au-dessus du sac et le plastique
en-dessous .
2) Fixer les 4 côtés de la toile sur le châssis rectangulaire en faisant
glisser les manchons plastiques du sac sur les tiges métalliques du
châssis. Ne pas fixer encore les parties supérieures droites et gauches.
3) Fixer la grille sur le 2 crochets du sac. Vérifier que la grille soit bien en
face de la tondeuse. Le côté "tondeuse" et le côté "bac" sont indiqués
sur la grille.
Montage du guidon - mod. 313 (Fig. 06)
1) Insérer les mancherons inférieurs du guidon dans les sièges prévus à
cet effet sur les deux moyeux latéraux et visser les deux poignées.
4) Placer les petites plaques métalliques sur les supports prévus à cet effet
sur le cadre. Les fixer avec vis, rondelles et écrous. L'autre extrémité
des attaches doit recouvrir le haut de la grille, juste derrière le crochet,
afin d'eviter que celle-ci ne tombe lors du vidage du bac, quand elle
est ouverte au maximum. Faire glisser les pièces plastiques supérieures
droites et gauches sur les tiges du châssis.
5) Fixer la plaque protectrice sur la partie droite inférieure de la grille
par les 4 vis et les 4 écrous. Reserrer au moyen du tournevis et de la
clé.
6) Pour mettre le sac en place sur la tondeuse, se placer du côté droit de
la machine, lever le déflecteur de la main droite et, avec la main
gauche accrocher le bac sur la tringle fixant le mancheron à la tondeuse.
Si vous souhaitez récolter l'herbe directement dans un sac poubelle,
placer le sac de ramassage sur le sol avec la grille vers le haut, introduire
le sac en plastique en prenant soin de le laisser dépasser de tous côté
pour le coincer en abaissant la grille. Accrocher le bac sur la tondeuse
et lorsque le sac poubelle est plein, le retirer et le remplacer par un
autre.
Contrôles avant mise en route:
Avant de mettre toute en marche, contrôlez les points suivants et, si
nécessaire, procédez à la mise au point adéquate.
l Contrôlez l'accrochage du bac et du déflecteur.
lVérifiez le niveau d'huile dans le moteur. En rajouter si nécessaire en
veillant à ne pas dépasser le niveau indiqué (voir instructions pour le
moteur).
lContrôlez et réglez la hauteur de coupe selon votre désir (voir
paragraphe "réglage de la hauteur de coupe").
Démarrage du moteur:
Après avoir effectué les opérations de mise au point, procéder au
démarrage du moteur de la manière suivante:
a- Agir sur la poignée du frein (4) pour permettre le démarrage du moteur.
b- Moteur avec système PRIMER: Appuyer 3-4 fois sur la petite pompe
d'enrichissement située sur le carburateur. Pour les modèles équipés
d'accélérateur positioner le levier d'accélérateur (3) sur MAX.
Moteur avec système CHOKE: Pour les modèles équipés d'accélérateur,
en cas de moteur froid, positioner le levier d'accélérateur (3) sur START.
c- Mettre en marche le moteur: Saisir la poignée de démarrage (7) et
tirer le lanceur sans effort, jusqu'à percevoir la résistance entrainée
par la compression, puis donner un coup sec.
Utilisez des lunettes de sécurité
our rotéger vos yeux.
Ne fumez as endant que vous
ajoutez du carburant.
4) FONCTIONNEMENT
Ne laissez jamais une ersonne n'ayant
as de connaissance des instructions de
sécurité, utiliser votre tondeuse.
Pendant le fonctionnement, maintenir appuyée la poignée (4). ès qu'on
la relâche, le moteur s'arrête. Pour tous renseignements supplémentaires,
voir la notice d'entretien du moteur.
Pour actioner la transmission
, sur les modèles
autotractés poussez la poignée (5) vers le mancheron. Pour arrêter
l'avancement il suffit de lâcher la poignée. La tondeuse peut être poussée
ou tirée lorsque la transmission n'est pas enclenchée.
Sur le modèle 471-C50-C54-P54, il est possible de faire varier la
vitesse davancement en actionnant le levier (17 - Fig.10).
ATTENTION! La lame est entrainée en rotation dès le
démarrage du moteur.
ATTENTION! Exécuter lo ération uniquement si le moteur
est en marche.
Arrêt du moteur:
Le moteur et la lame s'arrêtént dès que la poignée est relachée.
ATTENTION! La lame continuera à tourner endant max.
3 secondes a rès I'arrêt du moteur.
5) RÉGLAGE DU COUPE
La tonte:
Ajustez la vitesse en rapport avec la hauteur de l'herbe. Réglez le régime
du moteur au maximum si l'herbe est dense, au minimum si l'herbe est
basse.
Réglage de la hauteur de cou e (Fig.11)
Pour régler la hauteur de coupe sur une machine avec commande
centralisée, il faut empoigner le levier, soulever le fourreau coulissant et
le positionner sur lun des 7 emplacements prévus.
N'utilisez jamais la tondeuse sans le bac ou le déflecteur.
Arrêtez le moteur et attendez que la lame soit com letement
immobile.

FRANCE
HARRY
20
REGLAGE DU CABLE DE LAUTOTRACTION (Fig. 15)
Le câble dembrayage de lautotraction doit être réglé seulement si, moteur
en fonctionnement et agissant sur la poignée de lautotraction, les roues
ne répondent pas rapidement et donnent la sensation que lembrayage
patine.
Le réglage seffectue en débloquant les 2 écrous (1), en tournant de deux
tours lécrou supérieur en sens contraire des aiguilles dune montre et en
le bloquant à laide du contre-écrou.
Répéter lopération si elle se révèle inefficace.
LUBRIFICATION
Moteur:
Changez l'huile après les deux premières heures de travail, ensuite toutes
les 25 heures de travail, comme indiqué dans le manuel du moteur.
Contrôlez, néanmoins, le niveau avant chaque emploi.
Pour lubrifier les organes en mouvement : de temps en temps, mettre
quelques gouttes de lubrifiant sur les organes en mouvement (tels que les
roulements, le levier de réglage de la hauteur des roues, etc.).
Vidange du bac (Fig. 12)
Le système breveté de vidange du bac prévoit deux possibilités:
A Soulevez le déflecteur et détachez le bac de la tondeuse en utilisant la
poignée qui se trouve au centre du bac. Ensuite, soulevez la partie
arrière du bac pour permettre l'éjection de l'herbe.
B Prenez la partie arrière du bac et basculez le vers le haut: I'herbe
tombera sur le terrain
Pour prolonger la vie du bac, il faut lui vider chaque fois la coupe est
terminée et avant le remisage hivernal.
Contrôler souvent le bac, si vous constater des défauts, remplacez-le par
un bac HARRY.
CONSEILS DE TONTE:
En herbe haute, on obtient les meilleurs résultats en coupant I'herbe aux
2/3 de sa hauteur. ans ce cas, utilisez la position de tonte la plus haute
pour la première coupe. Si vous voulez tondre à ras, effectuez un deuxième
passage en position basse. Cependant, si vous coupez le gazon trop
court, il devra employer toute son énergie pour développer ses feuilles au
détrimer des racines et risquera d'être brûlé en cas de sécheresse.
'un autre côté, si votre herbe devient trop longue, la partie inférieure
s'affaiblit et jaunit. Le ramassage du gazon tondu est toujours recommandé
car I'herbe laissée sur le terrain forme un tapis qui étouffe le gazon.
Toutes les tondeuse HARRY sont conçues pour permettre la coupe et le
ramassage simultané ou séparément. Notez que une seule coupe n'est
pas recommandée pour l'herbe très haute.
6) MAINTENANCE
ATTENTION!
Eteigner le moteur et détacher le câble de la bougie
avant de rocéder au nettoyage.
1Contrôlez fréquemment la lame et les vis de fixation du moteur.
2Vérifiez le serrage de tous les écrous.
3Contrôlez l'état du bac de ramassage. Si vous constatez des défauts
sur le bac, remplacez-le par un bac HARRY.
4Après le travail, laissez refroidir le moteur à l'air libre. Ne remisez jamais
le tondeuse dans un endroit clos avec le réservoir à essence plein.
5Après avoir vidé le réservoir, le cas échéant, souvenez-vous que
l'essence est inflammable.
6Pour écarter tout risque d'incendie, il faut débarasser le moteur de tout
corps étranger susceptible de s'enflammer (herbes, feuilles mortes,
graisses).
7Faites réviser votre tondeuse, à la fin de chaque saison, par un
Revendeur HARRY.Votre tondeuse restera ainsi en parfait état pour la
saison suivante.
8N'utilisez que des pièces de rechange HARRY pour vos réparations.
Elles seules vous permettrons de conserver la qualité et la fiabilité de
votre tondeuse HARRY.
CONTROLE - DEMONTAGE ET AFFUTAGE DE LA LAME (Fig.13-
Fig.14)
- Stoppez le moteur. étachez le câble de la bougie.
- Penchez la tondeuse du côté opposé à la bougie pour éviter un
engorgement qui pourrait empêcher le démarrage.
-Contrôle: Examinez soigneusement le degré d'affûtage ou d'usure
de la lame, en particulier au niveau des plis .
- u sable ou des pièrres peuvent être la cause d'une usure. Nous vous
conseillons de vérifier fréquemment l'état de votre lame. Si vous relevez
des anomalies, il faut la remplacer .
ATTENTION!
Eteigner le moteur et détacher le câble de la bougie
avant de rocéder au nettoyage.
7) CONTROLES ET REGLAGES
-Démontage : empoignez énergiquement une extrêmité de la lame
- pour éviter de se couper, il est conseillé de porter des gants - dévissez
le boulon, enlevez la rondelle puis la lame.
-Affûtage: Affûtez la lame si les tranchants sont usés. Utilisez une
meule (èmeri).Après l'affûtage contrôlez impérativement l'équilibrage
de la lame. Si la lame est déséquilibrée, des vibrations excessives
apparaîtraient en marche. Prenez toutes les précautions pour ne pas
vous couper.
- Montez la lame en la centrant sur le support et serrez le boulon.
ATTENTION! L'usure excessive de la lame eut entraîner
des fêlures rofondes, voires des rojections de morceaux
de couteau, constituant un danger sérieux our l'o érateur
et les ersonnes résentes dans l'entourage.
Après le réglage, toujours vérifier que, moteur éteint et tirant la machine
en arrière sans actionner la poignée de lautotraction, les roues arrières
tournent librement.
ATTENTION!
Un effort excessif sur le câble eut rovoquer la ru ture de la
transmission.
This manual suits for next models
26
Table of contents
Languages:
Other Harry Lawn Mower manuals
