Hatari AC Max User manual

ขอมูลจำเพาะ / Product Specification
AC Max
300 mm
220V 50Hz
133W
0.63A
F
6,895.-
คูมือการใชงาน / User Manual
พัดลมไอเย็น-พรอมรีโมท / Air Cooler - with remote control

สารบัญ
1
1
2
3
3
4
4
5
6
6
7
7

1
1.
2.
3.
4.
5.
6.
7.
8.
9.
10.
สวนประกอบพัดลม / FAN COMPONENTS
2
4
5
6
18
17
3
9
11
19
12
13
1
16
15
12
10
9
14
7
8
11.
12.
13.
14.
15.
16.
17.
18.
19.
1.
2.
3.
4.
5.
6.
7.
8.
9.
10.
CORD WINDER
CONTROL AND DISPLAY PANEL
HANDLE
WIND DIRECTION SHUTTERS
FRONT COVER
WATER TANK
WATER LEVEL WINDOW
WHEELS (2 back wheels with brakes)
PRE-FILTERS
•SIDE 2 PIECES
• BACK 1 PIECES
SIDE GRILLES (LEFT-RIGHT)
11.
12.
13.
14.
15.
16.
17.
18.
19.
BACK GRILLE
WATER DIFFUSING PLATE
• SIDE 2 PIECES
• BACK 1 PIECE
WATER TANK LID
POWER SUPPLY
CORD & PLUG
TOP COVER
WATER DRAIN LID
REMOTE CONTROL
GEL PACK 2 PIECES
SPACE FOR REMOTE CONTROL
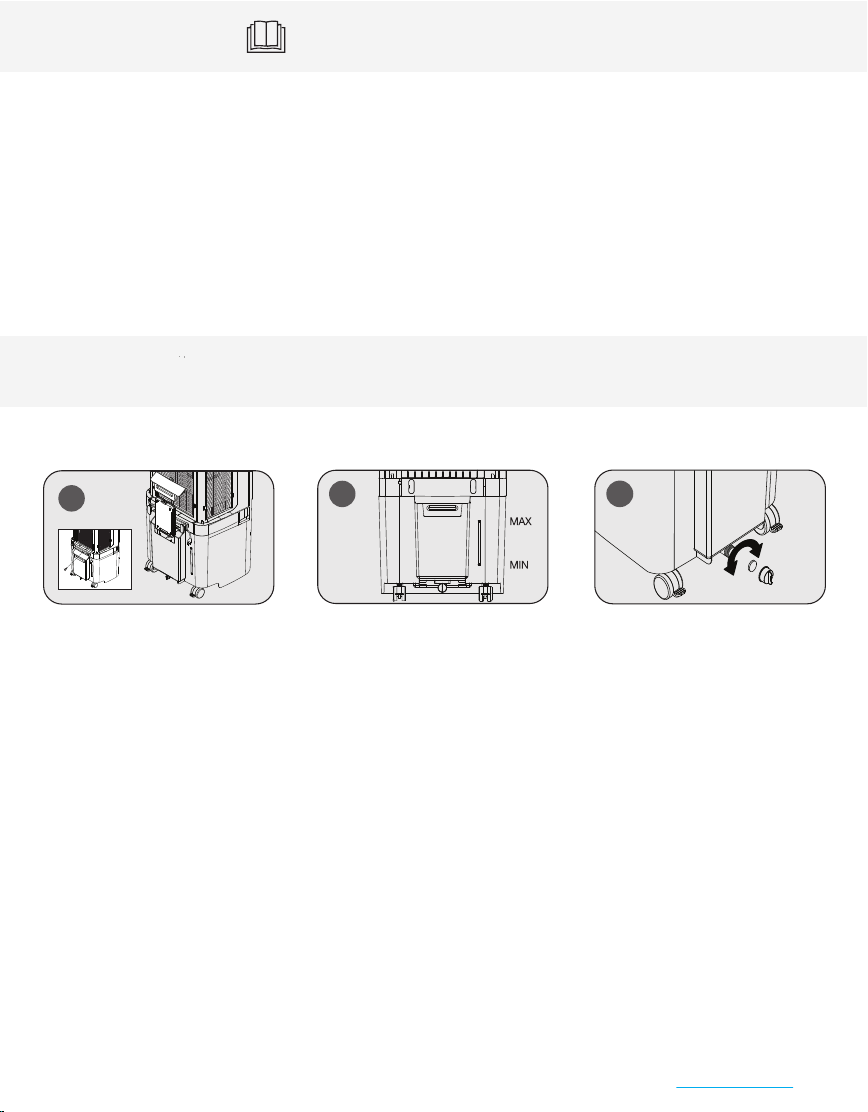
การติดตั้งลอ / WHEELS INSTALLATION
Make sure that the water tank is empty and that the power supply cord is not plugged in. On a flat surface, place the air cooler on
its side and push the wheels into the indicated positions. Install the 2 wheels with brakes at the back and the other two at the front
of the machine.
1.
2.
3.
3.1
3.2
4.
5.
6.
7.
8.
9.
10.
11.
12.
วิธีการใชงาน
2
ระบบสัมผัส
รีโมทคอนโทรล
1 11
2
9 6 8 1210
4 5 7 3
1.
2.
3.
4.
¤Óàµ×͹
1.
2.
3.
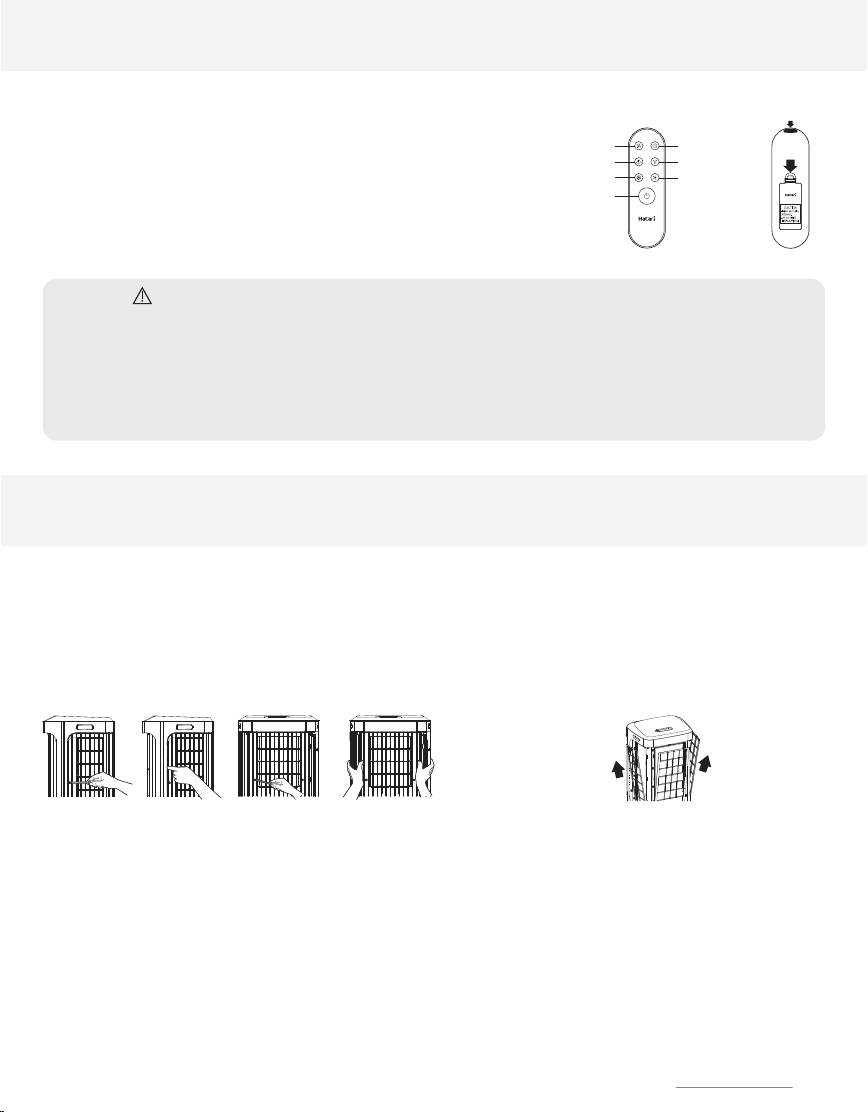
การเปลี่ยนแบตเตอรี่รีโมทคอนโทรล
วิธีทำความสะอาดและการบำรุงรักษา
3
การทำความสะอาดแผนกรองชั้นแรก (3ชิ้น)
การถอดตะแกรง
4
ขอแนะนำการใชงาน
1.
2.
3.
4.
5.
ขอควรระวังการใชงาน
13
CLOSE
OPEN
3
2
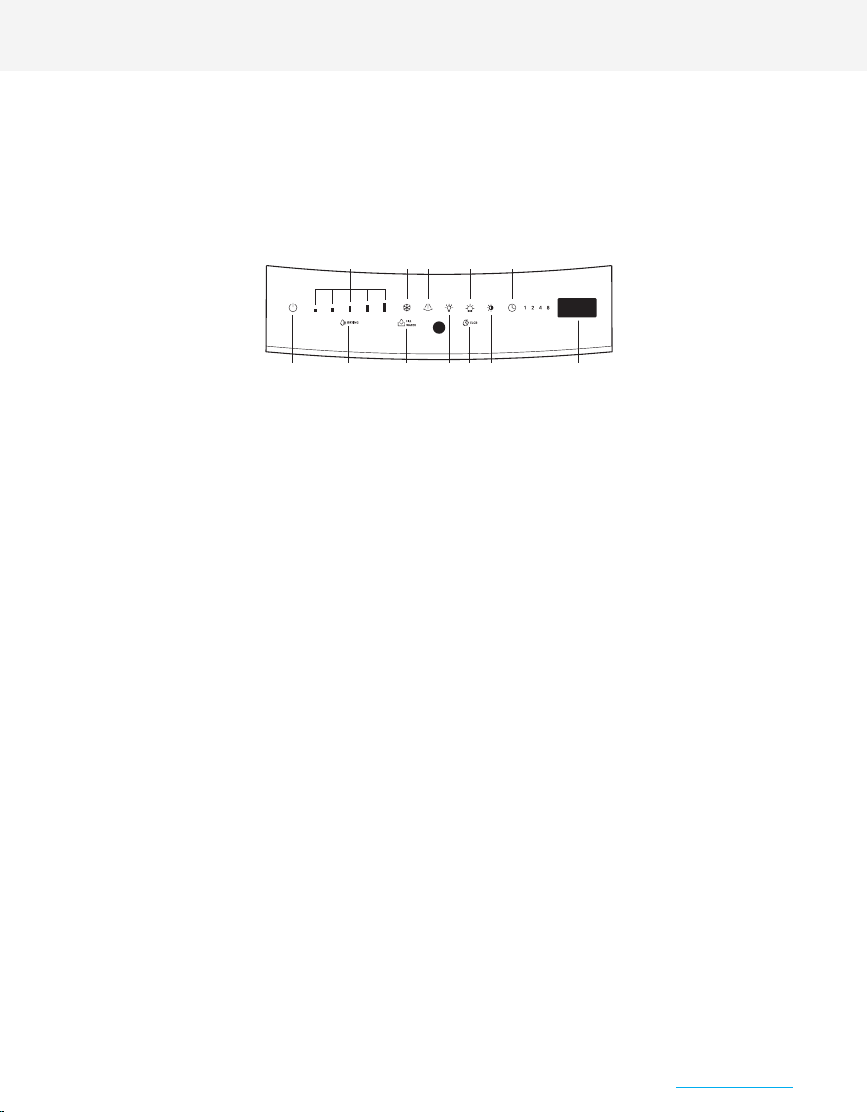
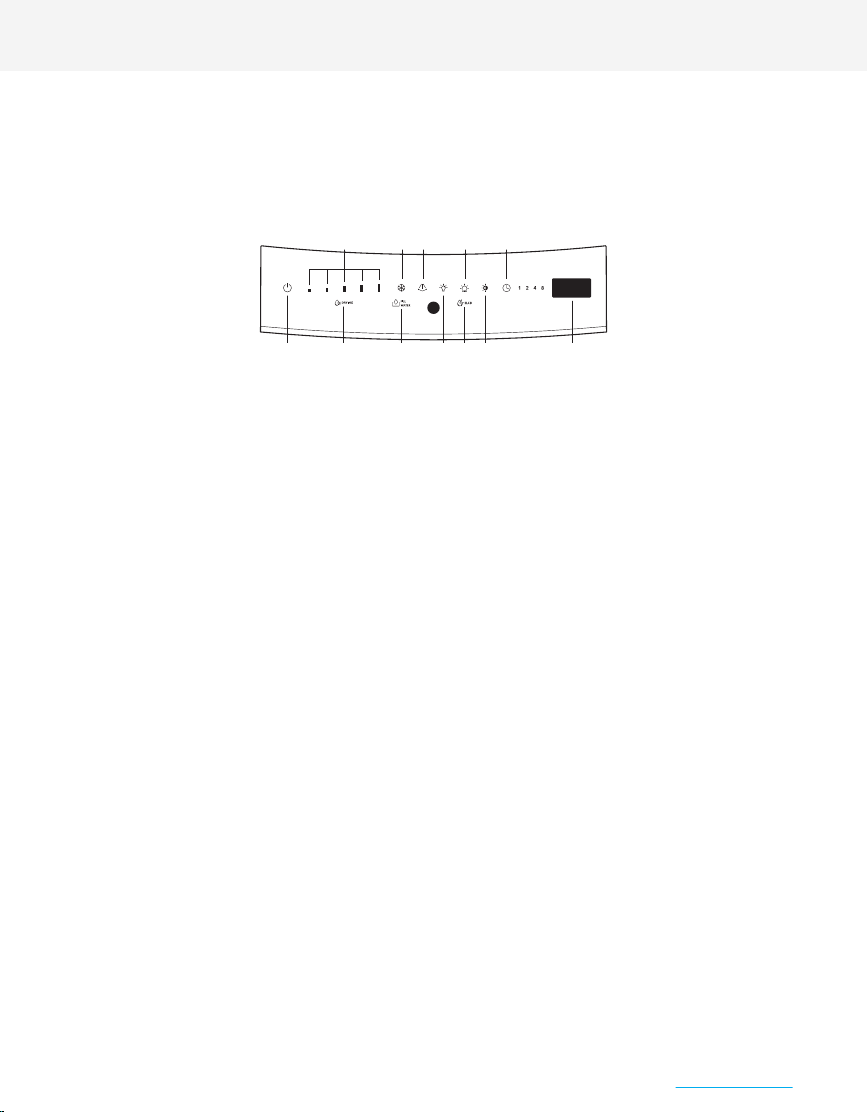
Touch the switch on the control and display panel to turn on the fan. The light will show the resumed
settings of the fan’s latest operation before having been switched off. To turn the fan off, touch the
switch again for about 1.5 seconds.
5 adjustable fan speed settings 0: off,1: lowest speed, 2: low speed, 3: medium speed, 4: high speed, 5:
highest speed, respectively.
Switch for timing the fan’s operation: 1, 2, 4, 8 hours or to cancel timing altogether, respective to the number
of time the sensor is touched. Once set, the timer will indicate the remaining time left of the duration.
Set the timer while the fan is switched on to set the time when the fan is to automatically turn off.
Set the timer while the fan is turned off (but it must be plugged in) to set the time when the fan is to automatically
turn on. After adjusting the settings, the operating lights will dim. When the time comes, the fan will resume
settings of the latest operation before having been switched off.
Switch for activating the water cooling system. Touch the switch to activate the function. Touch the switch
again to deactivate the function.
Switch for adjusting left to right swinging motions. Touch the switch to activate the function. Touch the
switch again to deactivate the function.
AMBIENT LIGHT on/off switch. Touch the switch to turn on the light. Touch the switch again to turn off the light.
Switch for changing the color of the AMBIENT LIGHT. Touch the switch to change the color (White - Blue
- Pink - Green) respectively. To use this function, the AMBIENT LIGHT has to be turned on. (This function
can be controlled on the control and display panel only)
Switch for adjusting the brightness of the AMBIENT LIGHT. Can adjust the brightness in 3 levels (High
brightness - Medium brightness - Low brightness) respectively.
A warning red light will light up when the water level in the tank is too low for the water distribution
system to function (unable to activate COOL function). Turn off and unplug the machine to fill the water
tank with clean water (do not exceed MAX level). The warning light will go off when the machine is turned
on and the COOL function is activated.
A warning red light with a warning sound will appear when there is electricity leakage. The circuit breaker
system will immediately be activated.
DRYING light will light up when the fan is switched off while the COOL function is activated, the fan will
continue to operate for 60 seconds to remove moisture. The temperature display will show a countdown
of 60 seconds, after which the fan will stop automatically.
Temperature display for the surrounding area of the fan while the fan is turned off or on (but it must be plugged in)
ON/ OFF
SPEED
TIMER
TIMER OFF
TIMER ON
COOL
SWING
AMBIENT LIGHT
AMBIENT LIGHT COLOR
BRIGHTNESS CONTROL
FILL WATER
ELCB
DRYING
TEMPERATURE
1.
2.
3.
3.1
3.2
4.
5.
6.
7.
8.
9.
10.
11.
12.
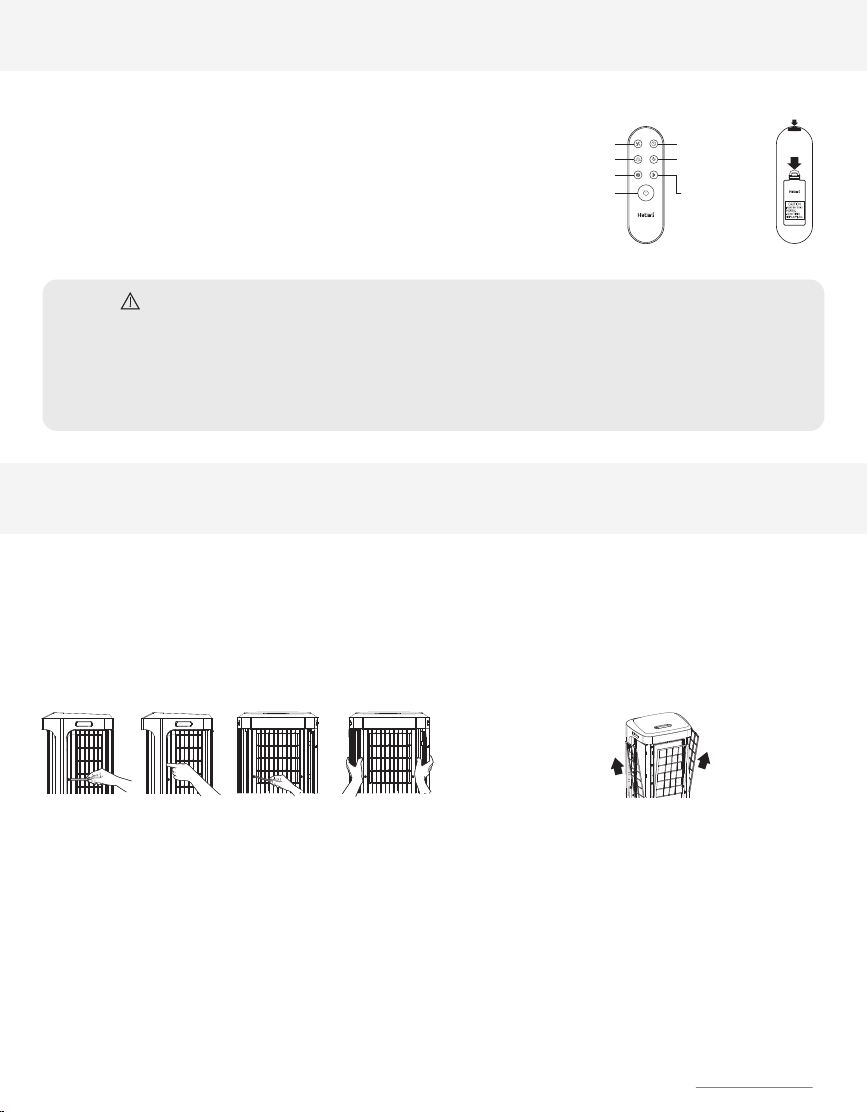
DIRECTION OF USE
5
Plug power supply cord into a 220V, 50Hz power socket.
This fan is operated by touch screen system and remote control. Touch screen system can be activated using fingers to touch the
control and display panel. When the machine is left idle for 20 seconds, the operating lights will dim but the fan will still be operating
as normal. By simply touching the control and display panel, the lights will illuminate and the fan will be ready to be adjusted again.
Remote control, point the remote signal transmitter in the direction of the signal receiver on the control and display panel. Avoid
having obstructions between the remote signal transmitter and the receiver.
1 11
2
968 1210
4 5 7 3
1.
2.
3.
4.
Use a damp cloth to wipe stains, and then dry the area by wiping.
When cleaning the fan, be careful not to let the wire, switch, motor and other electrical components get wet.
Do not use chemical products, thinner solvents, alcohol, kerosene or petrol to clean the fan.
The water tank, pre-filter,
grilles
, and water tank can be cleaned with water or soapy water. It should be cleaned at least
every 1-2 months.
HOW TO REPLACE THE REMOTE CONTROL BATTERY
Open the battery cover by using your fingernail to push the catch downwards as shown
by the arrow and remove the battery cover. Replace the used batteries with new “AAA”
batteries, ensuring that the positive (+) and negative (-) poles are correctly inserted
and correspond with the symbols on the remote control. Place the battery cover back
in its original position.
*Batteries should be removed from the remote control when not in use for a long
period of time.
CARE AND CLEANING INSTRUCTIONS
6
CAUTION
1.
2.
3.
Unplug the fan before water filling, cleaning or changing the components, and when not in use for a long period of time.
This appliance is not intended for use by persons (including children) with reduced physical, sensory or mental
capabilities, or lack of experiences and knowledge, unless they have been given supervision or instruction concerning
use of the appliance.
Children should be supervised to ensure they do not play with the appliance.
HOW TO CLEAN THE PRE-FILTER (3 PRE-FILTER)HOW TO REMOVE THE GRILLE
Use a screwdriver to loosen the screws holding the grille in place
(Back grille - 2 screws, Side grille - 1 screw). Hold the grille in the
area marked “PULL HERE” and pull the grille outward. Repeat for
the other grilles.
Use your hands to hold the pre-filter and slide it upwards
according to the direction of the arrows. Clean the
pre-filter with water or soapy water and leave it to dry.

1.
2.
3.
4.
5.
USAGE RECOMMENDATIONS
The fan should not be placed or installed in areas that are of extreme temperatures or near stoves, or in areas that are wet
with high humidity, or has hydrocarbon vapors such as petroleum.
Do not spray all types of spray into the fan; for example, hairspray or cleaning spray.
Do not insert fingers, pencils or other objects into the grille while the blades are spinning as it may result in possible injury or
physical damage.
If an electrical component such as supply cord, motor, or switch is damaged, it must be replaced by the manufacturer, its service
agent or similarly qualified persons in order to avoid a hazard. It is not advisable to fix the fan at home.
The fan must always be placed vertically; it must never be lying horizontally or placed upside down. If the fan falls down,
unplug it immediately and lift the fan up to a vertical standing position. Use a cloth to wipe the fan and leave it to dry in order
to prevent electrocution.
USAGE PRECAUTIONS
Use only clean water to fill the water tank. Do not use any other liquid. The water tank should be cleaned regularly to reduce
bacteria buildup.
7
Loosen the screws and pull open the
water tank lid to fill water before
inserting the gel back (frozen).
Constantly check the water level in the
tank, making sure that it is not below the
MIN level and not above the MAX level.
If the fan is not in use for a long period
of time, drain out all the water by
twisting open the water drain lid.
Securely close the lid back after to
prevent dust and insects from entering
the water tank.
13
CLOSE
OPEN
3
2
Table of contents
Languages:
Other Hatari Air Conditioner manuals


Popular Air Conditioner manuals by other brands


 instruction manual")


 Service manual")


Toshiba
Toshiba HWS-455XWHM3-E owner's manual

Dettson
Dettson COND-UHD-09 Installation instructions and homeowner's manual

Daikin
Daikin Super Multi NX 3MKS50E3V1B Service manual

Vogue
Vogue 373008 Installation instructions & user guide

Mitsubishi Electric
Mitsubishi Electric MSZ-SF25VE Service manual

Panasonic
Panasonic S-22MZ1H4A operating instructions