HAUSSLER ALPHA User manual

Operang instrucons
ALPHA / ALPHA 2G
Dough mixer
Translaon of the original operang instrucons

2
Inhalt
1 Welcome ... ........................................................................................................3
2 For your safety ...................................................................................................4
List of symbols ......................................................................................................... 4
Intended use............................................................................................................ 4
Basic rules................................................................................................................ 4
Safety instrucons................................................................................................... 5
3 Product overview ...............................................................................................6
Product descripon................................................................................................. 6
Technical data.......................................................................................................... 6
4 Scope of supply ..................................................................................................8
Seng up the device............................................................................................... 9
Cleaning the device for the rst me ...................................................................... 9
Connecng the device............................................................................................. 9
5 Kneading ..........................................................................................................10
Pouring ingredients in ........................................................................................... 10
Kneading dough with the ALPHA (1-speed model) ............................................... 10
Kneading dough with the ALPHA 2G (2-speed model).......................................... 12
Removing the dough ............................................................................................. 13
6 Good to know – Hefezopf (braided yeast bun) basic recipe ...............................14
7 Cleaning ...........................................................................................................16
8 Maintenance ....................................................................................................18
9 Troubleshoong ...............................................................................................20
10 Disposal ...........................................................................................................22
11 For specialist personnel: Circuit diagrams and parts lists ..................................23
ALPHA circuit diagram (1-speed model)................................................................ 24
ALPHA 2G circuit diagram (2-speed model) .......................................................... 25
Parts lists ............................................................................................................... 26
12 Accessories ......................................................................................................31
13 EC Declaraon of Conformity ........................................................................... 33
14 Warranty ..........................................................................................................34
15 For your notes ..................................................................................................35

3
1 Welcome ...
... to our world of milling, kneading, baking, and pasta making!
Häussler stands for doing it yourself. Our devices will give you fabulous delicacies
which will treat your taste buds to a truly unique experience. Lose yourself in our
world of milling, kneading, baking, grilling, and pasta making.
Häussler stands for uncompromising quality – Made in Germany. Decades of
experience and thousands of devices delivered worldwide speak for themselves.
Häussler stands for customer service. Even aer you have made your purchase, you can
rely on us to be at your side – with no ifs or buts. We want you to enjoy your device for
many years, to keep picking up ps and discovering new recipe ideas from us.
You have opted for the ALPHA dough mixer and no longer need to knead dough
laboriously by hand. The ALPHA is easy to clean and it doesn't maer whether you
are making dough for pasta, bread or other delicacies.
Great fun and consistent success.
Welcome ...

4
2 For your safety
List of symbols
Descripon of symbol
⚠Hazard symbol
Call to acon
iNoce
Bullets
Tab. 1: List of symbols
Intended use
The dough mixer complies with all spulated product-specic safety regulaons.
The dough mixer is intended solely for the kneading of ingredients for making dough
and for beang ingredients with an oponal whisk in enclosed spaces. Any other use
is considered to be contrary to the intended use. Karl-Heinz Häussler GmbH bears no
liability from any loss or injury resulng from this.
Basic rules
Read the operang instrucons carefully before pung the device into operaon.
Note the safety instrucons and warnings in the operang instrucons.
The device must only be operated if it is in perfect working order.
Keep the operang instrucons readily available with the device.
Do not pass on the device without these operang instrucons.
Always carry out a visual inspecon before starng up the device.
For your safety

5
Safety instrucons
⚠Allergic reacon to our dust
If you experience allergic symptoms, seek medical advice immediately.
⚠Danger to life from electric shock
Do not operate the device if the cable or plug are damaged and do not touch dam-
aged parts.
Contact a professional in the event of damage to the cable or plug.
Only open the housing with the plug unplugged.
Only qualied specialist personnel are permied to carry out maintenance work on
electric components.
⚠Risk of injury due to heavy weight
Take care during transport owing to the heavy weight of the device.
Prior to liing, check that the weight can be borne safely.
Li the device carefully and only with two people.
The device must always be set up on a stable surface.
⚠Risk of collision with your head owing to lng head opening at
the rear
Fasten the lng head at the locking clip and carefully guide it upwards.
⚠Danger of crushing of your hands by rotang parts
Do not leave the device unaended when in operaon.
Keep the device out of the reach of children younger than 14 years and always
supervise children.
Do not start up the device without the guard and housing parts.
Only operate the device with a mixer bowl.
Do not reach between the mixer bowl and the device or for rotang parts during
operaon.
⚠Risk of injury owing to catching and entanglement of clothing or
hair in rotang parts
Wear snugly ng clothing.
Tie long hair back.
Do not wear necklaces or bracelets.
For your safety
6
3 Product overview
Product descripon
In the ALPHA dough mixer from Häussler, you have purchased a very robust and
high-performance device. The dough mixer is easy to clean, easy to operate, almost
maintenance-free and suitable for the producon of all doughs.
The dough mixer is made exclusively from food-safe materials. The mixer bowl, bowl
mounng and dough hook are made from non-rusng stainless steel. The swivel
mounted protecve cover is made from transparent plasc. Raising of the lng head
is assisted by a pneumac spring and is therefore parcularly user-friendly.
The dough mixer uses the tried and tested spiral mixing system. Dierent speeds for
the dough hook and the mixer bowl result in parcularly even mixing and kneading of
the dough, even with small quanes.
The ALPHA 2G model allows for kneading at two kneading speeds – for example for
heavy rye and wholemeal doughs or low-gluten doughs.
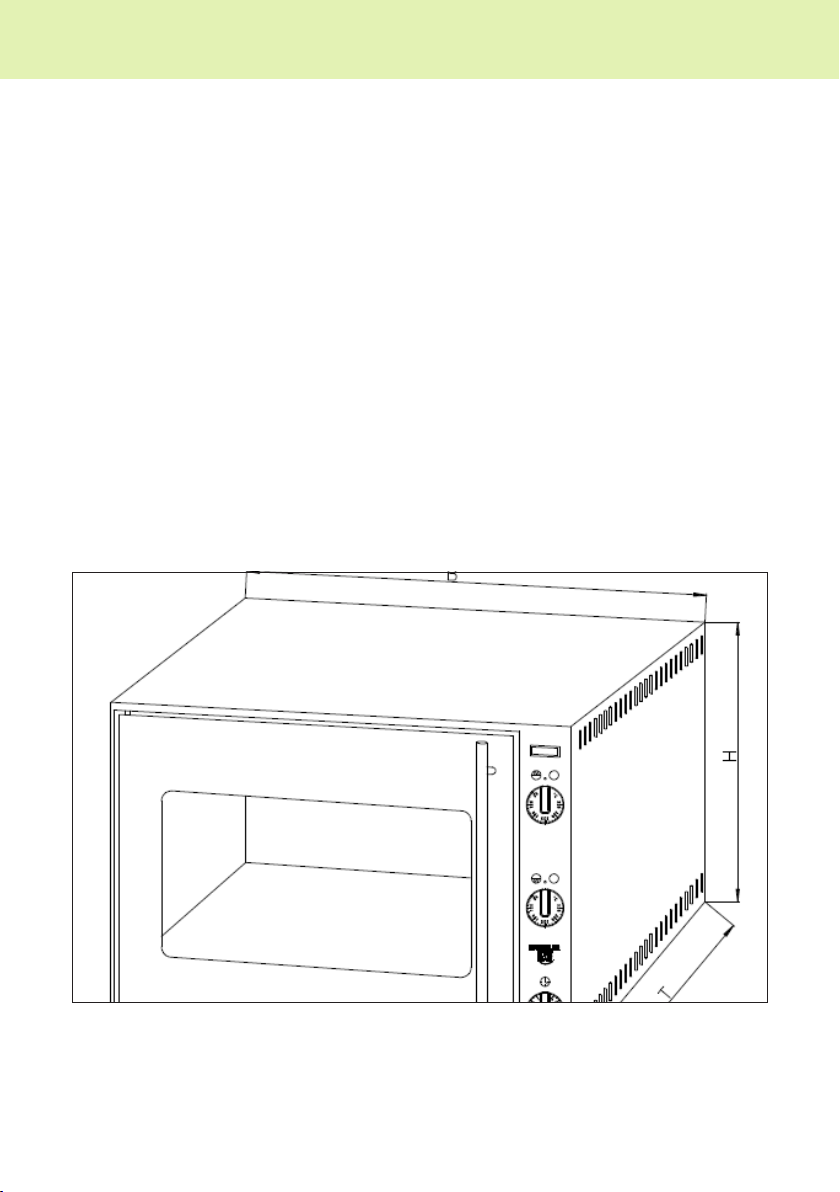
Technical data
Product overview

7
Name Value
Width 280 mm
Height 400 mm
Length 450 mm
Weight 29 kg
Motor output max. 0.39 kW
Power supply 230 volt, 50 Hz
Connecon cable Power cable
(1.5 m with shock-proof plug)
Housing according to order type Non-rusng stainless steel or
powder-coated
Mixer bowl and dough hook Non-rusng stainless steel
Colour according to order type RAL 9010 pure white
RAL 5011 steel blue
RAL 3005 wine red
Anthracite
Operaon Keypad with digital display
Pre-set me clock Adjustable up to max. 30 minutes
max. amount of dough per kneading
cycle
5 kg
Mixer bowl volume 8.5 liter
Specied our capacity 3.0 kg
Technical feature Tilng head with pneumac spring.
Dough hook and mixer bowl are
removable.
Tab. 2: Technical data
Product overview
8
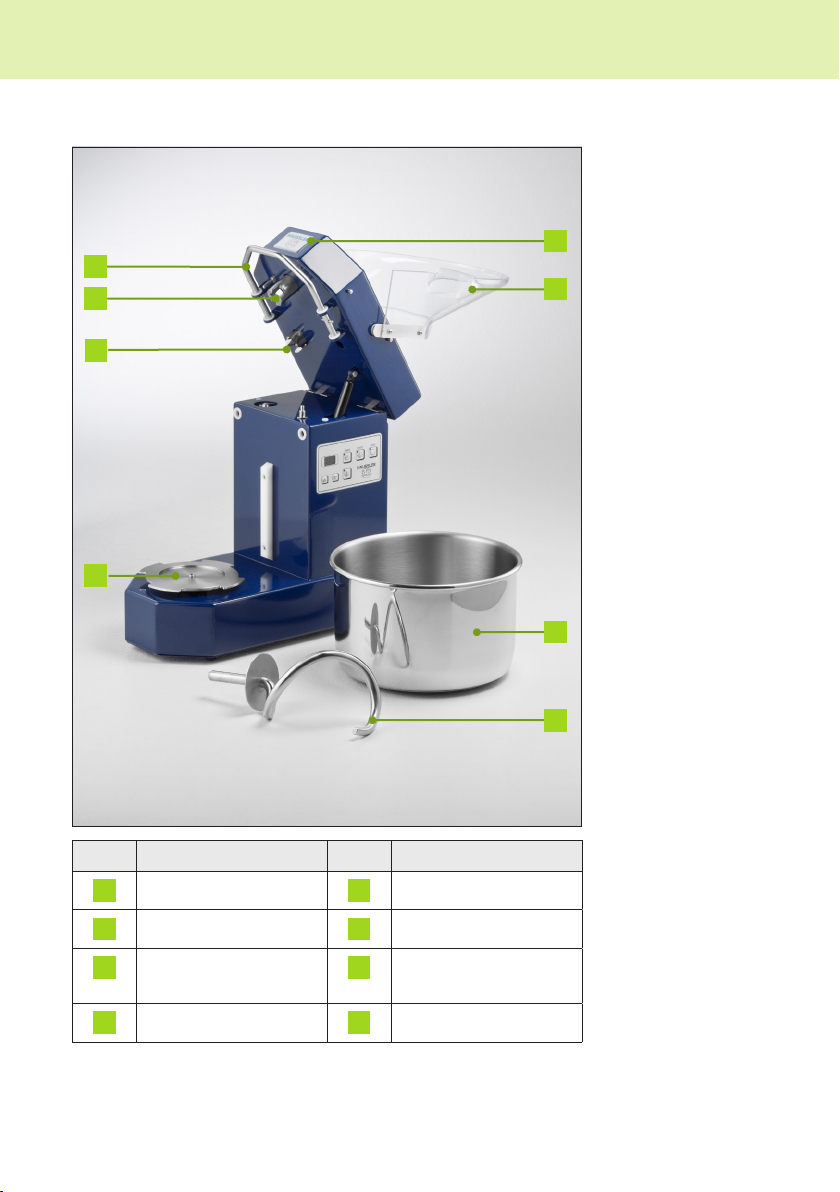
4 Scope of supply
1
8
7
5
2
3
4
6
No. Designaon No. Designaon
1Tilng head 5Bowl mounng
2Protecve cover 6Tappet
3Mixer bowl 7Dough hook
mounng
4Dough hook 8Locking clip
Tab. 3: Scope of supply
Scope of supply

9
Seng up the device
Check the delivery for completeness with the help of Tab. 3 “Scope of supply”.
Li the device carefully due to its heavy weight and always place it on a sturdy and
even work surface.
iThe wheeled base frame from Häussler oers the opmal work surface, see chap-
ter 12 “Accessories” on page 31.
Create enough space for working with the device.
Cleaning the device for the rst me
iFor hygiene reasons, all parts which come into contact with the dough must be
removed and cleaned before the rst use.
Clean all parts, see chapter 7 “Cleaning” on page 16.
Connecng the device
Check the device, the cable and the plug for visible exterior damage. Do not put
a damaged device into operaon!
Insert the mains plug into a mains plug socket.
Scope of supply
10
5 Kneading
Pouring ingredients in
iFor idencaon of the parts, see Tab. 3 on page 8.
Li the protecve cover 2 up.
Retain the lng head 1 at the locking clip 8, pull the locking clip out to the stop
and guide the lng head upwards.
Pour the ingredients for the dough into the mixer bowl 3.
Slowly press the lng head 1 downwards.
iIf the lng head cannot be pressed downwards, turn the dough hook slightly.
Push the locking clip 8 into the stop.
Close the protecve cover 2.
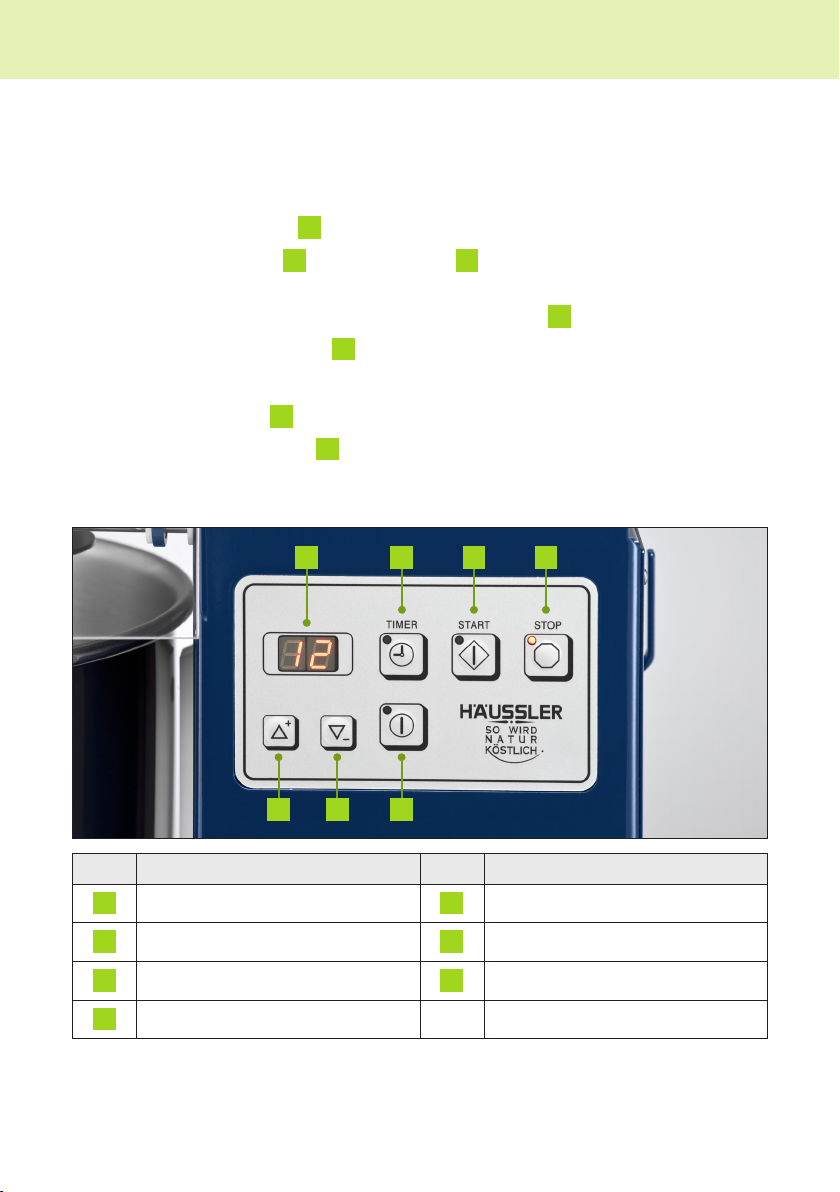
Kneading dough with the ALPHA (1-speed model)
ABC D
G F E
No. Designaon No. Designaon
ATime display EPower
BTimer / start with pre-set me FMinus
CStart / start without pre-set me GPlus
DStop
Tab. 4: ALPHA operang controls (1-speed model)
Kneading

11
⚠CAUTION
Risk of injury owing to catching and entanglement of clothing or hair in rotang
parts
Injuries to head an limbs
Wear snugly ng clothing.
Tie long hair back.
Do not wear necklaces or bracelets.
⚠CAUTION
Danger of crushing by rotang parts
Injuries to ngers and hands
Only operate the device with a mixer bowl.
Do not reach between the mixer bowl and the device or for rotang parts
during operaon.
iThe locking clip must be pushed in to the stop otherwise the dough mixer will not
start.
Kneading without pre-set me
Switch the device on using the "Power" buon E.
Start the kneading cycle using the "Start" buon C.
The me display A shows the elapsed me.
The kneading cycle can be interrupted at any me using the "Stop" buon D.
In order to resume the cycle, press the "Start" buon Cagain.
Kneading with pre-set me
iYou can set a maximum kneading me of 30 minutes.
Switch the device on using the "Power" buon E.
Set the kneading me using the arrow buons F and G.
The me display A shows the kneading me set in two digits.
Start the kneading cycle using the "Timer" buon B.
The me display A shows the me remaining.
Once the kneading me has ended, the dough mixer automacally switches o.
The kneading cycle can be interrupted at any me using the "Stop" buon D.
In order to resume the cycle, press the "Timer" buon Bagain.
Kneading

12
Kneading dough with the ALPHA 2G (2-speed model)
ABC D
G F E
No. Designaon No. Designaon
ATime display EPower
BSlow FMinus
CFast GPlus
DStop
Tab. 5: ALPHA 2G operang controls (2-speed model)
⚠CAUTION
Risk of injury owing to catching and entanglement of clothing or hair in rotang
parts
Injuries to head an limbs
Wear snugly ng clothing.
Tie long hair back.
Do not wear necklaces or bracelets.
⚠CAUTION
Danger of crushing by rotang parts
Injuries to ngers and hands
Only operate the device with a mixer bowl.
Do not reach between the mixer bowl and the device or for rotang parts
during operaon.
Kneading

13
iThe locking clip must be pushed in to the stop otherwise the dough mixer will not
start.
iYou can set a maximum kneading me of 30 minutes. If you do not set a kneading
me then a kneading me which is saved on the device will run automacally.
Switch the device on using the "Power" buon E.
Set the kneading me using the arrow buons F and G.
The me display shows the kneading me set in two digits.
Start the kneading cycle using the "Slow" B or "Fast" C buon as required.
The me display shows the me remaining.
Once the kneading me has ended, the dough mixer automacally switches o.
The kneading cycle can be interrupted at any me using the "Stop" buon D. In
order to resume the cycle, press the "Slow" B or "Fast" C buon again.
Change speed
The speed can be changed as required by rst pressing the "Stop" buon D fol-
lowed by the "Slow" buon B for the rst speed or "Fast" C for the second speed.
Removing the dough
iFor idencaon of the parts, see Tab. 3 on page 8.
Li the protecve cover 2 up.
Retain the lng head 1 at the locking clip 8, pull the locking clip out to the stop
and guide the lng head upwards.
Release the mixer bowl 3 by turning it to the le.
Remove the mixer bowl 3 from the bowl mounng 5.
Kneading
14
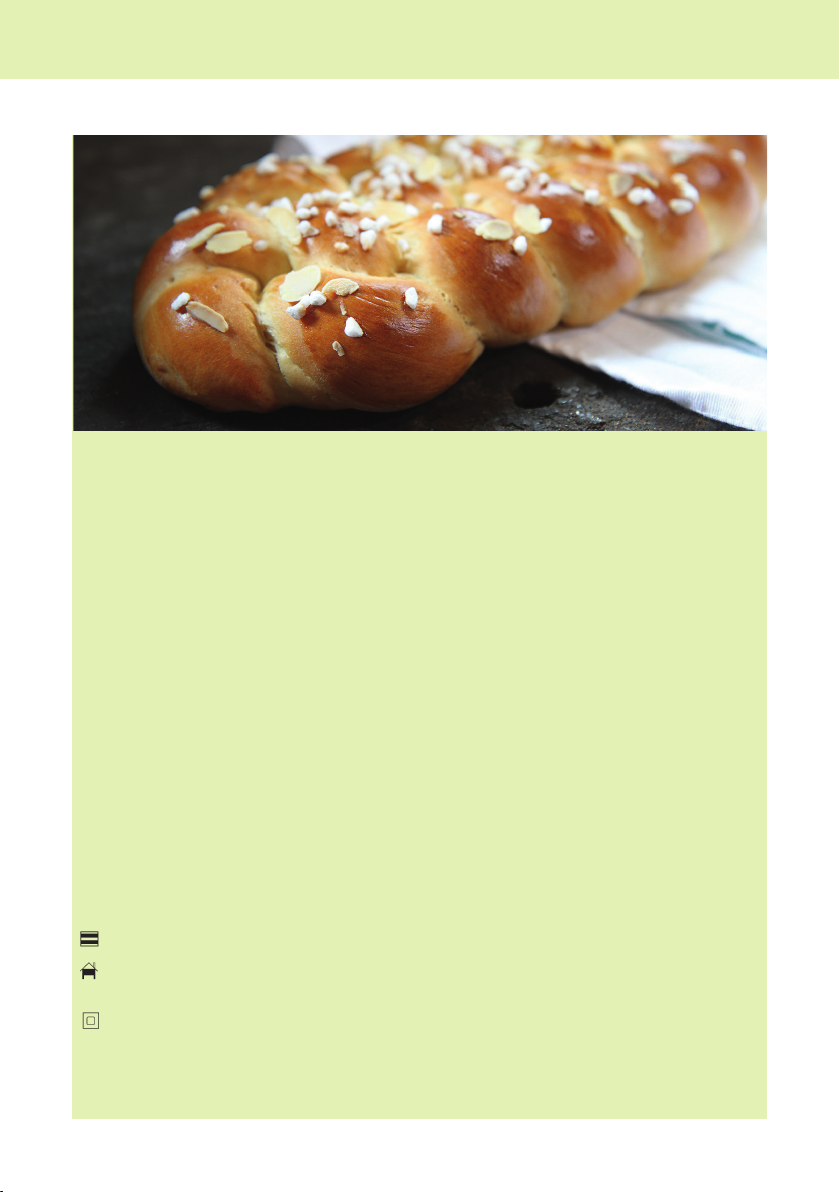
6 Good to know – Hefezopf (braided yeast bun) basic recipe
Ingredients for 4 x 450 g Hefezopf (braided yeast bun)
1 kg Häussler Zopf our/type 550
500-600 ml Milk
1 Yeast cube
220 g Sugar
Peel and juice of one lemon
1/2 tsp Salt
1 Egg
60 g Buer
60 g Lard
1 Egg for glazing
Preparaon
Put the our into a bowl and make a fermentaon starter with a lile lukewarm
milk and the yeast. Leave this to prove for 20 minutes. Now knead into a dough with
the rest of the ingredients (approx. 8 minutes). Then add the room temperature
buer and lard and knead for a further 4 minutes. Cover the dough and leave to
prove for around an hour.
Weight the dough out into 450 g porons. Split each poron into three and roll into
approx. 50 cm long strands. Lay the strands next to each other and begin braiding.
Press both ends together rmly. Brush with egg yolk and sprinkle with sugar crystals
and aked almonds to taste. Bake aer a proving me of 30 minutes.
Baking instrucons
In a Häussler wood-red oven: insert at 220° C. Baking me 30-40 minutes.
In a Häussler electric stone oven: top heat 230° C, boom heat 130° C, backing me
30-40 minutes.
In a domesc oven: insert at 220° C baking me 30-40 minutes.
Good to know – Hefezopf (braided yeast bun) basic recipe

15
Kneading mes
Our dough mixers are parcularly powerful. Please take care to ensure that
the dough is not kneaded for too long. Because "too much" is bad for the dough as
well. If the gluten is overworked then the bread can no longer rise properly. That's
why each dough mixer has an integrated clock mer which can be used to easily set
the right kneading me and monitor it. For 1-speed machines, the dough is enrely
kneaded at a consistent speed. In contrast, 2-speed machines start mixing slowly
and then knead fast. This is parcularly benecial for wholemeal, wheat or spelt mix
doughs.
1-speed machine Kneading me (approximate values)
Dough for rolls 12 min
Wheat and spelt dough 15 min
Rye dough 8 min
Wheat and wholemeal dough 15 min
Baguee dough 13 min
Ciabaa dough 16 min
Pizza dough 12 min
Hefezopf sweet dough 10 min
2-speed machine Speed 1 Alpha 2 G Total kneading
me
SLOW FAST
Dough for rolls 4 min 5 min 9 min
Wheat and spelt dough 4 min 9 min 13 min
Rye dough 5 min 2 min 7 min
Wheat and wholemeal dough 4 min 9 min 13 min
Baguee dough 5 min 6 min 11 min
Ciabaa dough 5 min 10 min 15 min
Pizza dough 4 min 6 min 10 min
Hefezopf sweet dough 4 min 3 min 7 min
Good to know – Hefezopf (braided yeast bun) basic recipe

16
7 Cleaning
iClean the device before inial commissioning and aer each use. Cleanliness is
a mandatory requirement for hygienic dough producon.
⚠WARNING
Danger to life from mains voltage 230 V / 50 Hz
Electric shock
Disconnect the device from the power supply.
The device can be cleaned with a damp cloth only.
⚠CAUTION
Danger of crushing by rotang parts
Injuries to ngers and hands
Disconnect the device from the power supply.
ATTENTION
Damage caused by incorrect cleaning
Water can get into the device and damage its inner workings.
Do not use a water jet or high-pressure cleaner to clean the device.
iFor idencaon of the parts, see Tab. 3 on page 8.
Disconnecng the power supply
Switch o the device.
Unplug the mains plug.
Cleaning

17
Removing the dough hook and mixer bowl
Li the protecve cover 2 up.
Retain the lng head 1 at the locking clip 8, pull the locking clip out to the stop
and guide the lng head upwards.
Hold the mounng 1 for the dough hook rmly in one hand.
Release the dough hook 4 by turning to the le and remove it from the dough
hook mounng 1.
Release the mixer bowl 3 by turning it energecally to the le and remove
the mixer bowl from the bowl mounng 5.
Cleaning the parts
iThe mixer bowl and dough hook are dishwasher safe.
First clean the mixer bowl 3 and the dough hook 4 roughly with a dough scraper.
Then clean the mixer bowl 3 and the dough hook 4 with hot water and a normal
domesc dishwashing detergent or in a dishwasher.
Clean the housing of the device with a damp cloth.
Installing the mixer bowl and dough hook
Place the mixer bowl 3 on the bowl mounng 5.
Turn the mixer bowl 3 to the right unl it clicks into place.
Check that the mixer bowl 3 is seated rmly in the bowl mounng 5 by turning
it slightly to the le and right.
Place the dough hook 4 in the mounng 1 for the dough hook and turn it to
the right unl it reaches the stop.
Check that the dough hook 4 is seated rmly in the drive unit by pulling on it.
Slowly press the lng head 1 downwards.
iIf the lng head cannot be pressed downwards, turn the dough hook slightly.
Push the locking clip 8 into the stop.
Close the protecve cover 2.
Cleaning

18
8 Maintenance
⚠WARNING
Danger to life from mains voltage 230 V / 50 Hz
Electric shock
Always disconnect the device from the power supply before commencing
maintenance work.
Only qualied specialist personnel are permied to carry out maintenance
work on electric components.
⚠CAUTION
Danger of crushing by rotang parts
Injuries to ngers and hands
Disconnect the device from the power supply.
Do not start up the device without the guard and housing parts.
iComponent-specic grease must be used for maintenance. For suitable grease, see
chapter 12 “Accessories” on page 31.
Disconnecng the power supply
Switch o the device.
Unplug the mains plug.
Lubricang the tappet at the lng head
iCheck every 4 weeks whether the tappet is sll fully lubricated with food-safe lu-
bricant.
iFor idencaon of the parts, see Tab. 3 on page 8.
Li the protecve cover 2 up.
Retain the lng head 1 at the locking clip 8, pull the locking clip out to the stop
and guide the lng head upwards.
Where necessary, brush the tappet 6 generously with a suitable lubricant.
Maintenance

19
Lubricang the drive chain for the dough hook
iThe drive chain for the dough hook must be lubricated at least every 50 operang
hours or every 2 years with chain adhesive grease.
Loosen the 9 screws in the cover of the lng head.
Remove the cover of the lng head.
Brush the chain with adhesive and chain grease.
Screw the lng head cover back on.
Lubricang the drive chain for the mixer bowl
iThe drive chain for the mixer bowl must be lubricated at least every 50 operang
hours or every 2 years with chain adhesive grease.
Carefully lay the device on its side.
Loosen the 11 screws on the boom of the device.
Remove the cover from the boom of the device.
Brush the chain with adhesive and chain grease.
Screw the cover back onto the boom of the device.
Maintenance

20
9 Troubleshoong
Fault Cause Soluon Illustraon
The device runs
with the protecve
cover open
The limit switch is
defecve
Switch
the device o.
Inform
customer
support
immediately.
The device doesn't
turn on
The protecve
cover is open
Close
the protecve
co ver.
The power supply
is interrupted
Insert
the mains plug.
Check
the fuses on
the installaon
side.
The lng head
is not clicking in
properly
Close the lng
head fully
and push
the locking clip
into the stop.
The limit switch
for the protecve
cover is not
correctly set
Set the limit
switch properly.
The device is run-
ning loudly
The drive chains
are too dry
Lubricate
the drive
chains, see
chapter 8
“Maintenance”
on page 18.
The upper coupling
is dry
Lubricate
the coupling.
The ball bearings
have worn out
Inform
customer
support.
Troubleshoong
This manual suits for next models
1
Table of contents
Other HAUSSLER Mixer manuals

Popular Mixer manuals by other brands


Kushlan
Kushlan 350 Gas Operating instructions and parts manual

Mondial Designs Limited
Mondial Designs Limited M-11 Instruction and Technical Service Manual

Phonic
Phonic AM120 user manual

Kenwood
Kenwood KMX50 series instructions

Aviom
Aviom A-16II user guide

Panasonic
Panasonic AG-HMX100P operating instructions


