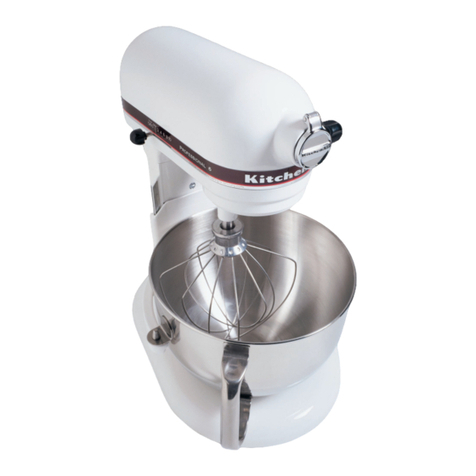
HAUSSLER NOVA User manual

Operang instrucons
NOVA
Dough mixer
Translaon of the original operang instrucons

2
Inhalt
1 Welcome ... ........................................................................................................4
... to our world of milling, kneading, baking, and pasta making! ............................ 4
2 For your safety ...................................................................................................5
List of symbols ......................................................................................................... 5
Intended use............................................................................................................ 5
Basic rules................................................................................................................ 5
Safety instrucons................................................................................................... 5
3 Product overview ...............................................................................................7
Product descripon................................................................................................. 7
Technical data.......................................................................................................... 7
4 Scope of supply ..................................................................................................9
Scope of supply and part designaon ..................................................................... 9
5 The Tools ..........................................................................................................10
Dough hook ........................................................................................................... 10
Srring paddle * .................................................................................................... 11
Whisk * .................................................................................................................. 12
6 Pung into operaon ......................................................................................13
Preparing the unit ................................................................................................. 13
Handling ................................................................................................................ 14
7 The display .......................................................................................................20
Overview ............................................................................................................... 20
Basic principle of the colours: ............................................................................... 21
Symbols ................................................................................................................. 21
Recipes .................................................................................................................. 24
Noces................................................................................................................... 29
8 The tools during operaon ...............................................................................30
Kneading................................................................................................................ 30
Srring................................................................................................................... 31
Whipping ............................................................................................................... 32
9 Worth knowing ................................................................................................33
The window sample .............................................................................................. 33
Pre-doughs ............................................................................................................ 33
What does DY mean .............................................................................................. 34
Pre-dough types .................................................................................................... 34
How much pre-dough do I need in the dough?..................................................... 34

3
10 Cleaning ...........................................................................................................35
Disconnecng the power supply ........................................................................... 35
Removing the dough hook and bowl..................................................................... 35
Cleaning the parts ................................................................................................. 36
11 Maintenance ....................................................................................................37
Disconnecng the power supply ........................................................................... 37
Lubricang the locking latch.................................................................................. 37
Belt 37
12 Faults ...............................................................................................................38
Fault indicaon in the display................................................................................ 38
13 Disposal ...........................................................................................................40
14 For specialist personnel: Circuit diagrams and parts lists ..................................41
Circuit diagram ...................................................................................................... 42
Parts list................................................................................................................. 43
15 Accessories ......................................................................................................45
16 EC Declaraon of Conformity ...........................................................................47
17 Warranty ..........................................................................................................49
Warranty coverage ................................................................................................ 49
Work carried out aer the warranty period.......................................................... 49
Our service to you ................................................................................................. 51
We can also oer you ............................................................................................ 51
How to get to the Baking Village ........................................................................... 51

4
1 Welcome ...
... to our world of milling, kneading, baking, and pasta making!
Häussler stands for doing it yourself. Our units will give you fabulous delicacies which
will treat your taste buds to a truly unique experience. Lose yourself in our world of
milling, kneading, baking, grilling, and pasta making.
Häussler stands for uncompromising quality – Made in Germany. Decades of
experience and thousands of units delivered worldwide speak for themselves.
Häussler stands for customer service. Even aer you have made your purchase, you
can rely on us to be at your side – with no ifs or buts. We want you to enjoy your unit
for many years, to keep picking up ps and discovering new recipe ideas from us.
You have opted for the NOVA dough mixer and no longer have to knead dough
laboriously by hand. The NOVA is easy to clean, and it does not maer whether you
are making dough for pasta, bread or other delicacies.
Great fun and consistent success.
Welcome ...

5
2 For your safety
List of symbols
Descripon of symbol
⚠Hazard symbol
Request for acon
iNoce
Bullets
Tab. 1: List of symbols
iIf the operang instrucons or parts of them are illustrated too small
for you, then you can view and enlarge the operang instrucons on
our homepage www.backdorf.de.
Intended use
The dough mixer complies with all spulated product-specic safety regulaons.
The dough mixer is intended solely for the kneading of ingredients for making dough
and for beang ingredients with an whisk in enclosed spaces. It is intended for
normal household quanes and periods of use and is not intended for connuous
use. Any other use is considered to be contrary to the intended use. Karl-Heinz
Häussler GmbH bears no liability from any loss or injury resulng from this.
Basic rules
Read the operang instrucons carefully before pung the unit into operaon.
Note the safety instrucons and warnings in the operang instrucons.
The unit must only be operated if it is in perfect working order.
Keep the operang instrucons readily available with the unit.
Do not pass on the unit without these operang instrucons.
Always carry out a visual inspecon before starng up the unit.
Safety instrucons
⚠Allergic reacon to our dust
If you experience allergic symptoms, seek medical advice immediately.
For your safety

6
⚠Danger to life from electric shock
Do not put the unit into operaon if the cable or plug are damaged and do not
touch damaged parts.
Contact a professional in the event of damage to the cable or plug.
Only open the housing with the plug unplugged.
Only permit qualied specialist personnel to carry out maintenance work on elec-
tric components.
⚠Risk of injury due to heavy weight
Take care during transport owing to the weight of the unit.
Prior to liing, check that the weight can be borne safely.
Li the unit carefully and with two people if necessary.
The unit must always be set up on a stable surface.
⚠Danger of crushing of your hands by rotang parts
Do not leave the unit unaended when in operaon.
Keep the unit out of the reach of children younger than 14 years and always super-
vise children.
Do not reach between the bowl and the unit during operaon.
Do not put the unit into operaon with a defecve or broken bowl cover or housing
parts.
Do not put the unit into operaon without the guard and housing parts.
⚠Risk of injury owing to catching and entanglement of clothing or
hair in rotang parts
Do not operate the unit with a defecve or broken bowl cover or
housing parts.
Do not put the unit into operaon without the guard and housing parts.
For your safety

7
3 Product overview
Product descripon
In the NOVA dough mixer from Häussler, you have purchased a very robust and
high-performance device. The dough mixer is easy to clean, easy to operate, almost
maintenance-free and suitable for the producon of all doughs.
All parts of the dough mixer that come into contact with the dough are made of
food-safe materials. Metal parts of the bowl and tools are made of stainless steel. The
swivel mounted bowl cover is made of transparent plasc. Raising of the lng head
is assisted by a pneumac spring and is therefore parcularly user-friendly.
The dough mixer works according to the proven spiral kneading system. Dierent
speeds for the dough hook and the bowl result in parcularly even mixing and
kneading of the dough, even with small quanes.
Technical data
Name Value
Width 24 cm
Height 38.1 cm
Length 41.5 cm
Weight 18 kg
Motor output 0.35 kW
Product overview

8
Name
Power supply 110-240V ~ 50/60Hz
Connecon cable Cold device power cable
(1.5 m with shock-proof plug)
Housing coang Powder coang
Colour
(according to order type)
• Pure white RAL 9010
• Steel blue RAL 5011
• Wine red RAL 3005
• Aluminium RAL 9006
• Anthracite RAL 7021
Materials • Stainless steel
Bowl, dough hook, whisk and srring
paddle
• Aluminium
housing
• Polycarbonate
bowl cover
Operaon Touch control panel
Timer adjustable up to max. 45 minutes
Time counter max. 45 minutes
Volume of the bowl 5 litres
Specied our capacity
Dough quanty
< DY160 * - from 0.3 - 2 kg dough
> DY160 * - from 0.3 - 3 kg dough
Technical features • SOFT OPEN - Pneumac spring sup-
port for lng head.
• SOFT CLOSE - End posion cushio-
ning for removable bowl cover.
• Recipe memory with 9 memory lo-
caons.
• Permanent magnet motor with
digital control.
• Glass bre reinforced belt drive.
• Spiral kneading system - dough hook
and rotang bowl.
Tab. 2: Technical data
*you can nd an explanaon of DY in the chapter “Useful informaon” on page 34.
Product overview

9
4 Scope of supply
Scope of supply and part designaon
1
3
5
8
9
10
7
2
6
11
4
No. Designaon No. Designaon
1NOVA 2Tilng head
3Release lever 4Display
5Power cable 6Recipe book/operang instrucons
7Dough hook 8Bowl cover
9Bowl mounng 10 Bowl
11 Bowl cover mounng
Tab. 3: Scope of supply * and part designaon *.
iThe display is shown acve here for illustrave purposes only and for beer recognion.
Scope of supply

10
5 The Tools
Dough hook
W1
V1
No. Designaon
V1 Dough hook locking unit
W1 Dough hook
Tab. 4:Dough hook
Use
Kneading dough and mixtures
Quanty
>DY160 * - from 0.3 - 2 kg dough
< DY160* - from 0.3 - 3 kg dough
iYou can nd an explanaon of DY in the chapter “Useful informaon” on page 34.
Speed levels
Level 1 to 4 can be used (depending on DY*)
iFor a more precise determinaon, please refer to the recipe book included in the
scope of delivery.
i*DY = Dough yield - describes the mixing rao of our to water.
Flour is always weighted with 100 parts.
For example: DY 160: 100 parts our to 60 parts water
DY 220: 100 parts our to 120 parts water
Producon marker
The producon process can lead
to “producon markers” (small
grooves or dents) at the dough
hook. Unfortunately, these can-
not be avoided, but do not aect
the quality of the product at all.
The Tools

11
Srring paddle *
W2
V2
No. Designaon
V2 Srring paddle locking unit
W2 Srring paddle
Tab. 5:Srring paddle
Use
Srring mixtures
e.g. creams, ready-made doughs, hot soaked grains.
Quanty
from 0.2 - 2.4 kg
Speed levels
Level 1 to 7 can be used
iFor a more precise determinaon, please refer to the recipe book included in the
scope of delivery.
* Accessory part, not included in scope of supply.
The Tools

12
Whisk *
W3
V4
V3
No. Designaon
V3 Whisk locking unit
V4 Locking sleeve
W3 Whisk
Tab. 6: Whisk
Use
Whipping ingredients
e.g. egg white, biscuits, cream
Quanty
from 0.2 - 1.5 litres
Speed levels
Level 1 to 7 can be used
iFor a more precise determinaon, please refer to the recipe book included in the
scope of delivery.
* Accessory part, not included in scope of supply.
The Tools

13
6 Pung into operaon
⚠CAUTION
Risk of injury owing to catching and entanglement of clothing or hair in rotang
parts
Injuries to the head and limbs
Wear snugly ng clothing.
Tie long hair back.
Do not wear necklaces or bracelets.
Preparing the unit
Seng up the unit
Check the delivery for completeness with the help of Tab. 3 "Scope of supply * and
part designaon *" on page 9.
Li the unit carefully due to its heavy weight and always place it on a sturdy and
even work surface.
Create enough space for working with the unit.
Cleaning the unit for the rst me
iFor hygiene reasons, all parts that come into contact with food must be removed
and cleaned before the unit is used for the rst me.
Clean all parts, see chapter 10 "Cleaning" on page 36.
Connecng the unit
Check the unit, the cable and the plug 5 for visible exterior damage. Do not put a
damaged unit into operaon!
Pung into operaon

14
Connecng the machine
Insert the cold-device plug
5
into the
socket on the machine.
Insert the shock-proof plug
5
into a
mains socket.
1. Connecng the machine
2. Switch on the machine
Switch on the main switch on the back of
the machine.
Handling
Opening/closing bowl cover
Li up the bowl cover
8
with one hand
on the edge and guide it back up to the
stop.
i The machine is stopped automacally
by the integrated sensors.
1. Open bowl cover
Close the bowl cover
8by lng
the cover down. The bowl cover is
cushioned shortly before its end posi-
on.
i The cover 8must be completely
closed and properly installed for the
machine to start.
2. Close bowl cover
Pung into operaon

15
Unlocking/locking lng head
Press the release lever
3
down.
iThe lng head 2 opens automa-
cally and swings slowly upwards. If
the dough hinders/impedes it from
opening automacally, then provide
assistance.
1. Unlock lng head
2. Lock lng head
Press the lng head
2
down unl it
clicks into the lock.
iThe locking is clearly audible and the
release lever is back in the horizontal
posion.
Pung into operaon

16
Inserng/removing tools
12 13
No. Designaon
12 Kneading and srring paddle mounng
13 Whisk mounng
1. Dough hook
Insert
To do this, hold the kneading and srring
paddle mounng
12
rmly.
Insert the dough hook
7
into the
kneading and srring paddle mounng
12
and turn it clockwise unl it clicks
into place.
Removing
To do this, hold the kneading and srring
paddle mounng
12
rmly.
Turn the dough hook
7
counterclockwi-
se so that it releases from the lock.
Turn and pull it out completely.
2. Srring paddle
Insert
To do this, hold the kneading and srring
paddle mounng
12
rmly.
Insert the kneading paddle into the
kneading and srring paddle mounng
12
and turn it clockwise unl it clicks
into place.
Removing
To do this, hold the kneading and srring
paddle mounng
12
rmly.
Turn the srring paddle counterclockwi-
se so that it releases from the lock.
Turn and pull it out completely.
Pung into operaon

17
3. Whisk
Insert
Push the locking sleeve
V4
of the whisk
down with your ngers and guide the
whisk onto the whisk mounng
13
unl
it is in posion.
Release the locking sleeve.
If necessary, turn the whisk a lile to
the right or le unl you feel it click into
place.
iThe
locking sleeve
must be in the upper
posion again.
Removing
Hold the whisk by the sha and push
the locking sleeve
V4
of the whisk
down with your ngers. Remove the
whisk downwards.
Pung into operaon

18
Inserng/removing bowl
1. Insert bowl
Place the bowl
10
on the bowl mounng
9
.
Turn the bowl clockwise unl it slides
down into the mounng.
Turn the bowl clockwise with a lile
swing so that it clicks into the bowl
mounng.
iIf the machine is ready for operaon
and the lng head is open, the bowl
holder is automacally locked electro-
nically. This enables beer and easier
locking of the bowl.
iThe correct locking can be clearly heard
and felt.
2. Remove bowl
Turn the bowl counterclockwise
10
with
a lile swing so that it releases itself
from the
9
bowl mounng.
Li the bowl up and o.
iIf the machine is ready for operaon
and the lng head is open, the bowl
holder is automacally locked electro-
nically. This enables beer and easier
unlocking of the bowl.
Pung into operaon

19
Dismantling the bowl cover
1. Dismantling the bowl cover
Pull the bowl cover
8
apart slightly
with both hands at the height of the
mounng.
iDo not apply too much force, 8
other-
wise
the bowl cover may break.
2. Removing the bowl cover
Pull the bowl cover forward
8
o the
machine.
Installing the bowl cover
3. Installing the bowl cover
Pay aenon to the posion of the
mounngs for the bowl cover 11
.
iThe mounng is slightly twisted due to
the cushioning system.
Slide the bowl cover
8
over the moun-
ngs
11
, unl it clicks into place.
Make sure that the
bowl cover
is pro-
perly seated on both sides.
Pung into operaon

20
7 The display
Overview
A
B
D
E
F
G
L
K
J
H
I
C
No. Designaon No. Designaon
ARecipe list BStart/Stop buon
CTime display (if mer is deacvated) DSpeed level (in numbers)
EIncrease the speed level FSpeed level (in points)
GTimer on/o HIncrease the mer me
ITime display mer JReduce the mer me
KReduce the speed level LSengs
Tab. 7:Display with mer
The display
Table of contents
Other HAUSSLER Mixer manuals
Popular Mixer manuals by other brands
Hydro systems
Hydro systems Accumax 35761 Installation and operation
Sound Devices
Sound Devices 442 User guide and technical information
Linea 2000
Linea 2000 DOMO DO9143M Instruction booklet
Sunbeam
Sunbeam MIXMASTER AUTOMATIC 1 Instructions for the care and operation
IMER
IMER MIX 60 PLUS instruction manual
MQ Multiquip
MQ Multiquip WC-62S Operation and parts manual

