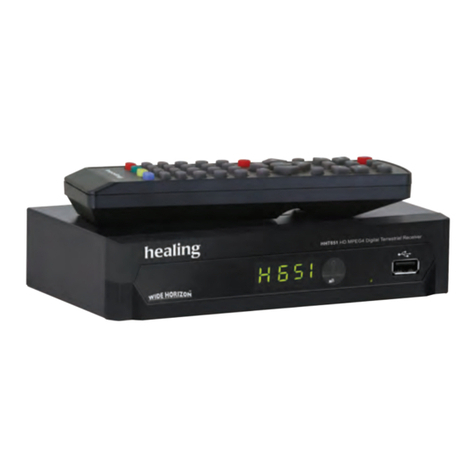
healing HHT896 User manual


healingHHT896 HDDigitalTerrestrialReceiver OperatingManual
NOTES
2

healingHHT896 HDDigitalTerrestrialReceiver OperatingManual
HHT896 FEATURES
Sensitive Tuner – responds to weak signals
Signal Strength and Quality bars colour coded
Receives all ‘freeview’ channels
Stores up to 400 TV and Radio channels
7 Day Electronic Program Guide with 8 day cross over
Closed Caption function embedded
Energy Saving functions included
Saves program parameters at Power Fail
Robust Power Supply built for long life and reliability
Compact Case Design: L 180mm x W 220mm x H 45mm
MPEG4 / H.264 enabled
Outstanding HD & SD ‘Wide Horizon’ Picture Quality
Resolutions: 1920 x 1080i, 1280 x 720p, 720 x 576p and 720 x 576i
Centre Cut option: displays 16:9 on 4:3 screens
Video Outputs: HDMI, Component Y/Pb/Pr and Composite CVBS
All video outputs active simultaneously
Optical Digital Audio: S/PDIF output
USB Record and TimeShift live TV
Flexible Media Player - plays:
ts, .vob, .mp4, .mkv, .divx, .avi, .mp3, .m4a, .aac, .wma and more
3D recording and playback ready
3

healingHHT896 HDDigitalTerrestrialReceiver OperatingManual
PREFACE
Thank you for choosing a healing HHT896 High Definition Receiver.
HHT896 includes a fully functional USB recorder with Time Shift and
comprehensive Media Player function, yet is easy to install with all AV
outputs active simultaneously. Built in a small footprint case less than
220mm wide with a removable mains power lead, HHT896 also includes up
to 8 day Electronic Program Guides, Optical Digital Audio for full surround
sound and embedded Closed Caption Subtitles. Healing HHT896 delivers
beautiful High Definition and Standard Definition Television pictures.
SAFETY
1. Allow clear space around the receiver for sufficient ventilation
2. Do not cover the receiver’s ventilation slots or place it near heat source
3. Do not connect AV cables when receiver connected to mains power
4. Do not remove the cover as dangerous voltages may be exposed
5. Do not allow the unit to be exposed to extreme heat, cold or humidity
6. Liquids or sprays must not make contact with internal receiver parts
GENERAL OPERATION OF THE RECEIVER
The everyday operation of your receiver is accessed via user friendly On
Screen Displays and Menus. These Menus can guide you through installation
and channel management with its various functions to enhance your viewing
pleasure. All functions can be accessed through the Remote Control and the
front panel keys provide access to many functions. As new software may
change the function of a receiver, it should not be installed unless specific
upgrade instructions have been given by healing for this receiver, HHT896.
Should you experience any difficulties with the operation of your unit, please
consult the relevant section of this manual or Trouble Shooting.
Alternatively contact your dealer or healing via www.healingdigital.com
4

healingHHT896 HDDigitalTerrestrialReceiver OperatingManual
INDEX
NOTES ......................................................................................................... 2
HHT896 FEATURES ................................................................................... 3
PREFACE..................................................................................................... 4
SAFETY ....................................................................................................... 4
GENERAL OPERATION OF THE RECEIVER ......................................... 4
INDEX.......................................................................................................... 5
FRONT PANEL............................................................................................ 6
REAR PANEL .............................................................................................. 7
REMOTE CONTROL UNIT - KEY FUNCTIONS..................................... 8
REMOTE CONTROL UNIT - KEY FUNCTIONS..................................... 9
PREPARING REMOTE CONTROL FOR USE ........................................ 10
REMOTE CONTROL OPERATING DISTANCE & ANGLE .................. 10
USEFUL REMOTE CONTROL UNIT TIPS............................................. 10
RCU BATTERY SAFETY PRECAUTIONS ............................................. 11
SETTING UP YOUR RECEIVER ............................................................. 12
GETTING STARTED ................................................................................ 16
FIRST TIME USE ...................................................................................... 16
CHANNEL SEARCH................................................................................. 17
PICTURE ................................................................................................... 18
OPTION ..................................................................................................... 19
PROGRAM ................................................................................................ 19
SYSTEM .................................................................................................... 20
USB RECORDER AND MEDIA PLAYER............................................... 21
ELECTRONIC PROGRAM GUIDE (EPG) .............................................. 24
TIME .......................................................................................................... 24
SPECIFICATIONS..................................................................................... 26
MEDIA PLAYER CODEC SPECIFICATION........................................... 28
TWELVE MONTH WARRANTY ............................................................. 31
5

healingHHT896 HDDigitalTerrestrialReceiver OperatingManual
FRONT PANEL
a. STANDBY key - Switches between Operational and Standby modes
b. LED display - Shows channel selected, Load status etc.
c. Power LED, green - Indicates power supply active
d. Signal Lock LED, Orange
- No Light = No Signal = No Pictures or Sound.
e. Remote Control sensor
f. CH+ key. Use to select a higher channel number
g. CH- key. Use to select a lower channel number
h. OK. Operation confirmation; Channel List
i. MENU. Press key to enter Main Menu
6

healingHHT896 HDDigitalTerrestrialReceiver OperatingManual
REAR PANEL
1. ANTENNA LOOP OUT: passes antenna signal to another receiver,
Antenna Loop Out becomes idle when receiver on STANDBY!
2. ANTENNA IN: connect your antenna, essential for stable pictures.
3. COMPONENT VIDEO: Y,Pb,Pr outputs for high picture quality.
4. AUDIO Right and Left Outputs.
5. VIDEO: Composite CVBS or lesser quality picture output.
6. SPDIF: Digital Audio Toslink output for superior audio quality.
7. HDMI: digital Video and Audio output, combined over a single cable.
8. USB: connect a USB Key or Hard Disk Drive for recording, replay
or in the unlikely event firmware upgrade is necessary.
9. Mains power connection: IEC C7 2 wire connector.
7

healingHHT896 HDDigitalTerrestrialReceiver OperatingManual
REMOTE CONTROL UNIT - KEY FUNCTIONS
8

healingHHT896 HDDigitalTerrestrialReceiver OperatingManual
REMOTE CONTROL UNIT - KEY FUNCTIONS
•STANDBY. Standby and Operational / On Off modes switch.
•MUTE. suspends or re-instates sound.
•RECALL. selects the last tuned channel, when the Menu is off.
•EXIT. leave a Menu or function.
•MENU. enter the Main Menu.
•OK. displays Channel List. In Menu mode confirms
operation.
•◄or ►. Audio level, in Menu mode: select or adjust parameter.
•▲or ▼. Channel select, in Menu mode: cursor Up or Down.
•0 – 9. Channel Number select, or in Menu: Number value entry.
•INFO. Information Bar, Present and Next program information.
•EPG. reveals Electronic Program Guide; Menu off.
•AUDIO. audio mode selection from Stereo, Left or Right; Menu off.
•SUBT. Closed Captions display or press again to suspend; Menu off.
•TV/R. TV and Radio reception mode switch; Menu off.
•FAV. reveals Favorite Channel list; Menu off.
•ASPECT. Picture Shape adjust, to match your display or screen.
•Coloured Red, Green and Blue keys: shortcuts and functions, as
listed.
•REC. records a selected program, when USB drive is connected.
•PAUSE. pause or restore when playing a recording from USB drive.
•PLAY. plays a recording selected from USB drive.
•STOP. stops Recording or Playing a file.
•REW Fast Rewind / Skip: 2, 4, 8, 16 or 32 times real time.
•FFW Fast Forward / Skip: 2, 4, 8, 16 or 32 times real time.
•T.SHIFT Freeze, Fast Forward or Rewind live TV via USB drive.
•USB Multimedia menu interface shortcut.
9

healingHHT896 HDDigitalTerrestrialReceiver OperatingManual
PREPARING REMOTE CONTROL FOR USE
Fresh batteries help ensure your Remote Control Unit is reliable.
1. Open the battery compartment lid on the back of the RCU.
2. Insert the batteries, negative terminals first. Take care that battery
polarity markings correspond with those of the Remote Control.
3. Close the battery compartment lid, checking that it locks in place.
4. Your RCU should now be ready for use.
REMOTE CONTROL OPERATING DISTANCE & ANGLE
Point the RCU towards your receiver and press key, with an
uninterrupted view of your receivers’ front panel.
1. Distance: the remote control should work up to
7 meters from the front of your receiver…
2. Angle: and about + or - 30 degrees from directly
facing the receiver.
USEFUL REMOTE CONTROL UNIT TIPS
1. To prolong Remote Control Unit battery life, intervals of continuous
switching should be kept to less than about one minute.
2. Should the receiver stop responding to RCU commands or freeze up,
remove batteries from the RCU and press a few keys and or disconnect
power from the receiver for 10 seconds or so, and restart.
3. Daylight and some electric light can compromise the distance over which
an RCU is effective. You can solve by re-adjusting receiver position and
room lighting as necessary.
10

healingHHT896 HDDigitalTerrestrialReceiver OperatingManual
RCU BATTERY SAFETY PRECAUTIONS
Save your RCU from damage by following these precautions:
1. Check that polarities of batteries and RCU battery terminals correspond.
2. If storing your receiver for weeks or longer, remove the batteries.
3. Never leave old or exhausted batteries in the remote control.
4. Only recharge cells designed for recharging, NiMh etc.
5. Do not disassemble, short-circuit, heat or throw batteries into fire.
6. Do not mix new and old or different types of batteries together.
7. In the event electrolyte fluid leaks from a battery inside the RCU, wipe it
away with a damp cloth, rinse cloth thoroughly and insert new batteries.
Damage to your RCU from leaking electrolyte is not covered by Warranty.
11

healingHHT896 HDDigitalTerrestrialReceiver OperatingManual
SETTING UP YOUR RECEIVER
Your healing HHT896 High Definition Receiver comes with a selection of
Video and Audio outputs. The outputs you use will be determined by the
inputs available on your TV monitor and/or HI-FI equipment. This receiver
delivers excellent picture and sound quality from High Definition and
Standard Definition broadcasts. Following are some basic terminology
explanations that may help you understand:
TERMINOLOGY QUALITY GRADING EXPLANATION
VIDEO CONNECTIONS
Composite CVBS Standard Definition Complete video signal on one
yellow RCA connector. Ideal for
smaller screens. Analogue.
Y/Pb/Pr High Definition Separate RGB over 3 RCA
connectors. Excellent picture
quality although Analogue.
HDMI High Definition Video and Audio on one cable.
Highest possible picture and
sound quality to 1080i. Digital.
AUDIO CONNECTIONS
RCA analogue Optimal Left and Right channels via
RCA connectors in high
impedance. Analogue.
Optical SPDIF CD quality Digital stream via Toslink for
multi channel audio. Surround
sound decoder ready, when
broadcast.
N.B. All AV outputs are available simultaneously, simplifying installation
and enabling multiple displays of different resolutions to be driven at the
same time.
Now you can choose the connection method that best suits your display from
one of the methods listed on the following pages:
12

healingHHT896 HDDigitalTerrestrialReceiver OperatingManual
1. BASIC SET UP using COMPOSITE VIDEO output
Uses the single Yellow RCA Video connector for Composite Video (CVBS)
with the Red and White RCA AUDIO R & L connectors at the back of your
receiver. All video outputs are active.
1. 1 Prepare your equipment
Ensure that the power leads to both the TV monitor and the Set Top Box are
unplugged whilst making AV connections.
Make sure that your TV monitor has Composite CVBS video input.
1.2. Connecting Video and Audio
Video
Connect the yellow CVBS Composite Video output from your receiver to the
Composite Video input of the TV or monitor.
Audio
a) Connect the Red and White AUDIO L&R output from your receiver to 2 x
RCA leads.
b) Connect the other end of each RCA lead to the corresponding Audio input
connectors on your television monitor.
1.3. Connect the antenna…
To the “ANTENNA IN” connection on the rear of your receiver.
1.4. Connect mains power you are now ready for ‘GETTING STARTED’.
13

healingHHT896 HDDigitalTerrestrialReceiver OperatingManual
2. BASIC SET UP using COMPONENT VIDEO (Red Green Blue)
For component connection, use the Red Green Blue video and the Red White
audio RCA connectors on the back of the receiver. The RCA leads included
with your receiver can assist. All video outputs are active simultaneously.
2.1. Prepare your equipment
Ensure that the power leads to both the TV monitor and the Set Top Box are
unplugged whilst making AV connections.
Your television or monitor must have a Component video input, which may
be labelled “Y, Pb, Pr” possibly distinguishable by coloured Red, Green and
Blue connectors grouped together.
2.2. Connecting Video
a) Connect one end of a 3 wire RCA lead to the Red, Green and Blue Y, Pb,
Pr RCA output connectors on the rear of the set top box.
b) Connect the other end of this cable to the corresponding RCA video input
connectors on your television or monitor.
2.3. Audio
c) Connect one end of a 2 x RCA lead to the Red and White AUDIO L & R
output connectors on the rear of the set top box.
d) Connect the opposite ends of the cable to the corresponding Audio Input
connectors on your television, monitor or amplifier.
14

healingHHT896 HDDigitalTerrestrialReceiver OperatingManual
e) You can also obtain premium quality Digital Audio from the OPTICAL
SPDIF terminal to a Digital Audio input on your Audio Decoder or TV set.
Optical connections also provide a high level of electrical isolation.
2.4. Connect the antenna…
to the “ANTENNA IN” connection on the back of your receiver.
2.5. Connect mains power…
to the back of your receiver using the IEC C7 figure 8 power lead supplied.
You are now ready for “GETTING STARTED”.
3. BASIC SET UP using HDMI output
Uses the HDMI connector on the back of the receiver to provide a complete
digital video and audio connection in one neat cable. A HDMI cable of
length to suit your purpose is required. All video outputs are active.
3.1. Prepare your equipment
Ensure the power leads to both display and receiver are unplugged whilst
making your AV connections. Your Monitor must have a HDMI input.
Check your Monitor has a HDMI input.
3.2. Connect the antenna…
to the “ANTENNA IN” socket on the rear of your receiver.
3.3. Connect mains power…
to the back of your receiver using the IEC C7 figure 8 power lead supplied.
You are now ready for ‘GETTING STARTED’.
15

healingHHT896 HDDigitalTerrestrialReceiver OperatingManual
GETTING STARTED
1. Select the most suitable display or TV connection method.
2. Connect a functional TV Antenna to your digital receiver.
3. Turn on your monitor or TV.
4. Turn on your HHT896 receiver.
5. Select the appropriate Input on your monitor or television and connect.
6. The HHT896 Menu should be visible on your Monitor or TV.
FIRST TIME USE
To simplify installation, default options
are pre-selected for Australia.
1/ [OSD Language] should not be
changed or the user risks the dilemma of
understanding an unfamiliar language.
2/ [Antenna Power] must remain [Off], being only required when a 5V
amplifier is installed.
3/ Press the ‘OK’ key to launch automatic Channel Search scan.
Alternately, move the cursor to [Channel Search] with the ‘▼’ key.
Centre Frequency of Channel and spacing appear at top left of screen.
When [Channel Search] is complete, the receiver returns to normal viewing
mode automatically, or when the ‘EXIT’ key is pressed during scan.
16

healingHHT896 HDDigitalTerrestrialReceiver OperatingManual
Should [Channel Search] be finding transmitters not required, you can
truncate Search by connecting the antenna for required channels only.
To use your receiver press the ‘▲’ ‘▼’ or 0 – 9 keys to change channels,
‘◄’ or ‘►’ to adjust sound level.
Correct picture shape proportions by
pressing the ‘ASPECT’ key several
times, whilst the receiver is in normal
viewing mode. [Aspect Ratio] can also
be adjusted from the [Picture] ‘MENU’
with the ‘◄’ ‘►’ keys.
You are now ready to settle back and
enjoy high quality Television viewing.
Due to the complexity of this product
descriptions of some functions in this
manual may be brief.
CHANNEL SEARCH
Manual Search adds new or updated
channels to those already saved.
Auto Search deletes and replaces all
saved channels.
Press the ‘MENU’ key to enter Main
Menu, then ‘◄’ or ‘►’ keys to select
[Channel Search].
17

healingHHT896 HDDigitalTerrestrialReceiver OperatingManual
Manual Search: Press the ‘▼’ key to
select [Manual Search] and ‘◄’ or ‘►’
keys to select a Channel to search. The
[Quality] bar indicates an active channel.
Press the ‘OK’ key to initiate scan.
¾Auto Search: Press the ‘▼’ or ‘OK’
keys to select and ‘◄’ or ‘►’ keys to
move cursor to [Auto Search]. Press the ‘OK’ key to initiate scan.
After Search, the receiver returns to viewing state.
¾Antenna Power provides 5V DC to ‘Antenna In’ terminal for a signal
preamplifier. It should remain Off unless an amplifier is connected!
PICTURE
Press the ‘MENU’ key to enter Main
Menu, then ‘◄’ or ‘►’ keys to select
[Picture] sub menu.
•Aspect Ratio: corrects picture
shape proportions on your display.
From the [Picture] sub menu press ‘▼’
or ‘OK’ keys to select [Aspect Ratio].
Step through 16:9 Wide Screen, 4:3
LetterBox, 4/3 Centre Cut, 4:3 Full or Auto with the ‘◄’ ‘►’ keys. Press
the ‘OK’ key to confirm selection and ‘EXIT’ EXIT’ to return to normal
viewing.
Aspect Ratio can also be adjusted by pressing the ‘ASPECT’ key from
within normal viewing mode.
¾Resolution: limits video output resolution to best fit to your display.
Default is 1080i (Digital TV does not use 1080p).
¾TV Format: default is PAL but lesser quality NTSC can be selected.
¾OSD Transparency: permits the user to see the picture through the On
Screen Display. Press the ‘◄’ or ‘►’ keys to adjust transparency.
18

healingHHT896 HDDigitalTerrestrialReceiver OperatingManual
OPTION
Press the ‘MENU’ key to enter the Main
Menu, then ‘◄’ or ‘►’ keys to select a
sub menu option.
Press ‘▼’ or ‘OK’ keys to enter.
¾OSD Language: enables users to
select On Screen Display in English, French, Spanish, Czech or
Slovenian by pressing ‘◄’ ‘►’ keys.
Change with care to avoid getting lost in an unfamiliar language!
¾Subtitle Language: can be selected, where broadcast. Default is [Off].
¾Audio Language: default is [English].select options where broadcast.
¾Digital Audio: default is PCM with options of RAW, and Off.
PROGRAM
¾Program Edit: allows programs or
channels to be sorted according to
user’s preference. From the Program
menu press ‘▼’ or ‘OK’ keys.
¾Enter password (default 000000) to
access.
Move: press the ‘Red’ key to mark a
program to move. Press the ‘▲’
‘▼’ keys to move it to another
position on the list. Press the ‘Red’
key again to place it.
Skip: programs or channels when
tuning with the ‘▲’ ‘▼’ keys.
19

healingHHT896 HDDigitalTerrestrialReceiver OperatingManual
Press the ‘Green’ key. Skipped programs are marked in the All TV
List.
Lock: press the ‘Yellow’ key to Lock or Unlock a program or channel.
Enter Password (default 000000) to access. Locked programs are
marked with a padlock in the All TV List.
Delete: press the ‘Blue’ key to remove a program or channel from the
list. Receiver asks ‘Do you want to delete this?’ Deleted programs
must be ‘Searched’ for again to be re-instated.
FAV: To add favorite programs or channels, press the ‘FAV’ key to
display [Favorite Type]. Press ‘▲’ or ‘▼’ keys to select one. Press
the ‘OK’ key to add tuned channel to this Group. Repeat to build your
favorites groups. [Disable] removes tuned program from all Favorite
groups.
To use, in viewing mode, press the ‘FAV’ key to see Favorites display.
Press ‘▲’ or ‘▼’ keys to select a program or ‘◄’ ‘►’ keys to step
through Favorite Groups. Press the ‘OK’ key to make a selection.
SYSTEM
Press the MENU key to show main
menu, press the ‘◄’ ‘►’ keys to select
SYSTEM sub menu. Press ‘▼’ key to
enter a further sub menu. Press the
‘OK’ key to enter selection.
¾Parental Guidance: limits access to
programs by broadcasters program
ratings. Enter Password (default
000000) to access. Press the ‘◄’ or
‘►’ keys to select. Press the ‘OK’
key to confirm selection.
20
Table of contents
Other healing Receiver manuals
