Healthy Choice RC510 User manual

The illustrations used in this manual are to illustrate the operation method and product
structure of the product. Where there is a small difference between the physical item and the
illustrations, please take the physical as the standard.
INTRODUCTION
This 5L Rice Cooker offers fuzzy logic technology and can cook any versatile texture of rice from
sushi-prepared rice all the way to congee and mixed grain rice.
Rice cookers with fuzzy logic technology have a smart sensor that makes automatic,
appropriate adjustments to the cooking time and cooking temperature. Whether cooking
minimum or maximum quantities, the rice comes out perfectly cooked every time as long as
our suggested rice-to-water proportions guide is followed. Enjoy regular, hard or soft rice
results as well as dedicated cooking programs for congee, soup, steam and reheat.
The large control panel combined with the easy-to-use and easy-to-see 4-LED digital display
makes user operation simple and straightforward. The 24-hour delay start makes for easy no-
fuss cooking when all the preparation is ready to go beforehand. The automatic 70°C keep
warm mode will keep the meals ready-to-eat until it is time to serve.
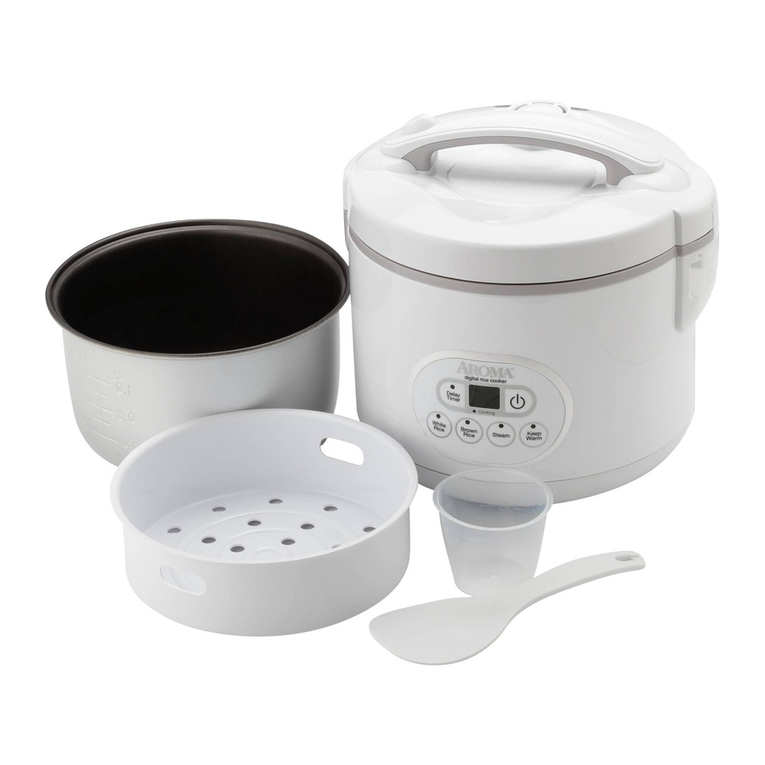
Pre-packaged with a steam tray, measuring cup and spoon, these accessories allow full cooking
possibilities for all the available cooking options. With a 5-litre non-stick aluminum inner pot,
this rice cooker is the ideal solution for effortless, large family meals and is simple to clean as
well.
Complete with a convenient carry handle and easy one-touch button pop up lid, this 5L Rice
Cooker is perfect for authentic homecooked meals.

IMPORTANT SAFEGUARDS
This User Manual contains information on the use and care of this product. Please read this
User Manual carefully before using the appliance and save it for future reference.
■Before first use, check the device specifications and the power supply in your network.
■Remove and safely disregard any packaging material and labels before using this product for
the first time. Ensure children and babies do not play with plastic bags or any packaging
materials.
■Do not use if the cord or plug are damaged. If the power cord is damaged; it must be replaced
by the manufacturer, its service agent or a similarly qualified person to avoid a hazard.
■Do not operate any appliance with a damaged cord or plug or after the appliance
malfunctions or is dropped or damaged in any manner, take it to the store where the unit was
purchased or call Lenoxx customer service for further assistance on 1300 666 848.
■Do not let the cord hang off the edge of a bench, table or touch a hot surface.
■Do not pull the cord. Always take the plug. Do not reel the cord around the device housing.
■Never attempt to disassemble and repair the appliance by yourself. If you encounter
problems, please contact customer service.
■Using accessories or replacement parts that are not recommended or not sold by the
manufacturer may cause damage to the appliance.
■Always unplug the appliance and let it cool down before cleaning and removing parts. Keep it
unplugged when not in use.
■To avoid electric shock and fire, do not immerse the appliance in water or other liquids. If
that occurs, immediately unplug it and contact customer service for inspection.
■This appliance shall not be used by children. Keep the appliance and its cord out of reach of
children.
■Children should be supervised to ensure that they do not play with the appliance.
■Place the appliance on a stable, horizontal and level surface. Position it far from flammable
materials including curtains, walls, and fabric upholstered furniture.
■Do not place the appliance near heat-emitting devices such as heaters, cooktops or electric
burners.

■Make sure that there is enough space around. The appliance should stand more than 15 cm
far from such flammable objects as furniture, curtains etc.
■Do not use the appliance near explosive objects.
■This appliance is not intended for used by persons (including children) with reduced physical,
sensory or mental capabilities, or lack of experience and knowledge, unless they have been
given supervision or instruction concerning use of the appliances by a person responsible for
their safety.
■This appliance is intended to be used in household and similar applications such as:
-staff kitchen areas in shops, offices and other working environments;
-farm houses;
-by clients in hotels, motels and other residential type environments;
-bed and breakfast type environments
■This appliance is not intended to be operated by means of an external timer or separate
remote-control system.
■Caution, hot surface. The surface is liable to get hot during use.
■Do not move the appliance when the appliance is connected to electricity.
■Extreme caution must be taken when moving an appliance containing hot foods or liquids,
ensure the carry handle is used.
■Do not leave water or products in the appliance for a long time.
■Pour water into the inner pot only. Don't pour water into the appliance body.
■While cooking, avoid using sharp utensils not to damage the inner pot surface. Please use
spoon which comes with the appliance. You may use also wooden, plastic or silicone utensils.
■Always check that there are no foreign objects between bottom of the inner pot and the
heating plate. It may cause a burning smell, strange sounds or cause the appliance to
malfunction.
■If any unusual sounds, odour or any other disruption happens, switch the appliance off. Make
sure that there are no objects or liquids between the inner pot and heating plate. If the
malfunction reason is not found, please contact customer service. Never attempt to dissemble
and repair the appliance by yourself.
■Do not cover the steam vent and the lid while the appliance is operating. It may cause
malfunction in the appliance.

■Do not operate the appliance with an empty inner pot.
■The inner lid and sealing ring are not removable, do not remove them.
Precautions
Check if the voltage indicated on the rice cooker corresponds to the local power voltage
before you connect it.
Do not immerse the rice cooker in water, nor rinse it under the tap.
Make sure that the external of the inner pot and the surface of the heating element remain
dry and clean. Do not use the cooker without the inner pot. Any foreign matter could lead
to malfunction of the cooker.
Only connect the rice cooker to a grounded power outlet. Always make sure that the plug is
properly connected firmly into the power outlet.
Place the unit on a flat and stable surface. Do not expose to water, high humidity or heat
sources. Do not use the inner pot directly over an open fire.
Keep the unit away from children to avoid accidents or any misuse.
When the unit is in operation, do not touch the lid or get close to the lid to avoid being
scalded by steam.
Do not cover the unit with a towel otherwise the lid of cooker might be deformed or
discolored.
Do not cover the steam valve with any objects (such as a towel).
Do not open the lid while the Rice Cooker is in operation.
Make sure the external surface of the inner pot and the heating plate is always kept dry
and clean. Place the inner pot and rotate it slightly to make it sit properly on the heating
element, then close the lid well.
Do not use any other container, instead of the provided inner pot, on the heating element.
Unplug the unit before taking out the inner pot.
Do not attempt to repair, dismantle or modify the unit in case of malfunction.
In case of a damaged power cord, please refer to our authorized service center to purchase
a new one.
SHORT CORD INSTRUCTIONS:
Do not use with an extension cord. A short power supply cord is provided to reduce the risks
resulting from being entangled in or tripping over a long cord.
ELECTRIC POWER:
If the electrical circuit is overloaded with other appliances, your unit may not operate properly.
It should be operated on a dedicated electrical circuit (power point).

PREPARATION FOR USE:
Before using the Rice Cooker for the first time:
Warning: when using for the first time, the Rice Cooker may emit slight odour which is not
harmful and will disappear after a few minutes. This is because a protective oil was applied to
protect parts from possible friction in transport.
Carefully unpack the Rice Cooker and remove all the packing materials.
Use a soft sponge and soapy water to remove any dust on the surface that may happen during
packing and transport. Allow the Rice Cooker to dry before use.
Place the Rice Cooker on a flat, heat-resistant non-flammable surface.
Connect the power cord to the socket on the Rice Cooker.

PRODUCT OVERVIEW:
1. Steam vent
2. Control panel
ACCESSORIES:
Rice Spoon Measuring Cup Steam Tray Power Cord Rice Spoon Holder

CONTROL PANEL:
Once the appliance is plugged in, it will beep once, and the screen will be illuminated.
Instructions for the control panel:
“Start” button:
Press “Start” button after you selected your desired function, the unit enters the operating
mode and starts heating.
“Cooking Program” button:
Press the “Cooking Program” button repeatedly to choose your desired function,
The function indicator will be illuminated. Press the “Start” button to begin operation.
“Rice Taste” button:
Press the “Rice Taste” button repeatedly to choose between 3 rice cooking modes:
Regular, Hard or Soft according to your taste.
“Hours” and “Minute” buttons:
Press these buttons to adjust time.
The time can be adjusted for Congee, Soup and Steam.
Also use the “Hour” and Minute” button when setting a count down timer for a delay start.

“Delay Start” button:
The “Delay Start” button can be used to set a countdown timer for a delay start.
When the set amount of time has elapsed, the unit will turn on and operate.
This is ideal to use when you wish to set the unit up to operate at a later time during the day.
The countdown timer can be set for a minimum time of 10 minutes and a maximum time of 24
hours.
How to set a countdown timer for a delay start, using the “Delay Start” button:
Press the “Delay Start” button.
Set up your chosen cooking program.
Then, use the “Hour” and “Minute” buttons to set your countdown timer.
The countdown timer can be set for a minimum of 1 minute and a maximum of 24 hours.
When your desired countdown time is shown on the screen, press the “Start” button.
The countdown time will be shown on the screen. When it reaches 00:00, the Rice Cooker will
begin cooking with your chosen cooking program.
“Keep Warm” and “Cancel” button
“Keep Warm”: Press the “Keep Warm” button in when the unit is in standby mode, the unit will
start to keep the food contents warm at a temperature of 70 Degrees Celsius.
This “Keep Warm” button will not function while the cooker is in operation.
This button also is used as a “Cancel” button.
“Cancel”: Press the “Cancel” button during any state of operation, the unit enters standby
mode.
Tip: It is recommended to keep warm less for than 5 hours, in order to prevent the rice from
changing in color and taste.

GENERAL OPERATION:
Cooking Rice:
Use the included measuring cup to measure rice and liquid.
Do not wash rice in the inner pot as much as possible so as not to scratch the surface of the
inner pot. We suggest that rice is washed in a separate bowl (not included).
Place ingredients into the inner pot.
Place the inner pot inside the main body of the Rice Cooker.
If the lid is not completely closed, it might affect the operation of the cooker.
Attach the power cord to the cooker and the power outlet properly.
Press the “Rice Taste” button repeatedly to choose between 3 rice cooking modes:
Regular, Hard or Soft according to your taste.
The difference between these is:
Regular: Cooking time is set by Fuzzy Logic, then it is followed by a 10-minute simmer time, not
as long as the soft mode.
Hard: Cooking time is set by Fuzzy Logic. No simmer time at the end of cooking.
Soft: Cooking time is set by Fuzzy Logic, then it is followed by a 15-minute simmer time.
A longer simmer time allows rice to become softer.
Function Cooking time
Simmer time, count
down time at the
end of cooking
Remarks
Regular Depend on amount
10 mins
Simmer time will begin at the end of
cooking time. At the end of the simmer
time, the unit will go into Keep Warm
mode.
Hard Depend on amount
None
When cooking is complete, the unit will
go into Keep Warm mode.
Soft Depend on amount
15 mins
Simmer time will begin at the end of
cooking time. At the end of the simmer
time, the unit will go into Keep Warm
mode.

The function indicator will be illuminated. Press the “Start” button to begin operation.
The dashes will be illuminated on the screen.
The “Start” button as well as function indicator will be illuminated and still.
The rice cooker will heat up inside and its rice will begin cooking.
The Fuzzy Logic technology will determine how much rice and water has been added and self-
regulate the cooking time and temperature.
The process inside is pre-heating, absorbing, heating up, boiling.
At the end of the cooking time, the simmer process will begin.
At the end of the simmer process, the timer will reach 00:00.
The Rice Cooker will make an audible alert.
The Rice Cooker will automatically enter Keep Warm Mode.
The light for Keep Warm on the control panel will be illuminated.
The time on the screen will start to display the amount of time the Rice Cooker has been in
Keep Warm Mode.
Press “Cancel” at any time to stop the Keep Warm mode.

Using the Cooking Program button:
Congee, Soup, Steam and Reheat:
Place ingredients into the inner pot.
Place the inner pot inside the main body of the Rice Cooker. If the lid is not completely closed, it
might affect the operation of the cooker.
Attach the power cord to the cooker and the power outlet properly.
Press the “Cooking Program” button repeatedly to choose between Congee, Soup, Steam or
Reheat.
Use the “Minute” and “Hour” buttons to change the cooking times.
Minutes can be set in 10-minute intervals, hours can be set in 1-hour intervals.
Press the “Start” button to begin cooking.
Mode
Default time
Lowest time range
Longest time
Congee
Default time:
30 mins Lowest time 10 minutes
Highest time 4 hours
Soup
Default time: 1
hour Lowest time 30 minutes
Highest time 5 hours
Steam
Default time:
10 minutes Lowest time 10 minutes
Highest time 2 hours
Once the “Start” button has been pressed, the contents inside will begin to heat.
The cooking timer will count down once the contents inside have reached 100°C.
At the end of cooking, the timer will reach 00:00.
The Rice Cooker will make an audible alert.
The Rice Cooker will automatically enter Keep Warm Mode.
The light for Keep Warm on the control panel will be illuminated.
The time on the screen will start to display the amount of time the Rice Cooker has been in
Keep Warm Mode.
Press “Cancel” at any time to stop the Keep Warm mode.

Reheat:
Press the “Cooking Program” button repeatedly until the indicator light for Re-Heat is
illuminated.
Press the “Start” button”.
The rice cooker will heat up to 112 ℃.
When the pot has reached 112 ℃, the unit will stop re-heating.
The Rice Cooker will make an audible alert.
The Rice Cooker will automatically enter Keep Warm Mode.
The light for Keep Warm on the control panel will be illuminated.
The time on the screen will start to display the amount of time the Rice Cooker has been in
Keep Warm Mode.
Press “Cancel” at any time to stop the Keep Warm mode.
Tips on cooking rice:
Measure rice and water with the measuring cup provided.
The measuring cup used for measuring rice holds only 170 grams. It is not a standard Australian
cup size.
Ensure the rice in the measuring cup is level.
Spread rice in the inner bowl evenly, do not lump it in one spot/side.
The rice cooker will switch to keep warm after the rice has been cooked. It is best to serve the
rice quickly because it might dry out too much if left in the pot on the warm setting for too
long.
Be sure not to wash rice in inner pot as much as possible so as not to scratch the surface.
For dry, hard, multigrain please soak in hot water for 2-3 hours before cooking.
Fill the washed rice in inner pot and add appropriate amount of water.
When cooking rice, 1 cup of rice matches 1.1 cups of water, when cooking congee 1 cup of rice
matches 10 cups of water, according to personal taste and experience, proper adjustment of
the ratios is allowed, however, do not fill water over the maximum water level mark.
Making rice
Making congee
Maximum amount of
rice (cup)
Minimum amount of
rice (cup)
Maximum amount
of rice (cup)
Minimum amount of
rice (cup)
10
2
3
1

Recommended proportions:
Basmati Rice – 2 cups rice, 2.5 cups water
Jasmine Rice – 2 cups rice, 2.75 cups water
White Rice – 2 cups rice, 2.75 cups water
Brown Rice – 2 cups rice, 3 cups water
Sushi Rice – 2 cups rice, 2.5 cups water *plus other ingredients
Arborio Rice – 2 cups rice, 3 cups water
Please Note: It is not recommended to cook a large amount of arborio or risotto rice in this
appliance. This type of rice contains high levels of starches. Starch and water may overspill
through the steam vent and splash onto the top cover of the appliance.
*Making sushi rice – use the recommended proportions of 2 cups rice and 2.5 cups water. Cook
until the timer reaches zero. Open the rice cooker lid and keep the appliance on keep warm
mode. Stir in ¼ cup rice vinegar, 1 tablespoon sugar and a pinch of salt. Mix thoroughly then
rest in the warmed pot for ten minutes.
Making congee – use a long grain white rice and measure 1 cup rice and 8 cups water.
Making soup – add water or broth liquids only, then add the meats, vegetables and spices.
Never use thickened liquids such as tomato soup base, chowder or cheesy soup.
This appliance is designed to make thin soups such as Vietnamese Pho, because of the steam
vent.
Using thickened liquids may damage the appliance.
Using the steam tray:
Use the steam tray inside the rice cooker to steam solid food such as vegetables. Other ideal
foods to be steamed include dim-sims, dumplings, wontons, chicken and fish. They can be
cooked at the same time as your rice to save time and counter space.
Do not try to cook the maximum amount of rice when cooking rice as well as using the
steaming tray. The rice will double in size when cooked and there will not be enough room for
the maximum amount of cooked rice as well as the steamer tray.
Insert the steaming tray towards the end of a rice cooking cycle and take it out when the foods
are cooked. Be careful of the hot steam and wear oven mitts to protect your hands.

Hard boiled eggs can be prepared by using the steaming tray. Add water inside the inner pot.
Place the steaming basket inside the inner pot, add raw eggs to the steaming basket. The
eggs will take 20 – 25 minutes depending on how you like them cooked.
Press the “Cooking Program” button and then use the “Minute” and “Hour” buttons to change
the cooking time.
Press the “Start” button to begin cooking.
TROUBLESHOOTING:
Rice
rice crust is too brown
Rice being
kept warm
the switch is
nonresponsive
such noises occur
is too tough
is raw
is too soft
spills over
has strange
has strange
is too dry
proportion of rice and water is right
√
√
√
√
√
the plug is properly connected
such as 'pa-', it could be resulted from the
heat expansion of the water drops on the
outside of the inner pot
the rice is washed clean
√
√
√
the bottom of the inner pot is placed properly
√
√
√
there is foreign object on the sensor or the
outside of the inner pot
√
√
√
√
√
√
√
the safety-valve is properly installed
√
√
√
√
√
there is oil with the rice being cooked
√
√
√
the rice is stirred after the cooking is finished
√
√
The time of warmth-keeping is over 5 hours, or
the amount of rice being kept warm is too little
√
√
√
the rice kept warm with the rice scoop
√
cold rice is being kept warm
√
√
the lid is not completely closed, or the inner pot
is not clean
√
√
the cooker is unplugged or switched off during
cooking
√
√
1. Above is a guide and inspection for common fault.
2. Please do not dismantle and repair it by yourself to avoid danger. If there is any error that cannot be
self-recovered, please contact the authorized service center for repair.
When
Please check if

FAULTS AND SOLUTIONS:
No.
Errors
Possible Reasons
Suggested Solutions
1
Indicating
light OFF
The heating
element is not
hot
1. Disconnection between the
circuit board and the power
supply.
2. Line fault in the power
panel.
3. Disconnection in the circuit
board
4. Errors in the main circuit
board
1. Check the switch, the plug,
the socket, the fuse and the
power cord and see if they
are in good condition
2. Send to the authorized
service center for repair
The heating
element is hot
Errors in the main circuit board
Send to the authorized
service center for repair
2
Indicating
light ON
The heating
element is not
hot.
1. Errors in the bottom
thermistor
2. Heating element burn out
3. Disconnection in the circuit
board
4. Line fault in the power panel
Send to the authorized
service center for repair
3
'E1' is displayed on the LCD
screen
1. Short circuit of the bottom
sensor
2. A temperature over 213℃
1. Send to the authorized
service center for repair
2. Wait until the temperature
becomes normal and retry
4
'E2' is displayed on the LCD
screen
1. Open circuit of the bottom
sensor
2. A temperature below -27℃
1. Send to the authorized
service center for repair
2. Wait until the temperature
becomes normal and retry
5
'E3' is displayed on the LCD
screen
Short circuit of the thermistor
inside the lid of cooker
Send to the authorized
service center for repair
6
'E4' is displayed on the LCD
screen
1. Open circuit of the
thermistor inside the lid of
cooker
2. A temperature below -27
℃
1. Send to the authorized
service center for repair
2. Wait until the temperature
becomes normal and retry
7
The rice is still raw, or the
cooking time is too long
1. Deformation of the heating
element
2. Inclination of the inner pot
3. Foreign object exists
between the inner pot and the
heating element
4. Deformation of the inner pot
5. Errors in the main circuit
board
1. Send to the authorized
service center for repair
2. Rotate the inner pot
slightly to make it seat
properly
3. Clean off the foreign
objects
4. Send to the authorized
service center to change a

6. Errors in the bottom
thermistor
new inner pot
5. Send to the authorized
service center
6. Send to the authorized
service center
8
The rice becomes brown or
the 'Warmth-Keeping' mode
is not working properly
1. Errors in the main circuit
board
2. Errors in the bottom
thermistor
Send to the authorized
service center
9
A big overflow when making
porridge
1. Errors in the main circuit
board
2. Errors in the thermistor
inside the lid of cooker
Send to the authorized
service center
10
No boiling over a long time
when making rice or porridge
1. Errors in the main circuit
board
2. Errors in the thermistor
inside the lid of cooker
Send to the authorized
service center
CLEANING AND MAINTENANCE:
Note: Unplug the Rice Cooker and allow it to cool down completely before handling, cleaning
or storing.
Do not immerse the power cord, plug or the Rice Cooker housing in water or any other liquids
as it may result in damage, fire, electric shock or injury.
Do not use gasoline, abrasive cleaners or steel wool to clean.
Always detach the power cord from the unit before cleaning.
Inner Pot:
Remove the inner pot from the unit and wait till it cools down to normal temperature before
cleaning.
Wash in warm soapy water after use.
Use a mild detergent and a non-abrasive sponge.
Dry with a soft dry cloth.
Nonstick coating might change color or have spots after some use, this is normal.
The inner pot is dishwasher safe.
Accessories:
The Rice Spoon, Measuring Cup, Steam Tray and Rice Spoon Holder can be washed in warm
soapy water after use.
Wash in warm soapy water after use.
Use a mild detergent and a non-abrasive sponge.
Dry with a soft dry cloth.
The Rice Spoon and Steam Tray are dishwasher safe at a maximum of 100 Degrees.

Parts:
Inner lid, sealing ring, steam valve and outer casing:
The inner lid and sealing ring are not removable, do not remove them.
Use clean soft dry cloth to clean.
Clean the inner lid and sealing ring every time after use.
The surface of the sealing ring may change color or have spots after use,
This does not affect the operation of the unit.
The steam valve can be wiped with a soft dry cloth
The outer casing of can be wiped with a soft dry cloth.
The Bottom Sensor and Heating Element (underneath the inner pot)
Use smooth abrasive sandpaper (such as #600) in removing cooked rice from the heating
element or bottom sensor.
STORING:
Allow the Rice Cooker to cool down completely before storing. Store the Rice Cooker in an
upright position in a dry location. Do not place any heavy items on top of the Rice Cooker
during storage as this may result in possible damage to the Rice Cooker.
SPECIFICATIONS:
Voltage
Power
Capacity
220V~50Hz
900W
5.0 L

This manual suits for next models
1
Table of contents

