Healthy Choice CW602 User manual

HOUSEHOLD USE ONLY
Carefully read all instructions before use and save for future reference.
Model: CW602 | Batch: PR4745
CARPET WASHER

2
FULL
FILL LINE
DO NOT OVERFULL
12
5
13
11
12
9
8
6
10
14
14
16
15
14
17
18
3
4
7
A

1. Handle
2. Solution release trigger
3. Water solution tank cap
4. Maximum lling line
5. On/Off switch
6. Full line
7. Dirty water tank
8. Exhaust lter housing
9. Dirty water tank handle
10. Dirty water tank locking latch
11. Water solution tank
12. Water solution tank release lever
13. Cord clip
14. Cord hooks
15. Carrying handle
16. Cord
17. Handle release pedal
18. Screw x2
COMPONENTS
ED
B C
18
1
11
12
17
10
9
3
ED
B C
18
1
11
12
17
10
9
3

ED
B C
18
1
11
12
17
10
9
3
ED
B C
18
1
11
12
17
10
9
3
F
H
J
I
G
U N LO CK
LO C K
FULL
19
7
9
20
8
21
4
F
H
J
I
G
U N LO CK
LO C K
FULL
19
7
9
20
8
21
4
F
H
J
I
G
U N LO CK
LO C K
FULL
19
7
9
20
8
21
4
F
H
J
I
G
U N LO CK
LO C K
FULL
19
7
9
20
8
21
4
F
H
J
I
G
U N LO CK
LO C K
FULL
19
7
9
20
8
21
4
19. Dirty water tank cap
20. Filter
21. Motor lter
IMPORTANT SAFEGUARDS
PLEASE READ AND SAVE THIS INSTRUCTION MANUAL
FOR FUTURE REFERENCE
When using the appliance, basic safety precautions should be followed,
including:
1. Read all instructions.
2. This product is designed for cleaning carpets and rugs. It is only
intended for private use and not suitable for commercial purposes.
3. Only use the product as described in this user manual. Any other
use is considered improper and may result in damage to property or
persons.
4. The manufacturer or vendor cannot be held liable for damages or
injury incurred through improper or incorrect use.
5. WARNING! Risk of electric shock! A faulty electrical installation,
excessive line voltage, or incorrect operation may result in an electric
shock. Only connect the product if the line voltage of the socket
corresponds to the data on the rating plate. Only connect the product to
an easily accessible socket so that you can quickly disconnect it from the
mains supply in the event of a problem.

6. Do not use the product if it is damaged or if the mains cord or plug
is defective. If the mains cord is damaged, it must be replaced by the
manufacturer, its service agent or similarly qualied persons in order to
avoid a hazard.
7. Do not open the housing; instead, have a qualied professional
perform repairs.
8. Only parts that comply with the original device data may be
used for repairs. This product contains electrical and mechanical parts
which are essential for providing protection against sources of danger.
9. Do not use the product with an external timer or separate remote
control system.
10. Do not immerse the product or the cord in water or other liquids.
11. Never touch the mains plug with wet or damp hands.
12. Do not pull the mains plug out of the socket by the cord; instead,
always pull it out by the plug itself.
13. Never move, pull, or carry the product by its cord.
14. Keep the product and mains cord away from open ames and
hot surfaces.
15. Lay the mains cord so that it does not pose a tripping hazard.
16. Do not kink the mains cord and do not lay it over sharp edges.
17. Only use the product indoors. Do not use the product in damp
rooms or in the rain.
18. Never reach to retrieve an electrical device if it has fallen into water.
In such a case, immediately disconnect the mains plug.
19. Never insert any objects into the housing.
20. Always switch the product off and unplug it when you are not using
it, when you intend to clean it, or in the event of a malfunction.
21. This product is not intended for use by persons (including children)
with reduced physical, sensory or mental capabilities, or lack of
experience and knowledge, unless they have been given supervision or
instruction concerning the use of the product by a person responsible for
their safety.
22. Children should be supervised to ensure that they do not play
with the product.

23. Cleaning and user maintenance should not be made by children
without supervision.
24. Keep children away from the product and mains cord.
25. Do not leave the product unattended while in use.
26. Improper handling of the product may result in damage to the
product.
- Never expose the product to high temperatures (heaters etc.) or to the
effects of the weather (rain etc.).
- Stop using the product if any of the parts are cracked, broken,
or deformed. Only replace damaged parts with corresponding original
spare parts.
27. Do not use the product to suck up any liquid other than the cleaning
solution dispensed from it.
- Do not use the product to suck up wet or damp materials such as mud,
tile grout, plaster ller, or caulking.
- Do not use the product without the tanks in place.
- Make sure all openings and outlets are free and clear of any blockage
that may reduce airow.
- Keep hair, loose clothing, ngers and other body parts away from the
openings and moving parts.
- Do not use the product to suck up ammable or toxic liquids such as
petrol, chlorine bleach or drain cleaner, or use it in areas where they
may be present.
- Do not suck up anything that is burning or smoking, such as cigarettes,
matches, or hot ashes.

Improper handling of the product may cause injury.
Do not connect the product to a mains socket until it is fully
assembled.Do not operate the product without the handle being rmly
screwed into place.
1. Set the product in an upright position.
2. Place the handle 1 rmly onto the main body of the product. Make
sure that the cord clip 13 is on the same side as the cord hooks 14 .
3. Using a crosshead screwdriver, drive one screw 18 into each side of
the handle and fasten them securely. Do not overtighten the screws, as
this could strip the screw holes.
Risk of damage! Using the product as a dry vacuum will damage it. Only
use the product with an appropriate carpet cleaning solution.
1. Remove as much furniture from the room as possible. Place a plastic or
other protective covering under and around any furniture left in the room.
2. Thoroughly vacuum the carpet to be cleaned with a regular vacuum
cleaner.
3. Test: Dampen a white cloth with the carpet cleaning solution you are
going to use with the product. Rub the cloth gently over a small test area
on the carpet and check for any colour bleeding. If the cloth remains
clean, it should be safe to clean the carpet.
ASSEMBLY
CARPET PREPARATION

Risk of injury! Improper handling of the product may cause injury. Always
unplug the product before lling the water solution tank. Avoid prolonged
skin contact with cleaning solutions. Keep carpet cleaning solution out of
the reach of children. In case of contact with eyes, rinse immediately with
plenty of water and seek medical advice.
Risk of damage! Using the product without the water solution tank in
place or with a wrong solution may damage the product. Always make
sure that the water solution tank is properly in place before using the
product. Do not use any solvents, cleaners with strong acidic or strong
alkali formulas, or any type of cleaning solution not specically for use in
carpet cleaning machines.
• Only use suitable (low-foaming) carpet cleaning solution. Using
incorrect solutions may cause excess foaming, which will prevent the
product from working effectively.
• Carpet cleaning solution is NOT included. Most commercially available
low foaming carpet cleaning solutions may be used. Always read the
manufacturer’s instructions before use.
1. Unplug the product.
2. Lift up the water solution tank release lever 12 and then remove the
water solution tank 11 from the product.
3. Unscrew and then remove the water solution tank cap 3from the
water solution tank.
4. Following the instructions on the bottle, add the cleaning solution and
then ll the water solution tank with warm tap water (max. 40°C). Do not
ll over the maximum lling line (FULL) 4.
FILLING THE WATER SOLUTION TANK
OPERATION

5. Replace the water solution tank cap.
6. Place the water solution tank back into position by pushing it down
until it clicks into place.
Repeat the steps above (except step 4) to empty the water solution tank
after use and before storage.
Before cleaning, determine where to start and stop, making sure you will
not walk over previously cleaned areas.
• Do not oversaturate the carpet with cleaning solution.
• For heavily soiled areas, additional applications may be necessary.
1. Plug the mains cord 16 into a mains socket and turn the product on by
setting the on/off switch 5to the ON position.
2. Step on the handle release pedal 17 to lower the handle 1into the
cleaning position.
3. While pressing the solution release trigger 2, pull the product in a
backwards direction towards you.
4. Release the solution release trigger and push the product forwards in
the same path to remove the dirty cleaning solution from the carpet.
5. Repeat steps 3–4 to clean other parts of the carpet or heavily soiled
areas.
6. When cleaning is done, turn the product off by setting the on/off
switch to the OFF position.
7. Push the handle forwards until it is positioned upright and locked into
place.
8. Unplug the product and wrap the mains cord around the cord hooks.
CLEANING A CARPET

- Use the carrying handle 15 to lift up the product and move it to the
desired cleaning location.
- Do not run the product over the mains cord 16 by holding any excess
cord in your free hand while cleaning.
- Use a steady, moderate, forwards and backwards motion. Always work
from back to front across a room to avoid stepping on wet carpet.
- Do not make the carpet too wet. Use no more than two sets of forwards
and backwards strokes while releasing carpet cleaning solution. Always
follow with dry strokes; the more dry strokes the better.
- Wipe any cleaning solution from woodwork and furniture to prevent any
damage.
- Allow plenty of time for the carpet to dry and avoid walking on it until
it is dry. Increased air circulation (open doors, fans, etc.) or the use of a
dehumidier will help the carpet dry thoroughly and prevent the growth
of mold or mildew.
- Vacuum the carpet thoroughly before cleaning it and after it has dried.
Risk of injury! Improper handling of the product may cause injury.
Always unplug the product before emptying the dirty water tank.
An automatic shut-off device prevents the product from picking up more
dirty water than the dirty water tank can hold. You will know the dirty
water tank needs to be emptied when:
• the motor sound rises in pitch,
• the dirty solution has reached the FULL line 6in the dirty water tank.
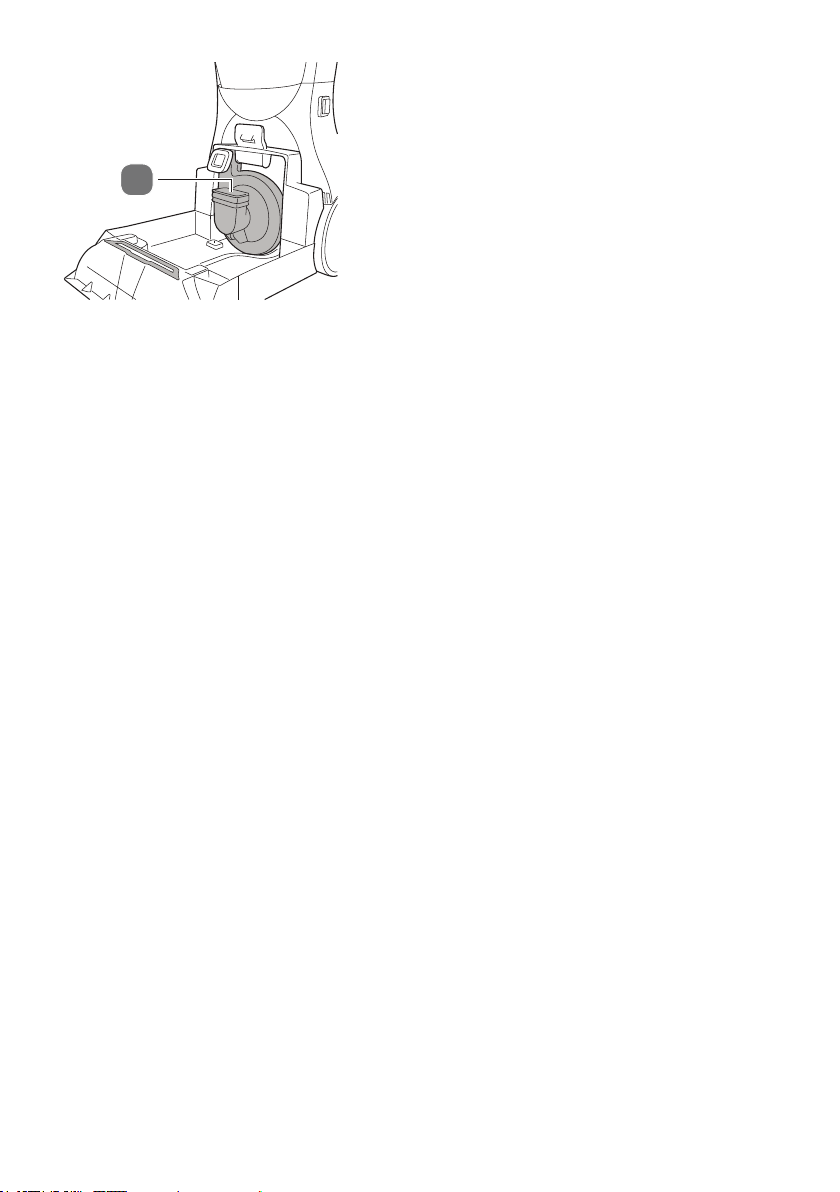
1. Unplug the product.
2. Unlock the dirty water tank 7by pressing the dirty water tank locking
latch 10 and lifting up the dirty water tank handle 9at the same time.
Remove the dirty water tank from the product.
3. Open the dirty water tank cap 19 by turning it anticlockwise, so the
grip points to the word “unlock”.
TIPS FOR CARPET CLEANING
EMPTYING THE DIRTY WATER TANK

4. Empty the dirty water tank, replace the dirty water tank cap and turn
it to the “lock” position. Then place the dirty water tank back into the
product.
5. Push the dirty water tank handle down until the dirty water tank
locking latch clicks into place.
Risk of injury! Improper handling of the product may cause injury. Always
unplug the product when not in use, relling the tanks, cleaning it, or
performing maintenance.
Risk of damage! Improper handling of the product may result in damage.
Do not use any aggressive cleaners, brushes with metal or nylon bristles,
or sharp or metallic cleaning utensils such as knives, hard scrapers and
the like. They could damage the surfaces. Never immerse the motor unit
in water or any other liquids and do not rinse it under the tap or with a
hose.
CLEANING THE FILTERS
Risk of damage! Improper handling of the product may result in damage.
Do not clean the lters with any chemicals as this will destroy them.
1. Remove the dirty water tank 7as described in the section “Emptying
the dirty water tank”.
2. Remove the exhaust lter housing 8from the dirty water tank.
3. Pull out the lter 20 from the exhaust lter housing.
4. Rinse the lter with warm water (max. 40°C). Allow the lter to dry
thoroughly.
CLEANING AND MAINTENANCE

CLEANING THE PRODUCT
1. Unplug the product.
2. Make sure the water solution tank 11 and the dirty water tank 7are
empty (see sections “Filling the water solution tank” and “Emptying the
dirty water tank”).
3. Use a soft damp cloth to wipe off the product and accessories. Then
let all parts dry completely.
STORAGE
5. Replace the lter and put the exhaust lter housing back into the dirty
water tank.
6. With the dirty water tank still removed, pull out the motor lter 21.
7. Rinse the motor lter with warm water. Allow the motor lter to dry
thoroughly.
8. Replace the motor lter and put the dirty water tank back into the
product as described in the section “Emptying the dirty water tank”.
Risk of damage! Mineral deposits and mildew can form when cleaning
solution and/or water is left in the tanks, affecting the performance of the
product.
Do not store the product with cleaning solution left in the water solution
tank or dirty water left in the dirty water tank.
All parts must be completely dry before being stored.
- Always store the product in a dry area.
- Protect the product from direct sunlight.
- Store the product so that it is not accessible to children.
Some problems may be caused by minor faults that you can x yourself.
To do so, follow the instructions in the following table. If it is still not
possible to resolve the problem, contact customer service. Do not repair
the product yourself.
TROUBLESHOOTING
Technical Parameters
Product Name Carpet Washer
Model No. CW602
Rated Voltage 220V-240V~
Rated Frequency 50Hz/60Hz
Power 600W
Water solution tank capacity 1.3L to FULL line (max 2.3L)
Dirty water tank capacity 1.7L to FULL line (max 2.5L)
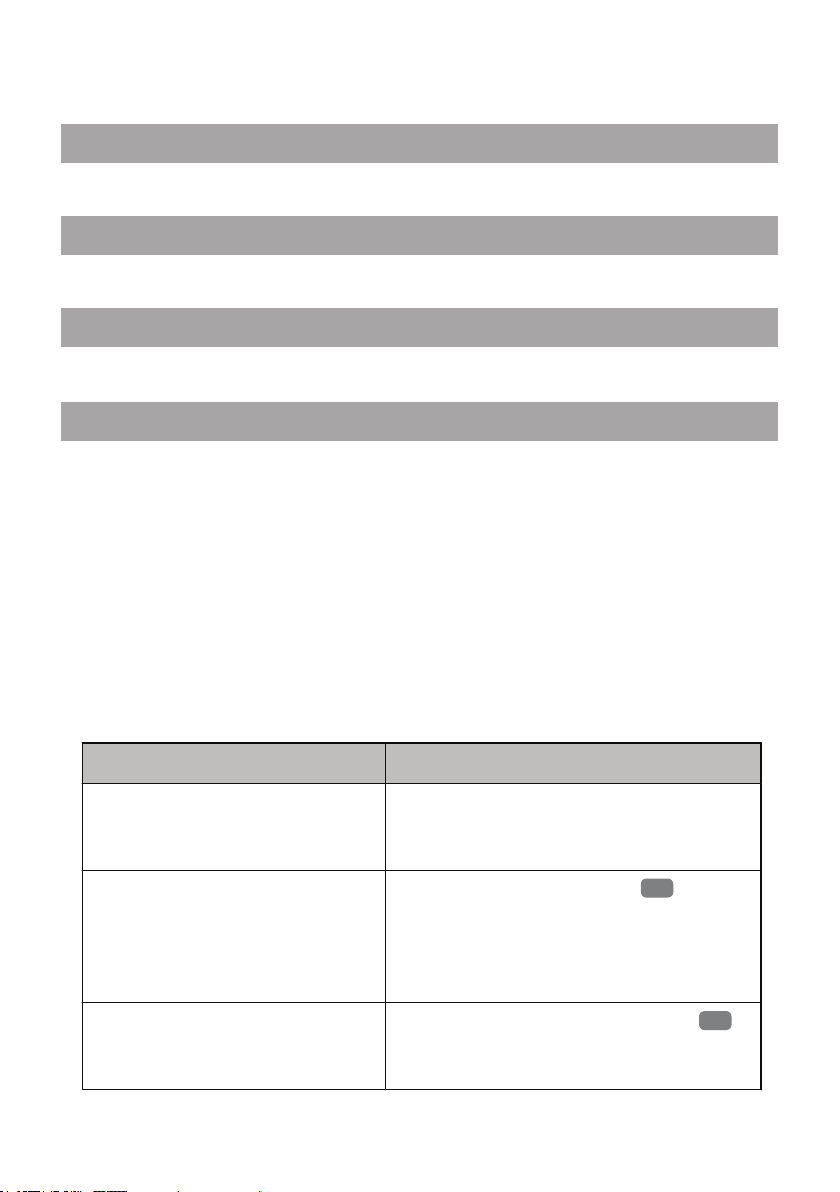
Troubleshooting
Some problems may be caused by minor faults that you can fix yourself. To do so,
follow the instructions in the following table. If it is still not possible to resolve the
problem, contact customer service. Do not repair the product yourself.
Problem Solution
The product will not operate. - Make sure the product is plugged in.
- Make sure that the main socket is not
defective.
Not enough suction during cleaning. - Empty the dirty water tank
7
; it may
be full and the automatic shut-off
engaged.
- Make sure the dirty water tank is
properly installed.
Cleaning solution will not dispense. - Make sure the water solution tank
11
is
fully inserted and securely in place.
-Refill the water tank if it is empty.
Technical data
Model: VC9385S
Power supply: 230 V~ 50 Hz
Output: 600 W
Protection class: II
IP code: IPX4
Water solution tank capacity: 1.3 L to FULL line (max. capacity 2.3 L)
Dirty water tank capacity: 1.7 L to FULL line (max. capacity 2.5 L)
Product code: 813704
Troubleshooting
18


www.lenoxx.com.au
1300 666 848
LenoxxElectronics LenoxxElectronics @LenoxxAustralia
Table of contents


