Hear Technologies back PRO Digital Overlay User manual
PRO Digital Overlay User Guide 1
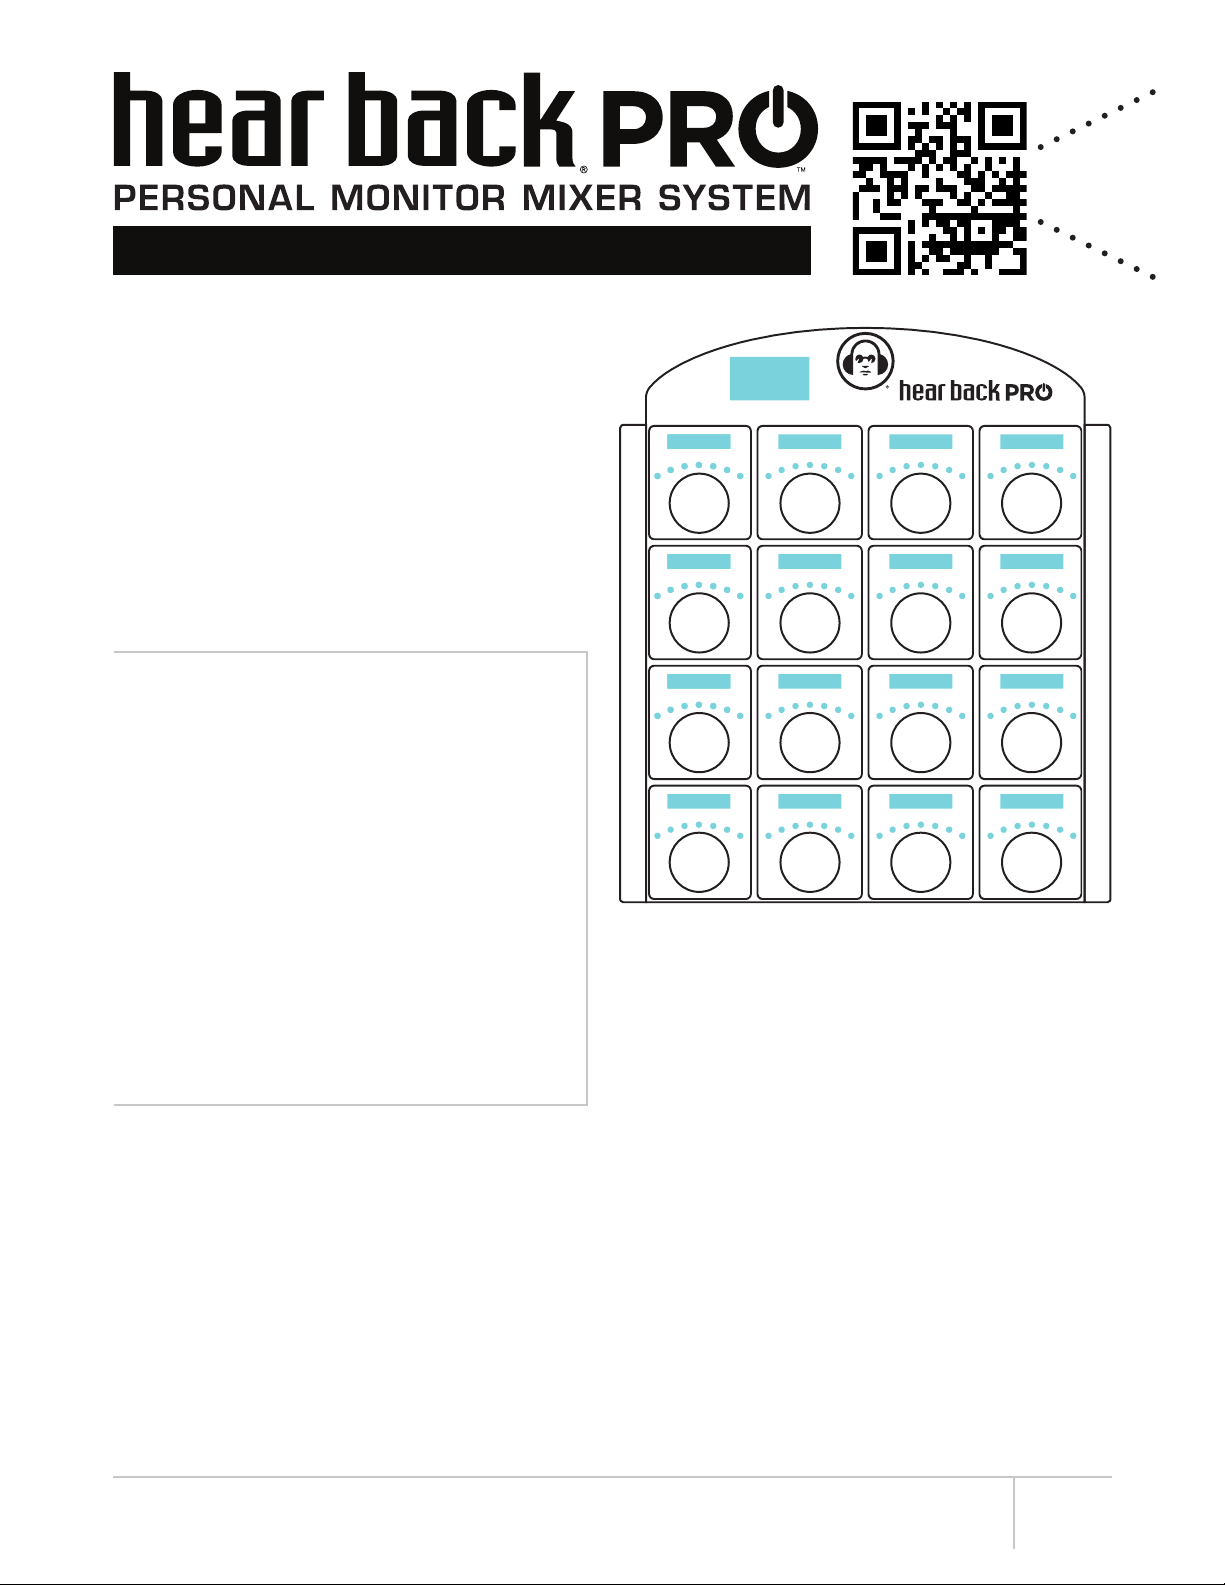
OVERVIEW
The PRO Digital Overlay is an ultra-thin faceplate for
electronic labeling of a Hear Back PRO Mixer. This attachable
upgrade modifies and expands the display of channels
and mixer functions through high contrast OLED graphical
displays. The Digital Overlay permanently mounts directly
onto the PRO Mixer’s face and connects via a ribbon cable
into the Mixer’s side expansion slot. The naming functions
can be accessed and updated through the iOS app or via
a computer, for added flexibility. The PRO Digital Overlay
is a time saving and easy to read solution to the standard
scribble strip for engineers and end users in studio sessions
and live entertainment settings.
ADVANTAGES / FEATURES
• Unobtrusive with a thin, ultra-low profile
(less than 3mm thickness)
• Rugged design for stage and touring
• Easy and quick installation
• Supports the use of letters, numbers, and
symbols when labeling channels and mixers
• Bright and easily legible OLED screens allow
for quick identification and control, even in low
light environments
• Mixers and channels can be named and
updated remotely with either the Hear Back
PRO iOS app or via a computer
PRO Digital Overlay
SCAN FOR
DOWNLOADS
A FEW NOTES BEFORE INSTALLATION
• Though the PRO Digital Overlay is rugged once installed onto the Mixer, DO NOT BEND OR TWIST THE OVERLAY, prior
to or during the installation process.
• Take care when handling the ribbon cable during the installation process. Creasing or twisting the cable can affect
performance of the Overlay.
• The PRO Digital Overlay is designed to be used with V6.1 firmware. Prior to use, the Hear Back PRO Hub firmware
must be updated to a minimum version of 6.1 with bootloader version 2.5 or higher. The PRO Mixer requires a minimum
firmware version of 6.1 with bootloader version 2.24 or higher. These software updates are available for download at:
www.HearTechnologies.com/support
OLED graphical displays for electronic labeling and
Mixer status

PRO Digital Overlay User Guide
2
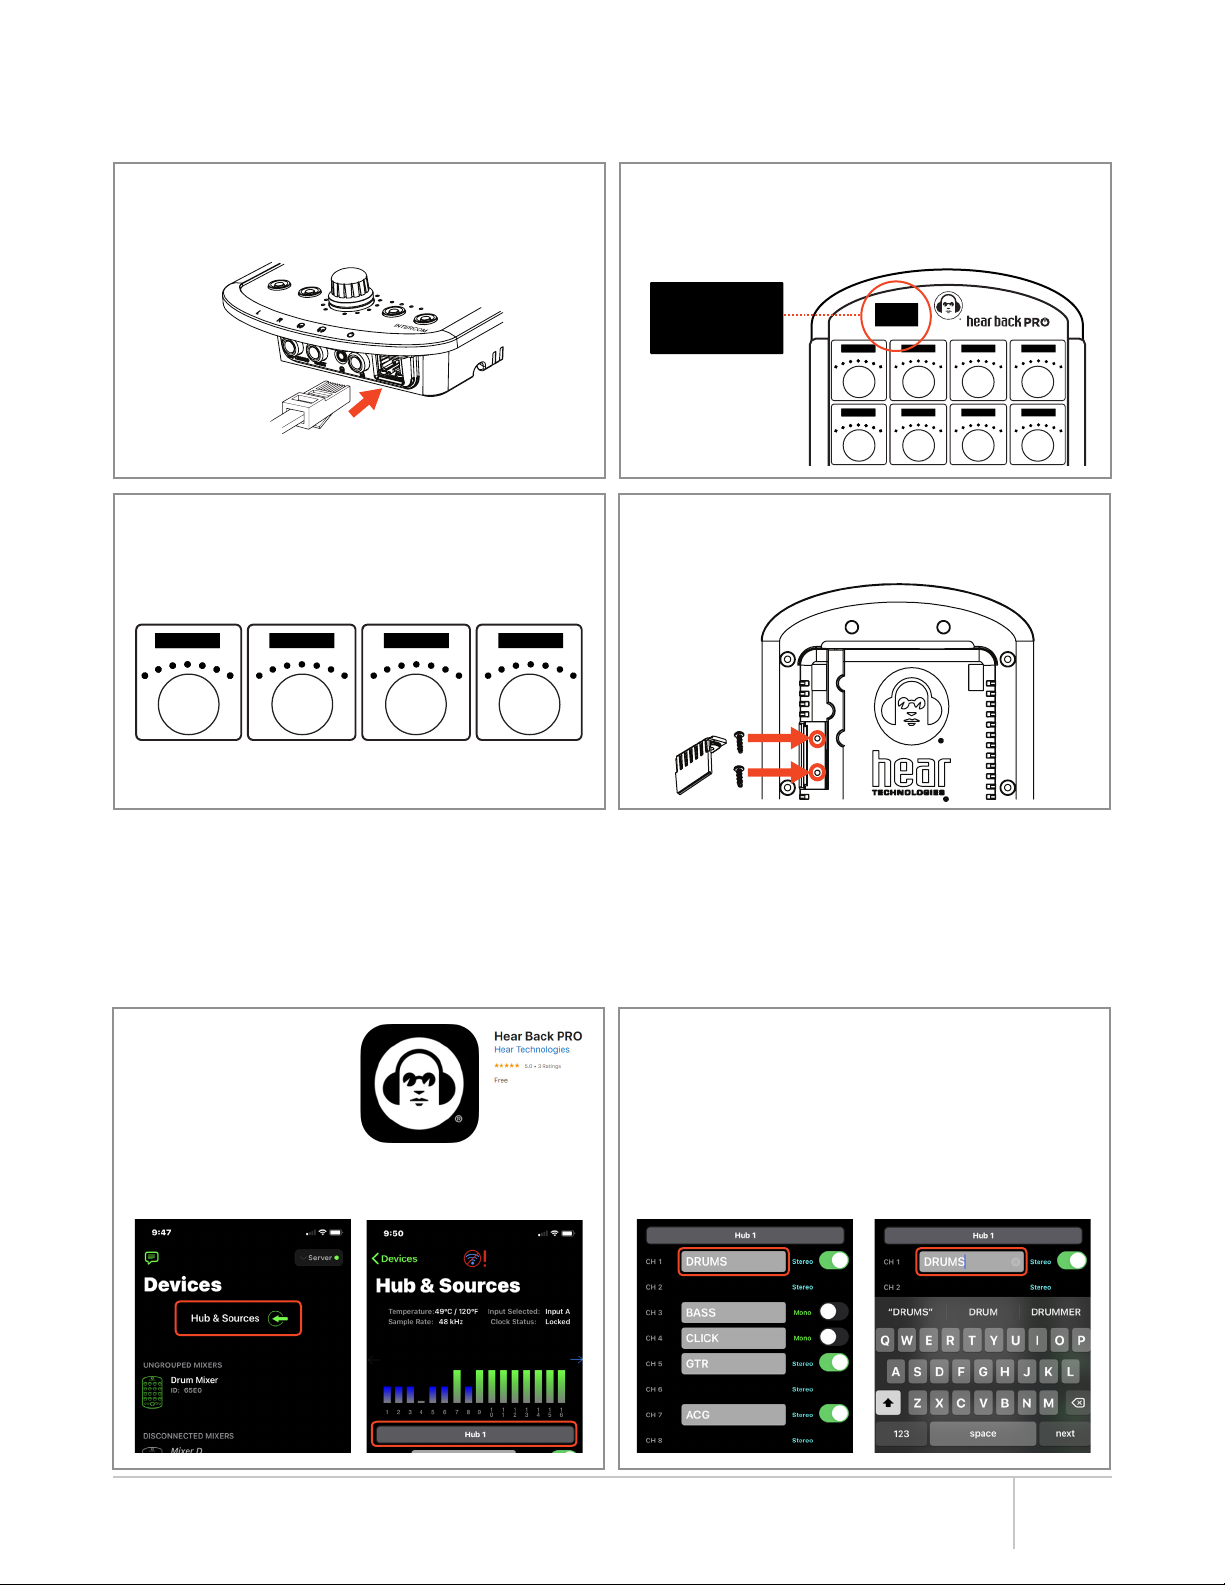
Remove 2 screws
and card cover
Remove tape from ribbon cable and
red release liner from sides
INSTALLATION
NOTE: Once mounted, the PRO Digital Overlay cannot be removed. Take adequate care when aligning and applying to
the PRO Mixer front.
1. Remove the two screws attaching the expansion
card slot cover to the Mixer. Keep screws for reuse.
2. Clean Mixer top edges with isopropyl alcohol and a
lint-free cloth (do not saturate).
3. With the Overlay face-down, CAREFULLY remove
the tape securing the flexible ribbon cable to the
bottom of the Overlay. Gently pull the tabbed end of
the tape while applying pressure to the opposite end.
4. On the left and right sides of the Overlay, peel the
red release liner off the double-sided mounting tape.
Clean top edges with
isopropryl alcohol and
lint-free cloth
5. Align Digital Overlay above PRO Mixer so the knob
spaces are centered over the corresponding knobs.
6. Press Digital Overlay firmly onto Mixer faceplate
along the side edges. DO NOT apply pressure to
any screens.
7. Gently curving the flexible ribbon cable, turn the blue
connector card towards the expansion slot and align
with top rails. (DO NOT TWIST OR CREASE the
ribbon cable).
8. Slide connector card face “UP” firmly into the top
rails of the expansion slot until it clicks.
Apply pressure
along side edges,
NOT in center to
any screens
Align knob spaces
over channel knobs
Slide blue connector card
face “UP” along top rails
of expansion card slot
until it clicks
WARNING! DO NOT TWIST OR CREASE
flexible ribbon cable
PRO Digital Overlay User Guide 3
INITIAL SETUP
NOTE: If not already installed, update the Hear Back PRO Hub to a minimum firmware version of 6.1 with bootloader 2.5 or
higher, and PRO Mixer to a minimum firmware version 6.1 with bootloader 2.24 or higher via the iOS app or Desktop FW Updater.
1. Apply power to the Mixer by inserting the network
cable into the Ethernet port.
2. Following the bootup sequence, the main screen
at the top left of the Digital Overlay will display the
Mixer’s firmware, bootloader, and overlay version.
3. Each screen above the 16 knobs will illuminate
and display either the default channel numbers
(INPUT 01, INPUT 02, etc.), or the channel
names stored in the V6 PRO Hub.
4. Attach the new expansion card slot cover, supplied
with the PRO Digital Overlay, using the original
screws that were removed during installation.
CHANNEL NAMING
Channel names can be created and updated instantaneously via the Hear Back PRO iOS app or the Desktop Config Editor
using a Windows computer connected to the PRO Hub. The Hub’s configuration file can also be edited directly via any
computer. These custom labels are stored remotely on the PRO Hub, allowing each Mixer to import the names when routing
is beyond the standard 16 channel 1:1. Channel names will display in UPPERCASE.
Using the Hear Back PRO iOS App
1. Open the mobile app
available from the
App Store:
Hear Back PRO
2. Select “Hub & Sources” > Select the desired Hub
(e.g. HUB 1) from the list beneath the level meters.
3. Scroll to the desired channel number to be updated
from the 32 available channels > Select the
associated gray box to the right of the “CH #”.
4. A keyboard will appear > Edit the name of the
channel using any combination of letters, numbers,
or available symbols, up to 9 characters in length.
5. Tap outside of the gray box to “Save”.
MIXER 65EO
M I X E R V 0 6 .1 0
B O O T V 02.25
O L E D V 0 1.0 8
MIXER 65EO
M I X E R V 0 6 .1 0
B O OT V0 2.2 5
OLED V01.08
INPU T 01 INPU T 02 INPUT 03 INPU T 04
INPUT 05 INPU T 06 INPUT 07 IN PUT 08
INPUT 01 INPUT 02 INPUT 03 INPUT 04
Default Channel Labels

PRO Digital Overlay User Guide
1. With the PRO Hub “ON”, plug a USB (B-Male) into the
“PROGRAM” port on the Hub’s Main Board and the
USB (A-Male) into a computer USB port.
2. If using Windows OS, a window should pop up
notifying you new hardware was found named “Hear
Back Pro Hub”. If using Mac OS, a new drive will
appear on your desktop named “HB_PRO”.
3. Open the drive and view the files. On a PC, locate
the drive in My Computer. On Mac, open the drive
on your Desktop or by opening Finder.
4. Open the “CONFIG.TXT” file > Listed are the PRO
Hub’s clock settings for input A/B, the mono/stereo
assignments for each channel, and the channel
name for each of the 32 channels stored.
5. Scroll down to the section that lists the “CH # Name =”
and find the channel to be edited.
6. Delete and replace the text following “CH # Name =”
with any combination of letters, numbers, or available
symbols, up to 9 characters in length.
Editing the Hub’s CONFIG.TXT File Directly
7. After completing all edits, click “Save”
8. Select “Hear Back PRO Hub” as location.
9. Click “Yes” to replace existing CONFIG.TXT file.
10. Click “Ok”. File is saved.
11. Click “Close”. Channel names are updated on the
Mixer.
NOTE: Channel names will not update until the
CONFIG.TXT file has been both SAVED and CLOSED.
150W 150W
Hear Back Hub V6 Windows Computer
Connect Hub
to Windows
OS via USB
CH 01 NAME = INPUT 01
CH 02 NAME = INPUT 02
CH 03 NAME = INPUT 03
CH 04 NAME = INPUT 04
CH 05 NAME = INPUT 05
CH 06 NAME = INPUT 06
CH 01 NAME = DRUM MIX
CH 02 NAME = DRUM MIX
CH 03 NAME = BASS
CH 04 NAME = CLICK
CH 05 NAME = 12ST GTR
CH 06 NAME = XYLOPHONE
4
1. With the PRO Hub “ON”, plug a USB (B-Male) into the
“PROGRAM” port on the Hub’s Main Board and the
USB (A-Male) into a computer USB port.
Using the Desktop Config Editor
150W 150W
Hear Back Hub V6 Windows Computer
Connect Hub
to Windows
OS via USB
2. Open HBPRO Config Editor > Click on “Get File”
3. Locate the Hear Back PRO drive in My Computer (PC)
or on your desktop (Mac) > Select the “CONFIG.TXT”
file > Click “Open”
4. Edit channel names with any combination of letters,
numbers, and supported symbols up to 9 characters.
Names will display in UPPERCASE.
NOTE: Clock configuration and stereo linking settings
can also be edited.
5. Click “Save” > Select Hear Back PRO drive as location
6. Click “Save” > Select “Yes” to replace existing
CONFIG.TXT file
7. Click “Ok” (File Saved) > Close HBPRO Config Editor
2
4 4

PRO Digital Overlay User Guide
MIXER NAMING
PRO Mixers can be named for easier identification via the iOS app. Mixer names will display UPPERCASE in the main screen
of the PRO Digital Overlay and within the mobile app. Mixer naming is saved only on the Mixer, not on the Hub.
0-9
A-Z
space
!
”
#
$
%
&
’
(
)
*
+
,
-
.
/
:
;
<
=
>
?
@
Supported
Characters
1. Open the Hear Back PRO iOS app > From the
“Devices” menu, select the Mixer to be named.
2. Click on the “Edit” icon next to the Mixer’s name.
3. Enter a custom name for the Mixer in the dialog box
up to 12 characters in length > Click “Done” to exit.
4. The “name” will update both in the mobile app and
on the Mixer being controlled.
CHANNEL SCREEN DISPLAY
Each screen above the 16 knobs displays either the default
channel numbers (INPUT 01, INPUT 02, etc.), or the
channel names stored in the V6 PRO Hub.
STEREO LINKS
When two adjacent channels are stereo linked, the vertical
bar icon “|” will appear on both sides of the channel name
(e.g. INPUT 01 and INPUT 02). These paired channels can be
named independently while being controlled simultaneously.
The iOS app however assigns one name to the stereo pair
and saves the name of second channel to be restored when
the stereo pair is removed.
SUBMIXES
Submixes are identified by a rectangular box around the
name in the channel screen above any of the Mixer’s 16
channel knobs (e.g. SUBMIX 01).
Submix names can be edited by using the Hear Back PRO
iOS app.
INPUT 01 INPUT 02 INPUT 03 INPUT 04
INPUT 01 INPUT 02 SUBMIX 01 INPUT 04
5
Naming a Submix via iOS App:
1. Open the Hear Back PRO iOS app > Under the “Devices”
menu, tap on the Mixer in which a Submix is to be named.
2. Select the dropdown arrow of the channel that contains
or will contain the submix. A dialog box will appear
highlighting selectable input channels.
3. Tap “Submixes” at the top right corner of dialog box >
Select the drop down arrow located next to the submix
that is to be renamed to expand the available options.
4. Select “Rename” to open a new dialog box > Type a
name for the submix > Select “Done” to save.
5. The channel screen will automatically update with the
submix name on the channel knob selected.

PRO Digital Overlay User Guide
GROUPED MIXERS
When Mixers are linked together, the first
Mixer in the group defaults as the master
Mixer, and each concurrent Mixer in the
group becomes a slave Mixer. Each slave Mixer in a group
will display “REMOTE CONTROL” in the main screen to
signify it is functioning in a group.
TEXT MESSAGES
The PRO Digital Overlay also displays
text messages in the main screen. This
allows the engineer to communicate with
players without using the intercom feature. After a message
is sent, it will continue to flash on the main screen until the
Mixer is adjusted (e.g. touch a knob, press a button). Text
messages can be sent from the Hear Back PRO iOS app
to all the Mixers in a session or to specific individual Mixers
equipped with a PRO Digital Overlay.
Send a Text Message to All Mixers in a Session:
1. Open the Hear Back PRO iOS app > Select the “Devices”
menu
2. Click on the text message icon > A dialog box will open.
3. Type a short text message (up to 36 characters) > Select
“Send” > The message will appear and begin flashing on
each of the Mixers’ main screens.
Send a Text Message to a Specific Mixer:
1. Open the Hear Back PRO iOS app > Select the “Devices”
menu
2. Swipe left on the Mixer to receive a message.
3. Select the “More” button to view additional functions.
4. Select “Send Text Message” from the drop down menu >
A dialog box will open.
5. Type a short text message (up to 36 characters) > Select
“Send” > The message will appear and begin flashing
only on that specific Mixer’s screen.
6
MAIN SCREEN DISPLAY
The main screen at the top left of the Digital Overlay displays
the Mixer’s name and status including firmware version,
channel levels, mode status, preset function, and text
messages.
FIRMWARE DISPLAY
Each time a Mixer equipped with the PRO Digital Overlay
completes its power up cycle, the main screen will display
the current Mixer firmware and boot version, as well as the
current Mixer overlay version.
CHANNEL KNOB ADJUSTMENTS
In addition to the seven LED indicators above each channel
knob, levels are tracked and the exact value is displayed
by the main screen. The main screen will display “Volume
Mode”, “Pan Mode”, and “Stereo Width Mode” statuses.
After adjusting, the main screen will continue to display the
channel name and current set value for approximately 4
seconds or until another channel is adjusted.
VOLUME MODE
When making adjustments to one of the
16 channel knobs, the respective channel
name will appear in the main screen as
well as its current adjusted value as a
percentage from 0-100%.
PAN MODE
When making adjustments while in “Pan
Mode” mode, the respective channel
name will appear in the main screen, with
the pan value in percentage, as well as,
the pan direction as “% Left”, “Center”, or “% Right”.
STEREO WIDTH MODE
When stereo-linked channels are present,
current stereo width settings are displayed
as “% Wide”, “Mono”, and “% Reverse”.
PRESETS
The following preset functions are displayed in the main
screen:
• “PRESET # LOADED” - displays which
preset is selected
• “PRESET # SAVED” - displays when
a current preset is being stored or
overwritten
• “PRESET ERASED” - if a preset is
zeroed out by holding the PAN and
AUX buttons simultaneously
MIXER 65EO
INPUT 1
VOLUME
28%
MIXER 65EO
INPUT 1
PAN
55% RIGHT
MIXER 65EO
INPUT 5
WIDTH
38% REVERSE
MIXER 65EO
M I X E R V 0 6 .1 0
B O O T V 02.25
O L E D V 0 1.0 8
MIXER 65EO
M I X E R V 0 6 .1 0
B O OT V0 2.2 5
OLED V01.08
INPU T 01 INPU T 02 INPUT 03 INPU T 04
INPUT 05 INPU T 06 INPUT 07 IN PUT 08
Main Screen
MIXER 65EO
PRESET 1
LOADED
MIXER 65EO
PRESET 3
SAVED
MIXER 65EO
PRESET
ERASED
MIXER 65EO
REMOTE
CONTROL
MESSAGE:
HELLO FROM
THE CONTROL
BOOTH

PRO Digital Overlay User Guide 7
TECHNICAL SPECIFICATIONS
Compatibility: Hear Back PRO Mixer V6
Mixer Minimum Firmware: V6.1 with bootloader 2.24 or higher
Hub Minimum Firmware: V6.1 with bootloader 2.5 or higher
Screen Dimensions: Main Screen: 128 x 64 pixels
Channel Screen: 96 x 16 pixels
Screen Character Limit: Main Screen: 4 lines of 12 characters each
Channel Screen: 1 line of 9 characters
Control: Channels names edited via mobile app or desktop editor of file on PRO Hub via
USB
Size: 15.72 cm W x 17.15 cm H x .27 mm D
Unit Weight: 0.14 lbs
Mounting: 3M very high bond (VHB) double-sided tape
Power: Supplied by PRO Mixer through connected ribbon cable into expansion card slot
TROUBLESHOOTING AND OPERATING TIPS
Mixer power is on, but
Overlay’s OLED screens
don’t light up
• Remove the blue connector card at the end of the flexible ribbon cable and reinsert into the
Mixer’s side expansion slot firmly until it clicks.
• Ensure the connector is aligned straight inside the rails during installation.
○If the connector has been installed at an angle, the Digital Overlay will not function properly.
• By default if connected properly, the main screen located to the left of the logo should display
“PRO Overlay”.
Channel screens do not
display names
• Overlay should display default channel names above knobs (INPUT 01, INPUT 02, etc.).
○If this is not the case, it’s possible one or more devices do not have the latest firmware
updates.
○Minimum versions required: Hub Firmware 6.1 with Bootloader 2.5; Mixer Firmware 6.1 with
Bootloader 2.24.
Cannot name channels
with iOS app
• Ensure the firmware on the Hub and Mixer have the latest update.
○Minimum versions required: Hub Firmware 6.1 with Bootloader 2.5; Mixer Firmware 6.1 with
Bootloader 2.24.
• Update the Hear Back PRO iOS app on your device to the latest version.
• If naming through the iOS app continues to fail, use the Hear Technologies Desktop Config
Editor to assign channel names.
Desktop Config Editor
is not updating channel
names
• Updated file must saved as “CONFIG.TXT” to the “Hear Back Pro Hub” drive connected to
your computer.
○Check connection of USB B-A cable from “Progam” port on Hub’s Main Board to USB port
on a Windows computer.
• Ensure the firmware on the Hub and Mixer have the latest update.
○Minimum versions required: Hub Firmware 6.1 with Bootloader 2.5; Mixer Firmware 6.1 with
Bootloader 2.24.
Firmware updates available for download on our Support webpage under “Hear Back PRO”:
www.HearTechnologies.com/support
If you need further assistance, feel free to contact Hear Technologies technical support
Tel: +1 (256) 922-1200 ext. 1135
Email: support@HearTechnologies.com

LIMITED WARRANTY
Hear Technologies warrants the equipment against defects in materials
and labor for a period of one year from the original date of purchase. The
duration of this warranty is limited to claims made to Hear Technologies
within the periods stated with respect to parts and labor from the date
of purchase. During the warranty period, defective equipment will
be replaced or repaired to the general condition as received, at the
discretion of Hear Technologies.
All transportation is the responsibility of the purchaser or owner.
Equipment should be shipped in the original shipping box.
This warranty applies only to defects in materials and workmanship and
does not cover failure or damage due to shipping loss or damage, abuse,
misuse, misapplication, incorrect or varying power line voltages, lack
of proper maintenance, natural disasters, acts of God, or unauthorized
modifications, repairs, or any alterations done without the expressed
written consent by Hear Technologies. Hear Technologies shall not be
liable for any loss of use of the equipment, or consequential damages,
including damages to other parts of the installation in which the
equipment is a part.
Hear Technologies does not make any warranty, express or implied,
other than the warranty contained herein. No agent, representative, or
employee has the authority to increase or alter the liability, obligations,
and terms of this warranty or sale of the equipment. NOTE: It is strongly
recommended that any equipment returned to Hear Technologies be
properly packaged and insured for its full value in case of loss, handling
or shipping damage.
Hear Technologies shall not be responsible for damage or loss of
equipment during shipment.
The following are trademarks of Hear Technologies:
Hear Technologies, Hear Back, Control Your Mix, Mix Back, Extreme Extender, HearBus, and the “Jack” logo.
All names and marks of other companies belong to those respective companies.
Hear Technologies®
991 Discovery Drive
Huntsville, AL 35806
www.HearTechnologies.com
Phone: 1-256-922-1200
Fax: 1-256-922-1221
Printed in U.S.A. ©2020
DEC 2020
Table of contents


