Hearth & Home Outdoor Lifestyles ODCASTLEWD-42-B User manual

Outdoor Lifestyles by Hearth & Home Technologies Inc. • ODCASTLEWD-42-B • 4070-160 Rev C • 05/23 1
Owner’s Manual
Installation and Operation
Models:
Outdoor Woodburning
ODCASTLEWD-42-B
DO NOT DISCARD THIS MANUAL
CAUTION
• Important operating
and maintenance
instructions included.
• Leave this manual with
party responsible for
use and operation.
• Read, understand
and follow these
instructions for safe
installation and
operation.
DO NOT
DISCARD
Fire Risk
• For use with solid wood fuel or decorative
gas appliance only.
WARNING
If the information in these instruc-
tions is not followed exactly, a
re may result causing property
damage, personal injury, or death.
• Donotstoreorusegasolineorotheram-
mable vapors and liquids in the vicinity of
this or any other appliance.
• Donotoverre.Overringwillvoidyour
warranty.
• Comply with all minimum clearances to
combustiblesasspecied.Failureto
complymaycausehousere.
WARNING
HOT SURFACES!
Glass and other surfaces are hot during
operation and cool down.
WARNING
• CAREFULLY SUPERVISE children in same room as
appliance.
• Alert children and adults to hazards of high
temperatures.
High temperatures may ignite clothing or other
ammable materials.
• Keep clothing, furniture, draperies and other combustibles
away.
Hot glass will cause burns.
• Do not touch glass until it is cooled
• NEVER allow children to touch glass
• Keep children away
WARNING: For Outdoor Use Only.
Installation and service of this appliance should be performed by
qualiedpersonnel.Hearth&HomeTechnologiesrecommendsHHT
FactoryTrainedorNFIcertiedprofessionals.

Outdoor Lifestyles by Hearth & Home Technologies Inc. • ODCASTLEWD-42-B • 4070-160 Rev C • 05/23
2
Read this manual before installing or operating this replace.
Please retain this owner’s manual for future reference.
Congratulations on selecting a Outdoor Lifestyles wood
burningreplace.TheOutdoor Lifestylesreplaceyouhave
selected is designed to provide the utmost in safety, reliability
andeciency.
As the owner of a new replace, you’ll want to read and
carefullyfollowalloftheinstructionscontainedinthisowner’s
manual. Pay special attention to all cautions and warnings.
Thisowner’smanualshouldberetainedforfuturereference.
We suggest you keep it with your other important documents
and product manuals.
Theinformationcontainedinthisowner’smanualunlessnoted
otherwise, applies to all models and gas control systems.
Your new Outdoor Lifestyleswoodburningreplacewillgive
you years of durable use and trouble-free enjoyment. Welcome
to the Outdoor Lifestylesfamilyofreplaceproducts!
Homeowner Reference Information
Model Name: Date purchased/installed:
Serial Number: Locationonreplace:
Dealership purchased from: Dealer phone:
Notes:
We recommend that you record the following pertinent
information about your replace:
Listing Label Information/Location
Themodelinformationregardingyourspecicreplacecanbefoundontheratingplatelocatedonthesmokeshieldofthe
replace.
Congratulations!
Grate Fireplace
Model
Serial
Number
FIREPLACE NO.
MODEL NO.
MODEL NO.
MFG. DATE
WARNING: RISK OF
FIRE DAMAGE. REPLACE
GRATE WITH HEARTH & HOME
TECHNOLOGIES
OUTDOOR FIREPLACE INTENDED FOR USE WITH HEARTH & HOME TECHNOLOGIES LISTED FIREPLACE PARTS. SEE INSTALLATION AND
OPERATING INSTRUCTIONS FOR THIS MODEL. ONLY HEARTH & HOME TECHNOLOGIES GLASS DOOR KITS CAN BE INSTALLED ON THIS UNIT.
CLEARANCE TO
COMBUSTIBLES:
CHIMNEY
2 IN. MIN.
FIREBOX
IN.
MIN.
DO NOT OVERFIRE. USE ONLY: SOLID WOOD FUEL OR
LISTED DECORATIVE GAS APPLIANCE. DO NOT USE A
FIREPLACE INSERT OR OTHER PRODUCTS NOT
SPECIFIED FOR USE WITH THIS PRODUCT. IF DOORS
ARE USED OPERATE FIREPLACE WITH DOORS FULLY
OPEN OR CLOSED ONLY. WHEN BURNING A
DECORATIVE GAS APPLIANCE IN THE FIREPLACE,
ADJUST DAMPER TO THE FULLY OPEN POSITION.
WARNING! THIS FIREPLACE HAS NOT BEEN TESTED WITH AN UNVENTED
GAS LOG SET. TO REDUCE THE RISK OF FIRE OR INJURY, DO NOT
INSTALL AN UNVENTED GAS LOG SET INTO FIREPLACE.
WARNING! TO AVOID THE RISK OF DAMAGING FIREPLACE MATERIALS
AND INCREASING THE RISK OF SPREADING A FIRE DO NOT USE THE
FIREPLACE TO COOK OR WARM FOOD.
IF INSTALLATION OR OPERATING INSTRUCTIONS ARE MISSING
CONTACT: HEARTH & HOME TECHNOLOGIES
,
7571 215th Street West, Lakeville, MN 55044
P.N. 4021-723E
CAN/ULC-S610
UTILISER DU CARBURANT
SOLIDE SEULEMENT
USE HHT SL SERIES CHIMNEY

Outdoor Lifestyles by Hearth & Home Technologies Inc. • ODCASTLEWD-42-B • 4070-160 Rev C • 05/23 3
Table of Contents
1 Listing and Code Approvals
A. ApplianceCertication.........................4
2 Getting Started
A. Design and Installation Considerations ............5
B. Non-Combustible Materials .....................5
C. Combustible Materials .........................5
D.ToolsandSuppliesNeeded .....................5
E. Inspect Fireplace and Components ...............6
F. Grate.......................................6
G. Firescreen...................................6
H.CoolingAir ..................................6
I. Molded Brick Panel ............................6
J. Glass Door (optional). . . . . . . . . . . . . . . . . . . . . . . . . . . 6
K. Drain Pan (optional) ...........................6
3 Framing and Clearances
A. Selecting Fireplace Location ....................7
B. Clearances .................................9
C. Sidewalls/Surrounds .........................10
D. Frame the Fireplace .........................10
E. Chimney Requirements.......................11
4 Installation of Fireplace
A. Secure the Fireplace .........................12
B.InstallCoolingAirHoods ......................13
5 Chimney Assembly
A. Chimney Requirements .......................14
B. Assemble the Chimney Sections ................15
C. Installing the Attic Insulation Shield ..............16
D.UsingOsets/Returns.........................17
6 Complete the Enclosure
A.ChimneyTermination .........................18
B.ChaseTop..................................18
C.InstalltheTerminationCap .....................18
7 Installation of Molded Brick Panel
A. Install the Refractory ..........................20
B. Install Screens ..............................21
C. Grate......................................21
D. Glass Door (optional)..........................21
8 Accessories
A. Gas Log/Lighter Provisions ....................22
9 Finishing
A. Non-combustible Materials .....................23
B. Combustible Materials ........................23
C.HearthExtension ............................23
D.RaisedHearthExtensionFraming ...............24
E. Non-combustible Sealant ......................25
F. Finishing Material ............................26
G. Mantel .....................................27
10 Operating Instructions
A. General Information ...........................28
B. Grate ......................................28
C. Clear Space Near the Fireplace .................29
D. Firescreen ..................................29
E. Glass Doors .................................29
F. Wood Fuel ..................................30
G. Starting a Fire ...............................31
11 Troubleshooting
A. Diagnostics and Problem Solving ................32
12 Maintenance and Servicing the Fireplace
A. Disposal of Ashes ...........................33
B. Chimney Inspection/Cleaning ..................33
C. FireboxRefractory...........................33
D. MaintenanceTaskList ........................34
E. Chimney Fire ...............................34
13 Reference Materials
A. Appliance Dimensions/Weight ..................35
B. Optional Components .........................36
C. Chimney Components ........................37
D.Terminationcaps.............................39
E. Service Parts List ............................40
F. Warranty ...................................42
G. Contact Information ..........................44
►

Outdoor Lifestyles by Hearth & Home Technologies Inc. • ODCASTLEWD-42-B • 4070-160 Rev C • 05/23
4
11 Listing and Code Approvals
A. Appliance Certication
Thisreplacesystemhasbeentestedandlistedinaccor-
dance with UL 127 and CAN/ULC-S610-M87 standards by
Underwriters Laboratories Inc. for installation and operation
intheUnitedStates and Canada.Thisreplace has been
tested and listed for use with the optional components speci-
edinthismanual.Theseoptionalcomponentsmaybepur-
chased separately and installed at a later date.
Outdoor Lifestyles is a registered trademark of Hearth &
HomeTechnologiesInc. Not intended for use as a primary heat source.
This replace is tested and approved as a decorative
replace. It should not be factored as a primary heat
source in residential heating calculations.
Improper installation, adjustment, alteration, service
or maintenance can cause injury or property damage.
Refertotheowner’sinformationmanualprovidedwith
thisreplace.Forassistanceoradditionalinformation
consult a qualied installer, service agency or your
dealer.
WARNING
Fire Risk
• Do not installoroperatedamagedreplace.
• Do notmodifyreplace.
• InstallationotherthanasinstructedbyHearth&Home
TechnologiesInc.isstrictlyprohibited.
• Do notoperatethereplacewithoutfullyassembling
all components.
• Do not overre.
• Installation and/or use of any component part not
approvedbyHearth&HomeTechnologies.
Hearth&HomeTechnologiesdisclaimsanyresponsibility
for, and the warranty and agency listing will be voided by
the above actions.
WARNING
Fire Risk
• WARNING! TOAVOID THE RISK OF DAMAGING
FIREPLACE MATERIALSAND INCREASING THE
RISK OF SPREADING A FIRE, DO NOT USE THE
FIREPLACE TO COOK OR WARM FOOD.
WARNING
WARNING: This product and the fuels
used to operate this product (wood and
wood pellets), and the products of combus-
tion of such fuels, can expose you to chemi-
cals including carbon black, which is known
to the State of California to cause cancer
and carbon monoxide, which is known to
the State of California to cause birth defects
or other reproductive harm. For more infor-
mation go to: www.P65Warnings.ca.gov.

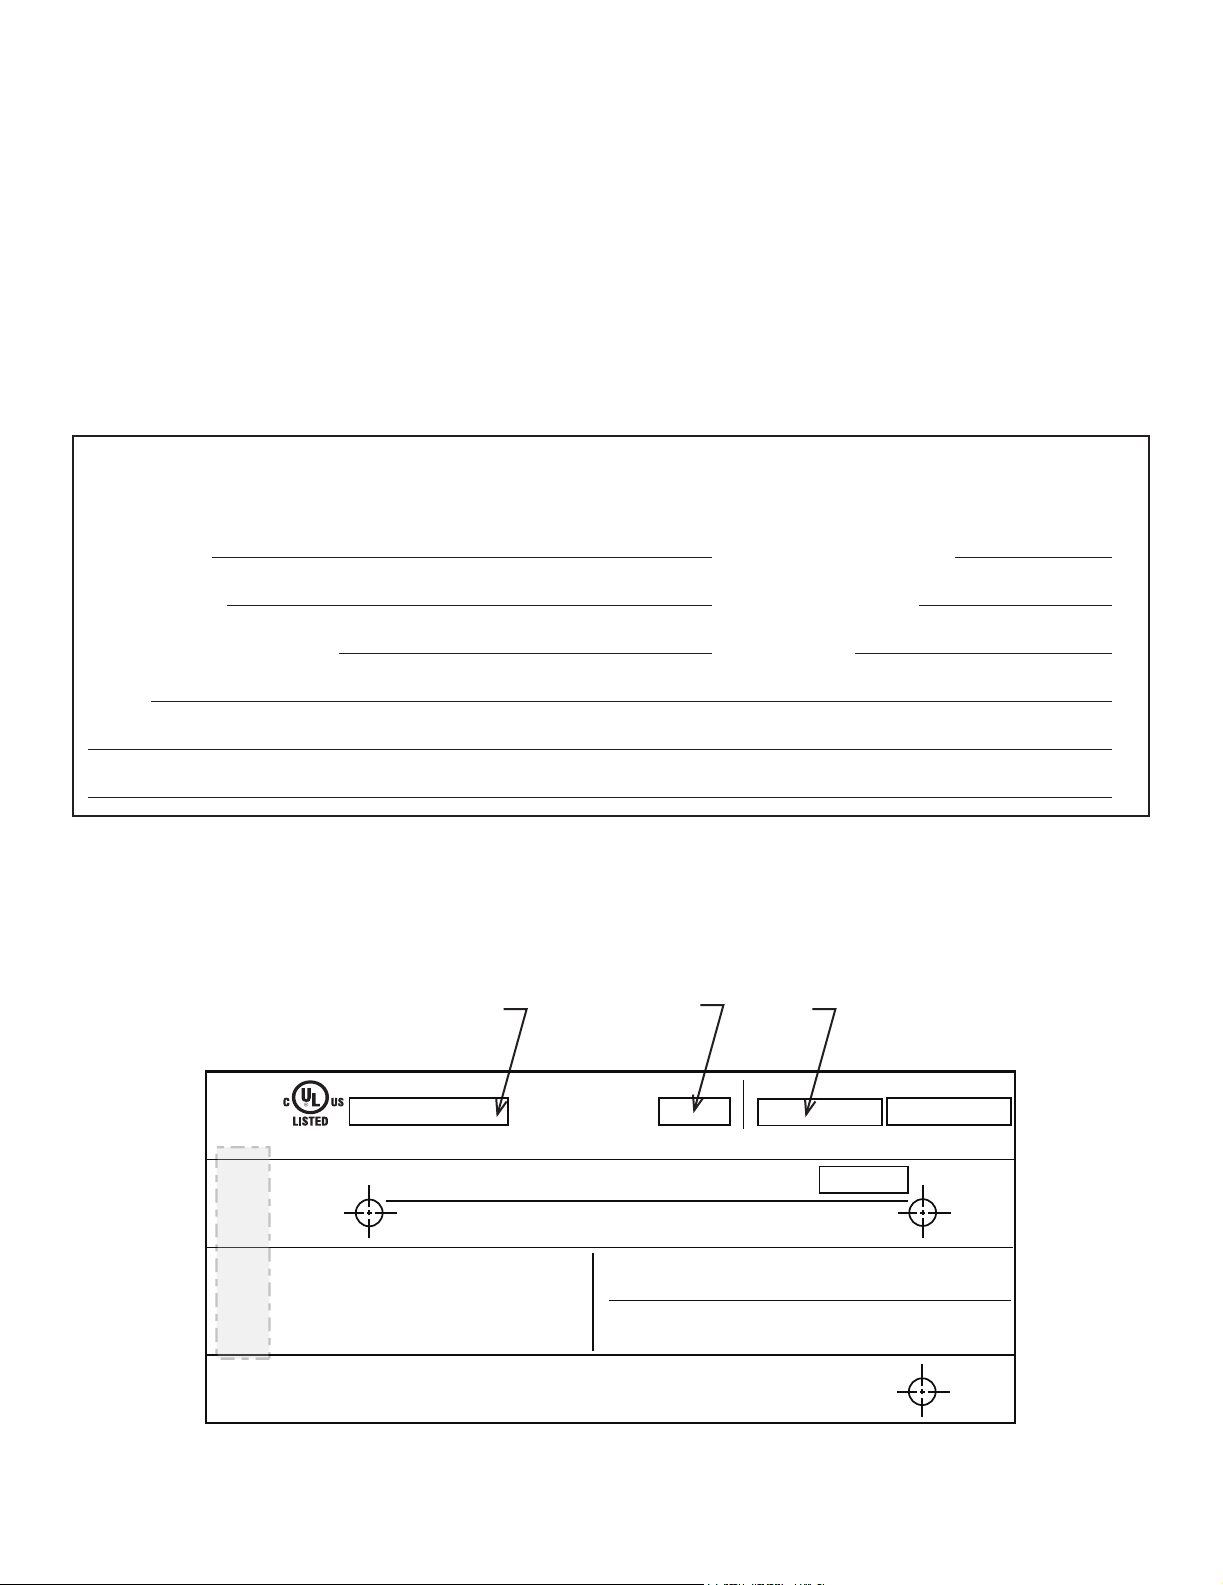
Outdoor Lifestyles by Hearth & Home Technologies Inc. • ODCASTLEWD-42-B • 4070-160 Rev C • 05/23 5
22 Getting Started
A. Design and Installation Considerations
Check building codes prior to installation.
• Installation MUST complywith local, regional,
state and national codes and regulations.
• Consult insurance carrier, local building inspector,
reocialsorauthoritieshavingjurisdictionabout
restrictions, installation inspection, and permits.
CAUTION
Whenplanningareplaceinstallation,itisnecessarytode-
termine the following information before installing:
• Where the fireplace is to be installed. See Sections
3 and 4.
• Theventsystemcongurationtobeused.SeeSections
5 and 6.
• Framingandnishingdetails.SeeSections3,6and8.
• Whether optional accessories are desired. See Section 13.
Moisture Resistance:
Thisoutdoorreplacewillshedmoderateamountsofwater,
but is not waterproof. Water and condensing water vapor
may enter the chase under certain conditions.
Thereplacewillnotperformasanexteriorwall.Moisture
penetration must be considered for construction that places
thereplaceinstructurewallsoronmoisturesensitivesur-
faces.
When installed on exterior walls:Hearth&HomeTech-
nologies recommends that the replace chase be con-
structed outside the structure’s weather envelope. Where
theplatformmeetsthewall,useaashingdetailsimilarto
that required for attached decks. Chase platforms, including
hearths should slope away from the structure at 1/8 in. to
1/4in.perfoot.Thereplacecanbeshimmedlevel.
When installed on surfaces where water may collect or
cause damage:Hearth&HomeTechnologiesrecommends
thatadrainage panbeplacedunder theunit.Thisissold
separately or can be constructed of metal, adhesive polymer
membrane (such as ice and water shield) or other suitable
materials. A means of drainage out of the pan such as tubes
or weep holes should be provided. A slope of 1/8 in. to 1/4
in.perfoottowardsthedrainportissuggested.Thereplace
can be shimmed level.
Hearths should slope away from the front of the replace
and chase at 1/8 in. to 1/4 in. per foot. Spark strips must be
on top of any combustible hearth materials used for moisture
management.
Read all the instructions before starting the
installation. Follow these instructions carefully
during the installation to ensure maximum safety
and benit.
B. Non-Combustible Materials
Materials which will not ignite and burn, composed of any
combination of the following:
- Steel -Iron
-Brick -Tile
-Concrete -Slate
-Glass -PlastersMaterialsreportedaspassingASTM
R136,StandardTestMethodforBehaviorofMetals,ina
VerticalTubeFurnanceaat750°C
C. Combustible Materials
Materials made of or surfaced with any of the following
materials:
-Wood -Compressed paper
-Plantbers-Plastic
Anymaterialthatcanigniteandburn;ameproofedor
not, plastered or un-plastered.
D. Tools and Supplies Needed
Before beginning the installation be sure the following
tools and building supplies are available:
Reciprocating Saw Framing material
Pliers Hightempcaulkingmaterial
Hammer Gloves
Phillips screwdriver Framing square
Flat blade screwdriver Electric drill and bits
Plumb line Safety glasses
Level Tapemeasure
1/2-3/4 in. lenght, #6 or #8 self-drilling screws
Misc. screws and nails

Outdoor Lifestyles by Hearth & Home Technologies Inc. • ODCASTLEWD-42-B • 4070-160 Rev C • 05/23
6
F. Grate
Thisreplaceisdesignedto beused withthegratesup-
pliedwiththisunitoroneapprovedbyHHT.Thegratewill
deteriorate over time and will need occasional replace-
ment.
Warning! Risk of Fire!
Use only the factory-supplied intergral grate.
Keep logs in place.
Allows proper air circulation around the re.
G. Firescreen
Therescreenisprovidedtocontrolsparks.Keepit
closedwhenthereplaceisinuse.
WARNING! Risk of Fire or Burns!
SCREEN WILL NOT PREVENT BURNING MATERIALS
FROM FALLING OUT.
SCREEN PULLS OR HANDLES MAY BE HOT.
H. Cooling Air
Coolingairisnecessarytoinstallthereplaceonacom-
bustiblesurfaceandinacombustilbeenclosure.Twoinlet
hoods are provided and must be installled, to allow cooling
air to be drawn into the enclosure. Ducting between the
hoodsandthereplaceisnotnecessary.
Thecompletestructuremustbenoncombustibleifthehoods
are not installed.
I. Molded Brick Panel
• The molded brick panels are shipped separately, but
required to contain heat and provide an attractive interior.
• Theywilldeteriorateovertimeandwillneedoccasional
replacement. Small hairline cracks and discoloration are
normalanddonotaectsafety.
J. Glass Doors (optional)
• If installing the glass door kit, make sure the nished
openingshouldbe38x42inches(965mmx167mm)
to allow for door installation.
K. Drain Pan (optional)
• Required on wood surfaces, can be bought or
manufactured. (See page 7.)
E. Inspect Fireplace and Components
Fire Risk
Explosion Risk
Inspect fireplace and components for
damage. Damaged parts may impair safe
operation.
• DoNOTinstalldamagedcomponents.
• DoNOTinstallincompletecomponents.
• DoNOTinstallsubstitutecomponents
WARNING
•Carefullyremovethereplaceandcomponentsfromthe
packaging.
Thereplacesystemconsistsofthefollowing:
• Fireplace / Integral grate/dual cooling air inlet hoods,
rescreen,andhearthrefractory.

Outdoor Lifestyles by Hearth & Home Technologies Inc. • ODCASTLEWD-42-B • 4070-160 Rev C • 05/23 7
33 Framing and Clearances
A. Selecting Fireplace Location
Thisoutdoorreplacewillshedmoderateamountsofwater,
but is not waterproof. Water and condensing water vapor
may enter the chase under certain conditions.
Thereplacewillnotperformasanexteriorwall.Moisture
penetration must be considered for construction that places
thereplaceagainststructurewallsoronmoisturesensitive
surfaces.
• Exterior Walls (see Figure 3.1)
Hearth & Home Technologies recommends that the
replace chase be constructed outside the structure’s
weather envelope. Where the platform meets the wall, use
aashingdetailsimilartothatrequiredforattacheddecks.
Chase platforms, including hearths, should slope away
fromthestructureat1/8in.to1/4in.perfoot.Thereplace
can be shimmed level. Build the outside enclosure out of
standard building materials, being careful to maintain the
minimum air clearances specied in these installation
instructions.
Fire Risk
Provide adequate clearances.
• Around air openings
• Tocombustibles
• For service access.
Locatereplaceawayfromtracareas.
WARNING Note:
• Illustrationsandphotosreecttypicalinstallations
and are FOR DESIGN PURPOSES ONLY.
•Illustrations/diagrams are not drawn to scale.
•Actual installation/appearance may vary due to
individual design preference.
• Hearth&HomeTechnologiesreservesthe rightto
alter its products.
• Freestanding Installations (see Figure 3.2)
Wheninstallingthisreplaceasafreestandingreplacein
your yard, it must be enclosed to prevent impact damage
tothereplace.
• Porch and Patio Installations
Thereplacewillnotperformasanexteriorwall.Hearth
& Home Technologies recommends that the replace
chase be constructed outside the structure’s weather
envelope. Where the platform meets the wall, use a
ashingdetailsimilartothatrequiredforattacheddecks.
Chase platforms, including heaths should slope away from
thestructureat1/8in.to1/4in.perfoot.Thereplacecan
be shimmed level.
• The cooling air hoods MUST be used if installing in
a combustible enclosure. Ducting is not necessary
betweenthehoodsandthereplace.
• Ifreplaceisinstalledoncementandtotallyenclosedwith
non combustilbe materials (i.e. metal studs, cement board,
etc.) the cooling air hoods do not need to be installed.
• When Installed on Surfaces Where Water May Collect
or Cause Damage:
Hearth&HomeTechnologiesrecommendsthatadrainage
panbeplacedundertheunit.Thisissoldseparatelyor
can be constructed of metal, adhesive polymer membrane
(such as ice and water shield) or other suitable materials.
A means of drainage out of the pan such as tubes or weep
holes should be provided. A slope of 1/8 in. to 1/4 in. per
foot towards the drain port is suggested. The replace
canbeshimmedlevel.Hearthsshouldslopeawayfrom
thefrontofthereplaceandchaseat1/8in.to1/4in.per
foot. Spark strips must be used on top of any combustible
hearth materials used for moisture management.

Outdoor Lifestyles by Hearth & Home Technologies Inc. • ODCASTLEWD-42-B • 4070-160 Rev C • 05/23
8
Figure 3.1 Fireplace Locations
FREESTANDING
INSTALLATION
(Combustible Structure)
(Enclosed Fireplace)
10 ft Min.
From Termination
Figure 3.2 Freestanding Fireplace Locations
CORNER INSTALL DIMENSIONS
Note: If this surface is inside the build-
ing’s warm air enevelope...
...then this surface must be an exterior wall
system.
29 in.
(737 mm) 28-1/2 in.
(724 mm)
1/2 in.
(13 mm)
53 in.
(1346 mm)
54 in.
(1372 mm)
1-1/2 in.
(38 mm)
1-1/2 in.
(38 mm)
1/2 in.
(13 mm)
1-1/2 in.
(38 mm) 1-1/2 in.
(38 mm)
1/2 in.
(13 mm) 1/2 in.
(13 mm)
53 in.
(1346 mm)
54 in.
(1372 mm)
95-1/2 in.
(2426 mm)
67-1/2 in.
(1714mm)
►

Outdoor Lifestyles by Hearth & Home Technologies Inc. • ODCASTLEWD-42-B • 4070-160 Rev C • 05/23 9
B. Clearances
Fire Risk
• Complywithallminimumclearancestocombustiblesasspecied.
• Framing or nishing material used on the front of, or in front of, the
appliance closer than the minimums listed, must be constructed entirely
of noncombustible materials (i.e., steel studs, concrete board, etc.).
Failuretocomplymaycausere.
WARNING
Figure 3.3 Clearance to Combustible
0 in. to level of standoffs
1-1/2 to side and back
0 in.
1/2 in to framing

Outdoor Lifestyles by Hearth & Home Technologies Inc. • ODCASTLEWD-42-B • 4070-160 Rev C • 05/23
10
C. Sidewalls/Surrounds
• Locateadjacentcombustiblesidewallsaminimumof24in.(610mm)fromreplaceopening.
• Mantle leg, surround, stub wall, whether combustible or non-combustible, may be constructed as shown in Figure 3.4.
D. Frame the Fireplace
Whentypicalcombustibleframing(2x4lumbershown)isused,coolingairhoodsarerequired.Ifthetotalstructureisnon-
combustible, cooling air hoods are not necessary. See Figure 3.4.
• Observe all required air space clearances to combustible materials as shown in Figure 3.5.
18 1/2 in.
[470 mm]
19 3/4 in.
[500 mm]
4 in.
[102 mm]
50° angle
39° angle
24 in.
[610 mm]
BRICK
FRONT
FLUSH
FRONT
24 in.
[610 mm]
22 3/8 in.
[568 mm] 52-7/8 in.
(1343 mm)
42 in.
[1067 mm]
Note: Grid depicts 1 inch squares.
Figure 3.4 Mantel Leg, Surround or Wall Projection (acceptable on both sides of opening)
Figure 3.5 Framing the Fireplace
28-3/8 in.
(721 mm) 74- 1/2 in.
(1892 mm)
Area to be covered with
nonccombustible
material.
17 in.
(432 mm)
framing
53-7/8 in.
(1368 mm)
A
NOTE: A structural header may be
positioned higher up during the early
framing to help with the installation of
theunitthennishframingdowntothe
correct height after the unit is set.

Outdoor Lifestyles by Hearth & Home Technologies Inc. • ODCASTLEWD-42-B • 4070-160 Rev C • 05/23 11
E. Chimney Requirements
Whenplanningyourreplacelocation,thechimneyconstruc-
tionandnecessaryclearancesmustbeconsidered.There-
place system and chimney components have been tested to
provide exibility in construction. The following gures are
theminimumdistancesfromthebaseofthereplace.
• Minimumoverallstraightheightis10ftIfthereplaceis
freestanding and a minimum of 10 ft from a combustible
structure. See Figure 3.2.
• Chimney must extend 2 ft (.6 m) above any portion of
the roof within 10 ft (3048 mm) of the chimney. Refer to
Figure 6.2.
FT M
•MINIMUMHEIGHTWITHOFFSET/RE-
TURN 16 4.88
•MAXIMUMHEIGHT 90 27.43
•MAXIMUMCHIMNEYLENGTHBETWEEN
ANOFFSETANDRETURN 20 6.1
•MAXIMUMDISTANCEBETWEENCHIM-
NEYSTABILIZERS 35 10.67
•DOUBLEOFFSET/RETURNMINIMUM
HEIGHT 24 7.32
•MAXIMUMUNSUPPORTEDCHIMNEY
LENGTHBETWEENTHEOFFSETAND
RETURN
6 1.83
•MAXIMUMUNSUPPORTEDCHIMNEY
HEIGHTABOVETHEFIREPLACE 35 10.67
•MINIMUMOVERALLSTRAIGHTHEIGHT
IFFIREPLACEISFREESTANDING 10 3.05
•MINIMUMSTRAIGHTHEIGHT 14.5 4.42
*Transitionsectionstandardwithunitand1
foot section of chimney will meet the mini-
mum 10 ft. for free standing installs.
SLA10 (for Canada) and CAK8A required for
Canada installation
9 ft
NOTE:Osetcancomeotransitionconeinall
instances, freestanding or otherwise.

Outdoor Lifestyles by Hearth & Home Technologies Inc. • ODCASTLEWD-42-B • 4070-160 Rev C • 05/23
12
44 Installation of Fireplace
Position the Fireplace
Thisreplacemaybeplacedoneitheracombustibleor
noncombustiblecontinuousatsurface.Followtheinstruc-
tionsforframinginSection3.D.Slidethereplaceintopo-
sition. Be sure to provide the minimum air clearance at the
sidesandbackofthereplaceassembly.SeeSection3.B.
FIre Risk!
Prevent contact with sagging, loose
insulation.
DoNOTinstalagainstvaporbarriersor
e x p o s e d
insulation.
CoolingAirHoodsmustbeinstalledif
instaling
on a combustible surface.
WARNING
Levelthereplaceside-to-sideandfront-to-back.Shimwith
noncombustible material, such as sheet metal, as neces-
sary.Securethereplace(usingthenailingangeslocated
oneithersideofthereplace)totheverticalframing.
1 in. (25 mm) overlap
Minimum
Metal strips are placed 2 in. (51 mm)
under the front of the fireplace and must
extend beyond the front and sides of
fireplace opening by 2 in. (51 mm).
Figure 4.2 Position the Protective Metal Hearth Strips
Raised Platform
Floor
2 in.
(51 mm)
1 in. (25 mm) min.
overlap
2 in.
(51 mm)
Top piece must overlap
bottom piece
Figure 4.1 Protect the Front of an Elevated Platform
Note: When elevating the fireplace above the hearth
extension the front of the elevated platform must be
protected with a protective metal hearth strip.
Important: Toensurepropertoftheglassdoors,check
the fireplace opening for square. Measure diagonal
distances of the opening to make sure they are equal.
Iftheyarenot, continuetoshimthe replaceuntilthose
diagonals are equal.
• Place the Protective Metal Hearth Strips
Fire Risk!
• Metal hearth strips MUST be installed.
Sparksorembersmayigniteooring.
WARNING
Includedwithyourreplaceyouwillndtwometalhearthstrips
measuringapproximately26in.x4in.(660mmx102mm).
Thesestripsareusedtoprovideaddedprotectionwherethe
replaceandthehearthextensionmeetwheninstalledon
a combustible service.
Slide each metal strip 2 in. (51 mm) under the front edge of
thereplace.Theindividualpiecesmustoverlapeachother
by1in.(25mm)minimuminthemiddleofthereplaceto
provide continuous coverage of the oor. See Figure 4.2.
Thesemetalstripsshouldextendfromthefrontandsidesof
thereplaceopeningby2in.(51mm).
A. Secure the Fireplace
Level the Fireplace
NOTE:Ifusingachase,considerwhereandhowthe
chimney will run. If there are obstacles that might be in
the way, it may be necessary to make the chase larger
thanshowntoallowforosetstobeused.

Outdoor Lifestyles by Hearth & Home Technologies Inc. • ODCASTLEWD-42-B • 4070-160 Rev C • 05/23 13
WARNING! Cooling air must be provided when installing
in combustible enclosure or on combustible surface.
• Locate cooling air hoods to prevent blockage from
leaves, snow/ice, or other debris. Blockages could
cause the unit to overheat.
• Recommended bottom of a 7-3/4” X 7-3/4” square hole
or 7-3/4” diameter hole 12” minimum above bottom of
unit. See Figure 4.4.
• DoNotplacecoolingairhoodclosetoexhaustvent.
• Theoutsideairhoodcanbepaintedtomatch/accentthe
color of the structure.
Caution! Risk of Fire or Asphyxiation! Do not draw
outside air from wall, oor, or ceiling cavity, or enclosed
spaces such as an attic or garage.
B. Install Cooling Air Hoods
Figure 4.3 Cooling Hoods
Figure 4.4 Air Hood
7-3/4 in.
197 mm
7-3/4 in.
197 mm
12 in. min.
305 mm

Outdoor Lifestyles by Hearth & Home Technologies Inc. • ODCASTLEWD-42-B • 4070-160 Rev C • 05/23
14
Vertical distancesaremeasured fromthebase ofthere-
place.
• Minimumoverallstraightheightis10ft.ifthereplaceis
freestanding and a minimum of 10 ft from a combustible
structure.
• Chimneymustextend2ft(.6m)aboveanyportionofthe
roof within 10 ft (3 m) of the chimney. Todeterminethe
chimney components needed to complete your particular
installation, follow the steps below:
• Determine the total vertical height of the fireplace
installation.Thisdimensionismeasuredfromthebaseof
thereplaceassemblytothepointwherethesmokeexits
the termination cap.
• Subtracttheeectiveheightofthereplaceassemblyfrom
theoverallheightofthereplaceinstallation(measured
from the base of the fireplace to the bottom of the
termination cap).
• RefertoTable5.1todeterminewhatcomponentsmust
beselectedtocompletethereplaceinstallation.
• Determine the number of ceiling restops, stabilizers,
roof flashing, etc. required to complete the fireplace
installation. Table 5.1
• Do NOT connect this fireplace to a chimney flue
servicing another appliance.
• Do NOT connect to any air distribution duct or
system.
CAUTION
Fire Risk
Must maintain 2 in. (51 mm) air clear-
ance to insulation and other com-
bustible materials.
Warning: DO NOT PACK REQUIRED AIR
SPACES WITH INSULATION OR
OTHER MATERIALS.
Note: Amaximumoftwopairsofosetsandreturnsmay
be used.
55 Chimney Assembly
FT M
•MINIMUMHEIGHTWITHOFFSET/RE-
TURN 16 4.88
•MAXIMUMHEIGHT 90 27.43
•MAXIMUMCHIMNEYLENGTHBETWEEN
ANOFFSETANDRETURN 20 6.1
•MAXIMUMDISTANCEBETWEENCHIM-
NEYSTABILIZERS 35 10.67
•DOUBLEOFFSET/RETURNMINIMUM
HEIGHT 24 7.32
•MAXIMUMUNSUPPORTEDCHIMNEY
LENGTHBETWEENTHEOFFSETAND
RETURN
6 1.83
•MAXIMUMUNSUPPORTEDCHIMNEY
HEIGHTABOVETHEFIREPLACE 35 10.67
•MINIMUMOVERALLSTRAIGHTHEIGHT
IFFIREPLACEISFREESTANDING 10 3.05
•MINIMUMSTRAIGHTHEIGHT 14.5 4.42
HEIGHT OF CHIMNEY COMPONENTS in. mm
US Canada ONLY
Chimney Stabilizer
SL11 SL4 4-3/4 121
Ceiling Firestops
FS538 FS538 0 0
FS540 FS540 0 0
Osets/Returns
SL1130 SL430 14-1/2 368
Chimney Sections*
SL1106 SL406 4-3/4 121
SL1112 SL412 10-3/4 273
SL1118 SL418 16-3/4 425
SL1136 SL436 34-3/4 883
SL1148 SL448 46-3/4 1187
n/a SLA10 16-3/4 425
* Dimensions reect eective height.
A. Chimney Requirements WARNING
*Transition section standard with unit and 1 foot section
required in addition as minimum..

Outdoor Lifestyles by Hearth & Home Technologies Inc. • ODCASTLEWD-42-B • 4070-160 Rev C • 05/23 15
B. Assemble the Chimney Sections
WARNING! Risk of Fire! DO NOT install substitute or dam-
aged chimney components.
• Use only those components described in this manual.
Substitute or damaged chimney components could impair
safeoperationandcauseoverheatingandre.
• Support the pipe during construction and check to be sure
inadvertent loading has not dislodged the chimney section
fromthereplaceoratanychimneyjoint.
• Attachthetransitionsectiontothetopofthereplace.
• Placeinneruetotheinsideofthechimneysectionbelow
it. Place the outer casing outside the outer casing of the
chimney section below it. Refer to Figure 5.1.
NOTICE: CHIMNEY SECTIONS CANNOT BE
DISASSEMBLED ONCE LOCKED TOGETHER. PLAN
AHEAD!
• Lockchimneysectionsand/orosets/returnstogetherby
pushing downward until the top section meets the stop
bead on the lower section.
• Pull on the top section to make sure it is fully engaged
and will not separate.
• You may use #6 or #8 sheet metal screws no longer than
1/2 in. (13 mm) to fasten chimney sections together. Do
NOTpenetrateinnerue.
• Fasten oset/returns to chimney sections. Insert the
screws (provided) through the predrilled holes. DoNOT
penetrateinnerue.
• Secure chimney returns with hanger straps (provided);
fasten to studs or joists.
• Vertical straight runs of chimney must be supported every
35 ft (10.7 m).
Figure 5.1 Assembling Chimney Sections

Outdoor Lifestyles by Hearth & Home Technologies Inc. • ODCASTLEWD-42-B • 4070-160 Rev C • 05/23
16
C. Installing the Attic Insulation Shield
WARNING! Risk of Fire! You MUST install an attic
installation shield when there is any possibility of insulation
or other combustible material coming into contact with the
chimney.
• DO NOT pack insulation between the chimney and the
attic insulation shield.
• Failure to keep insulation and other materials away
fromthechimneypipecouldcauseare.
• DO NOT osetchimneyinsideinsulationshield.
• Combustible material may come into contact with
the attic insulation shield as long as the required
clearances are maintained to the chimney pipe.
Installationofaceilingrestopisrequired:
Note: In Canada a CAS10 must also be installed. See
instructions provided with kit.
• Refer to Figures 5.2, 5.3, and 5.4.
• Iftheatticshieldispre-rolledcontinue.Ifitisaatpart,
try to roll it up to aid in wrapping it around the chimney.
• Pre-bend all the tabs in at the top to 45 degrees.
• Wrap the shield (around the chimney if already
installed) until you have an overlap and the three holes
on each side match up (large holes on top).
• Insert three screws into the matching holes to form a
tube starting at the bottom.
• Bend the tabs on the bottom of the tube inward to 90
degrees to maintain chimney air space.
• Resttheinsulationshieldontheceilingrestopbelow.
• Tapeoanyopeningsaroundthebottom.
If you want to make a custom shield or barrier, follow these
guidelines:
• Metal is preferred, although any material sti
enough to hold back the insulation can be used.
WARNING! Risk of Fire! Use of cardboard or other
materials that can deect under humidity or other
environmental conditions is not recommended.
• The shield or barrier must be tall enough to extend
above the insulation and prevent blown-in insulation
from spilling into the cavity and accommodate the
amount of insulation as required by the National
Building Code.
• Maintainspeciedairspacesaroundchimney.
• Check instructions and local codes for further details.
Double-check the Chimney Assembly
Continue assembling the chimney sections up through
theceilingrestopsasneeded.Whiledoingso,beaware
of the height and unsupported chimney length limitations
given under Section 5.A.
Check each section by pulling up slightly from the top to
ensure proper engagement before installing the succeeding
sections. If they have been connected correctly, they will
not disengage when tested.
Insert three
screws
Pre-bend the tabs to
rest against pipe to
prevent insulation
from falling in.
(5)Tabs bent
in 90°
Figure 5.2 Prepare Attic Insulation Shield
Figure 5.3 Install Attic Insulation Shield (restop above ceiling)
5 Tabs bent
in 90°
Tabs bent in to
rest against pipe
Attic Insulation Shield
Ceiling Firestop
10-1/2 in.
(267 mm)
14-1/2 in. (368 mm)
diameter
InsulationInsulation
Pipe
Pipe
2 in. (51 mm)
air space
Seal with tape
5 Tabs bent
in 90°
Tabs bent in to
rest against pipe
Attic Insulation Shield
Ceiling Firestop
10-1/2 in.
(267 mm)
14-1/2 in. (368 mm)
diameter
InsulationInsulation
Pipe
Pipe
2 in. (51 mm)
air space
Seal with tape
Figure 5.4 Install Attic Insulation Shield (restop below ceiling)
Note: Thechimneymustbeenclosedfromthereplace
to the attic maintaining the 2 inch clearances.

Outdoor Lifestyles by Hearth & Home Technologies Inc. • ODCASTLEWD-42-B • 4070-160 Rev C • 05/23 17
D. Using Osets/Returns
Tobypassanyoverheadobstructions,thechimneymaybe
osetusinganoset/return.
Anosetandreturnmaybeattachedtogetherorachimney
section(s)maybeusedbetweenanosetandreturn.
Perform the following steps to determine the correct chim-
ney component combination for your particular installation:
Fire Risk
• Draft will be restricted if osets/returns
greaterthan30°areused.
WARNING
Table 5.2
A B SL1106
SL406
SL1112
SL412
SL1118
SL418
SL1136
SL436
SL1148
SL448in. mm in. mm
4 7/8 124 17 7/8 454 - - - - -
7 1/4 184 2 2 559 1 - - - -
9 3/4 248 26 1/8 664 2 - - - -
10 1/4 260 27 1/4 692 - 1 - - -
12 3/4 324 31 3/8 797 1 1 - - -
13 1/4 337 32 3/8 822 - - 1 - -
15 3/4 400 36 5/8 930 - 2 - - -
18 1/8 460 40 3/4 1035 1 2 - - -
18 3/4 476 41 3/4 1060 - 1 1 - -
21 3/4 552 47 1194 - - 2 - -
22 1/4 565 48 1219 - - - 1 -
24 3/4 629 52 1/8 1324 1 - - 1 -
27 3/4 705 57 3/8 1457 - 1 - 1 -
28 1/4 718 58 3/8 1483 - - - - 1
30 3/4 781 62 1/2 1588 1 - - - 1
33 3/4 857 67 3/4 1721 - 1 - - 1
36 3/4 933 73 1854 - - 1 - 1
39 3/4 1010 78 1/8 1984 - - - 2 -
41 1/8 1045 82 3/8 2092 1 - - 2 -
45 3/4 1162 88 1/2 2248 - - - 1 1
48 1/8 1222 92 3/4 2356 1 - - 1 1
51 3/4 1314 98 7/8 2511 - - - - 2
Proper assembly of air cooled chimney parts results in an overlap of chimney joints
of1-1/4in.(32mm).Eectivelengthisbuiltintothistable.
• Measure how far the chimney needs to be shifted to enable
it to avoid the overhead obstacle. See Figure 5.1. Use
dimension “A” to determine chimney section required to
achieve the needed shift.
• Afterdeterminingtheosetdimension,refertoTable5.2
andndthe“A”dimensionclosesttobutnotlessthanthe
distance of shift needed for your installation.
• The“B”dimensionthatcoincideswiththe“A”dimension
represents the required vertical clearance that is needed
tocompletetheosetandreturn.
• Readacrossthechartandndthenumberofchimney
sections required and the model number of those particular
chimney parts.
• Wheneverthechimneypenetratesaoor/ceiling,aceiling
restopmustbeinstalled.
• Theeectiveheightofthereplaceassemblyismeasured
fromthebaseofthereplacetothetopofthestartercollar.
See Dimensions in Section 12.
A
B
1-1/4 in. (32 mm)
OVERLAP
Example: Your “A” dimension from Figure 5.5 is 14 1/2 in.
(368mm).UsingTable 5.2thedimensionclosestto, but
not less than 14 1/2 in. (368 mm) is 15 3/4 in. (400 mm)
usinga30°oset/return.Itisthendeterminedfromthetable
that you would need 36 5/8 in. (930 mm) (Dimension “B”)
betweentheosetandreturn.Thechimneycomponents
thatbesttyourapplicationaretwoSL1112sorSL412s.
Figure 5.5

Outdoor Lifestyles by Hearth & Home Technologies Inc. • ODCASTLEWD-42-B • 4070-160 Rev C • 05/23
18
66 Complete the Enclosure
B. Chase Top
A metal chase top is required to seal the top of the chase
around the chimney pipe. The top should include a turn-
down and drip edge to prevent water from seeping into the
chase.Providea1/8in.(3mm)gaparoundtheuepipeand
slope the top downward away from the penetration.
• All seams must be caulked to prevent leaks.
• A chase installation must use a chase top. Chase tops
areavailablefromyourHHTdealerormaybeeld
constructed.
• Attach the chase top to the top of the chase.
A. Chimney Termination
Chimney Termination Requirements (see Fig-
ure 6.1)
• Musthaveacapapprovedandlistedforthisreplace
system
• Must not be located where it will become plugged by
snow or other material
• Must terminate at least 3ft (.914m) about the roof
and at least 2 ft (.610m) above any portion of the roof
within 10 ft. (3.05m)
• Must be located away from trees or other structures
Fire Risk
• Must maintain 2 in. (51 mm) air clearance
to insulation and other combustible
materials.
WARNING
Slope Downward
Turn-down
Drip Edge
2 in. (51 mm) Collar
on Chase Top
.018 (26 ga) min. Galvanized Chase Top
C. Install the Termination Cap
Note: Toprotectagainsttheeectofcorrosiononthose
partsexposedtotheweather,theterminationcapcanbe
painted with a rust-resistant paint.
Fire Risk
• The minimum overlap of cap to pipe
MUSTbemetorchimneymayseparate
from cap.
Separation allows sparks, heat and embers
to escape.
WARNING
Install the chimney sections up through the chase enclosure
and refer to termination cap instructions.
NOTE: TR11/TR444 Round Termination Cap and TR11T/
TR442 Round Telescoping Termination Cap not recom-
mended for Installations less than 20 feet.
ST1175/ST475 Square Termination Cap
Chimney
Pipe
Chase Top
Termination Cap
Chase
Collar
2 in. (51 mm)
Minimum Height
Place waterproof
caulk or sealer under
each flange of the
termination cap and
on top of each screw
to help prevent leaks.
Flange
Termination cap pipe and chimney section must overlap 1-1/2 in. (38 mm)
2 in. (51 mm)
maximum
4 3/4 in. (121 mm)
maximum
The last section of pipe
must stop between 2 in. (51
mm) above the top of the
chase and 4 3/4 in. (121
mm) below the top of the
chase.
Figure 6.2 Installing an ST1175/ST475 Square Termination Cap
Figure 6.1 Field Constructed Chase Top Specication

Outdoor Lifestyles by Hearth & Home Technologies Inc. • ODCASTLEWD-42-B • 4070-160 Rev C • 05/23 19
TCT1175 Terra Cotta Cap
Chimney
Pipe
Chase Top
Termination Cap
Chase
Collar
2 in. (51 mm)
Minimum Height
Remove 2 screws
from front & back
to lift the top off
Termination cap pipe and chimney section must overlap
1-1/2 in. (38 mm)
Place waterproof sealer
under each flange of the
termination cap and on
top of each screw to
help prevent leaks.
The last section of pipe
must stop between 2 in.
(51 mm) above top of
chase and 7 in. (178 mm)
below top of chase
2 in. (51 mm)
7 in. (178 mm)
Figure 6.3 Installing a TCT1175 Square Termination Cap

Outdoor Lifestyles by Hearth & Home Technologies Inc. • ODCASTLEWD-42-B • 4070-160 Rev C • 05/23
20
77 Installation of Molded Brick Panel
Side Refractory
Retainer
Back Refractory Retainer
Back Molded Brick Panel
Left Side
Molded Brick
Panel
Side Refractory
Retainer
Grate
Retainer
Hearth
Right Side Molded
Brick Panel
Figure 7.4
A. Install the Refractory
Note: Before installing refractory, be sure all back edges
of each piece are smooth to ensure proper t. Scrape
awayexcesswitharegularscrewdriver.SeeFigure7.1.
•Tilttopofsiderefractorytowardscenterofreboxwhen
placingitintoreplace.Pushsiderefractorytowardsback
cornerofreplaceuntilittstightlyagainstbackrefractory.
•Secure side refractory in place with screws and bracket
provided in the hardware package.
•Repeat these two steps for installation of the other side
refractory.
•Place grate into grate brackets. See Figure 7.3.
•Replace smoke shield.
•Replace left and right screens.
•See section B for installing screens.
• Remove screen rods. (Locate screw holding each rod
and remove.)
• Remove smoke shield. (Remove the (5) screws holding
the shield.)
• Set back refractory into place, making sure refractory
iscenteredandnotchesaretothebottomofrebox.
• Place grate brackets in outer two notches of refractory.
See Figure 7.2.
•Secure back refractory in place with screws and bracket
supplied in hardware package.
We recommend two installers for hearth stone and refrac-
toryinstallation!
Figure 7.1 Scrape Away Rough Edges
Grate Brackets
Figure 7.2 Grate Brackets In Place
Figure 7.3 Grate Secured In Grate Bracket
Table of contents
Popular Outdoor Fireplace manuals by other brands

Heat Outdoor Living
Heat Outdoor Living OSLO User instructions

Mayer Barbecue
Mayer Barbecue MFK-102 Assembly instructions

Backyard Creations
Backyard Creations OFW107S-M manual

Extreme Fire
Extreme Fire BIG 6 Installation and operating instructions

Living & Co
Living & Co LF378-A manual

MWH
MWH Palermo M owner's manual