HEAVENCHEF Olympic 69247 User manual
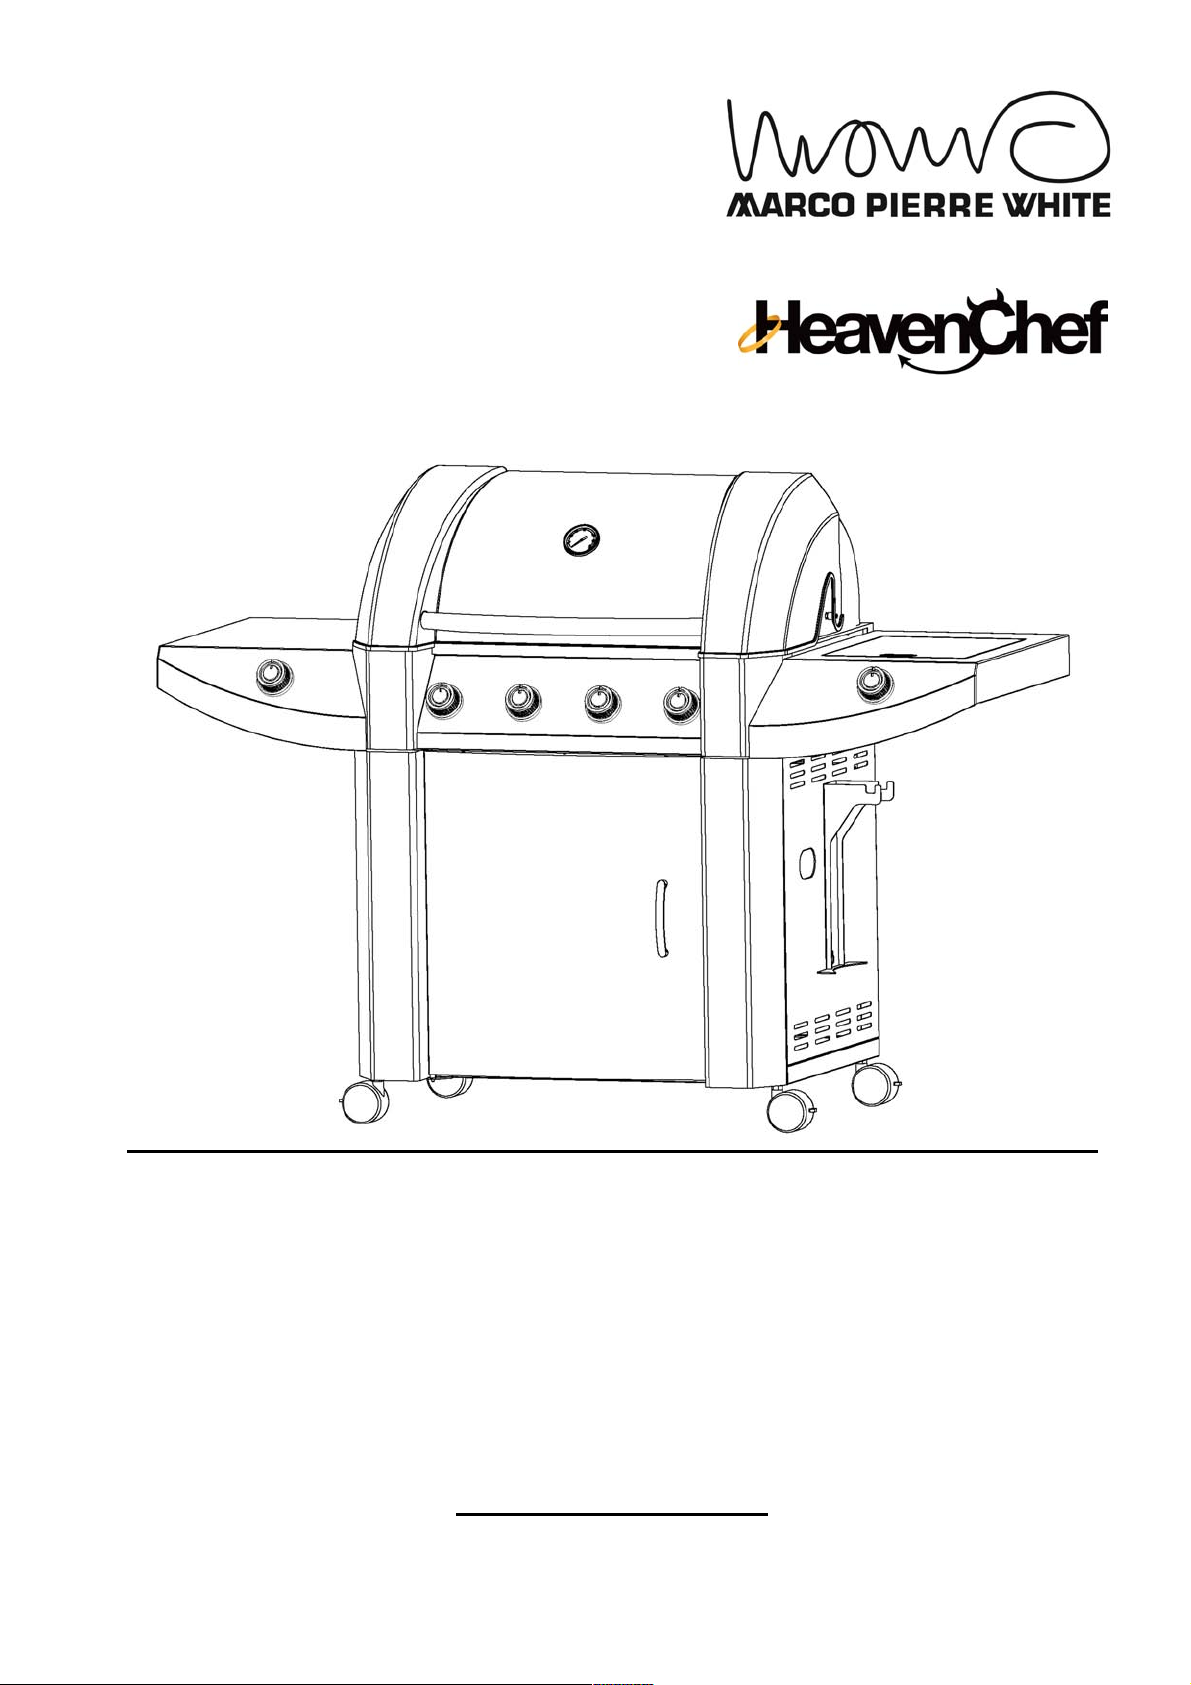
Olympic 4 Burner Barbecue
Product Code 69247
www.heavenchef.co.uk
by

2
Olympic 4 Burner Barbecue
Assembly Instructions
No.
Description
QTY
Remark
1
Base
1
2
Caster
4
3
(Trolley) Left panel
1
4
(Trolley) Right panel
1
5
(Trolley) Back panel
1
6
Left doorpost
1
7
Right doorpost
1
8
(Trolley) front brace
1
9
Door
1
10
Door handle
1
11
Door pin
1
12
BBQ frame
1
13
Side shelf
1
14
Side burner
1
15
Light
1
16
Battery
3
17
Flamesafe flavour bars
4
18
Cast iron grill
1
19
Cast iron griddle
1
20
Warming rack
1
21
Moisture/Drip tray
1
22
Drip tray handle
1
23
Gas Bottle Holder
1
24
M6 nut
2
25
M6×12 screw
27
26
M5×10 screw
2
27
M4×5 screw
2
28
Washer
4
29
Side burner hose
1
30
Regulator hose
1
CUSTOMER SERVICES: 01246 473445

3
Step 1
Screw the casters (No.2) into the base (No.1)
Step 2
Join the side panels (No.3 & 4) to the base (No.1).
You will need
4×M6×12 screws (No.25)

4
Step 3
Attach the trolley rear panel (No.5) to the trolley left/right panels & base (Nos.3, 4 & 1).
You will need
5×M6×12 screws (No.25)
Step 4
a) Put the left doorpost (No.6) into the trolley left side panel (No.3)
You will need 3×M6×12 screws (No.25) to complete this step.
b) Put the right doorpost (No.7) into the trolley right side panel (No.4)
You will need 3×M6×12 screws (No.25) to complete this step.
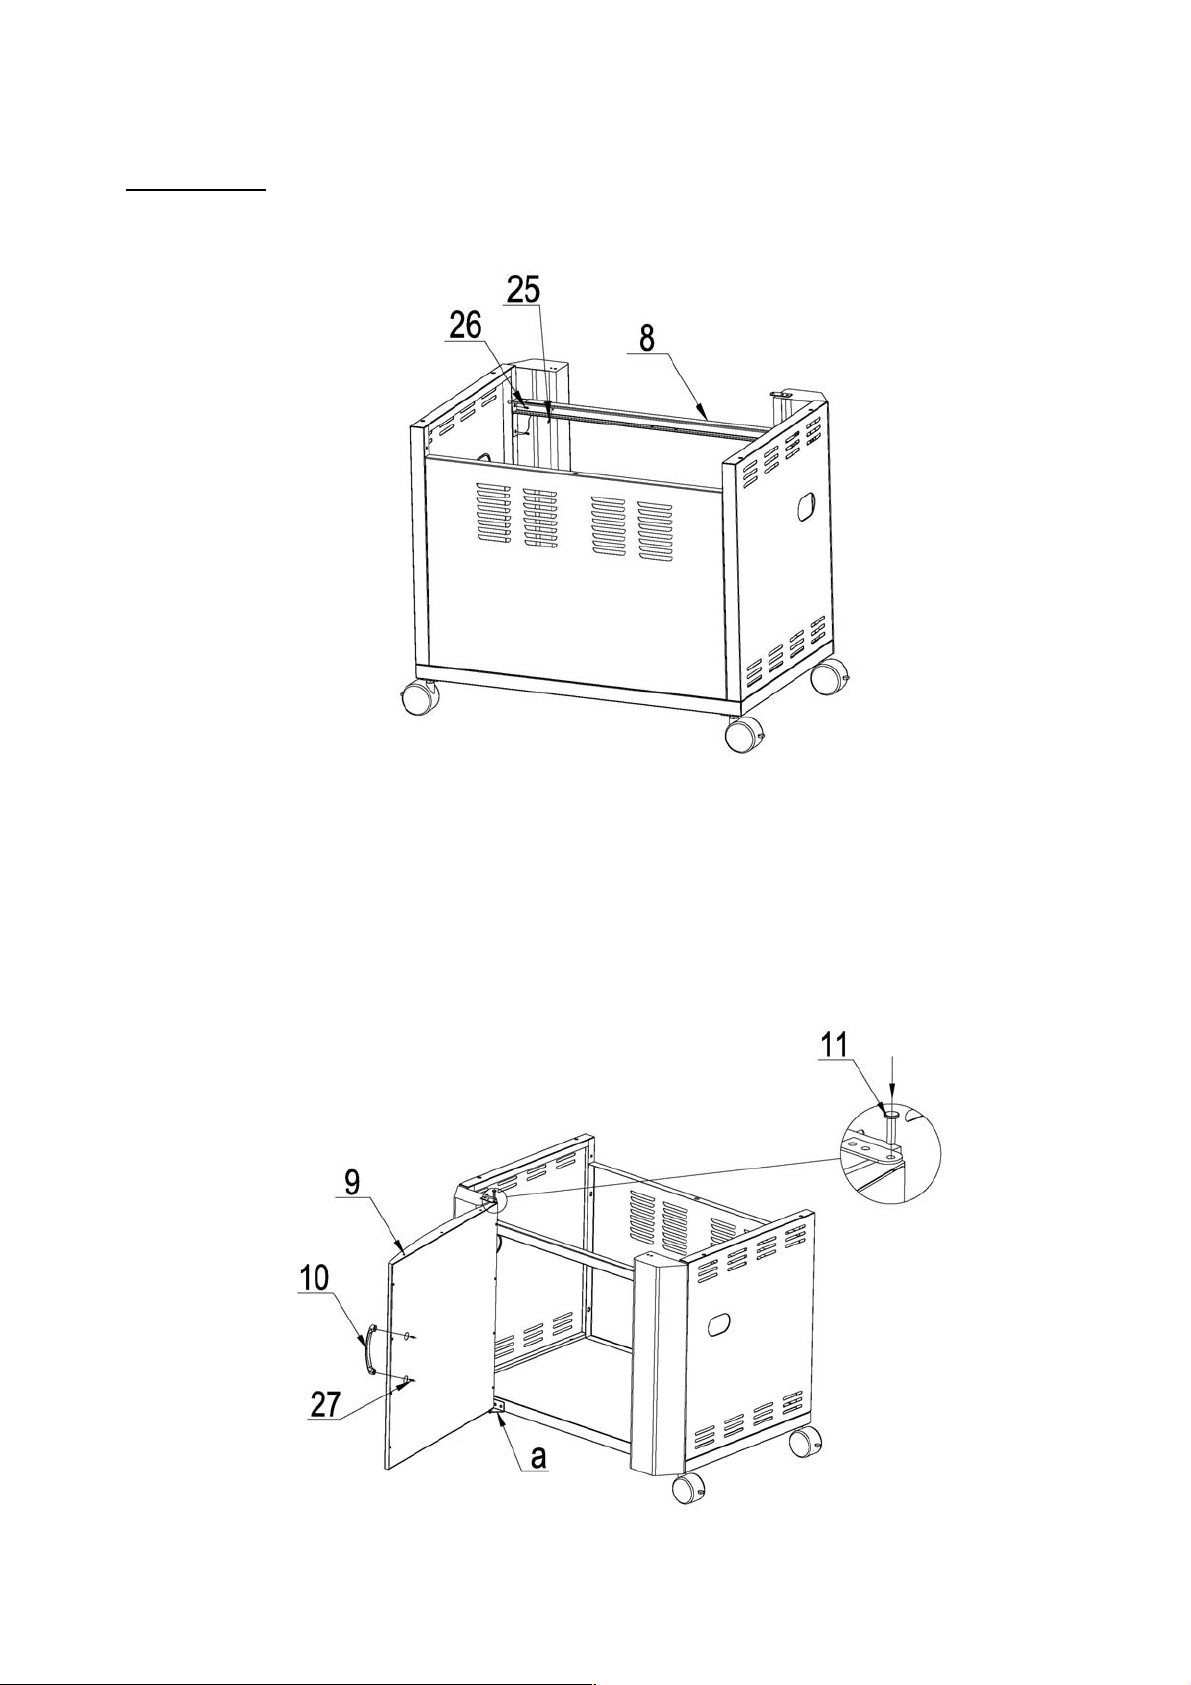
5
Step 5
Attach the trolley front brace (No.8) to the trolley left & right doorposts (No.6 & 7).
You will need
4×M6×12 screws (No.25)
2×M5×10 screws (No.26)
Step 6
Fit the door (No.9)
a) Put the lower lug of the door into the hole in the base shelf.
Position the door so that the lug at the top of the door is just below the mating hole.
Then, fit the door pin (No.12) into the door as picture below.
b) Using 2×M4×5 screws (No.27) attach the door handle (No.10) to the door (No.9) as
pictured below.
Table of contents
Popular Grill manuals by other brands


Landmann
Landmann Avalon PTS Plus 5.1 Plus 12122 Assembly and operating manual

Kenyon
Kenyon B70200 owner's manual

Better Homes and Gardens
Better Homes and Gardens GBC1486W owner's manual

Orbegozo
Orbegozo GR 2300 instruction manual

bora
bora PT11 Operating and installation instructions

Klarstein
Klarstein 10031664 manual

Garland
Garland MWE3W Installation and operation manual

Char-Broil
Char-Broil 463722714 Product guide

MPM
MPM MOP-03 user manual

Kenmore
Kenmore 415.16123800 Use and care guide

Tucker Barbecues
Tucker Barbecues GTR Series Assembly, installation and operating instructions

Monogram
Monogram ZGG540NCP1SS owner's manual