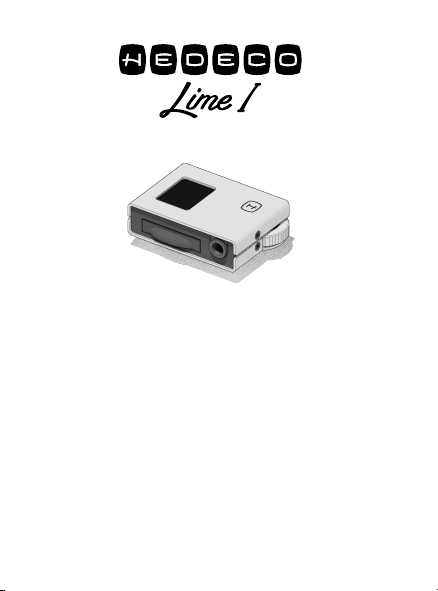
HEDECO LIME ONE User manual

USER MANUAL
MANUAL V1.0 16.04.2021
PRODUCT NAME: LIME ONE
MODEL NUMBER: H-LM010
HEDECO GMBH NÜRNBERG

Contents
1 Introduction 1
1.1 General information . . . . . . . . . . 1
1.2 Basic control . . . . . . . . . . . . . . 4
1.3 Menu . . . . . . . . . . . . . . . . . . 5
1.4 ISO selection . . . . . . . . . . . . . . 5
1.5 Battery . . . . . . . . . . . . . . . . . 6
1.6 Mounting/adapters . . . . . . . . . . . 8
2 Exposure modes 9
2.1 aperture priority . . . . . . . . . . . . 10
2.2 shutter priority . . . . . . . . . . . . . 11
2.3 manual mode . . . . . . . . . . . . . . 11
2.4 exposure value . . . . . . . . . . . . . 12
3 Setup 13
3.1 Inverted mode . . . . . . . . . . . . . 13
3.2 Low resolution mode . . . . . . . . . . 14
4 Measurement and calibration 14
4.1 Introduction . . . . . . . . . . . . . . 14
4.2 Calibration . . . . . . . . . . . . . . . 15
4.3 User calibration . . . . . . . . . . . . 15

5 General exposure advice 17
5.1 Exposure compensation . . . . . . . . 18
6 Technical data 20
7 Service/Cleaning 21
7.1 Cleaning . . . . . . . . . . . . . . . . 21
7.2 Dismantling . . . . . . . . . . . . . . 21
7.3 Problems . . . . . . . . . . . . . . . . 22


1 Introduction
1.1 General information
The Lime One is designed in a way that most experi-
enced photographers probably only need to check out
the quick guide. Additionally, this manual contains a
detailed description of all the functionality and oper-
ation of the Lime One light meter.
The light meter is delivered with an included battery
protected with a plastic strip. Remove the strip on the
battery cover carefully to activate the device.
1

2

3

1.2 Basic control
Step by step rst use:
The basic operation of the light meter with the default
settings (aperture priority mode) is as follows: Attach
the light meter to your camera via the accessory shoe.
Power the meter on by pressing the push button .
Double press the button and use the wheel to go
to the ISO screen. Press the button to select the lm
ISO using the control wheel. Double press again, to go
back to the main info screen.
Being on the main Infoscreen, rotate the control wheel
to change the aperture to the desired value you also
have set on your lens. The light meter reading in this
case is the calculated shutter speed.
When you are comfortable with a reading, transfer the
shutter speed to your camera shutter dial.
If desired, the exposurecompensationcan be changed
when holding the button while rotating the control
wheel (exposure compensationexplainedin section
5.1).
4

When wanting to lock in the reading after framing us-
ing the eye piece, holding down the button locks in
the reading until button release.
The meter shuts off automatically after 40 seconds of
not having an input.
1.3 Menu
The menu is entered and exited by pressing button
two times in short succession. Rotate the wheel to
the desired setting to change and enter the selection
by pressing the button.
Thecontentsof the menu are describedin theupcom-
ing sections.
1.4 ISO selection
The ISO, also called "lm speed", denes the sensitiv-
ity to light of the used lm or emulsion. It is the sec-
ond parameter selectable in the menu.
5

When planing to use low ISO lm/emulsions with long
exposure times, note to look up and account for the
reciprocity failure of the specic lm/emulsion.
1.5 Battery
The Lime One is designed to work with a CR 2032 coin
cell. Similarcoin cells like theCR2025 could also work,
as long as they output 3V and have the 20mm diame-
ter, though because of their thinner size, they have a
shorter battery life.
Thebattery indicationis displayedas a percentagevalue
on the menu screen. This is only a rough estimation:
It uses the cell voltage as a way to gauge the battery
level, which is affected by a lot of different factors, so
6

the following behaviour is expected:
• Depending on the individual coin cell, it can go
pretty fast from 100% to 90%
• Using it very heavily during a single day, it may
showalowerestimateatthe endof theday and
recovers the next day
• After not using the meter for a couple weeks,
it may even show a higher estimate directly af-
ter powering on, going down to a more realistic
level after a moderate amount of use
7

1.6 Mounting/adapters
Please note when using the optional adapters: When
storing the adapters for a longer period of time (more
than a couple of days): remove any devices attached
to the adapter and remove it from the camera. Since
plastic can creep, leaving it stressed may decrease
the clamping force of the integrated spring elements!
This is especially important if there exists a tight t!
Thelight metercanbe mountedon anyaccessory shoe
mount, be it a cold or a hot shoe. The sprung ball on
the bottom of the shoe mount isn't connected to any-
thing, so it should not interfere with any camera.
Use the optional adapters as necessary, note that us-
ing the dual-slot adapter backwards (rotated 180°) re-
sults in an "offset" adapter that may be useful for some
obstructions on some cameras.
8

2 Exposure modes
For displaying and calculating the exposure parame-
ters, there are four modes available:
•A(aperture priority, default): You choose the
aperture f-number, the light meter then calcu-
lates the appropriate shutter speed.
•S(shutter priority): You set the shutter speed
whichdenes the motionblur and thelight me-
ter calculates the aperture f-number.
•M(manual mode): You set the shutter speed
as well as the f-number. The light meter cal-
culates the exposure offset and displays it on
the scale on the bottom of the screen.
•EV (exposure value): It displays the exposure
value, incorporating the ISO and the exposure
offset in its reading.
Exposure Compensation
All modes (except manual) allow the setting of the ex-
posure compensation. This means that you can set
over or under exposure in 1
/3stop increments up to 3
stops over/under exposed. See “Basic exposure ad-
vice” in section 5.1 on page 18 for more information on
9

when and how to use this feature. For a neutral ex-
posure, make sure to set it to 0. On the display it is
displayed as "ev" and as a bar graph on the bottom.
2.1 aperture priority
Thismode is probably the mostpopular mode. Bychoos-
inga small aperture (bigf number e.g. f11)youincrease
the depth of eld, having sharpness across a near and
far elements of the frame.
Choosing a big aperture (low f number e.g. f2.0) you
can shorten the needed shutter time in low light or use
10

the shallow depth of eld to isolate subjects, by blur-
ring out the background.
2.2 shutter priority
With shutterpriority, you set thedesired shutter speed
and let the light meter calculate the corresponding f-
number to set on the aperture. This is helpful when
shooting sports or fast moving subjects, since a man-
ually selected fast shutter speed reduces the motion
blur in the picture.
Alsowhen shootingin lowlight whilewanting thebiggest
depth of eld possible, setting the shutter speed to
theslowestcomfortablyheld speedpossible(e.g. 1/30
or 1/15) results in the calculation of the smallest useful
aperture to gain the highest depth of eld.
2.3 manual mode
With manual mode, youset both the aperture (jog wheel)
aswellas the shutterspeed (holding button+ jog wheel)
In this mode, the over or underexposure of the current
11

settings is displayed on the scale usually used for dis-
playing the exposure compensation.
Displaying the current over- or underexposure in real
time makes it easy to “scope out” a scene. This way it
is easier to judge which areas will be over or underex-
posed.
2.4 exposure value
The exposure value (german “Lichtwert”) can be inter-
preted as a combination of a camera's shutter speed
and f-number, suchthat allcombinations thatyield the
same exposure have the same EV. Some cameras al-
lowing the shutter and aperture controls to be locked
together such that, when one is changed, the other
is automatically adjusted to maintain the same expo-
sure.
The value is identical to the “light value” LV when the
light meter is set to ISO 100 with no exposure compen-
sation applied.
Changing the ISO/exposure compensation results in
the according adjustment of the exposure value read-
ing.
12

3 Setup
3.1 Inverted mode
In the Setup screen there are multiple combinations
for operating the light meter with two additional set-
tings: inverted and low resolution mode.
In normal mode without any additional settings, the
lightmeteris continuouslyreading andcalculating the
exposure values. Changing the settings with the con-
trolwheel happensin 1
/3stopincrements. Locking down
ameasurementhappens bycontinuously pushing down
on the button, starting new measurements as soon as
the button is released.
Inverted mode changes that behaviour of the button:
it continuously updates the measurement/display of
the exposure values when continuously pushing down
on thebutton, while locking in the latest measurement
when releasing the button.
13

3.2 Low resolution mode
Low resolution mode allows faster operation, when 1
/3
stop accuracy isn’t needed. Most cameras only allow
the changing of the exposure settings in one stop in-
crements, so it can be useful to have settings change
and displayed in one stop increments. Instead of 3
clicks of movement on the control wheel to change
one stop, you now only need one.
4 Measurement and calibra-
tion
4.1 Introduction
The light meter uses photo diodes to measure the in-
coming light. The direction dependency of the photo
sensor follows a Gaussian bell curve. Together with
the physical aperture (stray light blocking cone insert
in front of the sensor), it results in a eld of view of
roughly 35°. It’s similar to that of a 50mm lens on a
35mm lm camera, measuring center weighted.
14

4.2 Calibration
The light meter is calibrated to ± 1
/3of a stop when
manufactured. When going to the menu in the cali-
bration screen “CALIB”, the current calibration offset
(most likely 0.0) is displayed.
4.3 User calibration
User Calibration using a reference camera:
Any camera that has working metering, be it digital or
analog, can be used as a reference for the light meter.
Using a ‘standard’ lens is preferred, so on 35mm lm a
lens in the 35mm to 50mm range of focal length. If the
metering can be changed, it should be set to average
15

or center weighted average.
It is important, to set the camera ISO setting the same
as the light meter ISO setting. When using a digital
camera, make sure not to use auto-ISO. When using
a 'newer' 35mm lm camera, a lm canister with DX
code (black/silver checker board pattern on the lm
canister) may be needed to be loaded in the camera.
Use the light meter in the mode most closely resem-
bling the mode on the reference camera (most likely
aperture or shutter priority). Compare the reading of
the light meter and the camera and if needed, adjust
the value in the CALIB menu
16
This manual suits for next models
1
Table of contents