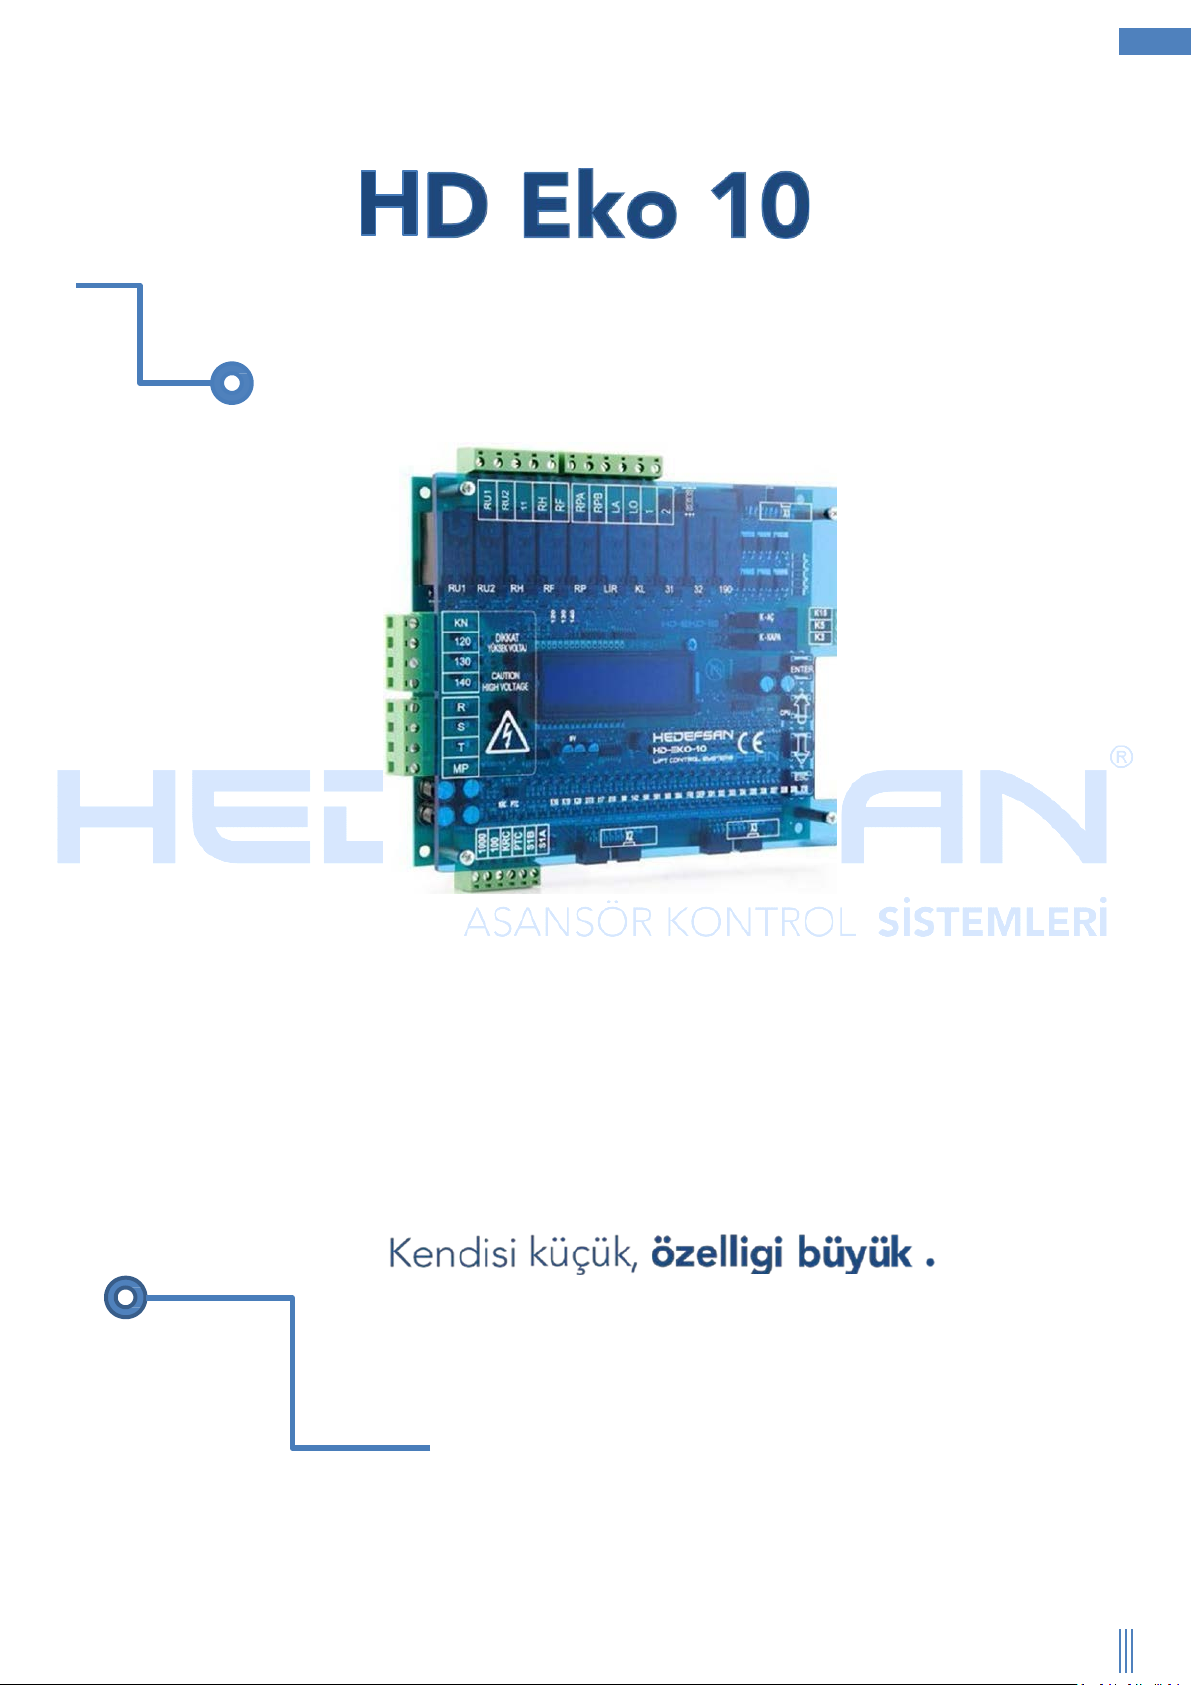
Hedefsan HD Eko 10 User manual
1
www.hedefsan.net
01 Ocak 2015
Small in size, with grand features
USER GUIDE
Elle-même petite, mais avec caractéristique grand
2
www.hedefsan.net
01 Ocak 2015
PARAMETER LIST
00 Elevator Type
01 Command Type
02 Door Type
03 Automatic Door at Floor
04 Automatic Door at Park
05 One Door Full Automatic
06 Special Door Setting
07 Number of Stops
08 Cabin Serial Card
09 Phase Protection
10 Phase Level
11 Ptc
12 Contact Feedback
13 Position reset
14 Limit Switch
15 Digital Setting
16
Display Exit
17 Max. Car Call Registration
18 Number of Basement
19 Fire Stop
20 Park Stop
21 Return to Park
22 Busy Time
23 Wait at Stop
24 Door Open Time
25 Lock Waiting
26 Door Still Open Error
27 Photocell Waiting
28 Fast Cruising
29 Slow Cruising
30 RP Delay
31 Plug Delay
32 Lock Delay
33 Maintenance Time
34 Change Password
35 Counter Type
36
Factory Settings

3
www.hedefsan.net
01 Ocak 2015
TECHNICAL SPECIFICATIONS
Dimensions
Lenght × Width × Hight (mm)
181 × 150 × 22
Operation Temperature ±0 - +60 °C
Protection Class IP20
Humidity %95
Network Control Inputs 3 x 380V, 50Hz, N
Control Feed Voltage 24 ± 5 Vdc
Power Usage Max. 400mA 10W, for 24VDC
Security Circuit Voltage
230Vac max. For hydraulic elevators in
emergency descent 24Vdc
Control Signal Inputs 24 ± 5 Vdc
Control Signal Outputs
24 ± 5 Vdc
Short-Circuit Protection
MAJOR FEATURES
2-line 16-character LCD display and 4 button keyboard
RS-485 serial communication for group operation
RS-485 serial communication for serial system connection with cabin
Including phase sequential motor protection circuit
Including in- and output control of 2 automatic doors
Short circuit protected digital and signal outputs
Setting of indicator possible via menu: 7-segment and Gray code
4
www.hedefsan.net
01 Ocak 2015
MAIN SCREEN
Waiting for recording…
D:10 +25.4V
Here it shows the feed voltage and the number of the floor where the
elevator is at the present.
ELEVATOR TYPE
00:Lift Type
Double Speed Set your elevator drive type here.
one Speed Choose this setting for single speed roped elevators.
Double Speed Choose this setting for double speed roped elevators.
Roped VVVF
Continous gear (with asynchronous machine) and gearless (with
synchronous machine)
COMMAND TYPE
01:Command Type
Simple Command Set your elevator command type here.
Simple Command
The cabin and floor buttons are connected parallely. No other except the
one registration is kept in memory.
Mixed Collective
The cabin and floor buttons are connected parallely. Registrations are
kept in memory.
Down Collective
The cabin and floor buttons are connected seperately. Cabin
registrations are collected from both sides. Floor calls are collected when
when cabin moves in downward direction.
Full Collective (both ways)
Cabin registrations and the up and down buttons at the floors are
connected seperately. Cabin registrations and floor calls are collected in
appropriate manner of movement direction.
OPENING SCREEN
Hedefsan Asansor
HD Eko 10 Ver:1.0
When you power on, you can view the software version and serial
number of the card on the opening screen. After a couple a seconds the
screen changes to the MAIN SCREEN.

5
www.hedefsan.net
01 Ocak 2015
DOOR TYPE
02:Door Type
Swing Door Set the open-close signal type for automatic doors here.
Swing Door Only for elevators that have no automatic door.
Aut. Unlimited Only used for elevators with automatic unlimited cabin doors.
Aut. limited Only used for elevators with automatic limited cabin doors.
Full Aut. Unlimited Only used for elevators with full automatic unlimited cabin doors.
Full Aut. limited Only used for elevators with full automatic limited cabin doors.
According to the EN 81-1/2 standarts in states of emergency stop, revision and take back automatic
doors must remain stationary
AUTOMATIC DOOR AT FLOOR
03:Aut.Door.At.Floor
Closed Standby
Set the open or closed position of the automatic door when waiting at
floor.
AUTOMATIC DOOR AT PARK
04: Aut.Door.At.Park
Wait closed
Set the open or closed position of the automatic door when waiting at
park.
ONE DOOR FULL AUTOMATIC
05:One Door Full Aut.
Cancel
On elevators with swing doors, set this parameter when there’s only
one full automatic door.
6
www.hedefsan.net
01 Ocak 2015
SPECIAL DOOR SETTING
06:Special Door Setting
Floor:10 Door:AB
Set the floor at which you want to open the automatic A and B doors.
When floor number is blinking, change the floor number with the UP-
DOWN buttons till you come to the floor number you want to change.
Press the ENTER button and next you will see the door setting blinking.
Determine the door setting again by using the UP-DOWN buttons.
A-B
NUMBER OF STOP
07:Number of Stops
D:10 Set the number of stops (maximum 10) here.
CABIN SERIAL CARD
08:Cabin Serial Card
19200 Baud
Set the communication speed between the main controller card and
the serial communication card here. Or choose to ignore it.
PHASE PROTECTION
09:Phase Protection
Phase Sequence Set the phase sequence or deactivate the phase here.
Out of Order Deactivate phase
Phase unsequenced Activates phase without sequence
Phase sequenced Activates phase sequenced
PHASE LEVEL
10:Phase Level
030 Adjust the phase imbalance here.
020 %- 060 % Choose the sensitivity of the phase balance time.

7
www.hedefsan.net
01 Ocak 2015
PTC
11:Ptc
Active Choose the PTC motor thermistor input setting.
ACTIVE Activates it.
CANCEL Deactivates it.
CONTACT FEEDBACK
12:Contact Feedback
Active
Set here the bypassing of the contact feedback error. The controller
card does not detect any contactor adhesion when it’s cancelled. If it is
canceled our company is not responsible.
ACTIVE Activating the contact feedback error
CANCEL Bypassing the contact feedback error
POSITION RESET
13:Position Reset
Cancel
Even when there’s a power blackout the controller card will remember
its last position. But in some special cases when the power returns, a
position reset may be wanted. In that case the elevator will go until it
reaches the 817 limit switch of the bottom floor. When it reaches the
bottom floor, the floor counter will reset. For example: with systems
that have battery charged rescuers, this parameter can be activated to
reset the position.
ACTIVE Activates it.
CANCEL Deactivates it.
REVISION LIMIT SWITCH
14:Rev. Limit Switch
Until limit switch Set the movement type of the up and down limit switches in revision.
Until Limit switch
When limit switches are enabled the elevator will stop before reaching
its floor.
Until Floor Even when limit switches are enabled the elevator will go to its floor.

8
www.hedefsan.net
01 Ocak 2015
DIGITAL SETTING
15:Digital Setting
FLOOR:1 IND:1 When the floor number is blinking, set the floor number with the UP-
DOWN buttons till you come to the floor number you want to change.
Press the ENTER button and next you will see the digits blinking. Set
the value you like. When finished exit with the exit button. Or if you
want to set another stop/floor, press the enter button, when floor
number is blinking, repeat the steps.
10
Indicator type
Outputs that can be selected
7 Segment indicator -4, -3, -2, -1, 0, 1, 2, 3, 4, 5, 6, 7, 8, 9, 10 ,11, 12, 13, 14, 15, 16
A, B, C, D, E, F, H, J, L, N, O, P
DISPLAY OUTPUT
16:Display Output
Normal
Set the display output of the HD EKO-10 controller card and HD EKO
SERI card.
7 Segment output Normal output.
Gray code output Gray code output.
MAX. CALL REGISTRATION
17:Max. Call Reg.
010
Set the maximum amount of calls that can be registrated from within
cabin. When this number is reached it stops registrating any calls from
within cabine.
01 - 10 Set the number of stops between the minimum and maximum.
NUMBER OF BASEMENT
18:Number of basement
000 Set the number of basement here.
If the elevator is down collective, the floors that are under the basement that is set, it will be up collective.
Note: Used in command types except for down collective.

9
www.hedefsan.net
01 Ocak 2015
FIRE STOP
19:Fire Stop
01
Set here the fire stop. When Fire input (at SIDE) is active the elevator
goes to the defined floor directly and waits with its doors open.
Elevator will return to normal operation mode when fire signal is over.
01 - 10 Seconds
This is the minimum and maximum time that is waited before going to
park stop.
Cancel Fire stop is not defined in the system.
PARK STOP
20:Park stop
05
Set the park stop here.
When elevator pauses its operation,it goes to this
floor and waits with open doors.
RETURN TO PARK
21:Return to park
200 Seconds Set the waiting time before going to park stop.
0 - 250 Seconds Set the waiting time between the minimum and maximum.
BUSY TIME
22:Busy Time
006 Seconds Set the cabin light delay here.
5 - 20 Seconds Set the cabin light delay time between the minimum and maximum.
According to the EN 81-1/2 standarts it is not allowed to bypass the cabin light delay.
On elevators with simple command (non-collective) this parameter must me equal to the “WAIT AT
STOP” time. And the busy time must be at least 2 seconds.
10
www.hedefsan.net
01 Ocak 2015
WAIT AT STOP
23:Waiting Time at Floor
008 Seconds
Set the waiting time before going to other registrations while
collecting.
3 - 15 Seconds Set the waiting time at floor between the minimum and maximum.
According to the EN81-1 and EN81-2 standarts, elevators with manual doors must have a waiting
time of al least 2 seconds when moving again after reaching its floor.
On elevators with simple command (non-collective) this parameter must me equal to the “CABIN
LIGHT” time and must be at least 2 seconds.
OPEN DOOR TIME
24:Open Door Time
15 Seconds
Set the time from opening till the start of closing of the automatic door.
05 – 20 Seconds Set the door open-close time between the minimum and maximum.
LOCK WAITING TIME
25:Lock waiting
008 Seconds
Set the maximum time to wait for the door lock signal (140) after
getting the door closed signal.
8 - 30 Seconds Set the lock waiting time between the minimum and maximum.
DOOR STILL OPEN ERROR
26: Door Still Open Error
015 Seconds
If after the time set in this parameter the door is not closed yet the
control panel will go out of service. It is possible to choose to bypass this
function.
0 - 250 Seconds
Set the time for passing the door still open error between the minimum
and maximum.

11
www.hedefsan.net
01 Ocak 2015
PHOTOCELL WAITING TIME
27:Photocell Waiting time
003 Seconds
Set the time of waiting for the photocell signal to close the door after
the opening of the automatic door.
02 – 05 Seconds Set the photocell waiting time between the minimum and maximum.
FAST CRUISING
28: Fast Cruising
015 Seconds
Set the maximum time of cruising between 2 stops. If this time should
be exceeded, the system automatically stops the movement of the
cabin and blocks it.
0 - 100 Seconds Set the fast cruising time between the minimum and maximum.
According to the EN81-1 / 2 standards motor operation time work must not exceed the smaller of
the following:
45 seconds
Longest cruising distance +10 seconds
If longest cruising distance is less than 10 seconds, the timeout should be at least 20 seconds.
SLOW CRUISING
29: Slow Cruising
015 Seconds
Set the maximum time of slow cruising from the moment it meets the
stopper of the target floor. If this time should be exceeded, the system
automatically stops the movement of the cabin and blocks it.
0 - 100 Saniye Set the slow cruising time between the minimum and maximum.
RP DELAY
30:RP Delay
02600
It could be demanded with roped VVVF systems to delay the fall of the
main contactor. In such cases, the RP delay of the relay output is set by
this parameter.
00000 – 25000 Miliseconds Set the contactor delay time between the minimum and maximum.
For twospeed elevators this must be 0.
PLUG DELAY
31:Plug delay
00600 Set here the waiting time after the 130 circuit.
00000 – 25000 Miliseconds Set the plug delay time between the minimum and maximum.

12
www.hedefsan.net
01 Ocak 2015
LOCK DELAY
32: Lock Delay
00100 Miliseconds
Set the maximum waiting time for arrival of the lock (140) signal after
the door closed signal.
0 - 2000 Miliseconds Set the lock delay time between the minimum and maximum.
MAINTENANCE TIME
33:Maintenance Time
200 Days
For every day the card operates the value of this parameter drops by
one. For example, if it is set for 45 days, this parameter will show a
value of 15 when 30 days have passed. After 45 days the value will be
0.
45 - 250 Days Set the maintenance time between the minimum and maximum.
CHANGE PASSWORD CODE
34:Change Password Set or change the password code here.
1_0_0_0_0 If the display looks like this, the password is activated.
COUNTER TYPE
35:Counter Type
M0 Set here your selection of the elevator floor sensor.
Standard M0 Standard M0 counter.
Standard M1 Standard M1 counter.
FACTORY SETTINGS
36:Factory Settings Here you can cancel your settings and return to factory settings.
13
www.hedefsan.net
01 Ocak 2015
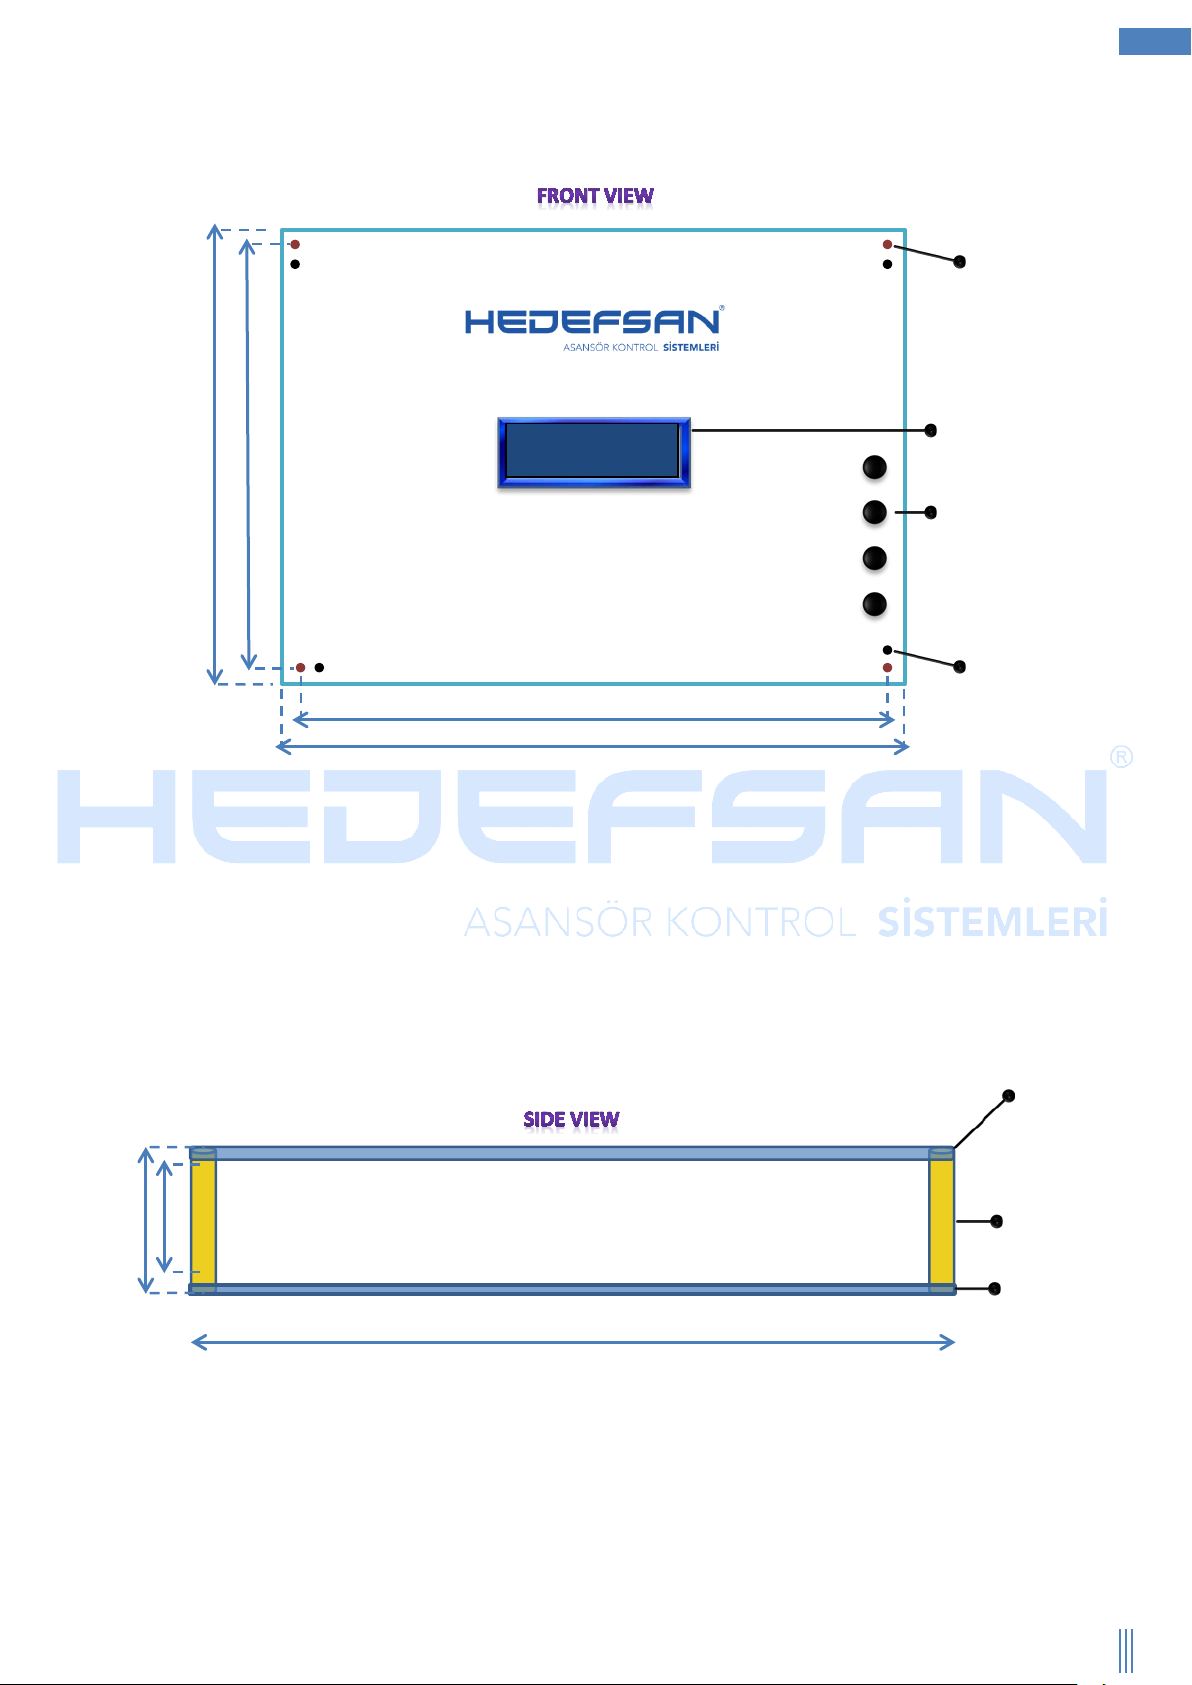
Card fixing hole
LCD Display
Setting buttons
Mika hole
157 mm
181 mm
150 mm
123 mm
150 mm
27mm
22 mm
Mika
Mika extension screw
Main controller
Table of contents
Popular Industrial Electrical manuals by other brands


Murata
Murata GRM022R61A152KE19 Series Reference sheet

Murata
Murata GJM1555C1H110GB01 Series Reference sheet

National Instruments
National Instruments PXIe-7821R Getting started guide

MG
MG M80BS-8 instruction manual

Murata
Murata GRM31CR60J476ME19 Series Reference sheet

Leviton
Leviton powerswitch AUXNO installation instructions


