Heico Quell EESeal User manual

Quell Corporation | A HEICO® Company
5639 Jefferson NE Albuquerque, NM 87109 USA
505.243.1423
EESeal@Quell.US
www.eeseal.com
EESeal ® Manual insertion Instructions
for MDM Connectors
Manual Insertion Instructions for MDM Style EESeal®FilterSeals
Warning: The very high density of MDM Style EESeals®and potential cutting action of the MDM connector’s
sockets make the installation more difficult than our standard EESeals®. Quell recommends using the MDM
Insertion Tools over hand insertion. Please follow these instructions carefully and take your time. We
recommend using some magnification the first time or two.
Since this EESeal®is so small, a rubber tool is suggested to assist with installation, and may have been
provided with your order (a pencil eraser from a mechanical pencil will also work).
Begin installation by orienting the EESeal®so the EESeal®blank side face up and match the EESeal’s®shape
with the host connector’s shell.
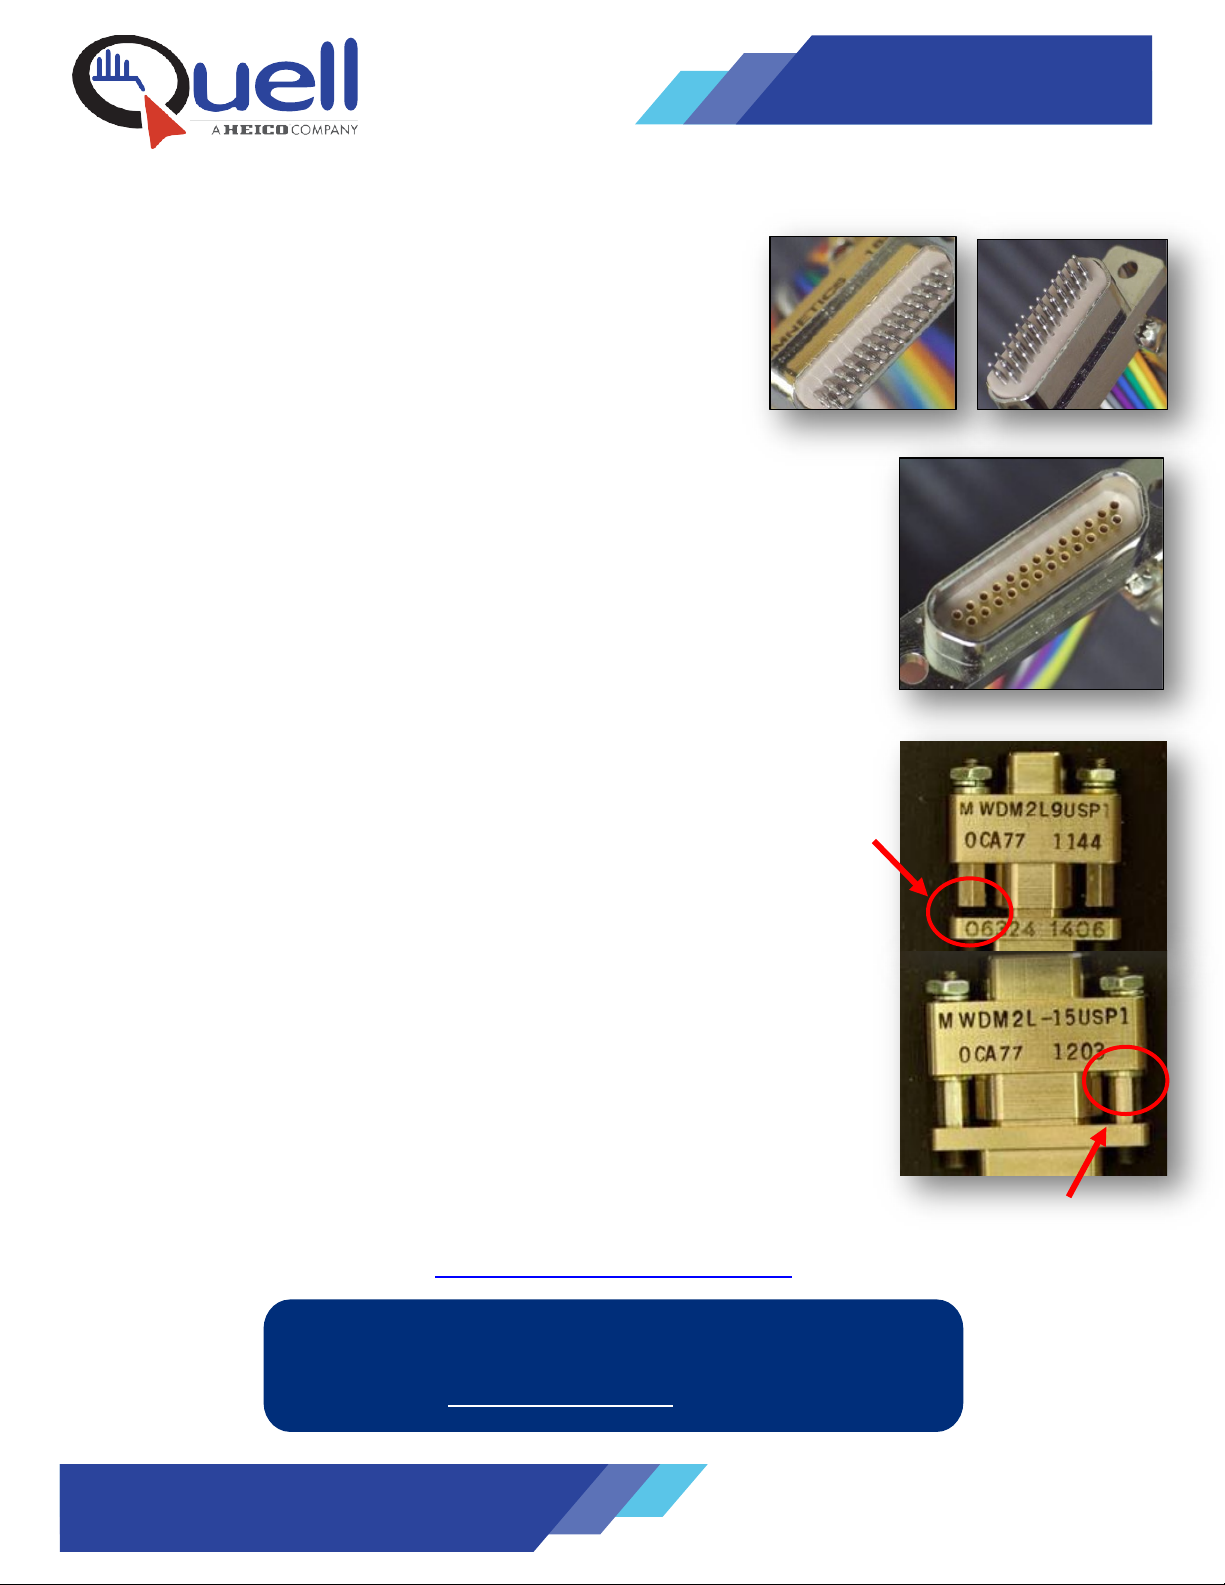
Important Note: It is imperative that the EESeal®be inserted “right side up” (with the EESeal®logo down and no printing
visible after it is inserted). The MDM connector is symmetrical about the vertical centerline and, thus, if an EESeal®is
incorrectly inserted with the EESeal®logo up, it will not filter the correct pins or will not function properly.
Next, place the EESeal®onto the MDM connector so the MDM sockets and the EESeal®pinholes are roughly
aligned. Now, simply start inserting the EESeal® into the connector shell by pushing down with your thumb
until it rests just over the MDM sockets. Do NOT try to seat it over the sockets with your fingers. First, verify
that the EESeal® is closely aligned with the MDM shell and sockets.
You are now ready to insert the EESeal® onto the tips of the MDM sockets. Use the flat side of the rubber tool,
starting at one end of the connector, to gently work the EESeal® down over just the tips of the sockets – the
sockets should barely poke through each corresponding hole in the EESeal®. You may notice some very minor
slivers of silicone trimmed from the EESeal’s®pinholes during this process, which is normal.
Once it is confirmed that the tip of every MDM socket is just poking through its corresponding hole in the
EESeal®, then the EESeal® can be fully seated by simply using the mating connector to push it to the bottom of
the host connector.
For additional information or to see an instructional video, Visit:
https://eeseal.com/installation-MDM/
Extraction: MDM style EESeals®cannot be extracted without damaging the EESeal®. Use any dull probe to carefully reach under
the inserted EESeal®and slowly work it out. Slowly work it up the shaft of all sockets a little bit at a time, working around the
perimeter. Do not try to pry the EESeal® completely off some sockets when other sockets are still fully seated. Slowly working the
EESeal® out will minimize tearing and make it easier to get it out in one piece without leaving torn sections behind.
Questions?
Please call (505) 243-1423 or
Email EESeal@Quell.us for Assistance

Quell Corporation | A HEICO® Company
5639 Jefferson NE Albuquerque, NM 87109 USA
505.243.1423
EESeal@Quell.US
www.eeseal.com
EESeal
® Insertion Instructions for
Micro-D & MDM Connectors
Overview
The very high density of MDM Style EESeals® and potential cutting
action of the MDM connector’s sockets make installation by hand
more difficult than our standard EESeals®. As a result, Quell has
developed MDM Installation Tools to ensure that your EESeal® is
installed easily and reliably into your MDM connector. Please follow these
instructions carefully and take your time. We recommend that you watch
the easy-to-follow installation video showing you the easy step by step
instructions. The video can be found on the Quell website at:
https://eeseal.com/installation-MDM/
Step 1 – Insert guide pins into the connector
It is important to orient the guide pins of the MDM Insertion Tool in the
proper direction. Guide pins must be installed into the MDM Insertion
Tool with the chamfered end first. The “flat” side of the guide pin is
designed to rest on the top of the MDM socket during installation.
Insert the guide pins by inserting the MDM insertion tool into your
connector. Squeeze the tool to release the guide pins into the MDM
sockets. Be careful to keep the MDM pins face up to keep the guide
pins in place.
Step 2 – Orient the EESeal®
Arrange the EESeal®so the blank side is up and the side with the
EESeal®logo is down, and the shape of the EESeal®matches up to the
shape of the connector. It is imperative that the EESeal®be inserted “right
side up” (with the EESeal®logo down and no printing visible after it is
inserted). The MDM connector is symmetrical about the vertical centerline
and, thus, if an EESeal®is incorrectly inserted with the EESeal®logo up, it will
not filter the correct pins.
Step 3 - Initial EESeal®placement
Place the EESeal® over the guide pins until the tips of the guide pins
protrude through the holes of the EESeal®. Use the insertion block to
press the EESeal® down over the guide pins. The insertion block helps
to maintain even downward pressure across the EESeal®. The EESeal®
should now be in place just above the rim of the MDM. The insertion
block must be gently removed to avoid pulling the guide pins from the
connector. Slightly rocking the insertion block from side-to-side should
ensure that the guide pins are not hung up in the block. If the guide pins
are pulled from the connector, all guide pins must be reinserted in the
insertion tool with the chamfered end facing the tool, and the insertion process must be started
over.
Press the Insertion
block down
Guide pins protruding
through the EESeal
®
Squeeze
the
insertion
tool
Guide pins
inserted
Quell Corporation | A HEICO® Company
5639 Jefferson NE Albuquerque, NM 87109 USA
505.243.1423
EESeal@Quell.US
www.eeseal.com
1/32” Washer
Step 4 – Seating the EESeal®
While holding the guide pins in place, gently press the edges of the
EESeal®below the connector rim using your fingernail or a soft
rubber tool. Make sure the edges of the EESeal®are below the
surface of the connector to prevent the EESeal®from rolling up
during final insertion. To complete installation, use the MDM
Insertion tool to seat the EESeal® at the bottom of the connector
and extract the guide pins from the MDM connector and back into
the tool.
Step 5 – Visually Inspect EESeal®
A visual inspection is suggested to ensure your EESeal®has been properly
installed. Under magnification check to see that the edges are properly seated
(not rolled up) and that the wire contacts are tucked down properly. If the
EESeal is not properly seated, the tip of the soft rubber tool may be used to tuck
in any rolled-up edges or exposed wire ends.
Your MDM is now a “Filtered” MDM connector.
Note: Mind the Gap
The presence of an EESeal®between the connectors pair will likely prevent
metal-to-metal contact between the mounting flange and the mounting jack
screws. Although the nominal torque of 2.5-4 in.-lb. is not sufficient to cause any
issues with the EESeal, overtightening the mounting hardware to try to close this
gap, or a severe vibration environment, could potentially damage the EESeal or
the connector.
Accordingly, if a gap is present after properly mating the connectors, a spacing
washer must be added to protect the EESeal®:
•If the connector has an interfacial seal, removing the connector interfacial seal and
adding a 1/64” thick flat washer between the jack screws and the connector
mounting flange will compensate for the thickness of the EESeal®.
•If the connector does not have an interfacial seal or the interfacial seal cannot be
removed, adding a 1/32” thick flat washer between the jack screws and the
connector mounting flange will compensate for the thickness of the EESeal®.
For additional information or to see an instructional video, Visit:
https://eeseal.com/installation-mdm/
Questions?
Please call (505) 243-1423 or
Email EESeal@Quell.us for Assistance
Gap
Edge un-tucked
Edge tucked in
Visually Inspect
Table of contents
Other Heico Cables And Connectors manuals


